


tableView的协议执行顺序
在开始正式的折叠cell讲解之前,我先来讲讲tableView的协议执行顺序
对一个固定高度的tableView(即不使用我在share总结中使用的自动计算高度的内容),一个tableView的协议方法执行程序如下:
nuberOfSectionTableView先取得这个tableView有多少个分区- 调用
numberOfRowsInSection来获取每个节有多少个cell - 使用
cellForRowAtIndexPath来得到每个row中的cell - 再用
heightForRowAtIndexPath来获取每个cell应该分配的宽度 heightForHeaderInSection和heightForFooterInSection- 然后取得头节点尾节点视图
viewForHeaderInSection和viewForFooterInsection(如果实现的话) - 再次调用
heightForRowAtIndexPath方法 willDisplayHeaderView和willDIsplayFooterView方法
如果一个tableView不会显示在视图中,那么方法之后执行到numberOfRowsInSection就停止,不会进行剩余的步骤来影响性能
折叠cell
折叠cell是为了简化用户界面,隐藏在通常情况下不需要的部分的一种方法,该方法符合渐进展开原则
在普通用户不需要过多的复杂选项或者信息,或者在需要选择某种风格之类的枚举值的时候可以考虑使用折叠cell
我们一般所说的折叠cell,实际上是在代理方法中,更换tableView的cell数量,来隐藏一部分的cell,在需要的时候,再展示的一个方法
为了在协议中更改cell的数量,我们可以使用一个枚举或者就是简单的布尔值来判断tableView是否展开,从而给tableView返回cell的个数
基本流程
更改流程:
- 使用一个按钮(可以是tableView的一个cell本身,或者在头视图上添加一个专门用来展开的按钮)来控制是否展开的布尔值
- 在按钮改变后,重新加载tableView剩下的事tableView会处理!
tableView的流程
- 正常加载tableView
- 在tableView中读取布尔值,根据布尔值来判断cell是否被展开从而渲染cell
- 展示
这就是基本的折叠cell的展开流程,我们写一个小demo来展示一下
实战演练
由于代码简单我这里就不使用MVC结构了,直接用View来处理model的数据存储
ViewController.h
#import <UIKit/UIKit.h>

#import "FoldAndExtendProtocol.h"
#import "PMHeaderView.h"

@class PMFoldCellView;

@interface ViewController : UIViewController <UITableViewDelegate,UITableViewDataSource,FoldAndExtendProtocol>
@property (nonatomic, strong)PMFoldCellView* mainView;
@property (nonatomic, strong)PMHeaderView* HeaderView;
@property (nonatomic, strong)NSArray* array1;
@property (nonatomic, strong)NSArray* array2;

@property (nonatomic, assign)BOOL isExtend;

@end
其中PMHeaderView内部只有一个tableView的属性,FoldAndExtendProtocol 声明了- (**void**)extendCell;这个方法用来控制tableView是否展开
ViewController.m
... // 初始化函数,填充了内容数组,并设置了基本的代理和约束
- (NSInteger)numberOfSectionsInTableView:(UITableView *)tableView {
    return 1;
}
- (NSInteger)tableView:(UITableView *)tableView numberOfRowsInSection:(NSInteger)section {
		// 根据属性的布尔值来确定当前是否处于展开状态
    if (self.isExtend) {
        return 5;
    } else {
        return 1;
    }

}
... //设置高度
- (UITableViewCell*)tableView:(UITableView *)tableView cellForRowAtIndexPath:(NSIndexPath *)indexPath {
//    NSLog(@"cellForRowAtIndexPath");

		// 不使用自定义cell,使用系统的默认样式
    UITableViewCell* cell = [tableView dequeueReusableCellWithIdentifier:@"MyCell"];
    if (cell == nil) {
        cell = [[UITableViewCell alloc] initWithStyle:UITableViewCellStyleDefault reuseIdentifier:@"Mycell"];
    }

    // 根据不同的状态来读取不同的数据源
    if (self.isExtend) {
        cell.textLabel.text = self.array1[indexPath.row];
    } else {
        cell.textLabel.text = self.array2[indexPath.row];

    }
    // 在第一个cell中添加控制展开收起的按钮
    if (indexPath.row == 0) {

        UIButton* btnExtend = [[UIButton alloc] init];
        [cell.contentView addSubview:btnExtend];

        [btnExtend mas_makeConstraints:^(MASConstraintMaker *make) {
            make.right.equalTo(cell.contentView.mas_right).offset(-10);
            make.centerY.equalTo(cell.contentView);
        }];

        // 根据状态来展示不同状态的按钮
        if (self.isExtend) {
            [btnExtend setBackgroundImage:[UIImage systemImageNamed:@"chevron.down"] forState:UIControlStateNormal];
        } else {
            [btnExtend setBackgroundImage:[UIImage systemImageNamed:@"chevron.up"] forState:UIControlStateNormal];
        }

        [btnExtend addTarget:self action:@selector(extendCell) forControlEvents:UIControlEventTouchUpInside];

    }


    return cell;
}

- (void) extendCell {
		// 切换当前状态,然后刷新整个tableView
    self.isExtend = !self.isExtend;
//    NSLog(@"点按按钮");
    [self.mainView.tableView reloadData];

}
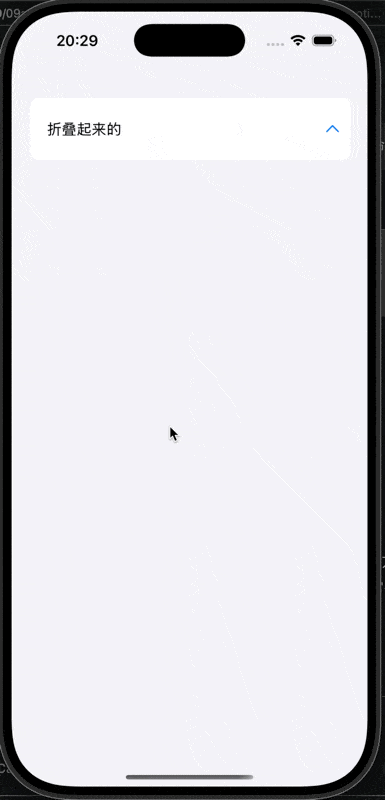
效果展示:


 938
938

 被折叠的 条评论
为什么被折叠?
被折叠的 条评论
为什么被折叠?
 到【灌水乐园】发言


