


 本文介绍如何使用Hashcat工具进行密码破解,包括安装、攻击模式选择、生成密码哈希列表、构建字典以及使用各种模式破解哈希密码。涵盖了字典攻击、组合攻击、掩码攻击、混合攻击等方法,并提供了实际操作示例。
This post will walk through the basics for getting started with cracking passwords using Hashcat. I’ll cover installation, attack modes, generating a list of password hashes, building a dictionary, and use the various modes to crack the hashed passwords.
Installation
You can download Hashcat from https://hashcat.net/hashcat/.
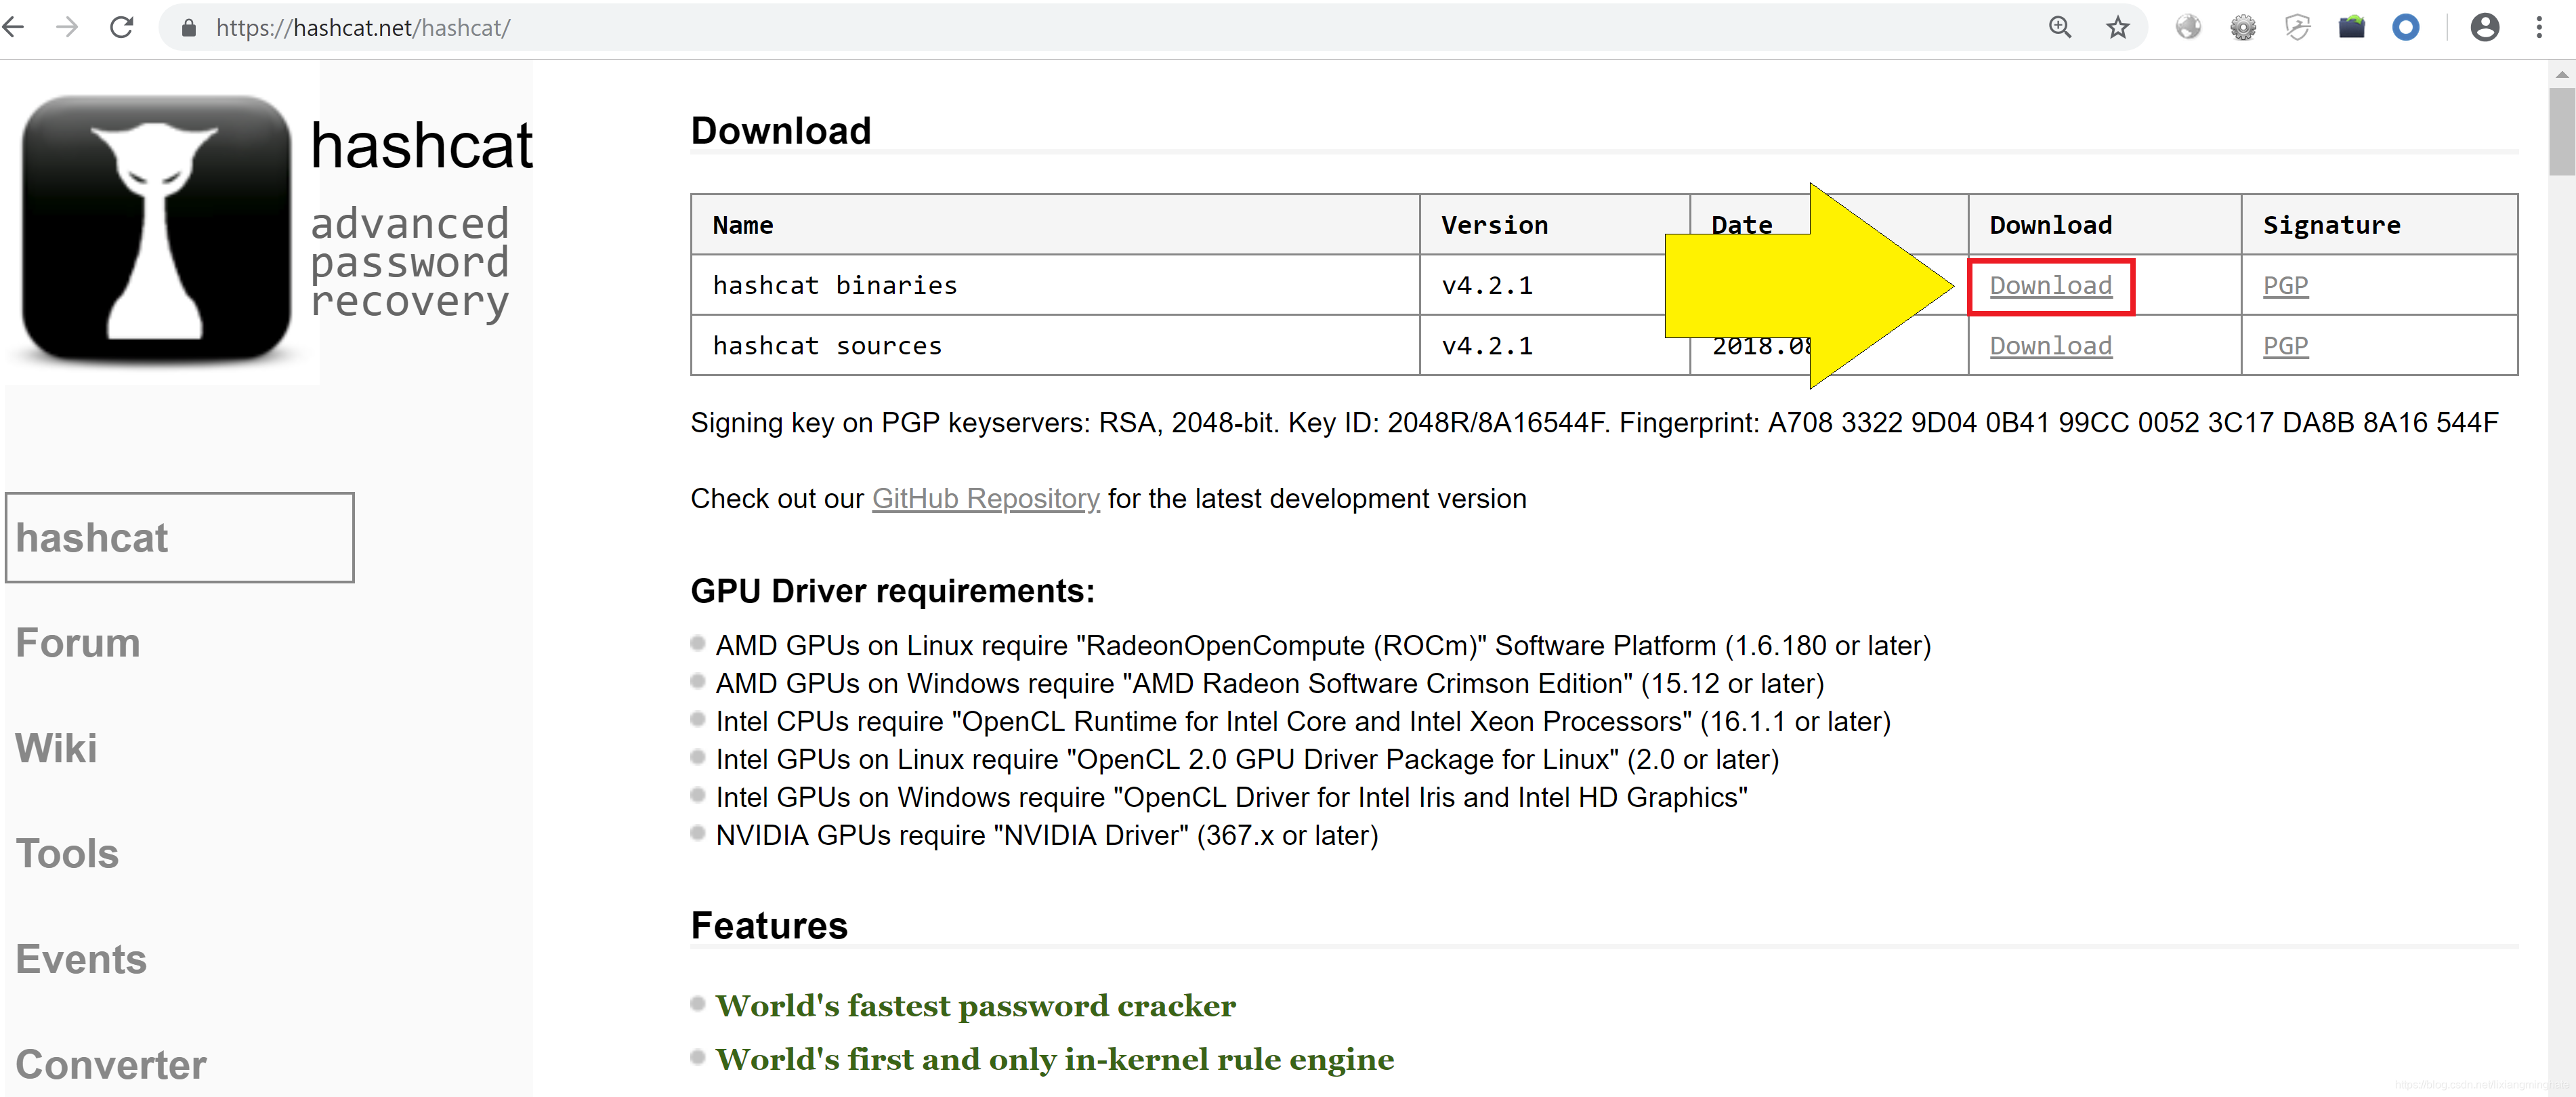
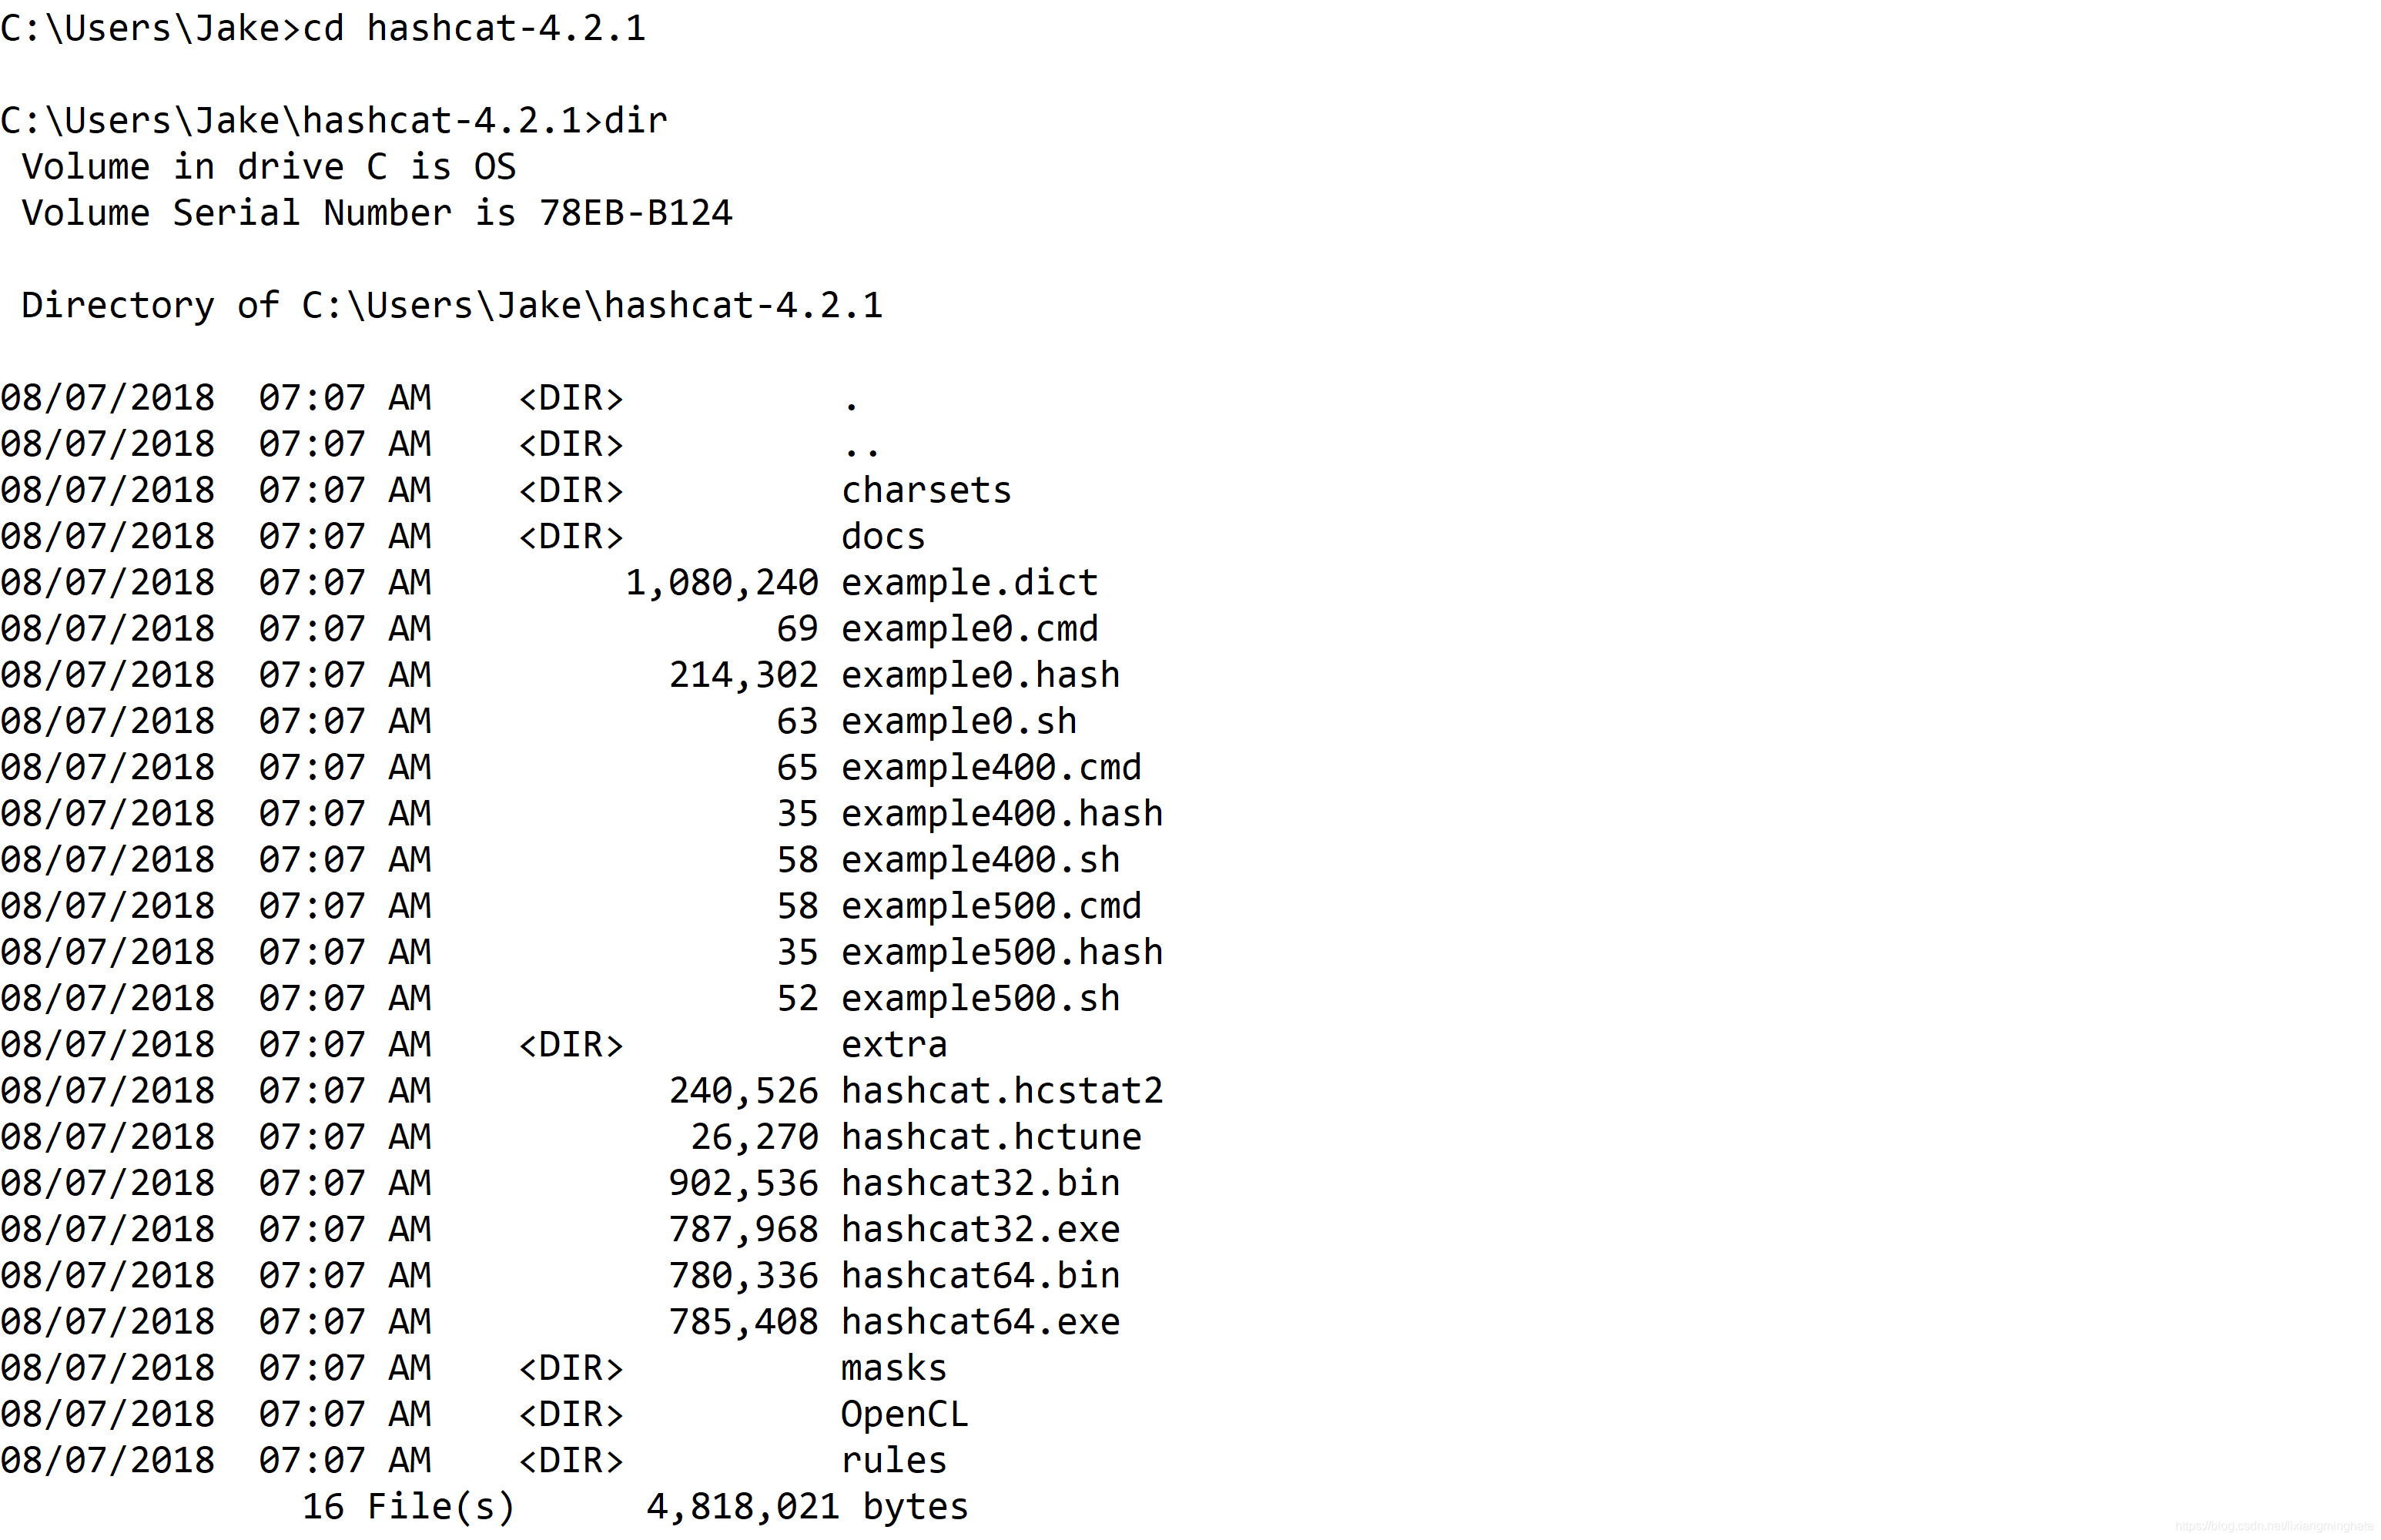
Extract the folder from the archive using 7-zip, and open a terminal in the extracted folder. The folder includes 32 and 64 bit binaries for both Windows and Linux, along with other example files and other files and documentation:
Test to see if it runs
Choosing the appropriate binary (I’m on 64-bit Windows), run one of the example commands (found in the options if you run -h) to crack some example MD5 hashes included in the hashcat download.
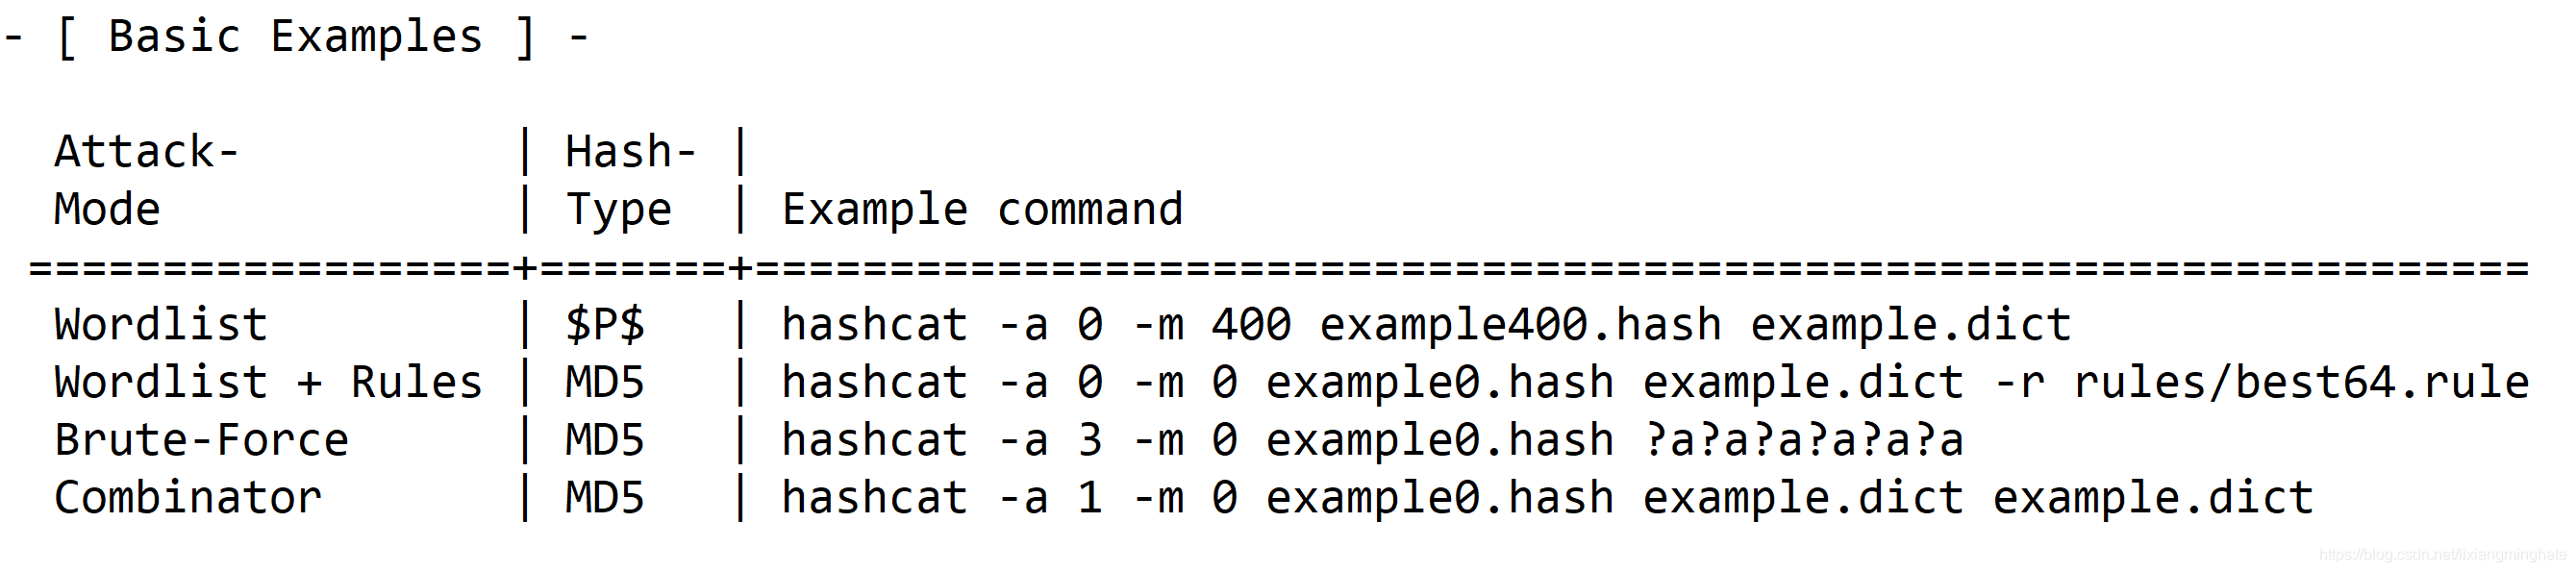
The ‘-a’ indicates the attack mode (covered shortly) and the ‘-m’ indicates the type of hash. Hashcat supports lots of hash types. You can view the help to look up all the hash types, but in this post I will be using ‘-m 0’, which specifies raw MD5.
If you run the command:
hashcat64.exe -a 0 -m 0 example0.hash example.dict -r rules/best64.ruleHopefully everything will just work fine and you’ll start seeing hashes being cracked:

However, if you run one of the example commands and you get an error, you’ll probably need to do a bit of troubleshooting to get hashcat working. The best advice I can give is to do an Internet search on the specific error and keep trying things until you get it to work.
Attack Modes Overview
Hashcat can perform multiple types of attacks:
Dictionary (-a 0) – Reads from a text file and uses each line as a password candidate
Combination (-a 1) – Like the Dictionary attack except it uses two dictionaries. Each word of a dictionary is appended to each word in a dictionary.
Mask (-a 3) – Try all combinations in a given keyspace. It is effectively a brute-force on user specified character sets.
Hybrid (-a 6 and -a 7) – A combination of a dictionary attack and a mask attack.
Additionally, hashcat also can utilize rule files, which greatly increases the effectiveness of the attack. Hashcat comes with multiple rules, and you can write your own rules as well.
A good way to understand the effectiveness of the attack modes is to put them to use, so I’ve generated a contrived list of 50 password hashes (available here), hashed with MD5, that you can use if you’d like to follow along. If you’d prefer to generate your own hashes, you could use a script I wrote, md5_hashgen.py (available here), that will take an existing plain-text password list, hash each line, and write the hashed passwords to a new file.
Now we have hashes, but before we can start testing each mode we will need to get a proper dictionary/wordlist, as we will need it in several attacks. The best wordlists are built from previous breaches, and specifically real passwords that are found in a particular target environment. If you don’t have your own list of compromised passwords, the best resource I’ve found for a starter password list is probably this repository: https://github.com/danielmiessler/SecLists/tree/master/Passwords, which has a lot of different password lists, including the infamous rockyou list, which is the go-to wordlist for many. My approach was to combine all of these lists, sort them, and remove duplicate words, leaving me with a large list of passwords. To accomplish this, I download the zip of the repository, extracted extracted the Passwords folder, and then in a terminal navigated to the Passwords folder. I wrote a Python script (here) to concatenate, sort, and remove duplicate words, and ran it in the Passwords directory:
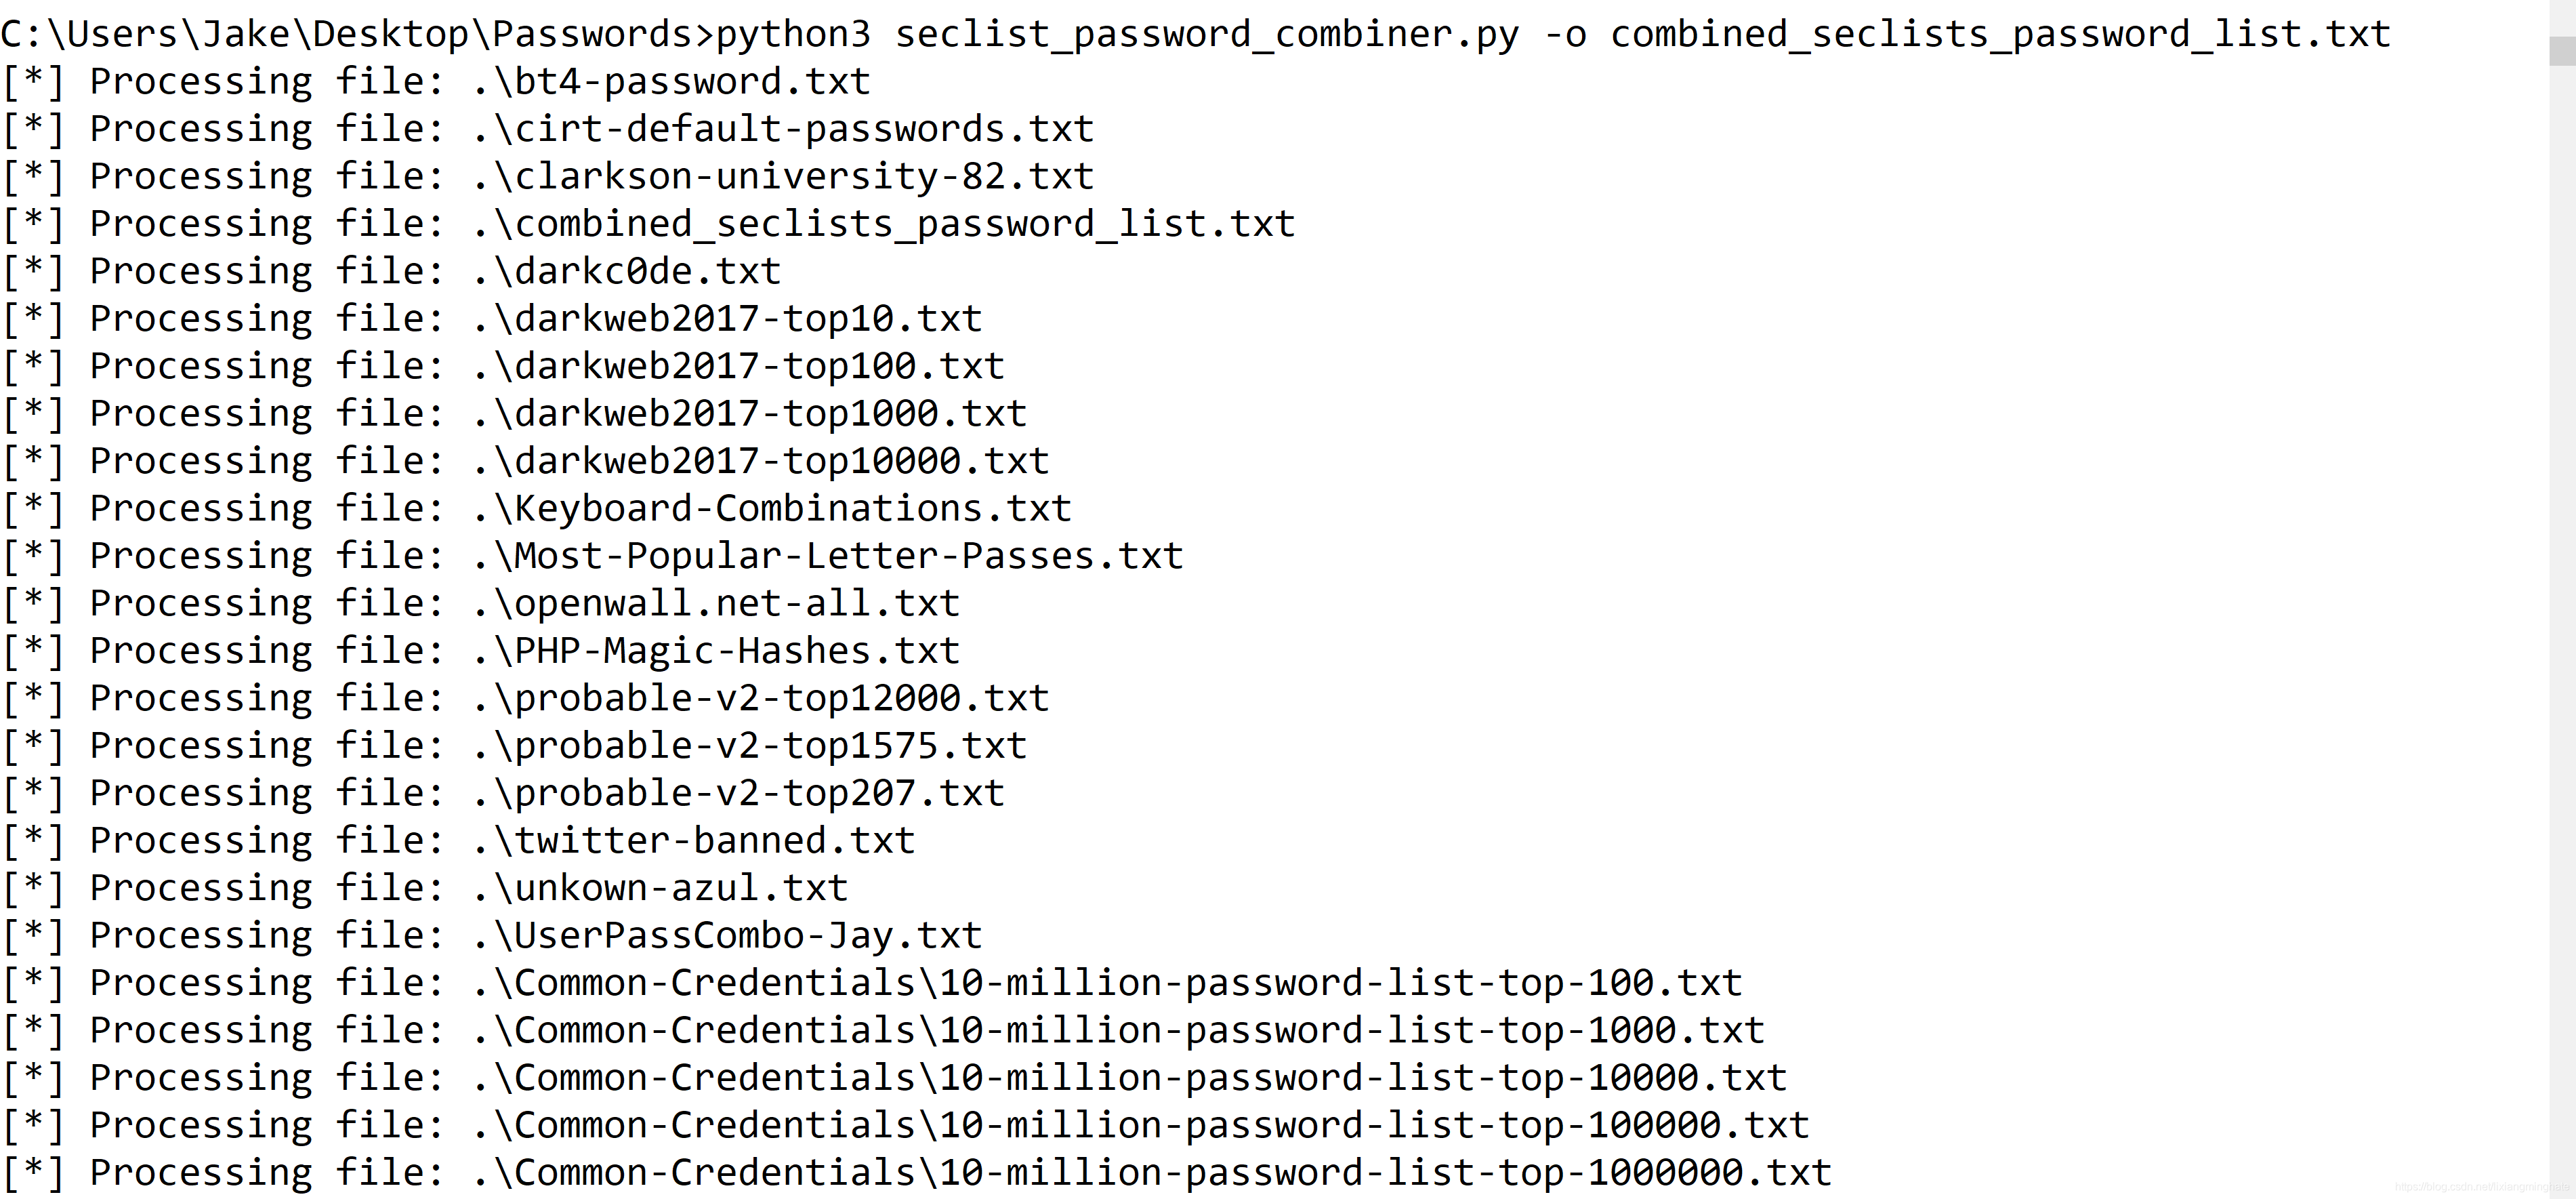
I’ll be using the resulting wordlist, combined_seclists_password_list.txt, in the next attacks. I’ll be using the wordlist as is for most of these examples, but another approach is to change everything to lowercase, and remove numbers and special characters, and manipulate the remaining words using rules.
Attack Examples
Dictionary attack
I’ll first start with a dictionary attack against the list of MD5 hashes:
hashcat64.exe -a 0 -m 0 example_md5_hashes.txt combined_seclists_password_list.txt -OThe result of the command cracked zero hashes. Bummer.
You may have noticed I added the -O flag to the end of the command. The -O will greatly increase the cracking speed, but will limit the password length that you’ll be able to crack. This is usually fine, unless you are cracking passwords greater than 27 characters.
Dictionary attack with rules
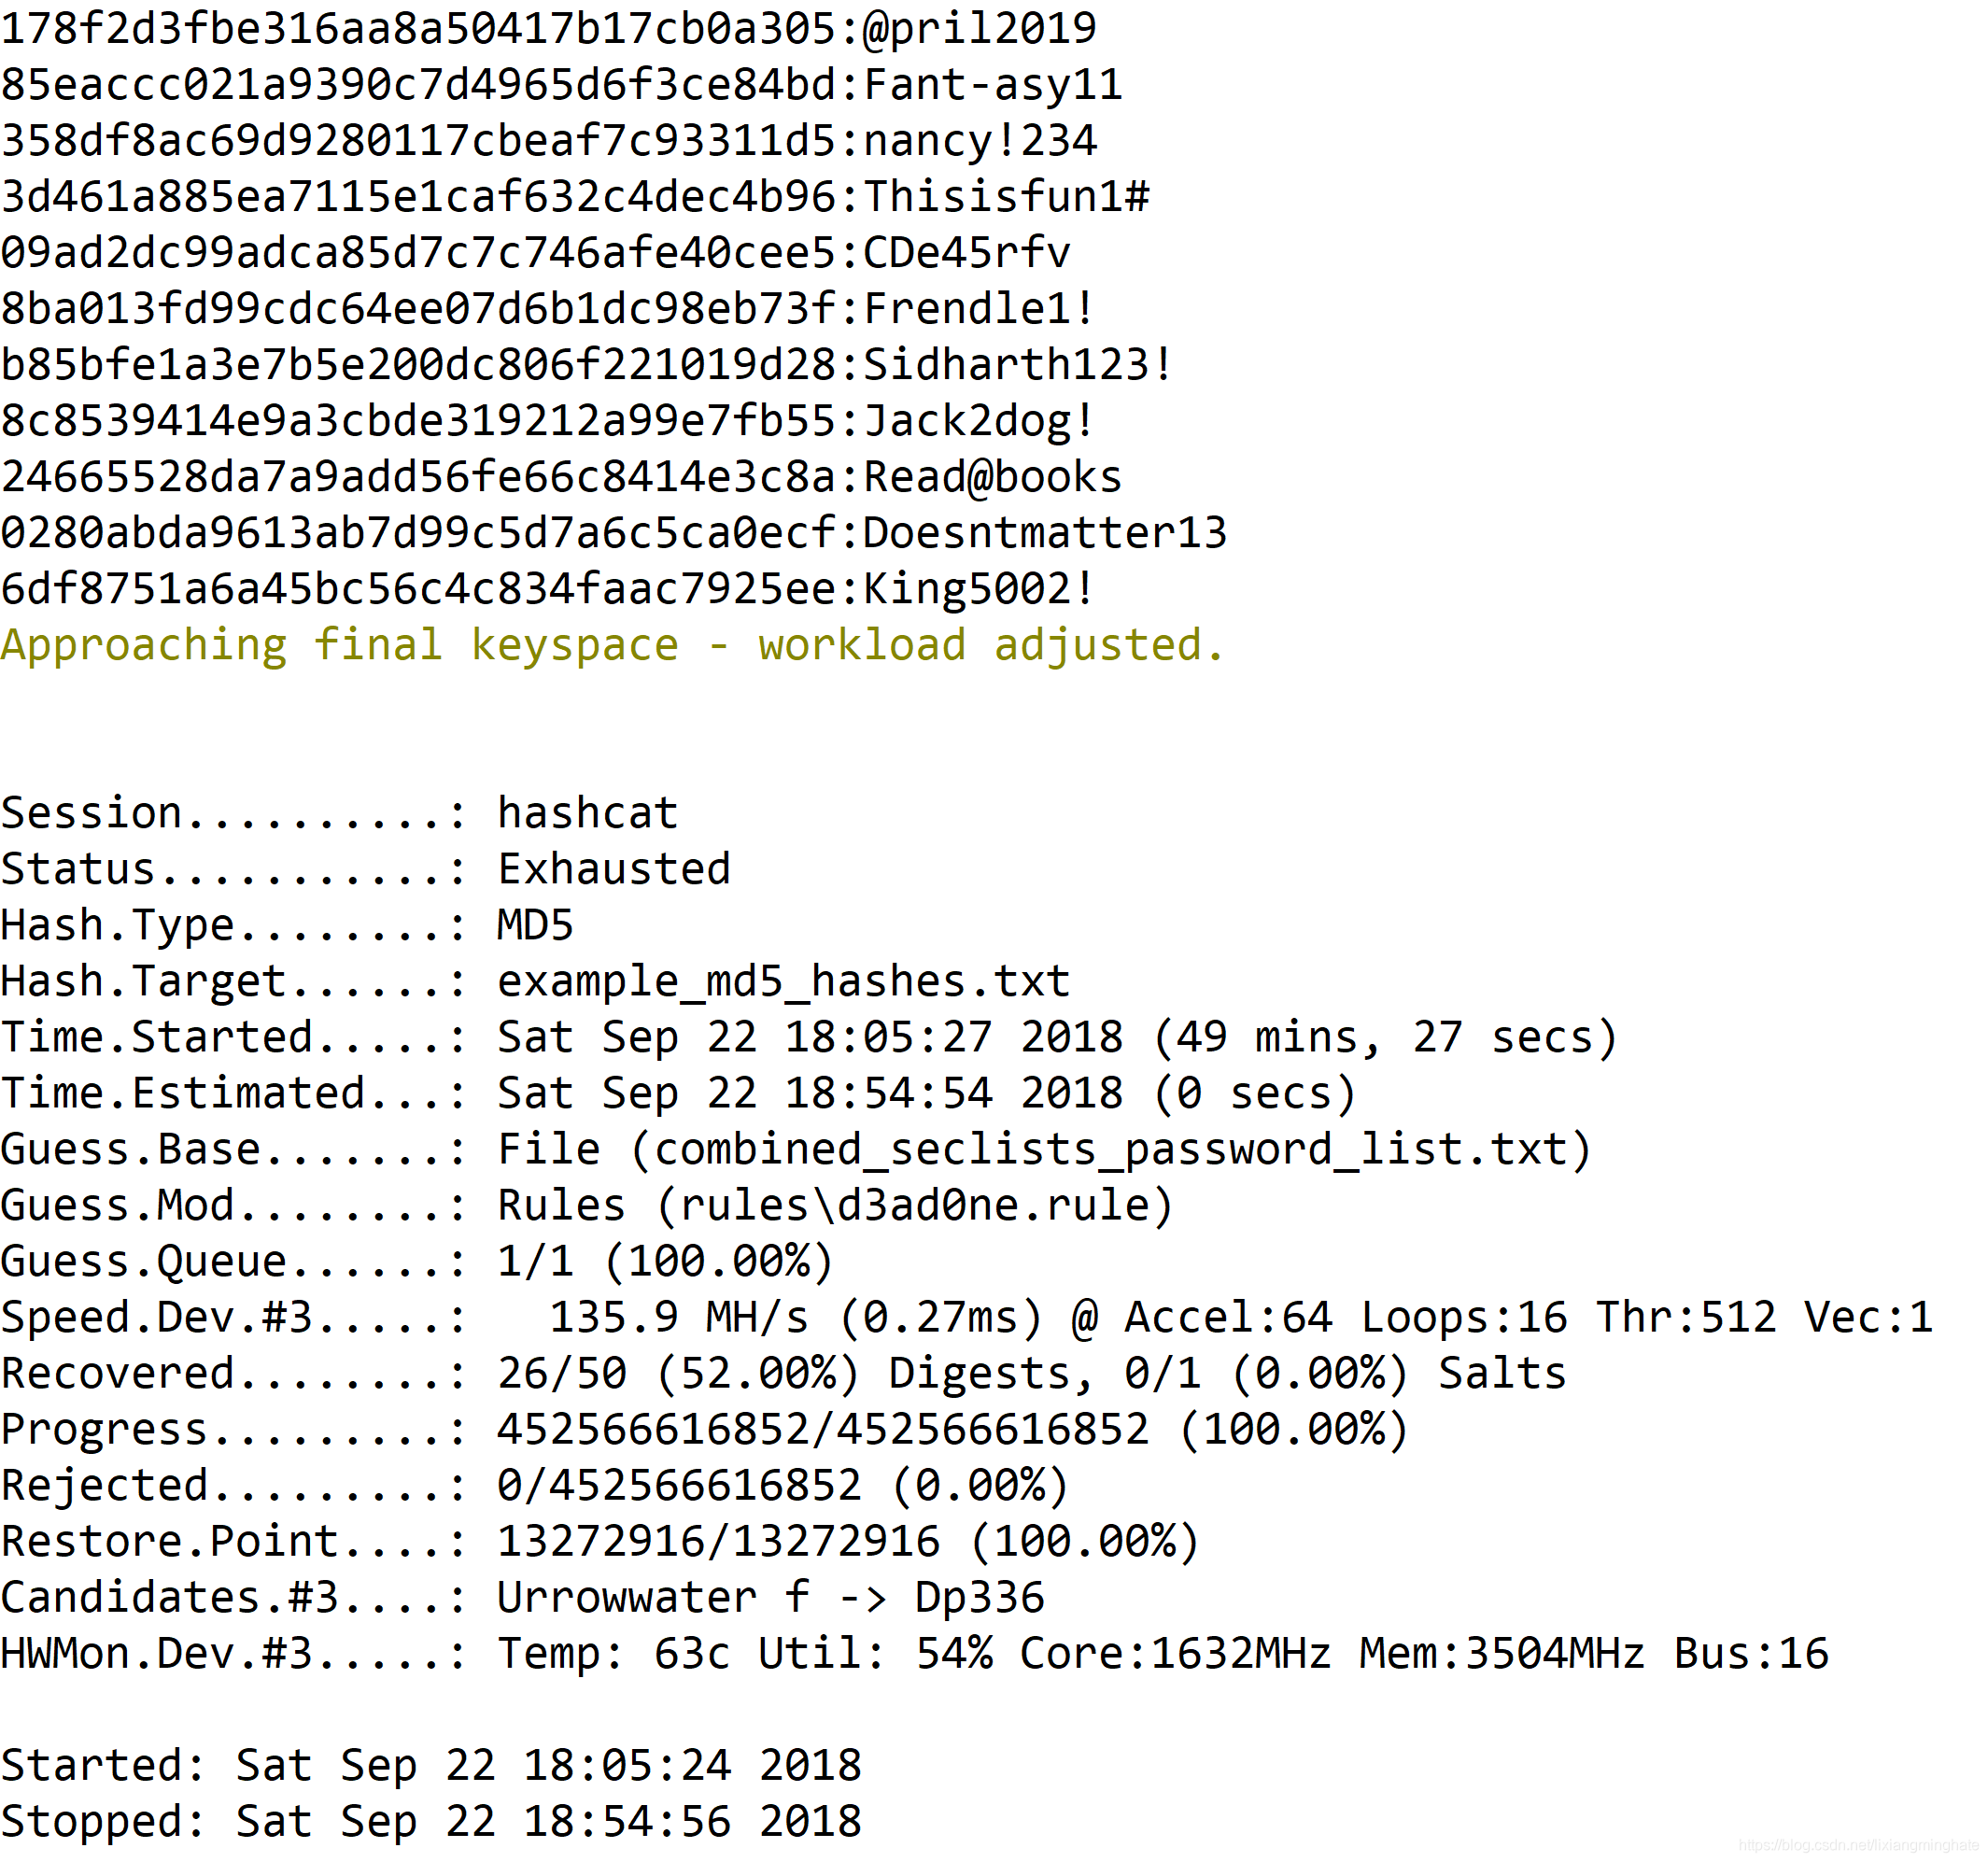
Let’s try a rule. As mentioned earlier, hashcat ships with several rules located in the rules directory. You use the -r <rulefile.rule> option to apply a rule. For example, I’ll use the d3ad0ne.rule:
hashcat64.exe -a 0 -m 0 example_md5_hashes.txt combined_seclists_password_list.txt -r rules\d3ad0ne.rule -OWithin a few seconds hashes will start to crack. You can press the ‘s’ key to get an estimated time of completion, as well as see other data about the session. For me, this ran for 8 minutes and recovered 26 of the passwords.
Not bad! And that is just one rule! Cycling through the rules will recover new passwords, but I’m just going to skip to a different attack. More on rules in a follow-on post (eventually), but you can take a look at my follow-on post about rule writing, or the hashcat wiki to get started with writing your own rules.
Combinator attack
A combinator attack is an attack that combines two dictionaries. To perform this attack I’ll first create a copy of my wordlist with a few modifications. First I’ll use a script, wordlist_cleaner.py to lowercase all letters, and remove any numbers and special characters from each word. Then I’ll use another script, capitalize_letters.py, to capitalize the first letter of each word.
C:\Users\Jake\hashcat-4.2.1>python3 wordlist_cleaner.py -f combined_seclists_password_list.txt -o combined_seclists_password_list_clean.txt

[*] Reading file: combined_seclists_password_list.txt
[*] Processing 13272929 words.
[*] Changing all words to lowercase...
[*] Removing numbers and special characters...
[*] Removing duplicate words...
[*] Printing cleaned words to combined_seclists_password_list_clean.txt

C:\Users\Jake\hashcat-4.2.1>python3 capitalize_letters.py -f combined_seclists_password_list_clean.txt -o combined_seclists_password_list_caps.txt
[*] Reading file: combined_seclists_password_list_clean.txt...
[*] Processing 7243374 words...
[*] Changing all words to lowercase...
[*] Capitalizing first letter of each word...
[*] Writing to combined_seclists_password_list_caps.txt…
Now I’ll try an attack:
hashcat64.exe -a 1 -m 0 example_md5_hashes.txt combined_seclists_password_list_caps.txt combined_seclists_password_list_caps.txt -k "$!" -OThis attack uses my two dictionaries (I used the same one twice) and also adds a single ! character (-k “$!”) to the right of the second dictionary. So if I have the combined word candidate of ThePassword, the -k “$!” transforms it to ThePassword!. Similarly, you can use the -j option to add characters to the left of the second dictionary. For example, if I had also added -j “$&”, my word candidate would be The&Password!.
This attack won’t result in any passwords being recovered from this example set of hashes, but it is a handy attack to play around with, especially after you have tried other attacks and are running out of ideas. Feel free to quit the attack early, and for the rest of the examples I’ll just be using the combined_seclists_password_list.txt as my wordlist.
Mask attack
Next, let’s try a mask attack (-a 3), but first let me explain a bit more about the syntax. Consider the following command:
hashcat64.exe -a 3 -m 0 example_md5_hashes.txt ?u?l?l?l?d?d?d?dThe -a 3 specifies a mask attack, -m 0 specifies MD5 as the hash type, and example_md5_hashes.txt is my file containing the hashes. After that, you have the mask. This particular mask will attempt to bruteforce an 8 character password, where the first character (?u) is an uppercase letter, the next three characters (?l?l?l) are lowercase letters, and the last four characters (?d?d?d?d) are digits. Hashcat has the following charsets built-in:
?l = abcdefghijklmnopqrstuvwxyz
?u = ABCDEFGHIJKLMNOPQRSTUVWXYZ
?d = 0123456789
?h = 0123456789abcdef
?H = 0123456789ABCDEF
?s = «space»!"#$%&'()*+,-./:;<=>?@[\]^_`{|}~
?a = ?l?u?d?s
?b = 0x00 – 0xff
You can also specify your own charsets. I’m going to do that against my hashfile:
hashcat64.exe -a 3 -m 0 example_md5_hashes.txt -1 ?s?d ?u?l?l?l?1?1?1?1This may be slightly difficult to read, but what I’ve done is specified a custom charset using the -1 ?s?d. This has created a character set that includes special characters and digits. When I want to use this character set, I’ll use ?1. Hashcat allows you to specify four custom charsets per mask. So, this particular command is looking for an 8 character password that starts with an uppercase letter, followed by three lowercase letters, where the last four characters will be a number or a special character. Running through all of these characters will take some time, but it will recover another password.
cd17666830b55097a331e1e23175ba13:Sari011!Hashcat also allows you to record your masks in a file, and then point hashcat to the file instead. This is great, because it allows you to try many masks automatically one right after the other. Hashcat comes with some pregenerated masks, which can be found in the masks directory. To run masks from a file, instead of specifying the mask (?l?u?d) on the command line you’ll instead just specify the filename:
hashcat64.exe -a 3 -m 0 example_md5_hashes.txt masks\8char-1l-1u-1d-1s-compliant.hcmaskThis command will go through all masks specified in the file. The file just contains masks, and it might looks like this:
?a
?a?a
?a?a?a
?a?a?a?a
?a?a?a?a?a
?a?a?a?a?a?a
?a?a?a?a?a?a?a
?s?d,?u?l?l?l?1?1?1?1
?d?u?l?l?l?l?l?l
Hashcat will go through each of these masks one after the other. In this example, it will look first for one character passwords, cycling through all characters, and it will continue to do this for up to 7 characters. After that, I use a mask with a custom charset. Instead of using -1 to specify the charset, I instead separate the charset with a comma (?s?d,?u?l?l?l?1?1?1?1). I then write the mask I want, using 1 for the charset I specified (?s?d,?u?l?l?l?1?1?1?1)If I wanted another charset, I could specify another and use another comma. After that completes, hashcat will run the next mask, and so on…
Hybrid attack
A hybrid attack combines a dictionary attack and a mask attack. Mask attacks by themselves are great, but typically when you work with a mask greater than 8 characters, the time it takes to complete the attack becomes an issue. A hybrid solves that problem because you can use a longer base word, such as September, and then add a mask of ?d?d?d?d, to cover all iteration of September0000 to September9999, which of course includes popular passwords like September2018 among others.
Hybrid attacks can use a mask after the word (-a 6), or prior to the word (-a 7), but can not do both at the same time. To perform that type of attack, see this guidance.
Let’s try a hybrid attack on our example hashes:
hashcat64.exe -a 6 -m 0 example_md5_hashes.txt combined_seclists_password_list.txt ?d?d?d?dThis shouldn’t take too long to run, and it should recover another password:
e309bdf1de5640f114fddfe5eac9ccf8:LosAngeles2019Next Steps
This tutorial only scratches the surface of how you can use hashcat to recover passwords, and you are only limited by your creativity. Check out my follow-on post that covers rule writing.


 被折叠的 条评论
为什么被折叠?
被折叠的 条评论
为什么被折叠?
 到【灌水乐园】发言


