


转自:http://www.cnblogs.com/greatverve/archive/2012/03/05/multi-datagridview.html
有个简易的方法:
2,添加CellPainting,代码如下:

{
if (e.RowIndex == - 1)
{
// int w = dataGridView1.HorizontalScrollingOffset + dataGridView1.TopLeftHeaderCell.Size.Width + dataGridView1.Columns[0].Width + 10;
Rectangle newRect = new Rectangle(e.CellBounds.X + 1,
e.CellBounds.Y + 1, e.CellBounds.Width - 4,
e.CellBounds.Height - 4);
using (
Brush gridBrush = new SolidBrush( this.GridColor),
backColorBrush = new SolidBrush(e.CellStyle.BackColor))
{
using (Pen gridLinePen = new Pen(gridBrush))
{
// Erase the cell.
e.Graphics.FillRectangle(backColorBrush, e.CellBounds);
// Draw the grid lines (only the right and bottom lines;
// DataGridView takes care of the others).
e.Graphics.DrawLine(gridLinePen, e.CellBounds.Left,
e.CellBounds.Bottom - 1, e.CellBounds.Right - 1,
e.CellBounds.Bottom - 1);
if (e.ColumnIndex > - 1 && topRow != null && topRow.Cells[e.ColumnIndex].ColSpan > 1)
{
e.Graphics.DrawLine(gridLinePen, e.CellBounds.Right - 1,
e.CellBounds.Top + e.ClipBounds.Height / 2, e.CellBounds.Right - 1,
e.CellBounds.Bottom);
}
else
{
e.Graphics.DrawLine(gridLinePen, e.CellBounds.Right - 1,
e.CellBounds.Top, e.CellBounds.Right - 1,
e.CellBounds.Bottom);
}
// Draw the inset highlight box.
// e.Graphics.DrawRectangle(Pens.Blue, newRect);
int scale = e.CellBounds.Height / 3;
if (e.ColumnIndex > - 1 && topRow.Cells[e.ColumnIndex].Text != null)
{
scale = e.CellBounds.Height / 2;
e.Graphics.DrawLine(gridLinePen, e.CellBounds.Left, e.CellBounds.Bottom - e.CellBounds.Height / 2, e.CellBounds.Right, e.CellBounds.Bottom - e.CellBounds.Height / 2);
}
// Draw the text content of the cell, ignoring alignment.
if (e.Value != null)
{
e.Graphics.DrawString(e.Value.ToString(), e.CellStyle.Font,
Brushes.Crimson, e.CellBounds.X + 2,
e.CellBounds.Y + scale + 2, StringFormat.GenericDefault);
}
if (e.ColumnIndex > - 1 && topRow.Cells[e.ColumnIndex].RelateIndex > - 1 && topRow.Cells[e.ColumnIndex].Text != null)
{
Rectangle recCell = new Rectangle(e.CellBounds.X - 1 - topRow.Cells[e.ColumnIndex].SpanRowWith,
e.CellBounds.Y + 1, topRow.Cells[e.ColumnIndex].SpanRowWith,
e.CellBounds.Height / 2);
StringFormat sf = new StringFormat();
sf.Alignment = StringAlignment.Center;
e.Graphics.DrawString(topRow.Cells[e.ColumnIndex].Text, e.CellStyle.Font, Brushes.Crimson, recCell, sf);
}
e.Handled = true;
}
}
}
}
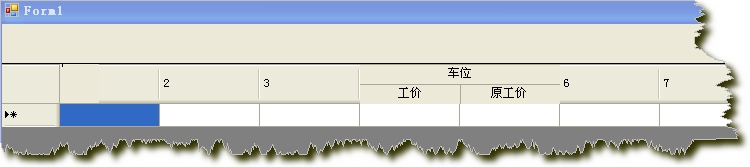
 dataGridViewEx1.TopRow.Cells[2].Text = "入库";
dataGridViewEx1.TopRow.Cells[2].ColSpan = 2;
dataGridViewEx1.TopRow.Cells[4].Text = "出库";
dataGridViewEx1.TopRow.Cells[4].ColSpan = 2;
dataGridViewEx1.TopRow.Cells[2].Text = "入库";
dataGridViewEx1.TopRow.Cells[2].ColSpan = 2;
dataGridViewEx1.TopRow.Cells[4].Text = "出库";
dataGridViewEx1.TopRow.Cells[4].ColSpan = 2;

至于表尾合计,也做出了原型。二维表头+表尾合计,基本上满足需求了。
1.DataGridView实现课程表 testcontrol.rar

2.DataGridView二维表头及单元格合并 DataGridView单元格合并和二维表头.rar myMultiColHeaderDgv.rar


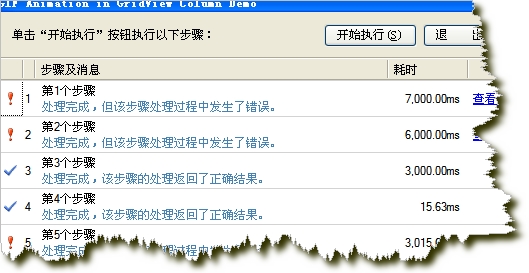
3.DataGridView单元格显示GIF图片 gifanimationindatagrid.rar
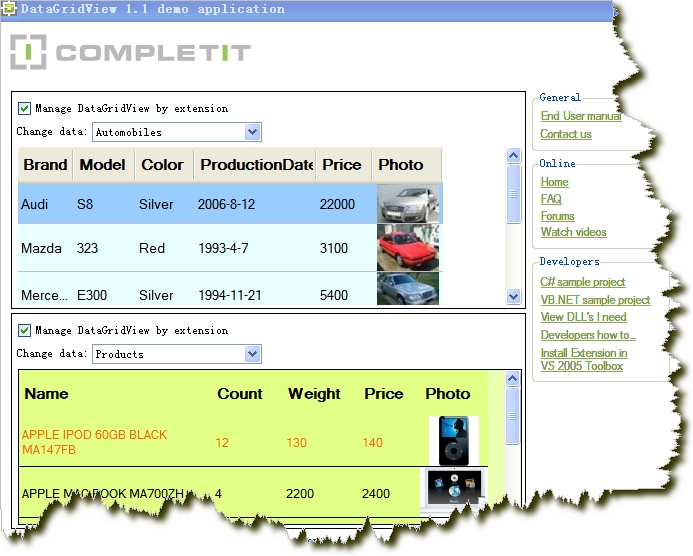
4.自定义显示DataGridView列(行头显示行号与图标,同一单元格显示图片也显示文字)TestDataGridViewRowStyle2.rar

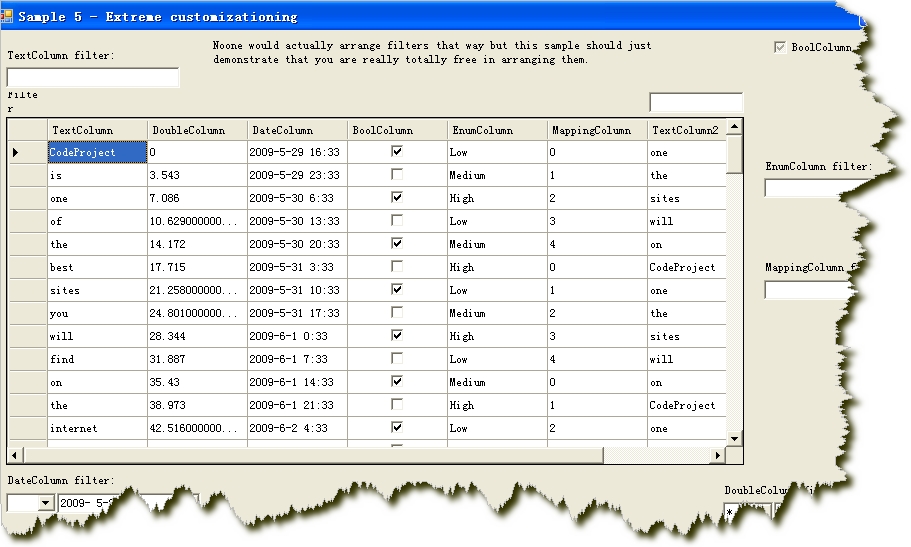
5.扩展DataGridView功能

相关文章
CheckBox Header Column For DataGridView
DataGridView填充、更新、删除(多行)Sql Express 2005数据库
DataGridView扩展的一些想法(二维表头、合并单元格、合计行)
DataGridView分页功能的实现
在DataGridView控件中加入ComboBox下拉列表框的实现
DataGridView中虚拟模式(Virtual Mode)的使用
从 DataGridView 控件 托放数据 到 TreeView控件
相关一些资料下载(收集自网络)
微软提供的例子 datagridviewsamples.rar
DataGridView使用文档 DataGridView_Doc.rar
Excel与DataGridView互导数据 Excl导入datagridview.rar
DataGridView扩展功能代码
--------------------------------------------------------------------------
还有用第三方控件的:
在做信息管理系统时,很多中式报表都是多维的,要实现报表数据显示,通常要用到多维表头。然而,非常遗憾的是,Winform中DataGrid、DataGridView本身不提供多维表头设计,要实现多维报表只好利用第三方的控件。通过对DataGridView的扩展,利用标题行进行重绘,可实现多维表头的友好界面。下面是对多维表头的探讨和实现。
1、常用多表头制作方法
a.第三方控件实现多维表头:FlexGrid--展示效果很好,就是数据量大加载时显示速度较慢。
b.报表方式实现多维表头:CrystalReport、Grid++Report--通过预览方式实现数据显示
c、DataGridView实现多维表头
2、DataGridView多维表头实现原理
通过重绘标题栏进行多栏实现,通过RowSpan和ColSpan来进行合并,类似Html的Table实现方式。
3、调用方法
private void Form1_Load(object sender, EventArgs e)
{
InitDataTable();
InitDataGridView();
}
DataTable table = new DataTable();
private void InitDataTable()
{
DataColumn col;
col = new DataColumn();
col.ColumnName = "客户名称";
table.Columns.Add(col);
col = new DataColumn();
col.ColumnName = "产品名称";
table.Columns.Add(col);
col = new DataColumn();
col.ColumnName = "规格";
table.Columns.Add(col);
col = new DataColumn();
col.ColumnName = "单位";
table.Columns.Add(col);
col = new DataColumn();
col.ColumnName = "期初存货数量";
col.DataType = System.Type.GetType("System.Decimal");
table.Columns.Add(col);
col = new DataColumn();
col.ColumnName = "期初货款";
col.DataType = System.Type.GetType("System.Decimal");
table.Columns.Add(col);
col = new DataColumn();
col.ColumnName = "期初帐款";
col.DataType = System.Type.GetType("System.Decimal");
table.Columns.Add(col);
col = new DataColumn();
col.ColumnName = "发货数量";
col.DataType = System.Type.GetType("System.Decimal");
table.Columns.Add(col);
col = new DataColumn();
col.ColumnName = "发货金额";
col.DataType = System.Type.GetType("System.Decimal");
table.Columns.Add(col);
col = new DataColumn();
col.ColumnName = "开票数量";
col.DataType = System.Type.GetType("System.Decimal");
table.Columns.Add(col);
col = new DataColumn();
col.ColumnName = "开票金额";
col.DataType = System.Type.GetType("System.Decimal");
table.Columns.Add(col);
col = new DataColumn();
col.ColumnName = "回款数量";
col.DataType = System.Type.GetType("System.Decimal");
table.Columns.Add(col);
col = new DataColumn();
col.DataType = System.Type.GetType("System.Decimal");
col.ColumnName = "回款金额";
table.Columns.Add(col);
col = new DataColumn();
col.DataType = System.Type.GetType("System.Decimal");
col.ColumnName = "未开票回款数量";
table.Columns.Add(col);
col = new DataColumn();
col.DataType = System.Type.GetType("System.Decimal");
col.ColumnName = "未开票回款金额";
table.Columns.Add(col);
col = new DataColumn();
col.DataType = System.Type.GetType("System.Decimal");
col.ColumnName = "期末存货数量";
table.Columns.Add(col);
col = new DataColumn();
col.DataType = System.Type.GetType("System.Decimal");
col.ColumnName = "期末应收货款";
table.Columns.Add(col);
col = new DataColumn();
col.DataType = System.Type.GetType("System.Decimal");
col.ColumnName = "期末应收帐款";
table.Columns.Add(col);
}
private void InitDataGridView()
{
MutilGridHeader topRow = new MutilGridHeader();
topRow.SetRowCol(3, 18);
//第一行
topRow.Cells[0][0].Value = "客户";
topRow.Cells[0][0].RowSpan = 3;
topRow.Cells[0][1].Value = "产品名称";
topRow.Cells[0][1].RowSpan = 3;
topRow.Cells[0][2].Value = "规格";
topRow.Cells[0][2].RowSpan = 3;
topRow.Cells[0][3].Value = "单位";
topRow.Cells[0][3].RowSpan = 3;
topRow.Cells[0][4].Value = "期初";
topRow.Cells[0][4].ColSpan = 3;
topRow.Cells[0][7].Value = "本期";
topRow.Cells[0][7].ColSpan = 8;
topRow.Cells[0][15].Value = "期末";
topRow.Cells[0][15].ColSpan = 3;
//第二行
topRow.Cells[1][4].Value = "存货数量";
topRow.Cells[1][4].RowSpan = 2;
topRow.Cells[1][5].Value = "应收货款";
topRow.Cells[1][5].RowSpan = 2;
topRow.Cells[1][6].Value = "应收帐款";
topRow.Cells[1][6].RowSpan = 2;
topRow.Cells[1][7].Value = "发货";
topRow.Cells[1][7].ColSpan = 2;
topRow.Cells[1][9].Value = "开票";
topRow.Cells[1][9].ColSpan = 2;
topRow.Cells[1][11].Value = "回款";
topRow.Cells[1][11].ColSpan = 2;
topRow.Cells[1][13].Value = "未开票回款";
topRow.Cells[1][13].ColSpan = 2;
topRow.Cells[1][15].Value = "存货数量";
topRow.Cells[1][15].RowSpan = 2;
topRow.Cells[1][16].Value = "应收货款";
topRow.Cells[1][16].RowSpan = 2;
topRow.Cells[1][17].Value = "应收票款";
topRow.Cells[1][17].RowSpan = 2;
//第三行
topRow.Cells[2][7].Value = "数量";
topRow.Cells[2][8].Value = "金额";
topRow.Cells[2][9].Value = "数量";
topRow.Cells[2][10].Value = "金额";
topRow.Cells[2][11].Value = "数量";
topRow.Cells[2][12].Value = "金额";
topRow.Cells[2][13].Value = "数量";
topRow.Cells[2][14].Value = "金额";
dataGridViewEx1.Header = topRow;
dataGridViewEx1.DataSource = table;
table.DefaultView.AllowNew = false;
dataGridViewEx1.Columns[0].Width = 120;
dataGridViewEx1.Columns[1].Width = 100;
dataGridViewEx1.Columns[2].Width = 80;
for(int i = 2;i<18;i++)
dataGridViewEx1.Columns[i].Width = 60;
}
4、界面显示
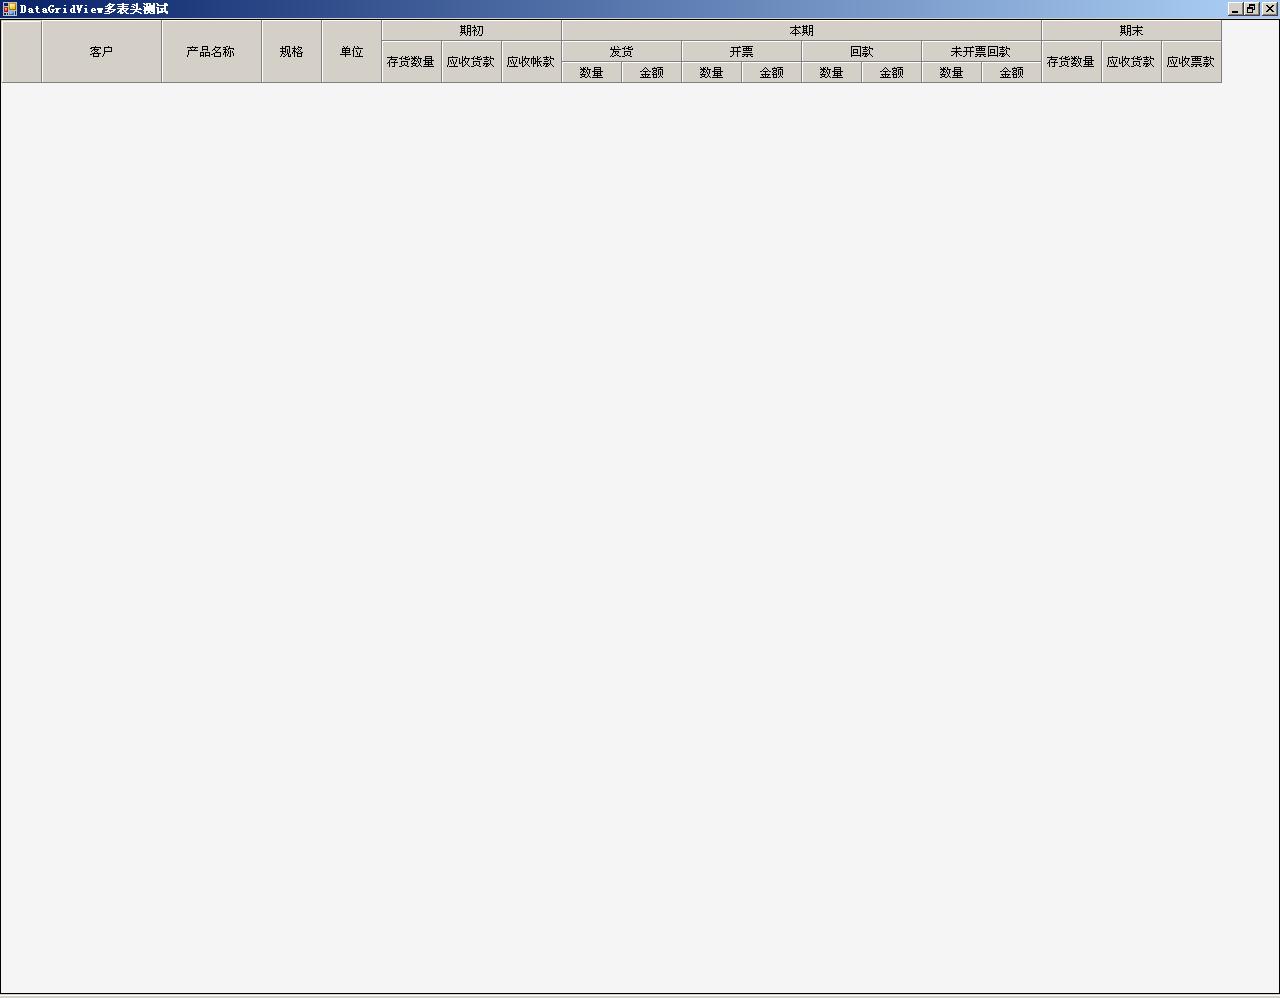
这段代码是两年前写的,由于当时时间和编程水平有限,很多代码段没有加注释,代码的可读性极差,只是为了达到效果,具体合并的实现方法自己也已模糊。
凡事以大气象去面对,优秀是一种习惯。


 5791
5791


 被折叠的 条评论
为什么被折叠?
被折叠的 条评论
为什么被折叠?
 到【灌水乐园】发言


