


这部分内容是几个月前做的项目,一直没时间整理记录,在这里随便写一下方便日后回忆.
"GrabCut":使用迭代图形切割的交互式前景提取工具,用于在分割任务中按像素标记图像数据.
算法过程:
- 首先,输入矩形框,矩形框外部区域都是背景。内部一定包含前景。
- 电脑对输入图像进行初始化,标记前景和背景的像素。
- 使用高斯混合模型(GMM)对前景和背景建模。
- 根据输入,GMM会学习并创建新的像素分布。对未知的像素(前景或背景不确定),根据他们与已知的分类像素关系进行分类。(类似聚类操作)
- 这样会根据像素的分布创建一幅图,图中节点是像素。除了像素点是节点以外,还有Source_node和Sink_node两个节点。所有的前景图像斗鱼Source_node相连。背景与Sink_node相连。
- 像素是否连接到Source_node/end_node依赖于权值,这个权值由像素属于同一类,也就是前景或者背景的概率来决定。如果像素的颜色有很大区别,那么他们之间的权重就很小。
- 使用mincut算法对图像进行分割。它会根据最小代价方程对图像分成source_node和sink_node。代价方程是指裁剪所有边上权重的和。裁剪完成后,所有连接到source_node的判定为前景,sink_node上的为背景。
- 继续此过程,直到分类收敛。
前后端分离的交互式图像分割:
- 接收:原图Array, 第一次初始化的Mask Array
- 返回:grabCut 计算后返回的 Mask Array
- 重复:接收与返回Mask Array,直至抠图效果满意
cv2.grabCut()函数参数
mask, bgdModel, fgdModel = cv2.grabCut(img,mask,None,bgdModel,fgdModel,5,cv2.GC_INIT_WITH_MASK)- img: 输入图像
- mask: (蒙板模式第一次可随意设定一些区域给算法),蒙板图像,确定前景区域,背景区域,不确定区域,可以设置为cv2.GC_BGD,cv2.GC_FGD,cv2.GC_PR_BGD,cv2.GC_PR_FGD,也可以输入0,1,2,3.计算完成后mask里面值为0到3,其中0表示背景,1表示前景,2表示可能是背景,3表示可能是前景.代码中将0和2合并为背景 1和3合并为前景
- rect: 前景的矩形,格式为(x,y,w,h),分别为左上角坐标和宽度,高度,可为None.
- bdgModel, fgdModel: 算法内部是用的数组,只需要创建两个大小为(1,65)np.float64的数组。
- iterCount: 迭代次数,越大需要的时间越多,精度也更准,1次可做到实时
- mode: cv2.GC_INIT_WITH_RECT 或 cv2.GC_INIT_WITH_MASK,使用矩阵模式还是蒙板模式。
函数返回:算法迭代后的mask图,可用作下一次迭代的输入(当得到的结果并不准确时,可以在这幅图片得到的蒙板上面添加标记,比如用白色(像素值为0)标记前景,黑色(像素值为255)标记背景,再次进行迭代计算。
)--即交互式操作.
原始C++的cv::grabCut函数参考
void cv::grabCut( InputArray _img, InputOutputArray _mask, Rect rect,
                  InputOutputArray _bgdModel, InputOutputArray _fgdModel,
                  int iterCount, int mode )

参数说明:
         img——待分割的源图像,必须是8位3通道(CV_8UC3)图像,在处理的过程中不会被修改;

         mask——掩码图像,如果使用掩码进行初始化,那么mask保存初始化掩码信息;
                在执行分割的时候,也可以将用户交互所设定的前景与背景保存到mask中,然后再传入grabCut函数;
                在处理结束之后,mask中会保存结果。mask只能取以下四种值:
                   GCD_BGD(=0),背景;
                   GCD_FGD(=1),前景;
                   GCD_PR_BGD(=2),可能的背景;
                   GCD_PR_FGD(=3),可能的前景。
                   如果没有手工标记GCD_BGD或者GCD_FGD,那么结果只会有GCD_PR_BGD或GCD_PR_FGD;

         rect——用于限定需要进行分割的图像范围,只有该矩形窗口内的图像部分才被处理,可为None;

         bgdModel——背景模型,如果为null,函数内部会自动创建一个bgdModel;bgdModel必须是单通道浮点型(CV_32FC1)图像,且行数只能为1,列数只能为13x5;

         fgdModel——前景模型,如果为null,函数内部会自动创建一个fgdModel;fgdModel必须是单通道浮点型(CV_32FC1)图像,且行数只能为1,列数只能为13x5;

         iterCount——迭代次数,必须大于0;

         mode——用于指示grabCut函数进行什么操作,可选的值有:
                   GC_INIT_WITH_RECT(=0),用矩形窗初始化GrabCut;
                   GC_INIT_WITH_MASK(=1),用掩码图像初始化GrabCut;
                   GC_EVAL(=2),执行分割。
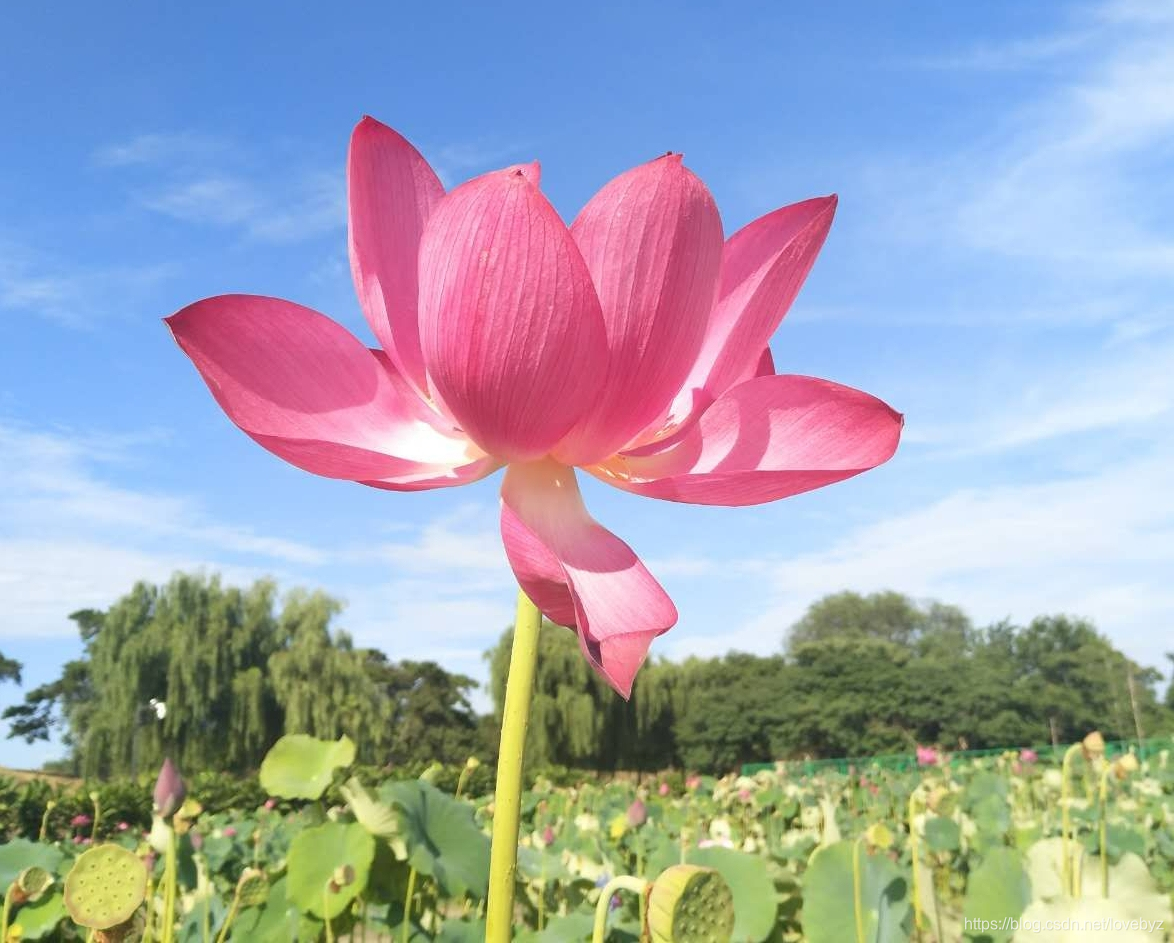
项目执行过程效果
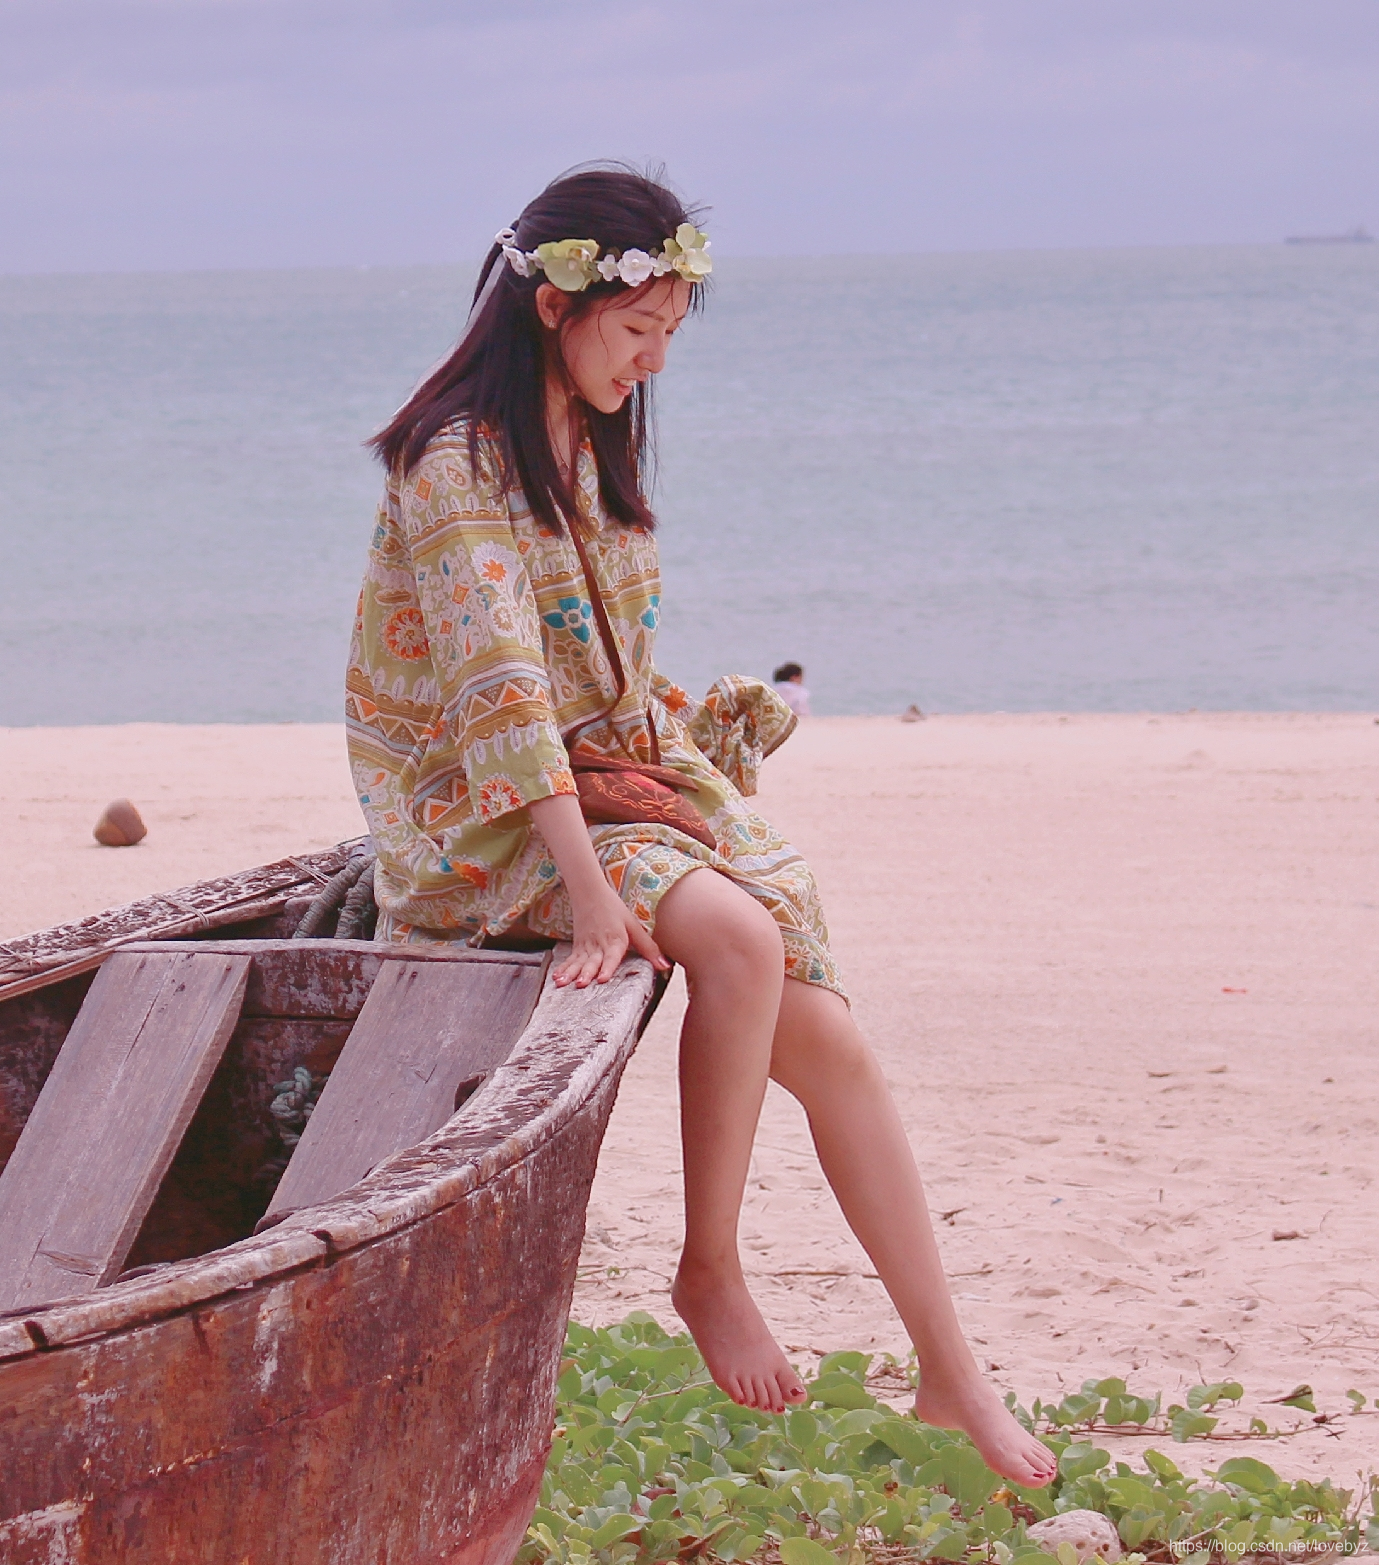
输入原图:
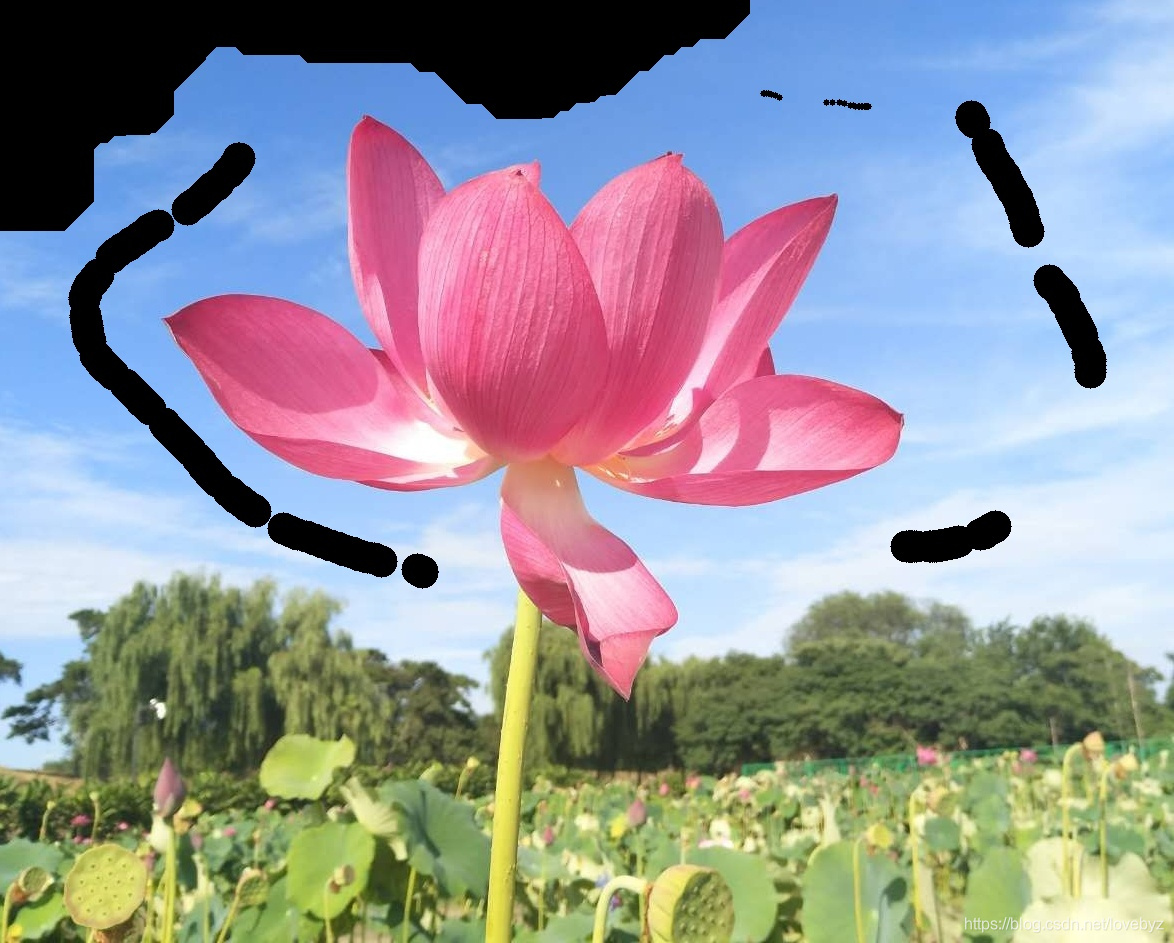
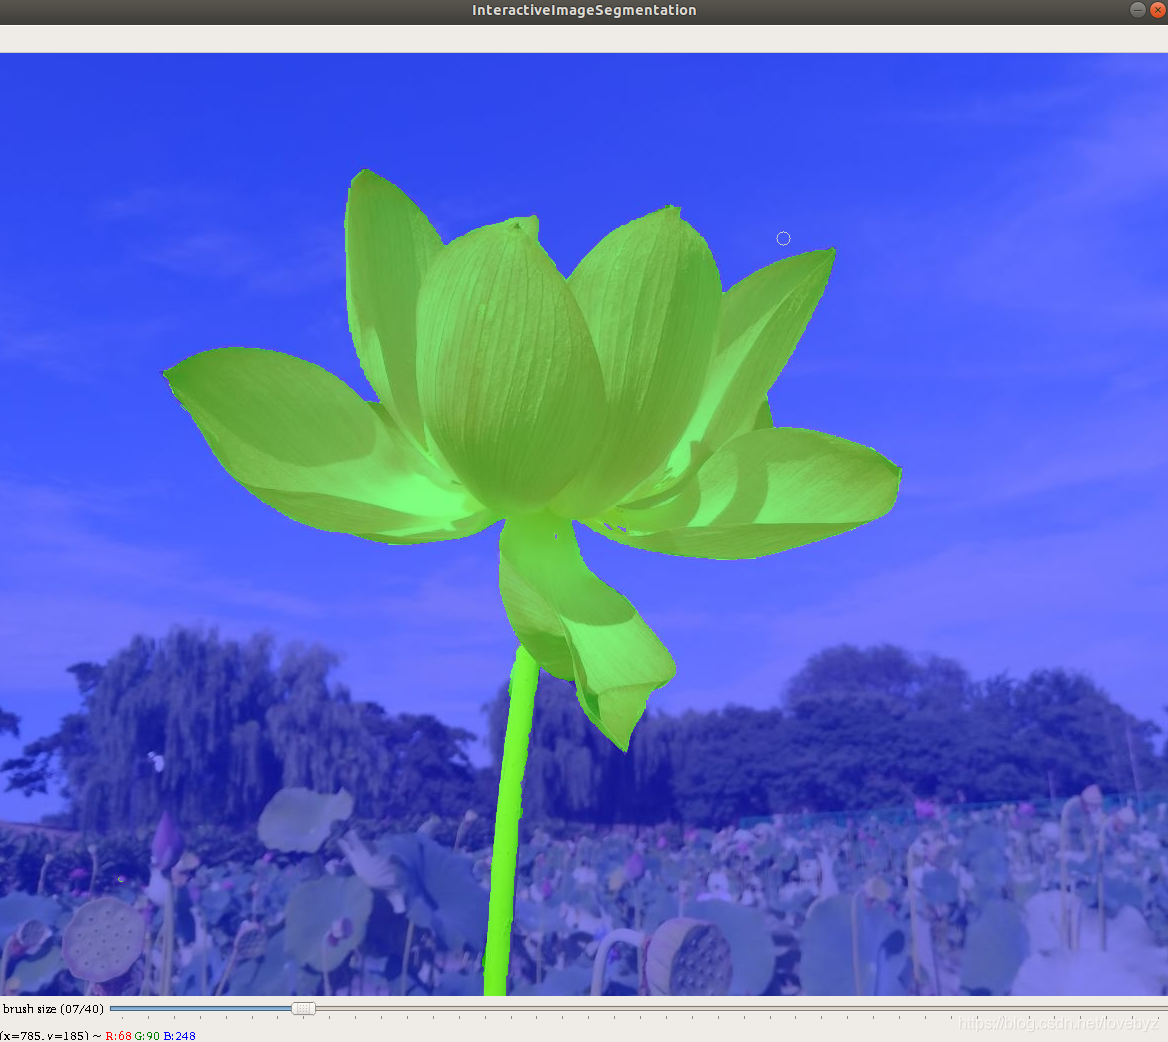
中间交互过程:
(左上角是第一次送给算法随意初始化的Mask)-(中间的黑色划线是用户标记的背景)
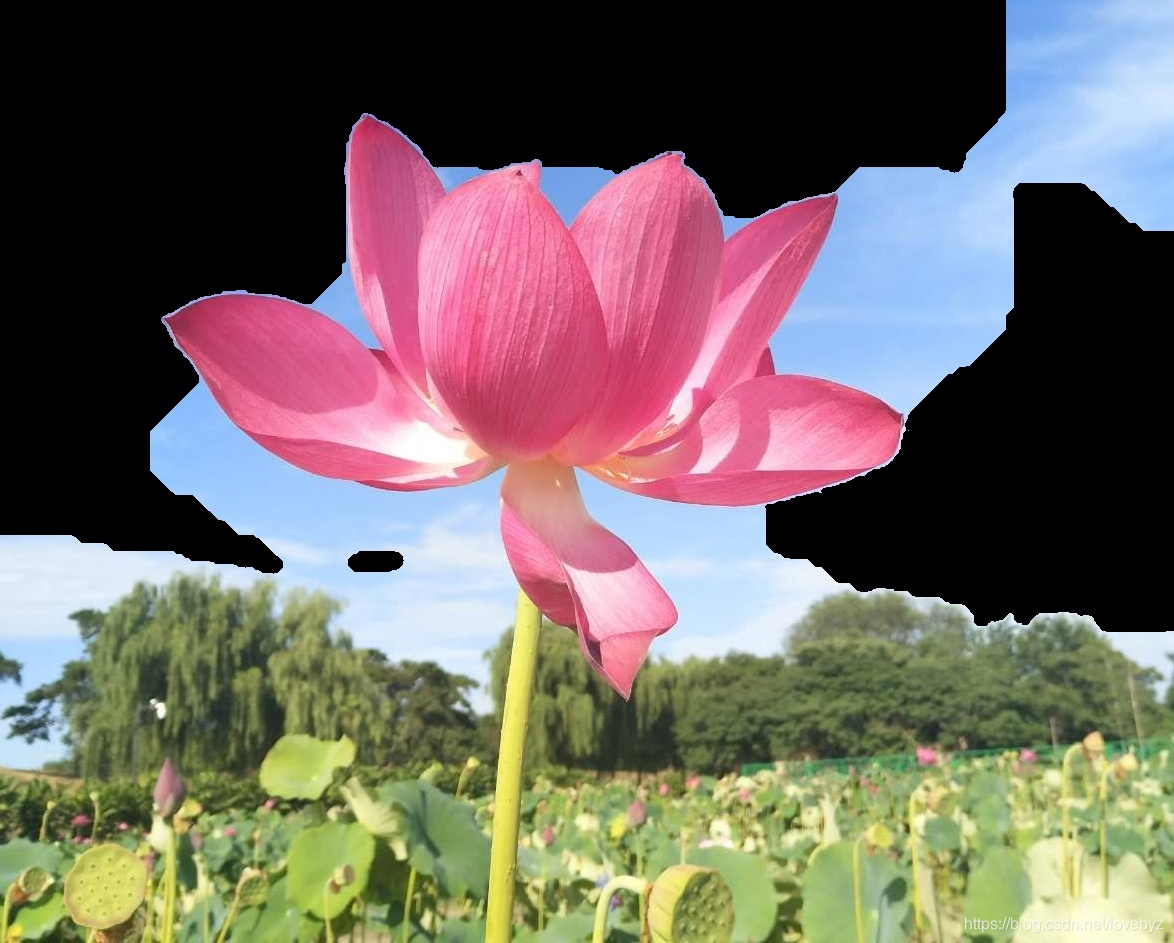
得到第一次结果返回:
(可能的结果图,使用1次迭代)
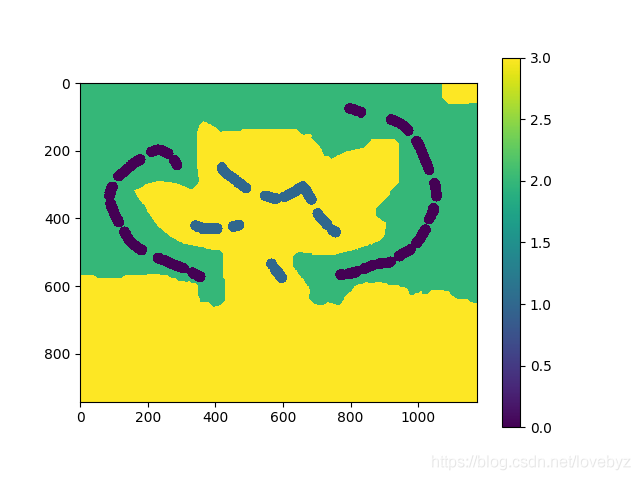
原图生成Mask的过程:
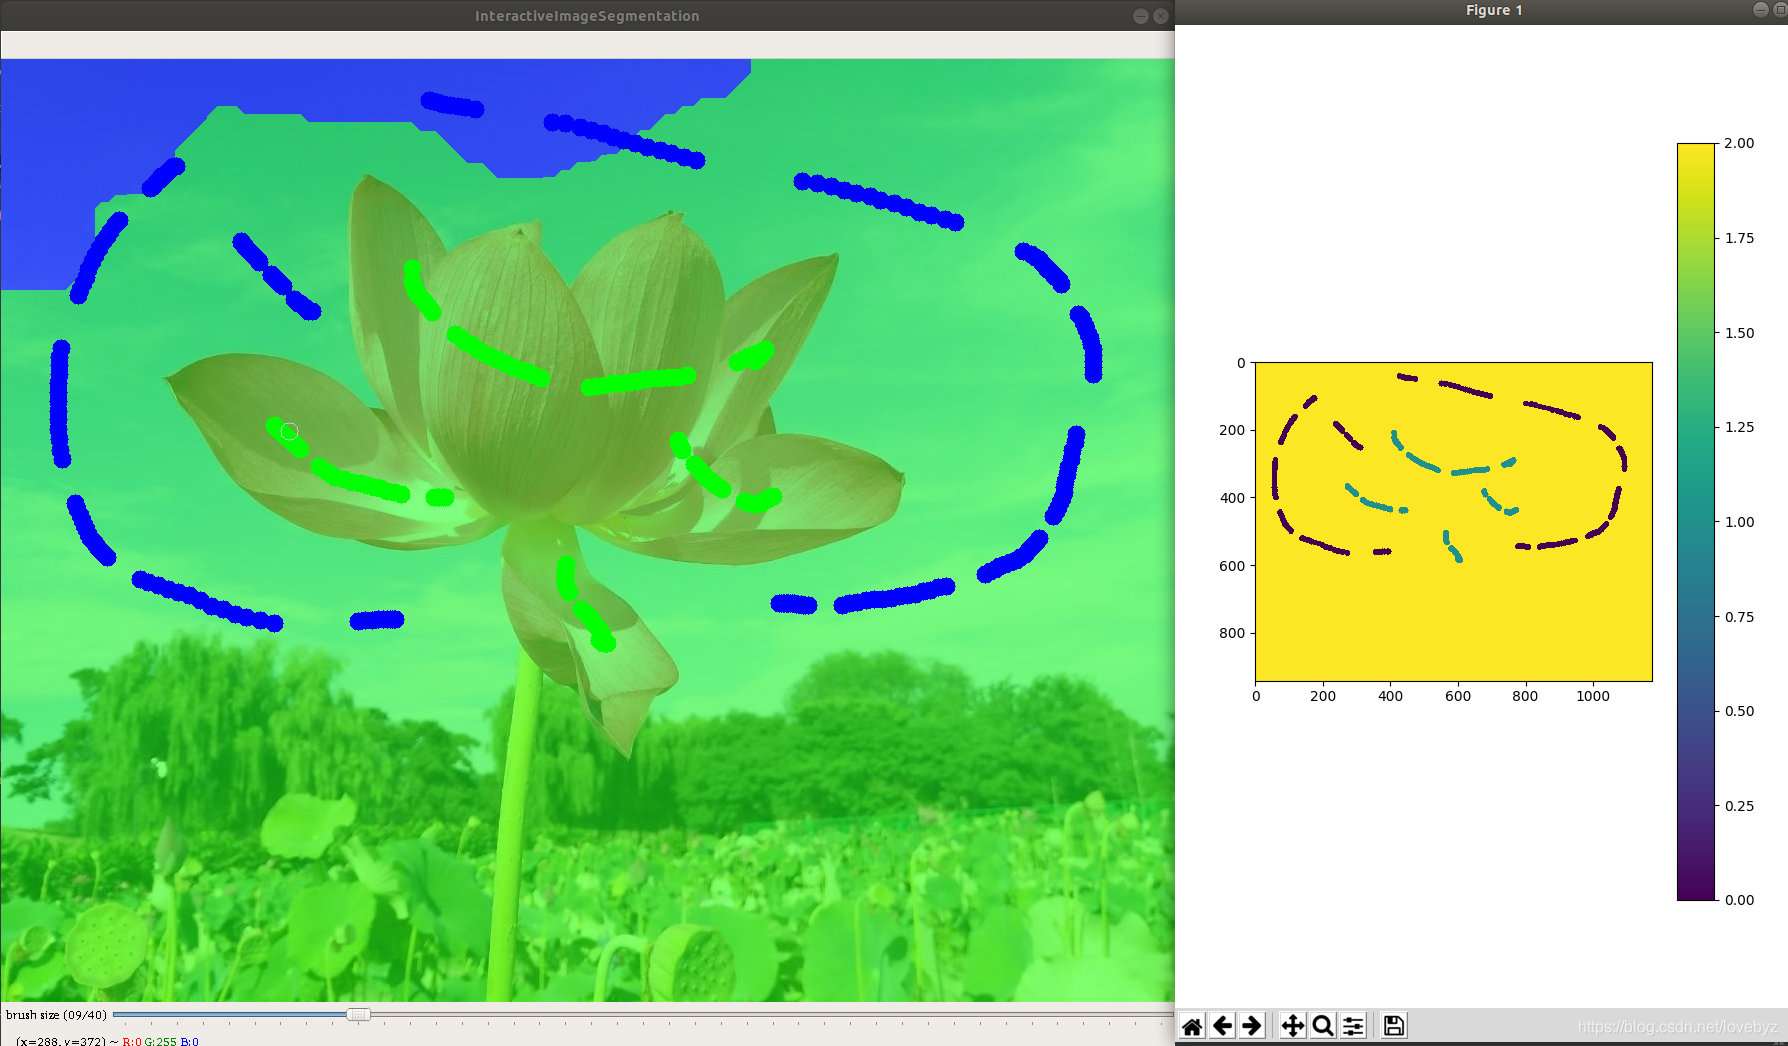
Mask的4个值(前景、背景、可能的前景、可能的背景)大致如:
(其中,确定为前后景的地方为用户划线)
过程(用户标记前景与继续提交grubCut计算)如此重复,直到效果满意。
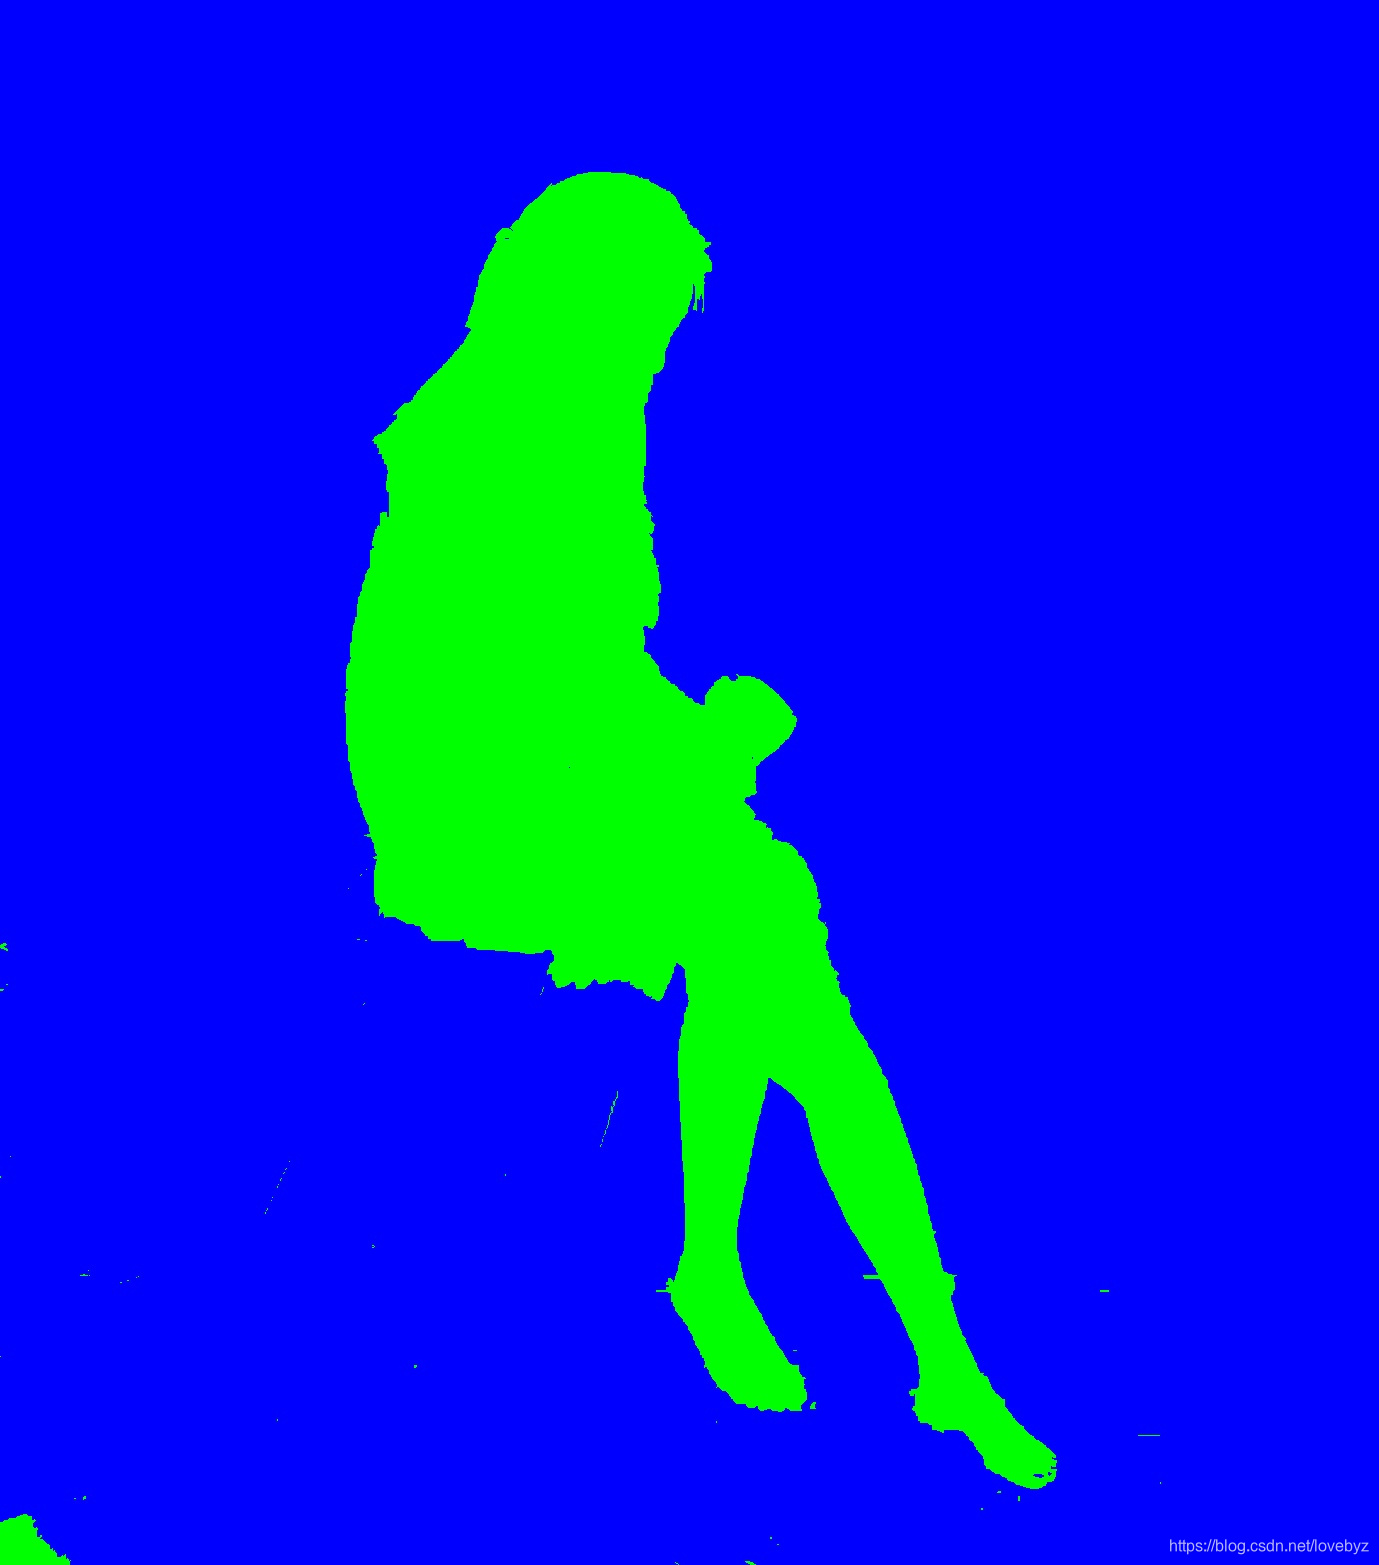
得到最终的Mask区域(前景)图为:

再放一张效果图:
还原Mask图的方法:
将mask区域对应到原图即为我们需要的前景图
    1)
    mask2 = np.where((mask==1) + (mask==3),255,0).astype('uint8')

    2)
    mask[newmask == 29] = 0 # 阈值29\150是观测图像所取
    mask[newmask == 150] = 1
    #mask = np.where((mask==2)|(mask==0),0,1).astype('uint8')
    img_2 = img*mask[:,:,np.newaxis]
    plt.imshow(img_2),plt.colorbar(),plt.show()

    3)
    ret,thresh1 = cv2.threshold(newmask,60,255,cv2.THRESH_BINARY) # 阈值60是观测图像所取, 低于60赋值0,高于赋值255(最后/255=1)
    #image = cv2.add(img, np.zeros(np.shape(img), dtype=np.uint8), mask=thresh1)
    img_cut = cv2.cvtColor(thresh1, cv2.COLOR_GRAY2RGB)
    plt.imshow(img*(img_cut//255)),plt.colorbar(),plt.show()
PS:可以看到结果图边缘有些锯齿,可以进一步采用边缘平滑的方法调整边缘。可参考PS中的功能实现。
附上参考代码,仅供参考
(非前后端分离)
import cv2
import numpy as np
import sys
import os
from matplotlib import pyplot as plt


COLOR_BG = (255,0,0)
COLOR_FG = (0,255,0)

def mask2color(mask):
    r,c = mask.shape[:2]
    color = np.zeros((r,c,3),np.uint8)
    color[np.where((mask==0)|(mask==2))] = COLOR_BG
    color[np.where((mask==1)|(mask==3))] = COLOR_FG
    return color

def color2mask(color):
    r,c = color.shape[:2]
    mask = np.zeros((r,c),np.uint8)
    mask[np.where((color==COLOR_BG).all(axis=2))] = 0
    mask[np.where((color==COLOR_FG).all(axis=2))] = 1
    # mask[np.where(color==COLOR_BG)] = 0
    # mask[np.where(color==COLOR_FG)] = 1
    return mask

def on_mouse(event,x,y,flags,param):
    param.mouse_cb(event,x,y,flags)

def nothing(x):
    pass

class InteractiveImageSegmentation:
    def __init__(self):
        self.winname = "InteractiveImageSegmentation"
        self.img = np.zeros((0))
        self.mask = np.zeros((0))
        self.left_mouse_down = False
        self.right_mouse_down = False
        self.radius = 3
        self.max_radius = 40
        self.use_prev_mask = False
        self.cur_mouse = (-1,-1)
        self.draw_color = 0
        cv2.namedWindow(self.winname)
        cv2.setMouseCallback(self.winname, on_mouse, self)
        cv2.createTrackbar('brush size',self.winname,self.radius,self.max_radius,nothing)

    def mouse_cb(self,event,x,y,flags):
        self.cur_mouse = (x,y)
        if event == cv2.EVENT_LBUTTONDOWN:
            self.left_mouse_down = True
        elif event == cv2.EVENT_LBUTTONUP:
            self.left_mouse_down = False
        elif event == cv2.EVENT_RBUTTONDOWN:
            self.right_mouse_down = True
        elif event == cv2.EVENT_RBUTTONUP:
            self.right_mouse_down = False
        if (self.left_mouse_down or self.right_mouse_down) and self.mask.size>0 and self.img.size>0:
            if flags & cv2.EVENT_FLAG_CTRLKEY:
                cv2.circle(self.img, (x,y), self.radius, (COLOR_BG if self.left_mouse_down else tuple([k/3 for k in COLOR_BG])), -1)
                cv2.circle(self.mask, (x,y), self.radius, (cv2.GC_BGD if self.left_mouse_down else cv2.GC_PR_BGD), -1)
            elif flags & cv2.EVENT_FLAG_SHIFTKEY:
                cv2.circle(self.img, (x,y), self.radius, (COLOR_FG if self.left_mouse_down else tuple([k/3 for k in COLOR_FG])), -1)
                cv2.circle(self.mask, (x,y), self.radius, (cv2.GC_FGD if self.left_mouse_down else cv2.GC_PR_FGD), -1)
        if event == cv2.EVENT_MOUSEWHEEL:
            if flags<0:
                diff_k = int(np.clip(self.radius*0.4,1,5))
                self.radius+=diff_k
            elif flags>0:
                diff_k = int(np.clip(self.radius*0.4,1,5))
                self.radius-=diff_k
            self.radius = np.clip(self.radius, 1, self.max_radius)
            cv2.setTrackbarPos('brush size', self.winname, self.radius)

    def __init_mask(self, mask):
        mask[:] = cv2.GC_PR_FGD # 全部像素作前景
        mask[:10,:] = cv2.GC_PR_BGD # 标志位:cv2.GC_BGD,cv2.GC_FGD,cv2.GC_PR_BGD,cv2.GC_PR_FGD,或者直接输入 0,1,2,3 也行

    def process(self, img):
        self.img = np.copy(img)
        if self.use_prev_mask==False or self.mask.shape[:2]!=self.img.shape[:2]:
            self.mask = np.zeros(img.shape[:2],'uint8')
            self.__init_mask(self.mask)
        self.bgdModel = np.zeros((1,65),np.float64)
        self.fgdModel = np.zeros((1,65),np.float64)
        mask1 = mask2color(self.mask) #np.where((self.mask == 2) | (self.mask == 0), 0, 1).astype("uint8")
        plt.imshow(mask1), plt.colorbar(), plt.show()
        print("初始化")
        cv2.imwrite("/home/raini/pro/Object_Segmentation/InteractiveImageSegmentation/resouce/过程图/1.jpg", mask1)
        #np.savetxt('/home/raini/pro/Object_Segmentation/InteractiveImageSegmentation/resouce/b.txt',self.mask)
        cv2.grabCut(img, self.mask, None, self.bgdModel, self.fgdModel, 1, cv2.GC_INIT_WITH_MASK)#GC_INIT_WITH_MASK蒙版模式 # <------------(只迭代一次有点少

        while True:
            self.radius = cv2.getTrackbarPos('brush size',self.winname)
            color = mask2color(self.mask) # 将mask变成蒙版
            alpha = 0.5 if self.draw_color==0 else (1 if self.draw_color==1 else 0)
            show_img = (self.img*alpha + color*(1-alpha)).astype('uint8') #好像是 opencv绘制半透明图形
            cv2.circle(show_img, self.cur_mouse, self.radius, (200,200,200), (2 if self.left_mouse_down else 1))
            cv2.imshow(self.winname,show_img)
            cv2.imshow('color',color)
            key = cv2.waitKey(100)
            if key == ord('c'):
                self.img = np.copy(img)
                self.__init_mask(self.mask)
            elif key == ord('q') or key == 27 or key==ord('s') or key==ord('p') or key==ord('n') or key == 10:
                break
            elif key == ord('w'):
                self.draw_color = (self.draw_color+1)%3
            elif key == ord('a') or key == 32:
                cv2.putText(show_img, 'segmenting...', (10,30), cv2.FONT_HERSHEY_SIMPLEX, 1, (0,255,255),2)
                cv2.imshow(self.winname,show_img)
                cv2.waitKey(1)
                cv2.grabCut(img, self.mask, None, self.bgdModel, self.fgdModel, 1, cv2.GC_INIT_WITH_MASK)
                #mask2 = mask2color(self.mask)
                #mask2 = np.where((self.mask == 0), 0, 1).astype("uint8")
                #mask2[self.mask == 2] = 1
                mask2 = np.zeros((img.shape[:2]), np.uint8)
                mask2[self.mask == 0] = 0
                mask2[self.mask == 1] = 1
                mask2[self.mask == 2] = 2
                mask2[self.mask == 3] = 2
                plt.imshow(mask2), plt.colorbar(), plt.show()
                print("grubCut1")
                plt.imshow(self.mask), plt.colorbar(), plt.show()
                print(self.mask)
                #cv2.imwrite("/home/raini/pro/Object_Segmentation/InteractiveImageSegmentation/resouce/过程图/mask2.jpg", mask2)
                #cv2.imwrite("/home/raini/pro/Object_Segmentation/InteractiveImageSegmentation/resouce/过程图/smask.jpg", self.mask)
                # np.savetxt('/home/raini/pro/Object_Segmentation/InteractiveImageSegmentation/resouce/过程图/a.txt',self.mask)
                self.img = np.copy(img)
        return key

if __name__ == '__main__':
    if(len(sys.argv)!=3):
        print('Usage: interactive_image_segmentation.py [img_dir] [save_dir]')
        'raini@biyuzhe:~/pro/Object_Segmentation/InteractiveImageSegmentation$ python interactive_image_segmentation.py resouce/images/ resouce/labels'
        exit()

    img_dir = sys.argv[1]
    save_dir = sys.argv[2]

    if not os.path.exists(save_dir):
        os.makedirs(save_dir)
        print('%s not exists, create it.'%save_dir)

    print("================= Interactive Image Segmentation =================")
    print("CTRL+left mouse button: select certain background pixels ")
    print("SHIFT+left mouse button: select certain foreground pixels ")
    print("CTRL+right mouse button: select possible background pixels ")
    print("SHIFT+right mouse button: select possible foreground pixels ")
    print("'a'/SPACE: run sengementation again")
    print("'p': prev image       'n': next image")
    print("'s'/ENTER: save label        'q'/ESC: exit")

    iis = InteractiveImageSegmentation()
    iis.use_prev_mask = True
    fimglist = sorted([x for x in os.listdir(img_dir) if '.png' in x or '.jpg' in x])
    idx = 0
    while idx<len(fimglist) and os.path.exists(os.path.join(save_dir,fimglist[idx])):
        idx += 1

    while idx<len(fimglist):
        fimg = fimglist[idx]
        print('process %s'%fimg)
        if os.path.exists(os.path.join(save_dir,fimg)):
            iis.mask = color2mask(cv2.imread(os.path.join(save_dir,fimg)))
        ## 读取原图
        img = cv2.imread(os.path.join(img_dir,fimg), cv2.IMREAD_UNCHANGED)
        key = iis.process( img )
        if key == ord('s') or key == 10:
            saveimg = os.path.join(save_dir, fimg)
            #cv2.imwrite(saveimg,mask2color(iis.mask))
            print('save label %s.'%saveimg)#
            # 保存cut图
            ###

            ## 读取原图
            #imgPath = os.path.abspath('/home/raini/pro/Object_Segmentation/InteractiveImageSegmentation/resouce/images/20180822163114.jpg')
            #img = cv2.imread(imgPath, cv2.IMREAD_COLOR)  # cv2.IMREAD_UNCHANGED
            #img_cut = cv2.cvtColor(img, cv2.IMREAD_COLOR)
            #img_cut = cv2.cvtColor(img, cv2.COLOR_BGR2RGB)

            ## 读取mask
            #newmask = cv2.imread('/home/raini/pro/Object_Segmentation/InteractiveImageSegmentation/resouce/20180822163114.jpg', 0)
            #newmask = cv2.imread(saveimg,0)
            mask2 = np.where((iis.mask == 2) | (iis.mask == 0), 0, 1).astype("uint8")
            img_cut_result = img * mask2[:, :, np.newaxis] # 不需要很复杂,原图*掩膜即可得
            plt.imshow(img_cut_result), plt.colorbar(), plt.show()
            print(iis.mask)
            #
            # newmask = color2mask(iis.mask)
            # ret, thresh1 = cv2.threshold(newmask, 60, 255, cv2.THRESH_BINARY)    # 阈值60是观测图像所取, 低于60赋值0,高于赋值255(最后/255=1)
            # img_mask = thresh1#cv2.cvtColor(thresh1, cv2.COLOR_GRAY2RGB)  #
            # print(newmask)
            # plt.imshow(newmask), plt.colorbar(), plt.show()
            #
            # ## 结果图
            # img_cut_result = (img_mask // (255,255,255)) * img
            # plt.imshow(img_cut_result), plt.colorbar(), plt.show()
            #
            cv2.imwrite(os.path.join(save_dir, 'cut_' + fimg), img_cut_result)
            print('save cut_img %s.'%os.path.join(save_dir, 'cut_' + fimg))
            #
            idx += 1
        elif key == ord('p') and idx>0:
            idx -= 1
        elif key == ord('n') or key == 32:
            idx += 1
        elif key == ord('q') or key == 27:
            break
        iis.mask[np.where(iis.mask==cv2.GC_BGD)]=cv2.GC_PR_BGD
        iis.mask[np.where(iis.mask==cv2.GC_FGD)]=cv2.GC_PR_FGD
小Demo:
import numpy as np
import cv2
from matplotlib import pyplot as plt

img=cv2.imread('/home/raini/图片/20180822163153.jpg', cv2.IMREAD_UNCHANGED)
mask=np.zeros((img.shape[:2]),np.uint8)

img=cv2.resize(img, (80, 80))
mask = np.zeros((80,80), np.uint8)
bgdModel = np.zeros((1, 65), np.float64)
fgdModel = np.zeros((1, 65), np.float64)
newmask = np.ones((80, 80), np.uint8) * 100
cv2.rectangle(newmask, (0, 0), (80, 80), 0, 5)
cv2.line(newmask, (10, 0), (0, 10), 0, 5)
cv2.line(newmask, (70, 0), (80, 10), 0, 5)
cv2.line(newmask, (0, 70), (10, 80), 0, 5)
cv2.line(newmask, (80, 70), (70, 80), 0, 5)
cv2.circle(newmask, (40, 40), 10, 255, -1)
mask[newmask == 0] = 0
mask[newmask == 255] = 1
mask[newmask == 100] = 3

mask, bgdModel, fgdModel = cv2.grabCut(img, mask, None, bgdModel, fgdModel, 5, cv2.GC_INIT_WITH_MASK)
mask = np.where((mask == 2) | (mask == 0), 0, 1).astype('uint8')
img2 = img * mask[:, :, np.newaxis]
plt.imshow(img2)
plt.colorbar()
plt.show()


 690
690


 被折叠的 条评论
为什么被折叠?
被折叠的 条评论
为什么被折叠?
 到【灌水乐园】发言


