


- Elasticsearch 是数据库,不是普通的 Java 应用程序,传统数据库需要的硬件资源同样需要,提升性能最有效的就是升级硬件
- Elasticsearch 是文档型数据库,不是关系型数据库,不具备严格的 ACID 事务特性,任何企图直接替代严格事务性场景的应用项目都会失败。
Elasticsearch 的安装
版本要求
Elasticsearch 7.11.x
Kibana 7.11.x
- 下载 Elasticsearch
Elasticsearch 下载地址:https://www.elastic.co/cn/elasticsearch/
- 安装 Elasticsearch
将安装文件解压即可
系统环境配置
- 操作系统
Windows/Mac OS 仅用于个人学习和开发使用,生产环境建议使用 CentOS 或 Ubuntu。
- 系统配置
| 配置项 | 建议配置 | 描述 |
|---|---|---|
| 防火墙配置 | 必须关闭 | Elasticsearch |
| 虚拟内存大小 | 必须配置 | 在 mmpfile 存储内存时需要 |
| 禁用内存交换 | 必须配置 | 内存不够,交换到磁盘; 内存锁定 |
| 设置文件句柄值 | 必须配置 | |
| 设置进程限制 | 必须配置 | |
| 专用账号 | 建议配置 | Elastic 默认禁止 root 用户启动 |
- 防火墙配置命令
- 关闭防火墙:service firewalld stop
- 禁止开机启动:chkconfig firewalld off
- 设置虚拟内存大小命令
- /etc/sysctl.conf
- vm.max_map_count = 262144
- /etc/sysctl.conf
- 禁用内存交换命令
- /etc/sysctl.conf
- vm.swappiness=1
- /etc/sysctl.conf
- 设置文件句柄值
- /etc/security/limits.conf
# 文件句柄时
* soft nofile 65535
* hard nofile 65535
- 设置进程线程限制
- /etc/security/limits.conf
# 进程线程数,默认为4096,需要调整
* soft nproc 65535
* hard nproc 65535
- 内存锁定交换
- /etc/security/limits.conf
# 内存锁定交换
* soft memlock unlimited
* hard memlock unlimited
- 创建 elasticsearch 用户,并将 elasticsearch 和 kibana 安装包上传到 /elasticsearch/ 目录,并为用户 elasticsearch 赋予访问 /elasticsearch 目录的权限
chown -R elasticsearch /elasticsearch/*
- Java 环境配置
在 Elasticsearch 中默认包含有 JDK,默认情况下无需配置 Java 环境,但是在实际生产环境中建议还是设置 Java 的环境变量。
- JVM 临时目录 - jvm.options.d
通过查看 jvm.options 文件可发现这样一段话:
DO NOT EDIT THIS FILE. If you want to override the JVM options in this file, or set any additional options, you should create one or more files in the jvm.options.d directory containing your adjustments.
即 Elasticsearch 官方建议不要编辑 jvm.options 这个文件,如果我们在使用过程中需要对默认的 JVM 选项进行配置或者增加一些其他选项,我们应该在 jvm.options.d 文件夹中创建一个或多个文件来包含我们的调整。
Elasticsearch 配置与启动
- Elasticsearch 目录解析
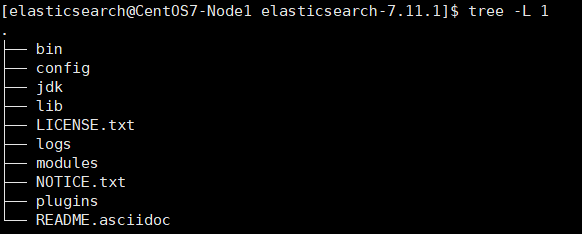
| 目录 | 描述 |
|---|---|
| bin | 启动脚本、常用的工具脚本 |
| config | 配置目录 |
| jdk | 内置的 JDK,可以选用 |
| lib/modules | 程序包 |
| plugins | 自有插件、三方插件目录 |
| data | 数据目录 |
| logs | 日志目录 |
- Elasticserach 配置文件解析
# 集群名称,默认可以不锈钢,此处为:es-application
cluster.name: es-application
# 节点名称,必需修改,默认修改为当前机器名称,若是多实例则需要区分
node.name: es-${HOSTNAME}
# IP 地址,默认是local,仅限本机访问,外网不可访问,设置 0.0.0.0 为通用做法
network.host: 0.0.0.0
# 访问端口,默认 9200、9300,建议明确指定端口
http.port: 9200
transport.port: 9300
# 数据目录与日志目录,默认在当前运行程序下,生产环境需要指定
# path.data: /path/to/data
# path.logs: /path/to/logs
# 内存交换锁定,此处需要操作系统设置才生效
bootstrap.memory_lock: true
# 防止批量删除索引
action.destructive_requires_name: true
# 设置处理器数量,默认无需配置,单机器多实例需要设置
node.processors: 4
# 集群发现配置
#discovery.seed_hosts: ["192.168.0.11:9300"]
cluster.initial_master_nondes: ["192.168.0.11:9300"]
- jvm.options 配置
## JVM configuration
################################################################
## IMPORTANT: JVM heap size
################################################################
##
## You should always set the min and max JVM heap
## size to the same value. For example, to set
## the heap to 4 GB, set:
##
## -Xms4g
## -Xmx4g
##
## See https://www.elastic.co/guide/en/elasticsearch/reference/current/heap-size.html
## for more information
##
################################################################
# Xms represents the initial size of total heap space
# Xmx represents the maximum size of total heap space
-Xms1g
-Xmx1g
################################################################
## Expert settings
################################################################
##
## All settings below this section are considered
## expert settings. Don't tamper with them unless
## you understand what you are doing
##
################################################################
## GC configuration
8-13:-XX:+UseConcMarkSweepGC
8-13:-XX:CMSInitiatingOccupancyFraction=75
8-13:-XX:+UseCMSInitiatingOccupancyOnly
## G1GC Configuration
# NOTE: G1 GC is only supported on JDK version 10 or later
# to use G1GC, uncomment the next two lines and update the version on the
# following three lines to your version of the JDK
# 10-13:-XX:-UseConcMarkSweepGC
# 10-13:-XX:-UseCMSInitiatingOccupancyOnly
14-:-XX:+UseG1GC
14-:-XX:G1ReservePercent=25
14-:-XX:InitiatingHeapOccupancyPercent=30
## JVM temporary directory
-Djava.io.tmpdir=${ES_TMPDIR}
## heap dumps
# generate a heap dump when an allocation from the Java heap fails
# heap dumps are created in the working directory of the JVM
-XX:+HeapDumpOnOutOfMemoryError
# specify an alternative path for heap dumps; ensure the directory exists and
# has sufficient space
-XX:HeapDumpPath=data
# specify an alternative path for JVM fatal error logs
-XX:ErrorFile=logs/hs_err_pid%p.log
## JDK 8 GC logging
8:-XX:+PrintGCDetails
8:-XX:+PrintGCDateStamps
8:-XX:+PrintTenuringDistribution
8:-XX:+PrintGCApplicationStoppedTime
8:-Xloggc:logs/gc.log
8:-XX:+UseGCLogFileRotation
8:-XX:NumberOfGCLogFiles=32
8:-XX:GCLogFileSize=64m
# JDK 9+ GC logging
9-:-Xlog:gc*,gc+age=trace,safepoint:file=logs/gc.log:utctime,pid,tags:filecount=32,filesize=64m
- 启动 Elasticsearch
- 在 windows 系统下启动 Elasticsearch ,执行 elasticsearch.bat 脚本
- 在 Linux shell 命令当前窗口启动,执行 ./elasticsearch 脚本
- 在 Linux shell 命令后台启动,执行 ./elasticsearch -d
Kibana 的安装
- 下载 Kibana
Kibana 下载地址:https://www.elastic.co/cn/downloads/kibana
- 安装 Kibana
将安装包解压即可
Kibana 的配置与启动
- Kibana 目录解析
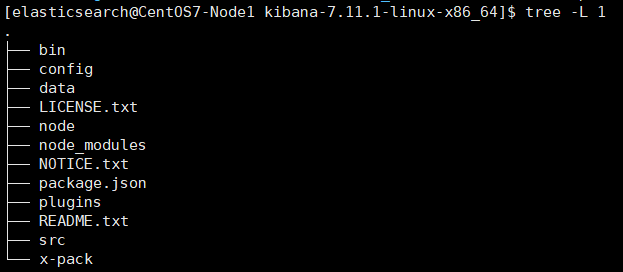
| 目录 | 描述 |
|---|---|
| bin | 启动脚本、常用工具脚本 |
| config | 配置文件目录 |
| data | 数据目录 |
- Kibana 配置文件解析
server.port: 5601
server.host: "192.168.0.11"
elasticsearch.hosts: ["http://192.168.0.11:9200"]
kibana.index: ".kibana"
Elasticsearch & Kibana 单机环境搭建
按照Elasticsearch 配置与启动和Kibana 的配置与启动的标准配置文件配置即可,然后启动。
Elasticsearch & Kibana 集群环境搭建
规划网络
搭建 Elasticsearch 三节点集群环境,节点网络规划如下:
| 节点名称 | 节点 IP 地址 | 占用端口 |
|---|---|---|
| node-1 | 192.168.10.252 | 9200、9300 |
| node-2 | 192.168.10.253 | 9200、9300 |
| node-3 | 192.168.10.254 | 9200、9300 |
配置各节点的配置文件
node-1:192.168.10.252
cluster.name: Elasticsearch-Cluster
node.name: node-${network.host}
network.host: 192.168.10.252
http.port: 9200
transport.port: 9300
discovery.seed_hosts: ["192.168.10.252:9300", "192.168.10.253:9300", "192.168.10.254:9300"]
cluster.initial_master_nodes: ["192.168.10.252:9300", "192.168.10.253:9300", "192.168.10.254:9300"]
node-2:192.168.10.253
cluster.name: Elasticsearch-Cluster
node.name: node-${network.host}
network.host: 192.168.10.253
http.port: 9200
transport.port: 9300
discovery.seed_hosts: ["192.168.10.252:9300", "192.168.10.253:9300", "192.168.10.254:9300"]
cluster.initial_master_nodes: ["192.168.10.252:9300", "192.168.10.253:9300", "192.168.10.254:9300"]
node-3:192.168.10.254
cluster.name: Elasticsearch-Cluster
node.name: node-${network.host}
network.host: 192.168.10.254
http.port: 9200
transport.port: 9300
discovery.seed_hosts: ["192.168.10.252:9300", "192.168.10.253:9300", "192.168.10.254:9300"]
cluster.initial_master_nodes: ["192.168.10.252:9300", "192.168.10.253:9300", "192.168.10.254:9300"]
启动集群
bin/elasticsearch
或
bin/elasticsearch -d
配置 Kibana
server.port: 5601
server.host: "192.168.10.252"
elasticsearch.hosts: ["http://192.168.10.252:9200","http://192.168.10.253:9200", "http://192.168.10.254:9200"]
启动 Kibana
bin/kibana
或
bin/kibana &
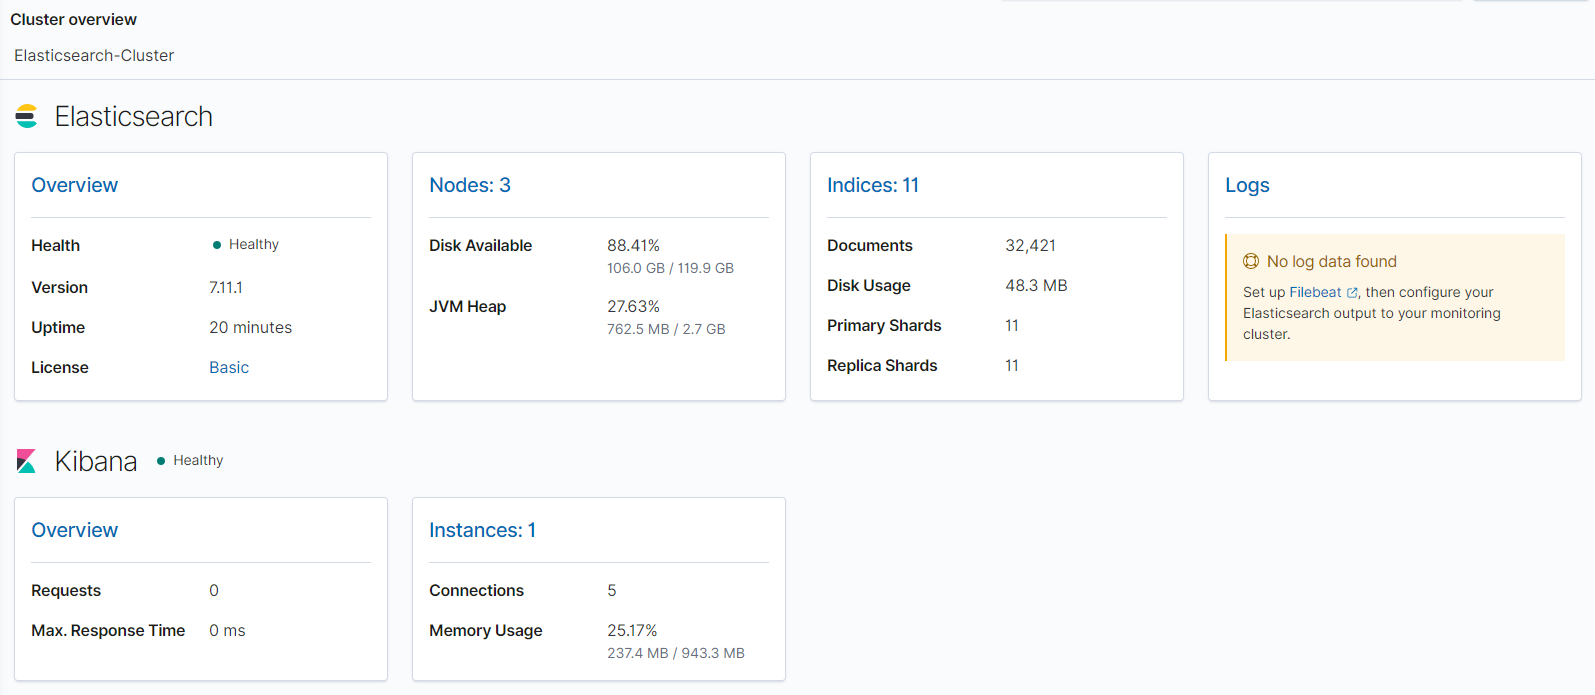
访问 Kibana 查看结果


 1万+
1万+


 被折叠的 条评论
为什么被折叠?
被折叠的 条评论
为什么被折叠?
 到【灌水乐园】发言


