


1.新建了一个Hibernate-Sample的Java Project, 然后本人在MyEclipse的window-->preferences--> java -->build path-->user libraries-->new 了一个Hibernate path,添加了Hibernate3.2的相应jar包,由于使用的数据库是MySQL,我还顺便添加了连接MySQL的jar包,这样在以后做Hibernate的项目时,只需要引入我这个用户自定义的library即可,不需要再逐一添加。
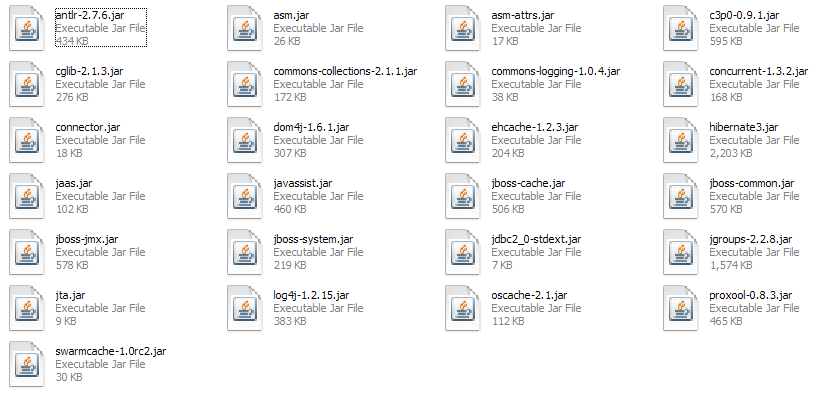
需引入的jar有:
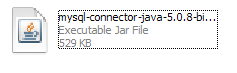
以及:
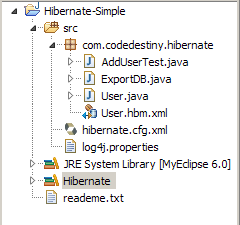
2.先上一张该项目的完整包图,之后再逐一解释
3.首先创建一个hibernate.cfg.xml,代码如下(我要连接的数据库名称叫hibernate-simple,注意要提前在MySQL中创建该数据库):
 <!
DOCTYPE hibernate-configuration PUBLIC "-//Hibernate/Hibernate Configuration DTD 3.0//EN" "http://hibernate.sourceforge.net/hibernate-configuration-3.0.dtd"
>
<
hibernate-configuration
>
<
session-factory
>
<
property
name
="hibernate.connection.url"
>
jdbc:mysql://127.0.0.1/hibernate_simple
</
property
>
<
property
name
="hibernate.connection.driver_class"
>
com.mysql.jdbc.Driver
</
property
>
<
property
name
="hibernate.connection.username"
>
root
</
property
>
<
property
name
="hibernate.connection.password"
>
root
</
property
>
<
property
name
="dialect"
>
org.hibernate.dialect.MySQLDialect
</
property
>
<
mapping
resource
="com/codedestiny/hibernate/User.hbm.xml"
/>
</
session-factory
>
</
hibernate-configuration
>
<!
DOCTYPE hibernate-configuration PUBLIC "-//Hibernate/Hibernate Configuration DTD 3.0//EN" "http://hibernate.sourceforge.net/hibernate-configuration-3.0.dtd"
>
<
hibernate-configuration
>
<
session-factory
>
<
property
name
="hibernate.connection.url"
>
jdbc:mysql://127.0.0.1/hibernate_simple
</
property
>
<
property
name
="hibernate.connection.driver_class"
>
com.mysql.jdbc.Driver
</
property
>
<
property
name
="hibernate.connection.username"
>
root
</
property
>
<
property
name
="hibernate.connection.password"
>
root
</
property
>
<
property
name
="dialect"
>
org.hibernate.dialect.MySQLDialect
</
property
>
<
mapping
resource
="com/codedestiny/hibernate/User.hbm.xml"
/>
</
session-factory
>
</
hibernate-configuration
>
我们看到mapping resources连接到了一个实体配置文件,这将在后面讲解,在这要注意的是路径要以“ / ”分开,而不是“ . ”。
4.创建一个User类:
package
com.codedestiny.hibernate;
import
java.util.Date; public
class
User
{
public
class
User
{
 private String id; private String name; private String password; private Date createTime; private Date expireTime;
  public String getId() {
 return id;
 } public void setId(String id) { this.id = id; } public String getName() { return name; } public void setName(String name) { this.name = name; } public String getPassword() { return password; } public void setPassword(String password) { this.password = password; } public Date getCreateTime() { return createTime; } public void setCreateTime(Date createTime) { this.createTime = createTime; } public Date getExpireTime() { return expireTime; } public void setExpireTime(Date expireTime) { this.expireTime = expireTime; }
  }
}
5.创建该类的hbm配置文件User.hbm.xml(注意设置主键,主键生成方式,以及其他属性):
<?
xml version="1.0"
?>
<!
DOCTYPE hibernate-mapping PUBLIC "-//Hibernate/Hibernate Mapping DTD 3.0//EN" "http://hibernate.sourceforge.net/hibernate-mapping-3.0.dtd"
>
<
hibernate-mapping
>
<
class
name
="com.codedestiny.hibernate.User"
>
<
id
name
="id"
>
<!--
主键生成方式
-->
<
generator
class
="uuid"
></
generator
>
</
id
>
<
property
name
="name"
></
property
>
<
property
name
="password"
></
property
>
<
property
name
="createTime"
></
property
>
<
property
name
="expireTime"
></
property
>
</
class
>
</
hibernate-mapping
>
(主键的生成方式还有多种,例如自增型:generate,设置属性时可以通过column=" "修改其在数据库中的相应字段,在<class>标签中还可以通过table=" "来修改表名)
6.编写一个ExportDB.java,通过运行它可以帮我们自动创建表:
package
com.codedestiny.hibernate;
import
org.hibernate.cfg.Configuration;
import
org.hibernate.tool.hbm2ddl.SchemaExport;
public
class
ExportDB
{ public static void main(String[] args) { //读取配置文件 Configuration cfg = new Configuration().configure(); //创建SchemaExport对象 SchemaExport se = new SchemaExport(cfg); //创建数据库表 se.create(true, true); }}
8.我编写了一个AddUserTest.java来测试通过Hibernate向数据库中插入一条数据:
package
com.codedestiny.hibernate;
import
java.util.Date;
import
org.hibernate.Session;
import
org.hibernate.SessionFactory;
import
org.hibernate.cfg.Configuration;
public
class
AddUserTest
{ public static void main(String[] args) { //读取配置文件 Configuration cfg = new Configuration().configure(); //创建SessionFactory SessionFactory sessionFactory = cfg.buildSessionFactory(); //获得Session Session session = sessionFactory.openSession(); //开始事务 session.beginTransaction(); //操纵实体类,POJO User u = new User(); u.setName("管理员"); u.setPassword("123"); u.setCreateTime(new Date()); u.setExpireTime(new Date()); //保存数据 session.save(u); //提交事务 session.getTransaction().commit(); //关闭Session,必须关闭 if(session.isOpen()) { session.close(); } }}
9.这样一个简单的Hibernate程序就完成了,没有涉及到一句sql语句,而且业务逻辑一直是面向对象的方式,这就是Hibernate的强大之处


 被折叠的 条评论
为什么被折叠?
被折叠的 条评论
为什么被折叠?
 到【灌水乐园】发言


