windows安装
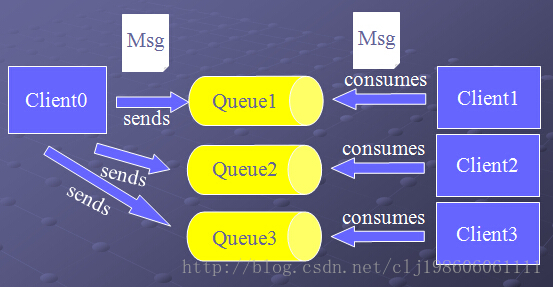
JMS(Java Messaging Service)是Java平台上有关面向消息中间件的技术规范,它便于消息系统中的Java应用程序进行消息交换,并且通过提供标准的产生、发送、接收消息的接口简化企业应用的开发,ActiveMQ而是这个规范的一个具体实现。
JMS的队列消息传递过程如下图:
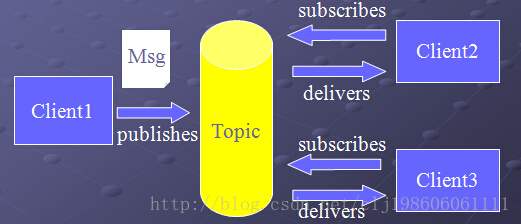
JMS的主题消息传递过程如下图:
ActiveMQ下载与部署。
1、 下载
到官网下载最新版本,有windows版本和linux版本的。
http://activemq.apache.org/download.html
windows版本:apache-activemq-5.11.1-bin.zip
linux版本:apache-activemq-5.11.1-bin.tar.gz
2、 部署
A、 windows下部署
ActiveMQ部署其实很简单,和所有Java一样,要跑java程序就必须先安装JDK并配置好环境变量,这个很简单。
然后解压下载的apache-activemq-5.11.1-bin.zip压缩包到一个目录,得到解压后的目录结构如下图:
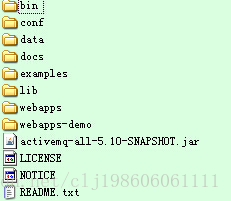
进入bin目录,发现有win32和win64两个文件夹,这2个文件夹分别对应windows32位和windows64位操作系统的启动脚本。
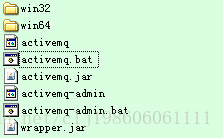
我的实验环境是windowsXP,就进入win32目录,会看到如下目录结构。
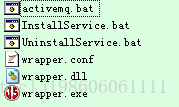
其中activemq.bat便是启动脚本,双击启动。
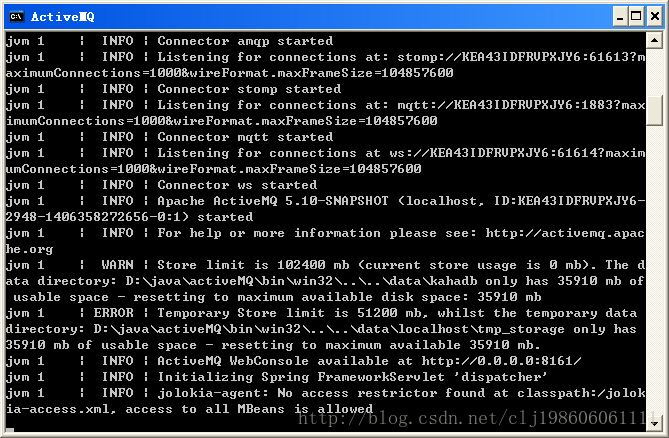
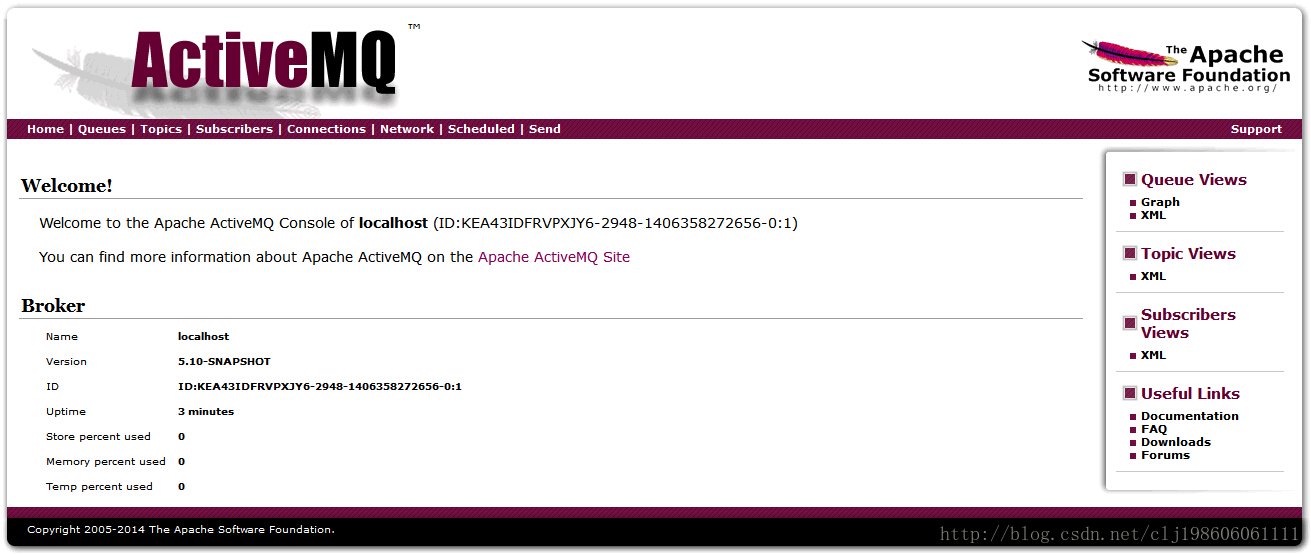
ActiveMQ默认启动到8161端口,启动完了后在浏览器地址栏输入:http://localhost:8161/admin要求输入用户名密码,默认用户名密码为admin、admin,这个用户名密码是在conf/users.properties中配置的。
输入用户名密码后便可看到如下图的ActiveMQ控制台界面了。
测试
ActiveMQ默认使用的TCP连接端口是61616, 通过查看该端口的信息可以测试ActiveMQ是否成功启动 netstat -an|find "61616"
C:\Documents and Settings\Administrator>netstat -an|find "61616"
TCP 0.0.0.0:61616 0.0.0.0:0 LISTENING
Linux和Aix系统下的安装:
解压:tar zxvf activemq-x.x.x.tar.gz,进入bin文件夹,运行:./activemq start &,也可以只运行:./activemq console。
验证方式和安全性配置和windows下的配置一样。
linux安装和代码示例
IP:192.168.4.101
环境:CentOS 6.6、JDK7
1、 安装 JDK 并配置环境变量(略)
JAVA_HOME=/usr/local/Java/jdk1.7.0_72
2、 下载 Linux 版的 ActiveMQ(当前最新版 apache-activemq-5.11.1-bin.tar.gz)
$ wget http://apache.fayea.com/activemq/5.11.1/apache-activemq-5.11.1-bin.tar.gz
3、 解压安装
$ tar -zxvf apache-activemq-5.11.1-bin.tar.gz
$ mv apache-activemq-5.11.1 activemq-01
如果启动脚本 activemq 没有可执行权限,此时则需要授权(此步可选)
$ cd /home/wusc/activemq-01/bin/
$ chmod 755 ./activemq
4、 防火墙中打开对应的端口
ActiveMQ 需要用到两个端口
一个是消息通讯的端口(默认为 61616)
一个是管理控制台端口(默认为 8161)可在 conf/jetty.xml 中修改,如下:
<bean id="jettyPort" class="org.apache.activemq.web.WebConsolePort" init-method="start"> <!-- the default port number for the web console -->
<property name="host" value="0.0.0.0"/> <property name="port" value="8161"/>
</bean>
# vi /etc/sysconfig/iptables
添加:
-A INPUT -m state --state NEW -m tcp -p tcp --dport 61616 -j ACCEPT
-A INPUT -m state --state NEW -m tcp -p tcp --dport 8161 -j ACCEPT
重启防火墙:
# service iptables restart
5、 启动
$ cd /home/wusc/activemq-01/bin $ ./activemq start
6、 打开管理界面:http://192.168.4.101:8161
ActiveMQ 的消息安全配置策略有多种,我们以简单授权配置为例:
在 conf/activemq.xml 文件中在 broker 标签最后加入以下内容即可:
$ vi /home/wusc/activemq-01/conf/activemq.xml
<plugins>
<simpleAuthenticationPlugin>
<users>
<authenticationUser username="wusc" password="wusc.123" groups="users,admins"/>
</users>
</simpleAuthenticationPlugin>
</plugins>
定义了一个 wusc 用户,密码为 wusc.123,角色为 users,admins
设置 admin 的用户名和密码: $ vi /home/wusc/activemq-01/conf/jetty.xml
<bean id="securityConstraint" class="org.eclipse.jetty.util.security.Constraint"> <property name="name" value="BASIC" />
<property name="roles" value="admin" /> <property name="authenticate" value="true" />
</bean>
确保 authenticate 的值为 true(默认)
控制台的登录用户名密码保存在 conf/jetty-realm.properties 文件中,内容如下:
$ vi /home/wusc/activemq-01/conf/jetty-realm.properties
# Defines users that can access the web (console, demo, etc.)
# username: password [,rolename ...]
admin: wusc.123, admin
注意:用户名和密码的格式是用户名 : 密码 ,角色名
重启:
$ /home/wusc/activemq-01/bin/activemq restart
设置开机启动:
# vi /etc/rc.d/rc.local
加入以下内容
## ActiveMQ
su - wusc -c '/home/wusc/activemq-01/bin/activemq start'
与spring整合异步发送邮件
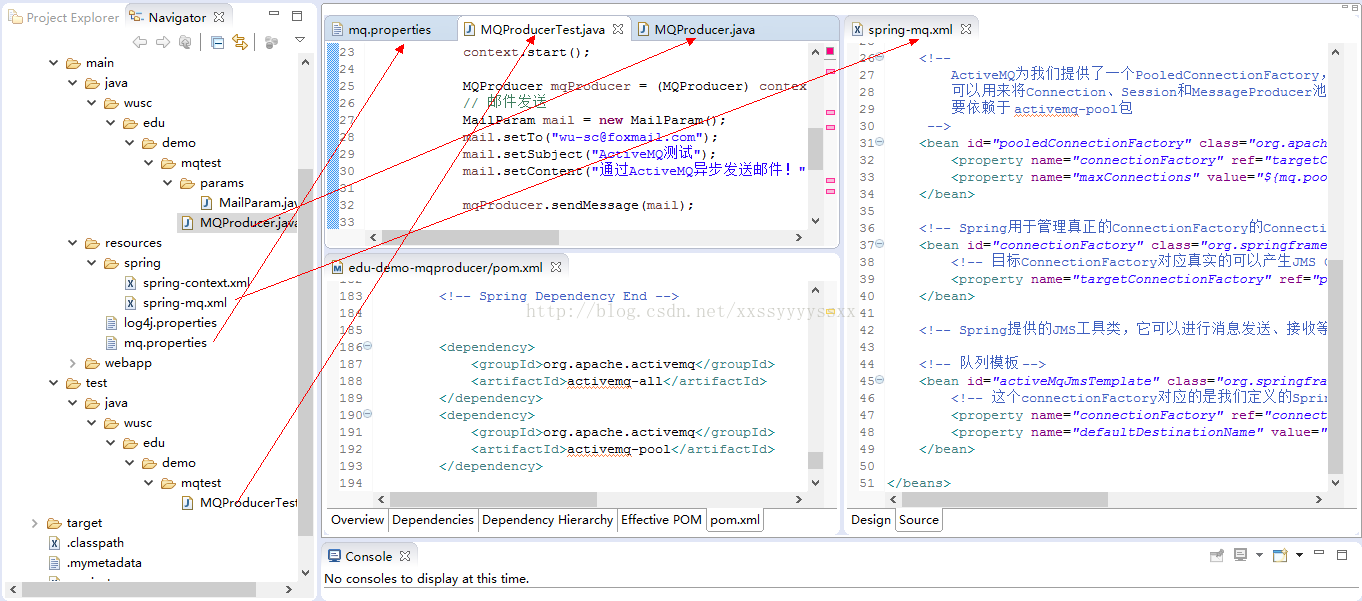
消息生产者(发邮件的请求)
mq.properties
- ## MQ
- mq.brokerURL=tcp\://192.168.4.101\:61616
- mq.userName=wusc
- mq.password=wusc.123
- mq.pool.maxConnections=10
- #queueName
- queueName=wusc.edu.mqtest.v1
spring-mq.xml被spring-context引用
- <?xml version="1.0" encoding="UTF-8"?>
- <beans xmlns="http://www.springframework.org/schema/beans"
- xmlns:xsi="http://www.w3.org/2001/XMLSchema-instance" xmlns:p="http://www.springframework.org/schema/p"
- xmlns:context="http://www.springframework.org/schema/context"
- xmlns:aop="http://www.springframework.org/schema/aop" xmlns:tx="http://www.springframework.org/schema/tx"
- xsi:schemaLocation="http://www.springframework.org/schema/beans
- http://www.springframework.org/schema/beans/spring-beans-3.2.xsd
- http://www.springframework.org/schema/aop
- http://www.springframework.org/schema/aop/spring-aop-3.2.xsd
- http://www.springframework.org/schema/tx
- http://www.springframework.org/schema/tx/spring-tx-3.2.xsd
- http://www.springframework.org/schema/context
- http://www.springframework.org/schema/context/spring-context-3.2.xsd"
- default-autowire="byName" default-lazy-init="false">
-
-
-
-
- <bean id="targetConnectionFactory" class="org.apache.activemq.ActiveMQConnectionFactory">
-
- <property name="brokerURL" value="${mq.brokerURL}" />
- <property name="userName" value="${mq.userName}"></property>
- <property name="password" value="${mq.password}"></property>
- </bean>
-
- <!--
- ActiveMQ为我们提供了一个PooledConnectionFactory,通过往里面注入一个ActiveMQConnectionFactory
- 可以用来将Connection、Session和MessageProducer池化,这样可以大大的减少我们的资源消耗。
- 要依赖于 activemq-pool包
- -->
- <bean id="pooledConnectionFactory" class="org.apache.activemq.pool.PooledConnectionFactory">
- <property name="connectionFactory" ref="targetConnectionFactory" />
- <property name="maxConnections" value="${mq.pool.maxConnections}" />
- </bean>
-
-
- <bean id="connectionFactory" class="org.springframework.jms.connection.SingleConnectionFactory">
-
- <property name="targetConnectionFactory" ref="pooledConnectionFactory" />
- </bean>
-
-
-
-
- <bean id="activeMqJmsTemplate" class="org.springframework.jms.core.JmsTemplate">
-
- <property name="connectionFactory" ref="connectionFactory"/>
- <property name="defaultDestinationName" value="${queueName}"></property>
- </bean>
-
- </beans>
MQProducer
- @Service("mqProducer")
- public class MQProducer {
-
- @Autowired
- private JmsTemplate activeMqJmsTemplate;
-
-
-
-
-
- public void sendMessage(final MailParam mail) {
- activeMqJmsTemplate.send(new MessageCreator() {
- public Message createMessage(Session session) throws JMSException {
- return session.createTextMessage(JSONObject.toJSONString(mail));
- }
- });
-
- }
-
- }
测试类
- public class MQProducerTest {
- private static final Log log = LogFactory.getLog(MQProducerTest.class);
-
- public static void main(String[] args) {
- try {
- ClassPathXmlApplicationContext context = new ClassPathXmlApplicationContext("classpath:spring/spring-context.xml");
- context.start();
-
- MQProducer mqProducer = (MQProducer) context.getBean("mqProducer");
- // 邮件发送
- MailParam mail = new MailParam();
- mail.setTo("wu-sc@foxmail.com");
- mail.setSubject("ActiveMQ测试");
- mail.setContent("通过ActiveMQ异步发送邮件!");
-
- mqProducer.sendMessage(mail);
-
- context.stop();
- } catch (Exception e) {
- log.error("==>MQ context start error:", e);
- System.exit(0);
- } finally {
- log.info("===>System.exit");
- System.exit(0);
- }
- }
- }
消息消费者(真正发邮件)
mail.properties
- #SMTP服务配置
- mail.host=smtp.qq.com
- mail.port=25
- mail.username=XXX@qq.com
- mail.password=XXXX
- mail.smtp.auth=true
- mail.smtp.timeout=30000
- mail.default.from=XXXXX@qq.com
spring-mq.xml
- <?xml version="1.0" encoding="UTF-8"?>
- <beans xmlns="http://www.springframework.org/schema/beans"
- xmlns:xsi="http://www.w3.org/2001/XMLSchema-instance" xmlns:p="http://www.springframework.org/schema/p"
- xmlns:context="http://www.springframework.org/schema/context"
- xmlns:aop="http://www.springframework.org/schema/aop" xmlns:tx="http://www.springframework.org/schema/tx"
- xsi:schemaLocation="http://www.springframework.org/schema/beans
- http://www.springframework.org/schema/beans/spring-beans-3.2.xsd
- http://www.springframework.org/schema/aop
- http://www.springframework.org/schema/aop/spring-aop-3.2.xsd
- http://www.springframework.org/schema/tx
- http://www.springframework.org/schema/tx/spring-tx-3.2.xsd
- http://www.springframework.org/schema/context
- http://www.springframework.org/schema/context/spring-context-3.2.xsd"
- default-autowire="byName" default-lazy-init="false">
-
-
-
-
- <bean id="targetConnectionFactory" class="org.apache.activemq.ActiveMQConnectionFactory">
-
- <property name="brokerURL" value="${mq.brokerURL}" />
- <property name="userName" value="${mq.userName}"></property>
- <property name="password" value="${mq.password}"></property>
- </bean>
-
- <!--
- ActiveMQ为我们提供了一个PooledConnectionFactory,通过往里面注入一个ActiveMQConnectionFactory
- 可以用来将Connection、Session和MessageProducer池化,这样可以大大的减少我们的资源消耗。
- 要依赖于 activemq-pool包
- -->
- <bean id="pooledConnectionFactory" class="org.apache.activemq.pool.PooledConnectionFactory">
- <property name="connectionFactory" ref="targetConnectionFactory" />
- <property name="maxConnections" value="${mq.pool.maxConnections}" />
- </bean>
-
-
- <bean id="connectionFactory" class="org.springframework.jms.connection.SingleConnectionFactory">
-
- <property name="targetConnectionFactory" ref="pooledConnectionFactory" />
- </bean>
-
-
-
-
- <bean id="activeMqJmsTemplate" class="org.springframework.jms.core.JmsTemplate">
-
- <property name="connectionFactory" ref="connectionFactory"/>
- <property name="defaultDestinationName" value="${queueName}"></property>
- </bean>
-
-
- <bean id="sessionAwareQueue" class="org.apache.activemq.command.ActiveMQQueue">
- <constructor-arg>
- <value>${queueName}</value>
- </constructor-arg>
- </bean>
-
-
- <bean id="consumerSessionAwareMessageListener" class="wusc.edu.demo.mqtest.listener.ConsumerSessionAwareMessageListener"></bean>
-
- <bean id="sessionAwareListenerContainer" class="org.springframework.jms.listener.DefaultMessageListenerContainer">
- <property name="connectionFactory" ref="connectionFactory" />
- <property name="destination" ref="sessionAwareQueue" />
- <property name="messageListener" ref="consumerSessionAwareMessageListener" />
- </bean>
-
- </beans>
spring-mail.xml真正发送邮件的
- <?xml version="1.0" encoding="UTF-8" ?>
- <beans xmlns="http://www.springframework.org/schema/beans" xmlns:xsi="http://www.w3.org/2001/XMLSchema-instance" xmlns:p="http://www.springframework.org/schema/p"
- xmlns:context="http://www.springframework.org/schema/context" xmlns:aop="http://www.springframework.org/schema/aop" xmlns:tx="http://www.springframework.org/schema/tx"
- xmlns:cache="http://www.springframework.org/schema/cache"
- xsi:schemaLocation="http://www.springframework.org/schema/beans http://www.springframework.org/schema/beans/spring-beans-3.2.xsd
- http://www.springframework.org/schema/context http://www.springframework.org/schema/context/spring-context-3.2.xsd
- http://www.springframework.org/schema/tx http://www.springframework.org/schema/tx/spring-tx-3.2.xsd
- http://www.springframework.org/schema/aop http://www.springframework.org/schema/aop/spring-aop-3.2.xsd
- http://www.springframework.org/schema/cache http://www.springframework.org/schema/cache/spring-cache-3.2.xsd">
-
-
-
-
- <bean id="mailSender" class="org.springframework.mail.javamail.JavaMailSenderImpl">
- <property name="host" value="${mail.host}" />
- <property name="username" value="${mail.username}" />
- <property name="password" value="${mail.password}" />
- <property name="defaultEncoding" value="UTF-8"></property>
- <property name="javaMailProperties">
- <props>
- <prop key="mail.smtp.auth">${mail.smtp.auth}</prop>
- <prop key="mail.smtp.timeout">${mail.smtp.timeout}</prop>
- </props>
- </property>
- </bean>
-
- <bean id="simpleMailMessage" class="org.springframework.mail.SimpleMailMessage">
- <property name="from">
- <value>${mail.default.from}</value>
- </property>
- </bean>
-
-
- <bean id="threadPool" class="org.springframework.scheduling.concurrent.ThreadPoolTaskExecutor">
-
- <property name="corePoolSize" value="5" />
-
- <property name="keepAliveSeconds" value="30000" />
-
- <property name="maxPoolSize" value="50" />
-
- <property name="queueCapacity" value="100" />
- </bean>
-
- </beans>
队列监听器
-
-
-
-
-
-
-
- @Component
- public class ConsumerSessionAwareMessageListener implements SessionAwareMessageListener<Message> {
-
- private static final Log log = LogFactory.getLog(ConsumerSessionAwareMessageListener.class);
-
- @Autowired
- private JmsTemplate activeMqJmsTemplate;
- @Autowired
- private Destination sessionAwareQueue;
- @Autowired
- private MailBiz bailBiz;
-
- public synchronized void onMessage(Message message, Session session) {
- try {
- ActiveMQTextMessage msg = (ActiveMQTextMessage) message;
- final String ms = msg.getText();
- log.info("==>receive message:" + ms);
- MailParam mailParam = JSONObject.parseObject(ms, MailParam.class);
- if (mailParam == null) {
- return;
- }
-
- try {
- bailBiz.mailSend(mailParam);
- } catch (Exception e) {
-
-
-
-
-
-
- log.error("==>MailException:", e);
- }
- } catch (Exception e) {
- log.error("==>", e);
- }
- }
- }
发送邮件的业务逻辑
- @Component("mailBiz")
- public class MailBiz {
-
- @Autowired
- private JavaMailSender mailSender;
- @Autowired
- private SimpleMailMessage simpleMailMessage;
- @Autowired
- private ThreadPoolTaskExecutor threadPool;
-
-
-
-
-
-
-
-
-
- public void mailSend(final MailParam mailParam) {
- threadPool.execute(new Runnable() {
- public void run() {
- try {
- simpleMailMessage.setFrom(simpleMailMessage.getFrom());
- simpleMailMessage.setTo(mailParam.getTo());
- simpleMailMessage.setSubject(mailParam.getSubject());
- simpleMailMessage.setText(mailParam.getContent());
- mailSender.send(simpleMailMessage);
- } catch (MailException e) {
- throw e;
- }
- }
- });
- }
spring启动类
-
-
-
-
-
-
-
- public class MQConsumer {
- private static final Log log = LogFactory.getLog(MQConsumer.class);
-
- public static void main(String[] args) {
- try {
- ClassPathXmlApplicationContext context = new ClassPathXmlApplicationContext("classpath:spring/spring-context.xml");
- context.start();
- } catch (Exception e) {
- log.error("==>MQ context start error:", e);
- System.exit(0);
- }
- }
- }
公共的邮件参数Bean
-
-
-
-
-
-
-
- public class MailParam {
-
-
- private String from;
-
- private String to;
-
- private String subject;
-
- private String content;
-
- public MailParam() {
- }
-
- public MailParam(String to, String subject, String content) {
- this.to = to;
- this.subject = subject;
- this.content = content;
- }.....省略getter/setter


 847
847

 被折叠的 条评论
为什么被折叠?
被折叠的 条评论
为什么被折叠?
 到【灌水乐园】发言


