找了好久到底为何不生效,教程也看了很多,终于让我找到了
先需要引入对应的js,css
截图来自此博文 :https://blog.csdn.net/u014645632/article/details/53202839
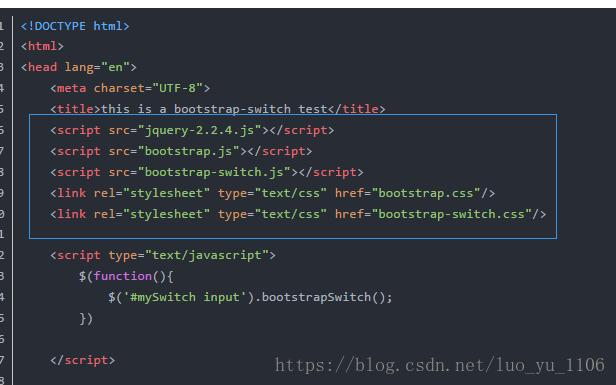
途中画蓝框的就是需要引入的,我的项目用的freemarker,我试过,必须在header.ftl和footer.flt中引入才有效。
下载地址的话:我后期找一下更新
把这个引入后,要先试一试直接引入是否生效,不生效就先别进行下一步了
直接引入
分两步:
1.是写个input框
2.是将这个框初始化
|
<body>
<div>
</div>
<input type="checkbox" name="my-checkbox" checked>
<script>
$('[name="my-checkbox"]').bootstrapSwitch({
onText:"启动",
offText:"停止",
onColor:"success",
offColor:"info",
size:"small",
onSwitchChange:function(event,state){
if(state==true){
console.log('已打开');
}else{
console.log('已关闭');
}
}
})
</script>
</body>
|
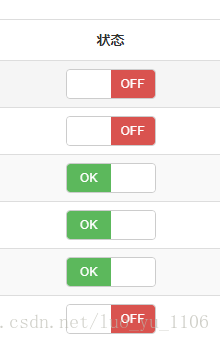
如果这样引用有下面的效果,说明你引入switch的js与css成功了

下一步就是在表格中使用了
在column的formatter中返回<input type="checkbox" name="my-checkbox" checked>
关键是在,column下面添加 onLoadSuccess:function(){} 中添加初始化代码,代码来自网络,
| columns: [
{field: 'xxx', title: 'xxx', align: 'xxx', valign: 'middle'},
{field: 'xxx', title: 'xx', align: 'xx', valign: 'xx', formatter: function (value, row, index) {
if(value==1){
return '<input id="create-switch" type="checkbox" name="my-checkbox1" checked>';
}else if(value==2){
return '<input id="create-switch" type="checkbox" name="my-checkbox1" check>';
}
}}
],
onLoadSuccess:function(){
$('[name="my-checkbox1"]').bootstrapSwitch({
onText:"开启",
offText:"关闭",
onColor:"success",
offColor:"danger",
size:"small",
onSwitchChange:function(event,state){
if(state==true){
console.log('已打开'); console.log(this);
}else{
console.log('已关闭');
}
}
})
}
}; |
附一下效果:
接下来就是在按钮上添加onclick事件了,要获取每列的id
这个我花了好久,各种查找,debug,终于又让我给找到了。
方法是先console.log(this); 结果发现,this里就有onclick时间的参数,参数里就有id
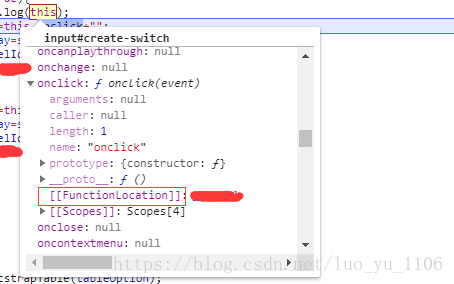
FunctionLocation: 后面 点击一下 就是 你反回input中的onclick方法
通过 var f=this.onclick+""; 将其转为字符串
再通过 var array= f.split(""); 将f分解为字符数组,你想要哪个值,就直接array[0]、array[1]、array[2]、array[3]去取就可以了
获取到我要的id后,我在调用方法 fun(id,0) /fun(id,1)这样,onclick时间也就生效了。
更新一下上面修改的代码
| columns: [
{field: 'xxx', title: 'xxx', align: 'xxx', valign: 'middle'},
{field: 'xxx', title: 'xx', align: 'xx', valign: 'xx', formatter: function (value, row, index) {
if(value==1){
return '<input id="create-switch" type="checkbox" οnclick="fun(' + row.id + ','+ row.sa+ ')" name="my-checkbox1" checked>';
}else if(value==2){
return '<input id="create-switch" type="checkbox" οnclick="fun(' + row.id + ','+ row.sa+ ')" name="my-checkbox1" check>';
}
}}
], onLoadSuccess:function(){
$('[name="my-checkbox1"]').bootstrapSwitch({
onText:"开启",
offText:"关闭",
onColor:"success",
offColor:"danger",
size:"small",
onSwitchChange:function(event,state){
if(state==true){
console.log(this);
var f=this.onclick+"";
var array=f.split("");
var id=array[3];
fun(id,1);
}else{
console.log(this);
var f=this.onclick+"";
var array=f.split("");
var id=array[3];
fun(id,0);
}
}
})
}
}; |
可算解决了,不过肯定有更方便的取id方法,知道的博友一定要评论告诉我
=========================分割线==================================
最新更新:
听取qq_41879760博主的建议(在此谢谢qq_41879760博主~)
我修改了一下,如下:
| columns: [
{field: 'xxx', title: 'xxx', align: 'xxx', valign: 'middle'},
{field: 'xxx', title: 'xx', align: 'xx', valign: 'xx', formatter: function (value, row, index) { var a=row.id
if(value==1){
return '<input value="'+a+'" type="checkbox" name="my-checkbox1" checked>';
}else if(value==2){
return '<input value="'+a+'" type="checkbox" name="my-checkbox1" check>';
}
}}
], onLoadSuccess:function(){
$('[name="my-checkbox1"]').bootstrapSwitch({
onText:"开启",
offText:"关闭",
onColor:"success",
offColor:"danger",
size:"small",
onSwitchChange:function(event,state){
if(state==true){
var id=this.value;
fun(id,1);
}else{
var id=this.value;
fun(id,0);
}
}
})
}
}; |


 1万+
1万+


 被折叠的 条评论
为什么被折叠?
被折叠的 条评论
为什么被折叠?
 到【灌水乐园】发言


