


imgaug是一款非常有用的python图像增强库,非常值得推荐应用于深度学习图像增强。其包含许多增强技术,支持图像分类,目标检测,语义分割,热图、关键点检测等一系列任务的图像增强。本文主要介绍imgaug基本使用,以及应用关键点和边界框增强。
- 官方代码仓库:imgaug
- 官方入门文档:imgaug doc
- 增强效果预览:overview of augmenters
- Api:imgaug dpi
# 安装imgaug模块
# pip install imgaug
文章目录
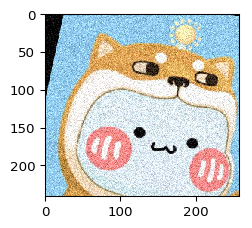
1 加载和增强图片
1.1 读图
import imageio
import imgaug as ia
# 图片地址
# https://gitee.com/luohenyueji/article_picture_warehouse/raw/master/private/halayu_avatar/1.jpg
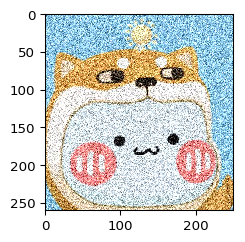
image = imageio.imread("1.jpg")
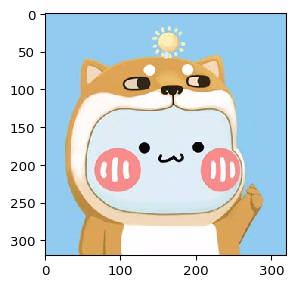
print("Original:")
ia.imshow(image)
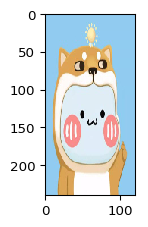
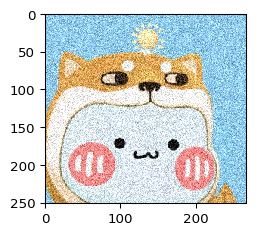
# 改变图形尺寸,(240,120)为图形高宽
image_resize = ia.imresize_single_image(image, (240, 120))
print("Resize:")
ia.imshow(image_resize)
Original:
Resize:
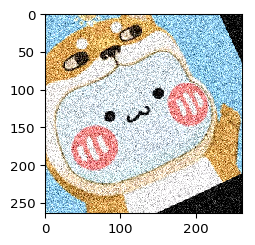
1.2 增强一张图片
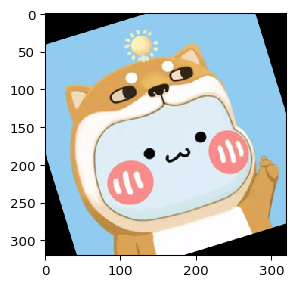
使用该技术将图像旋转-25度至25度之间的随机值,我们也可以直接设置rotate为180,则图片固定旋转180度
from imgaug import augmenters as iaa
# 设定随机数
ia.seed(42)

# 设定角度
rotate = iaa.Affine(rotate=(-25, 25))
image_aug = rotate(image=image)

print("Augmented:")
ia.imshow(image_aug)
Augmented:
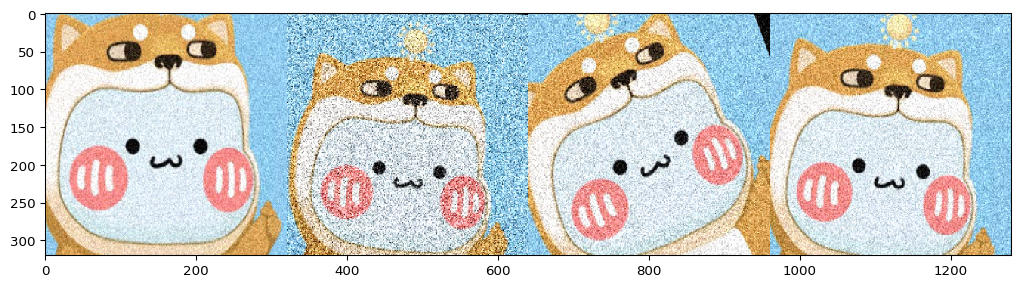
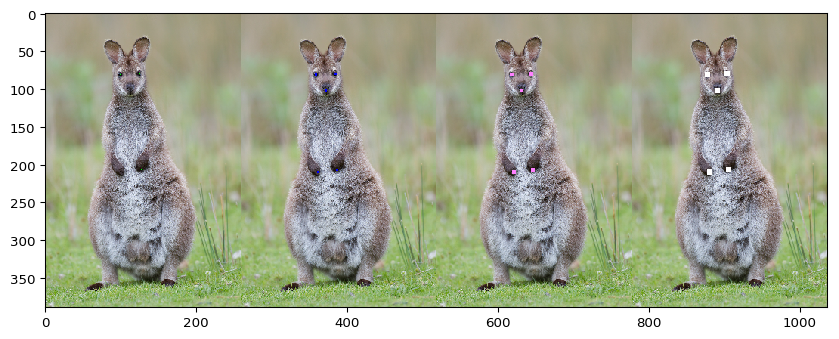
1.3 增强多张图片
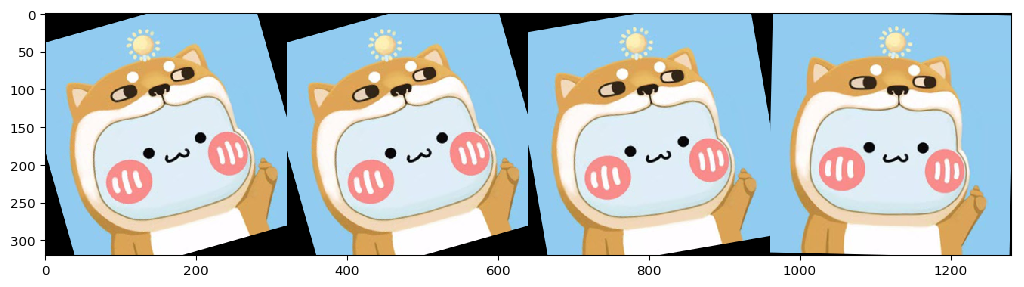
直接将原始图像复制几次,然后进行扩增,得到四张不同效果的扩增图片。通常图片大小不同,用列表最为合适,如果是同样大小,按(N, H, W, [C])顺序输入一个numpy数组也行,N是图像个数,H,W为图像高宽,C为图像通道数。
import numpy as np

images = [image, image, image, image]
images_aug = rotate(images=images)

print("image count: {}".format(len(images_aug)))
print("image size: {}".format(images_aug[0].shape))
print("Augmented batch:")
ia.imshow(np.hstack(images_aug))
image count: 4
image size: (320, 320, 3)
Augmented batch:
1.4 多个增强器使用
通过Sequential将不同的增强器组合到一个管道中,然后将它们全部应用到单个增强调用中。如下面例子我们使用仿射旋转(Affine),添加一些高斯噪声(AdditiveGaussianNoise)并通过从每个图像侧面(Crop)删除0%到20%来裁剪图像。不同增强器的接口见Overview of Augmenters
。
要注意的是Crop函数剪切图片后,图像尺寸不变,非原图区域用黑色填充。如果想要更改图像大小修改Crop为,Crop(…, keep_size=False)
seq = iaa.Sequential([
    iaa.Affine(rotate=(-25, 25)),
    iaa.AdditiveGaussianNoise(scale=(10, 60)),
    iaa.Crop(percent=(0, 0.2),keep_size=True)
])

images_aug = seq(images=images)

for i,img in enumerate(images_aug):
    print("img{} size is{}".format(i,img.shape))

print("Augmented:")
ia.imshow(np.hstack(images_aug))
img0 size is(320, 320, 3)
img1 size is(320, 320, 3)
img2 size is(320, 320, 3)
img3 size is(320, 320, 3)
Augmented:
不同尺寸的结果
seq = iaa.Sequential([
    iaa.Affine(rotate=(-25, 25)),
    iaa.AdditiveGaussianNoise(scale=(10, 60)),
    iaa.Crop(percent=(0, 0.2),keep_size=False)
])

images_aug = seq(images=images)

for i,img in enumerate(images_aug):
    print("img{} size is{}".format(i,img.shape))
    ia.imshow(img)
img0 size is(241, 258, 3)
img1 size is(251, 267, 3)
img2 size is(264, 262, 3)
img3 size is(260, 249, 3)
此外,我们可以设置random_order=True,以随机排序使用各种增强技术,具体如下所示
seq = iaa.Sequential([
    iaa.Affine(rotate=(-25, 25)),
    iaa.AdditiveGaussianNoise(scale=(30, 90)),
    iaa.Crop(percent=(0, 0.4))
], random_order=True)

images_aug = [seq(image=image) for _ in range(8)]

print("Augmented:")
ia.imshow(ia.draw_grid(images_aug, cols=4, rows=2))
Augmented:

1.5 不同尺寸的图片随机增强
这个例子我们将增强不同大小的图像
seq = iaa.Sequential([
# crop and pad images 裁剪并填充图形
iaa.CropAndPad(percent=(-0.2, 0.2), pad_mode="edge"),
# change their color 更改颜色
iaa.AddToHueAndSaturation((-60, 60)),
# water-like effect 添加水体般的效果
iaa.ElasticTransformation(alpha=90, sigma=9),
# replace one squared area within the image by a constant intensity value 用一个单色框随机填充区域
iaa.Cutout()
], random_order=True)
# load images with different sizes
# 不同尺寸图像
images_different_sizes = [
# https://upload.wikimedia.org/wikipedia/commons/e/ed/BRACHYLAGUS_IDAHOENSIS.jpg
imageio.imread("https://upload.wikimedia.org/wikipedia/commons/e/ed/BRACHYLAGUS_IDAHOENSIS.jpg"),
imageio.imread("1.jpg"),
]
# augment them as one batch
images_aug = seq(images=images_different_sizes)
# visualize the results
print("Image 0 (input shape: %s, output shape: %s)" % (images_different_sizes[0].shape, images_aug[0].shape))
ia.imshow(np.hstack([images_different_sizes[0], images_aug[0]]))
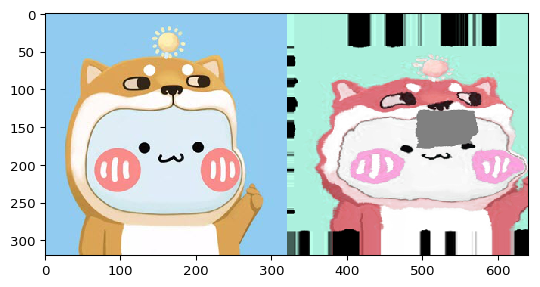
print("Image 1 (input shape: %s, output shape: %s)" % (images_different_sizes[1].shape, images_aug[1].shape))
ia.imshow(np.hstack([images_different_sizes[1], images_aug[1]]))
Image 0 (input shape: (257, 286, 3), output shape: (257, 286, 3))
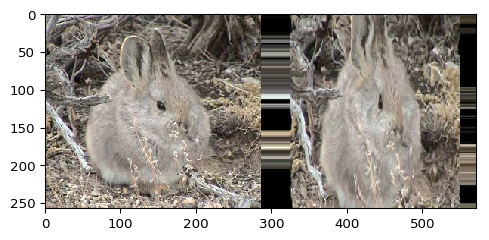
Image 1 (input shape: (320, 320, 3), output shape: (320, 320, 3))
1.6 保存图片
直接循环结果列表通过imageio.imwrite即可保存图片
for index,image in enumerate(images_aug):
    # imwrite == imsave
    imageio.imwrite("result{}.jpg".format(index),image)
2 关键点图片增强
关键点为图像上的点,通常以像素点的坐标位置表示。又称为landmarks,常用于人体姿势估计,人脸识别等。imgaug进行关键点增强所用到的api为KeypointsOnImage,KeypointsOnImage实例化关键点类,将关键点列表与图像形状组合在一起
2.1 基础实例
import imageio
import imgaug as ia
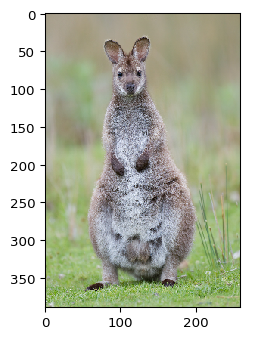
# https://upload.wikimedia.org/wikipedia/commons/e/e6/Macropus_rufogriseus_rufogriseus_Bruny.jpg
image = imageio.imread("https://upload.wikimedia.org/wikipedia/commons/e/e6/Macropus_rufogriseus_rufogriseus_Bruny.jpg")
# 重置图片大小
image = ia.imresize_single_image(image, (389, 259))
ia.imshow(image)
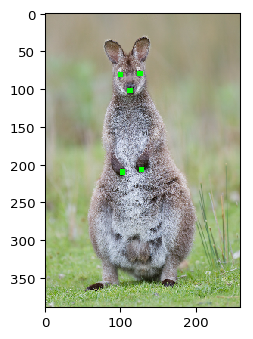
然后我们放置并可视化一些关键点
from imgaug.augmentables.kps import Keypoint, KeypointsOnImage
kps = [
    Keypoint(x=99, y=81),   # left eye (from camera perspective)
    Keypoint(x=125, y=80),  # right eye
    Keypoint(x=112, y=102), # nose
    Keypoint(x=102, y=210), # left paw
    Keypoint(x=127, y=207)  # right paw
]
# 实例化关键点类,将关键点列表与图像形状组合在一起
# https://imgaug.readthedocs.io/en/latest/source/api_augmentables_kps.html?highlight=KeypointsOnImage#imgaug.augmentables.kps.KeypointsOnImage.from_xy_array
kpsoi = KeypointsOnImage(kps, shape=image.shape)

ia.imshow(kpsoi.draw_on_image(image, size=7))

# 打印关键点
print(kpsoi.keypoints)

[Keypoint(x=99.00000000, y=81.00000000), Keypoint(x=125.00000000, y=80.00000000), Keypoint(x=112.00000000, y=102.00000000), Keypoint(x=102.00000000, y=210.00000000), Keypoint(x=127.00000000, y=207.00000000)]
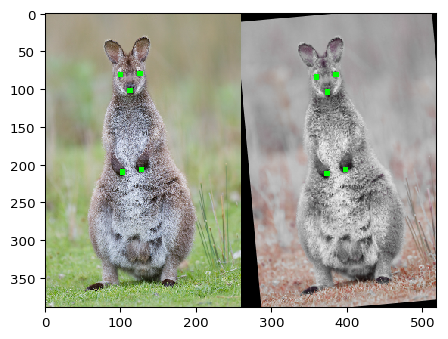
接下来我们将应用平移和仿射变化改变图片和关键点
import imgaug.augmenters as iaa
ia.seed(3)

seq = iaa.Sequential([
    iaa.Affine(translate_px={"x": (10, 30)}, rotate=(-10, 10)),
    # color jitter, only affects the image 色彩抖动只影响图片,不影响关键点。
    iaa.AddToHueAndSaturation((-50, 50))
])

# 输入图形和关键点参数,得到变换后的图形和关键点参数
# 如果是处理多张图像,给出图像列表和对应的关键点列表
image_aug, kpsoi_aug = seq(image=image, keypoints=kpsoi)

# 可视化变换前后关键点效果
import numpy as np
ia.imshow(
    np.hstack([
        kpsoi.draw_on_image(image, size=7),
        kpsoi_aug.draw_on_image(image_aug, size=7)
    ])
)
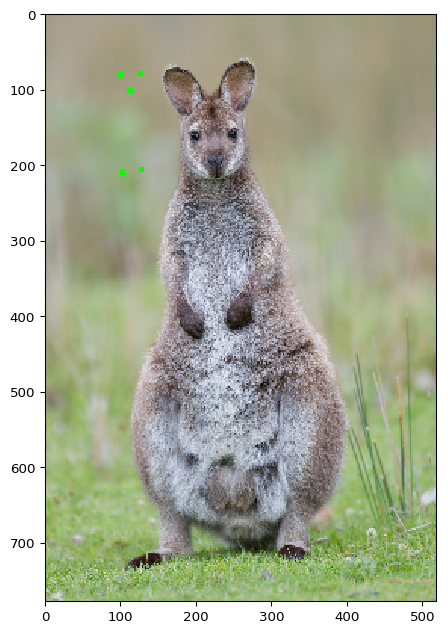
2.2 关键点投影
使用关键点时,您可能有时必须更改图像大小。KeypointsOnImage.on(image or shape)更改图像大小后,该方法可用于重新计算关键点坐标。它将关键点投影到新图像上相同的相对位置上
# 扩大图像为原来的两倍
image_larger = ia.imresize_single_image(image, 2.0)

print("Small image %s with keypoints optimized for the size:" % (image.shape,))
ia.imshow(kpsoi.draw_on_image(image, size=7))

print("Large image %s with keypoints optimized for the small image size:" % (image_larger.shape,))
ia.imshow(kpsoi.draw_on_image(image_larger, size=7))

print("Large image %s with keypoints projected onto that size:" % (image_larger.shape,))
ia.imshow(kpsoi.on(image_larger).draw_on_image(image_larger, size=7))
Small image (389, 259, 3) with keypoints optimized for the size:
Large image (778, 518, 3) with keypoints optimized for the small image size:
Large image (778, 518, 3) with keypoints projected onto that size:

当然输出投影后的关键点信息也可以用KeypointsOnImage.on
# 打印关键点
print(kpsoi.keypoints)
# 打印关键点
print(kpsoi.on(image_larger).keypoints)
[Keypoint(x=99.00000000, y=81.00000000), Keypoint(x=125.00000000, y=80.00000000), Keypoint(x=112.00000000, y=102.00000000), Keypoint(x=102.00000000, y=210.00000000), Keypoint(x=127.00000000, y=207.00000000)]
[Keypoint(x=198.00000000, y=162.00000000), Keypoint(x=250.00000000, y=160.00000000), Keypoint(x=224.00000000, y=203.99998474), Keypoint(x=204.00000000, y=420.00000000), Keypoint(x=254.00000000, y=414.00003052)]
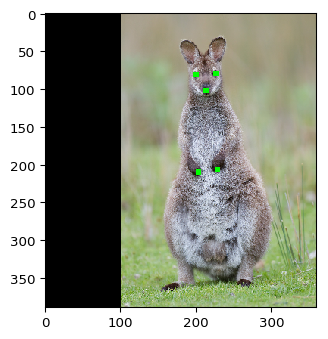
2.3 关键点平移
前面提到的on()可以在调整大小的图像的情况下提供帮助,但是在填充图像时则无济于事,因为在这些情况下,关键点在图像上的相对位置会发生变化。可以使用KeypointsOnImage.shift(x=, y=)来补偿这种填充,其中x描述了向左/向右和y向顶部/底部的移动。
image_pad = ia.pad(image, left=100)
kpsoi_pad = kpsoi.shift(x=100)
ia.imshow(kpsoi_pad.draw_on_image(image_pad, size=7))
# 打印关键点
print(kpsoi.shift(x=100).keypoints)
/opt/conda/envs/python35-paddle120-env/lib/python3.7/site-packages/imgaug/imgaug.py:106: DeprecationWarning: Using imgaug.imgaug.pad is deprecated. Use imgaug.augmenters.size.pad instead.
  warn(msg, category=DeprecationWarning, stacklevel=stacklevel)
[Keypoint(x=199.00000000, y=81.00000000), Keypoint(x=225.00000000, y=80.00000000), Keypoint(x=212.00000000, y=102.00000000), Keypoint(x=202.00000000, y=210.00000000), Keypoint(x=227.00000000, y=207.00000000)]
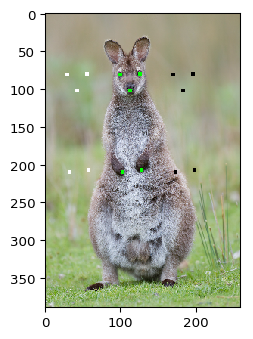
2.4 关键点绘制
KeypointsOnImage.draw_on_image()可以在图像上绘制关键点,size控制关键点大小,color控制关键点颜色。
ia.imshow(np.hstack([
    kpsoi.draw_on_image(image, size=1, color=(0, 255, 0)),
    kpsoi.draw_on_image(image, size=3, color=(0, 0, 255)),
    kpsoi.draw_on_image(image, size=5, color=(255, 128, 255)),
    kpsoi.draw_on_image(image, size=7, color=(255, 255, 255))
]))
此外draw_on_image()方法还提供了一个copy参数,可以将其设置为False直接修改图像
image_draw = np.copy(image)
kpsoi.draw_on_image(image_draw, size=5, color=(0, 255, 0), copy=False)
kpsoi.shift(x=-70).draw_on_image(image_draw, size=5, color=(255, 255, 255), copy=False)
kpsoi.shift(x=70).draw_on_image(image_draw, size=5, color=(0, 0, 0), copy=False)
ia.imshow(image_draw)
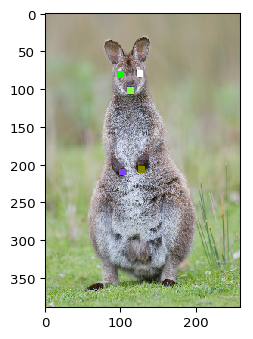
以下代码显示如何单独设置各个关键点的颜色
colors = [(0, 255, 0),
          (255, 255, 255),
          (128, 255, 64),
          (128, 64, 255),
          (128, 128, 0)]
image_drawn = np.copy(image)
for kp, color in zip(kpsoi.keypoints, colors):
    image_drawn = kp.draw_on_image(image_drawn, color=color, size=9, copy=False)
ia.imshow(image_drawn)
2.5 关键点与numpy数组
KeypointsOnImage可以轻松转换为(N, 2)xy坐标形式的float32 numpy数组
arr = kpsoi.to_xy_array()
print("Keypoints as objects:", kpsoi.keypoints)
print("Keypoints as array:", arr)
print("Shape:", arr.shape)
Keypoints as objects: [Keypoint(x=99.00000000, y=81.00000000), Keypoint(x=125.00000000, y=80.00000000), Keypoint(x=112.00000000, y=102.00000000), Keypoint(x=102.00000000, y=210.00000000), Keypoint(x=127.00000000, y=207.00000000)]
Keypoints as array: [[ 99.  81.]
 [125.  80.]
 [112. 102.]
 [102. 210.]
 [127. 207.]]
Shape: (5, 2)
同样numpy数组也可以直接转换为KeypointsOnImage,但必须要提供图像尺寸
xy = np.float32([
    [10, 20],
    [50, 17],
    [27.54, 49.13]
])
image_height = 50
image_width = 100
kpsoi_new = ia.KeypointsOnImage.from_xy_array(xy, shape=(image_height, image_width, 3))
print(kpsoi_new)
KeypointsOnImage([Keypoint(x=10.00000000, y=20.00000000), Keypoint(x=50.00000000, y=17.00000000), Keypoint(x=27.54000092, y=49.13000107)], shape=(50, 100, 3))
3 边界框增强
常用api如下:
- imgaug.augmentables.bbs.BoundingBox(x1, y1, x2, y2, label=None): 单个边界框的容器,根据其左上角和右下角定义,每个角均以x和y像素坐标给出,label为标签
- imgaug.augmentables.bbs.BoundingBoxesOnImage(bounding_boxes, shape): 包含放置在图像上的边界框列表的容器。shape变量表示放置边界框的图像的形状。
3.1 基础实例
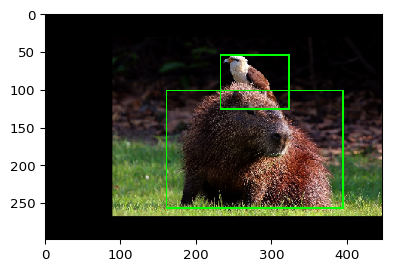
让我们尝试一个简单的边界框增强示例。我们加载一张图像,在其上放置两个边界框,然后使用仿射变换来扩充数据。首先,我们加载并可视化数据。
import imageio
import imgaug as ia
from imgaug.augmentables.bbs import BoundingBox, BoundingBoxesOnImage

ia.seed(42)

image = imageio.imread("https://upload.wikimedia.org/wikipedia/commons/8/8e/Yellow-headed_caracara_%28Milvago_chimachima%29_on_capybara_%28Hydrochoeris_hydrochaeris%29.JPG")
# 重置图像大小
image = ia.imresize_single_image(image, (298, 447))

# 设置边界框
bbs = BoundingBoxesOnImage([
    # 边界框的左上角和右下角坐标
    BoundingBox(x1=0.2*447, x2=0.85*447, y1=0.3*298, y2=0.95*298),
    BoundingBox(x1=0.4*447, x2=0.65*447, y1=0.1*298, y2=0.4*298)
], shape=image.shape)

ia.imshow(bbs.draw_on_image(image, size=2))
下一步是定义我们要应用的增强方法。我们选择一个简单的对比度增强(仅影响图像)和仿射变换(影响图像和边界框)。
from imgaug import augmenters as iaa
ia.seed(1)

seq = iaa.Sequential([
    iaa.GammaContrast(1.5),
    iaa.Affine(translate_percent={"x": 0.1}, scale=0.8)
])
现在,我们同时增强图像和其上的边框。我们可以使用seq.augment(…)它或它的快捷方式seq(…)。请注意,如果我们想扩充几张图片,则可以使用seq(images=[image1, image2, …], bounding_boxes=[bbs1, bbs2, …])。该方法相当灵活,并且还可以处理不同于的边界框BoundingBoxesOnImage
# 输入增强前的图像和边框,得到增强后的图像和边框
image_aug, bbs_aug = seq(image=image, bounding_boxes=bbs)
# 可视化,size边框的宽度
ia.imshow(bbs_aug.draw_on_image(image_aug, size=2))
如果想要保存数据到xml,直接循环提取信息即可
for index,bb in enumerate(bbs):
    print("index is {}".format(index))
    print("x1 is {}".format(bb.x1))
    print("y1 is {}".format(bb.y1))
    print("x2 is {}".format(bb.x2))
    print("y2 is {}".format(bb.y2))
    print("label is {}".format(bb.label))
    print("-"*50)
index is 0
x1 is 89.4
y1 is 89.39999999999999
x2 is 379.95
y2 is 283.09999999999997
label is None
--------------------------------------------------
index is 1
x1 is 178.8
y1 is 29.8
x2 is 290.55
y2 is 119.2
label is None
--------------------------------------------------
3.2 图像旋转带来的问题
让我们尝试另一种增强技术。这次我们应用仅包含旋转的仿射变换。
image_aug, bbs_aug = iaa.Affine(rotate=45)(image=image, bounding_boxes=bbs)
ia.imshow(bbs_aug.draw_on_image(image_aug))
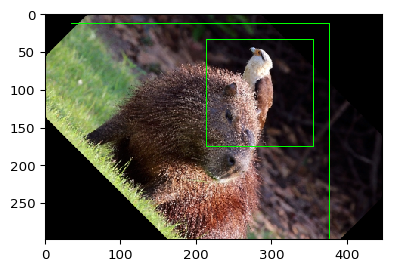
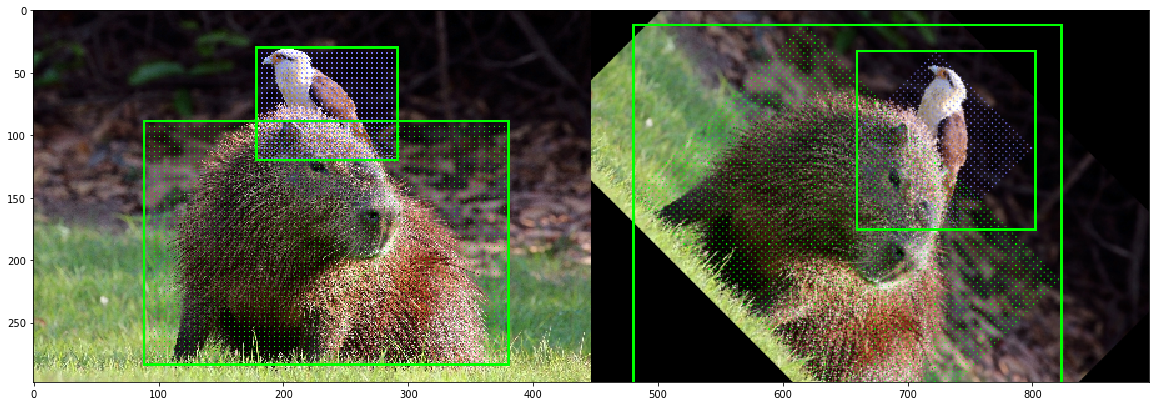
您现在可能倾向于说这些增强功能看起来有些错误,并且某些地方一定出错了。但是输出实际上是正确的,并且显示了边界框扩展的特殊情况,为什么要避免旋转。问题源于非对象像素是边界框的一部分。旋转后,必须绘制一个新的边界框,其中包含了这些非对象像素。以下示例将问题可视化。可以看到旋转后原来的对象一部分在图像外了,所以尽可能不要旋转图像。
import numpy as np
import matplotlib.pyplot as plt

# highlight the area of each bounding box
# 深度复制图像
image_points = np.copy(image)
colors = [(0, 255, 0), (128, 128, 255)]
# 设置每个边框面积颜色
for bb, color in zip(bbs.bounding_boxes, colors):
    image_points[bb.y1_int:bb.y2_int:4, bb.x1_int:bb.x2_int:4] = color

# rotate the image with the highlighted bounding box areas
# 旋转图像
rot = iaa.Affine(rotate=45)
image_points_aug, bbs_aug = rot(image=image_points, bounding_boxes=bbs)

# visualize
# 可视化
side_by_side = np.hstack([
    bbs.draw_on_image(image_points, size=2),
    bbs_aug.draw_on_image(image_points_aug, size=2)
])
fig, ax = plt.subplots(figsize=(20, 20))
ax.imshow(side_by_side)
<matplotlib.image.AxesImage at 0x7f36ac06f690>
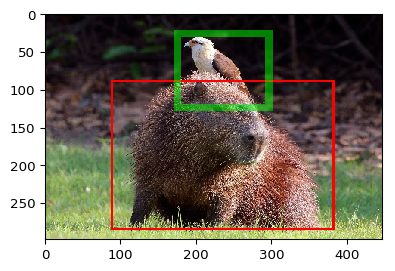
3.3 绘图
常见的操作是在图像上绘制边框。上面的示例中已经使用了执行此操作的方法。它提供参数来控制绘制的边界框的颜色,size(即边框厚度)和alpha(即透明度)。以下示例显示了它们的用法。
image_bbs = np.copy(image)
image_bbs = bbs.bounding_boxes[0].draw_on_image(image_bbs, color=[255, 0, 0], size=3)
image_bbs = bbs.bounding_boxes[1].draw_on_image(image_bbs, color=[0, 255, 0], size=10, alpha=0.5)
ia.imshow(image_bbs)
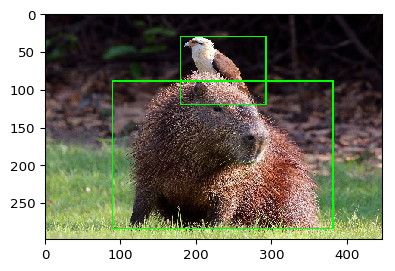
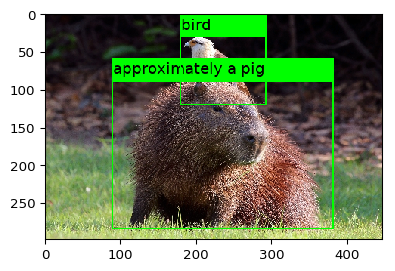
如果我们向边界框添加标签,它们也会自动绘制
bbs_labeled = bbs.deepcopy()
# 添加标签
bbs_labeled[0].label = "approximately a pig"
bbs_labeled[1].label = "bird"

image_bbs = bbs_labeled.draw_on_image(image, size=2)

ia.imshow(image_bbs)
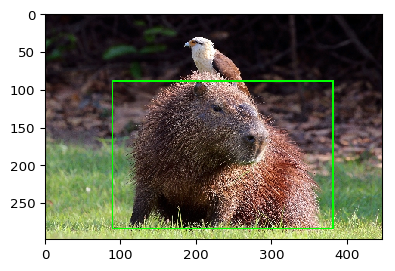
如果要在边界框上设置标签但不绘制它们,请在每个边界框上手动调用draw_box_on_image()或者draw_label_on_image()。那只会画边界框或者标签
bbs_labeled = bbs.deepcopy()
# 添加标签
bbs_labeled[0].label = "approximately a pig"
bbs_labeled[1].label = "bird"
image_bbs = bbs_labeled.bounding_boxes[0].draw_box_on_image(image,size=2)
ia.imshow(image_bbs)
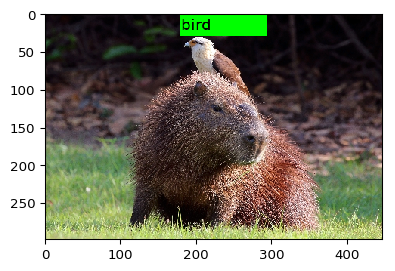
image_bbs = bbs_labeled.bounding_boxes[1].draw_label_on_image(image,size=2)
ia.imshow(image_bbs)
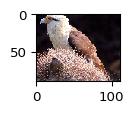
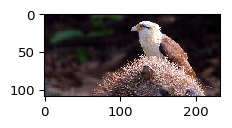
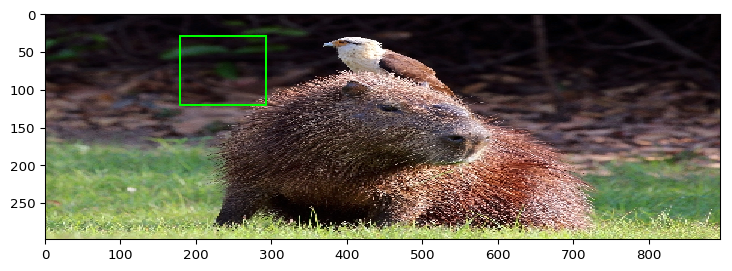
3.4 提取图像内容,移动边界框
使用边界框时,另一种常见操作是提取其相应的图像区域。当边界框完全位于图像平面内时,这很容易。如果它全部或部分位于图像平面之外,则操作将变得更加复杂。BoundingBox提供extract_from_image(image),避免了处理此类问题。如果边界框未完全位于图像中,则将结果零填充,以达到边界框的高度和宽度。
bird = bbs.bounding_boxes[1].extract_from_image(image)
ia.imshow(bird)
通过结合.extend()和.extract_from_image()可以提取更大的图像区域
bird = bbs.bounding_boxes[1].extend(all_sides=10, left=100).extract_from_image(image)
ia.imshow(bird)
现在,我们将边界框部分移到图像的外部,然后提取其内容
bb = bbs.bounding_boxes[1].shift(x=200)
ia.imshow(bb.draw_on_image(image, size=2))
ia.imshow(bb.extract_from_image(image))

如您在第二张图像中看到的,图像外部的像素填充有零。如果您不希望这样做,则可以添加参数pad=False以停用填充。默认情况下,它将仍然填充以防止任何轴变为零,即,您将不会获得(0, 0, 3)输出数组。这样可以防止错误,例如在绘制过程中。如果您希望在这种情况下获得零大小的数组,只需添加prevent_zero_size=False。
3.5 交并比Intersection, Union and IoU
在处理边界框时,计算IoU值(联合上的交集)是最常见的任务之一。imgaug提供了一种方法可用于计算边界框的交集和并集。让我们从相交处开始,可以使用相交进行估算BoundingBox.intersection(other_bounding_box)并返回一个新的边界框。
# 例子中两个边框的交集
bb_intersection = bbs.bounding_boxes[0].intersection(bbs.bounding_boxes[1])
ia.imshow(bb_intersection.draw_on_image(image))
print("The intersection has a height of %.4f, width of %.4f and an area of %.4f" % (
    bb_intersection.height, bb_intersection.width, bb_intersection.area))

The intersection has a height of 29.8000, width of 111.7500 and an area of 3330.1500
现在,使用BoundingBox.union(other_bounding_box)计算并集
bb_union = bbs.bounding_boxes[0].union(bbs.bounding_boxes[1])
ia.imshow(bb_union.draw_on_image(image, size=2))
print("The union has a height of %.4f, width of %.4f and an area of %.4f." % (
    bb_union.height, bb_union.width, bb_union.area))
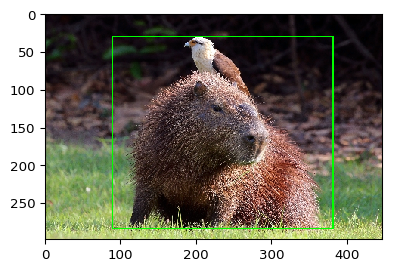
The union has a height of 253.3000, width of 290.5500 and an area of 73596.3150.
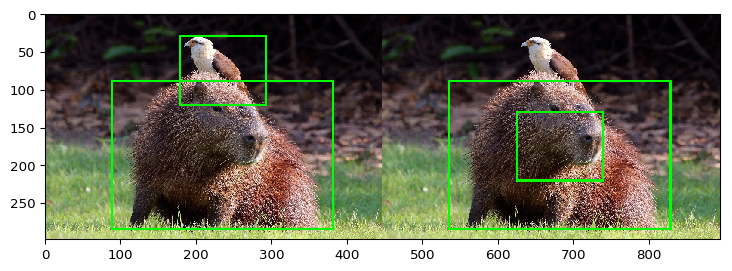
最后是IoU值,计算为BoundingBox.iou(other_bounding_box)。在下面的代码块中,我们为标准示例边界框计算一次,然后在移动两个框之一以使其重叠的情况下计算一次。在后一种情况下,IoU较高。
# Shift one BB down so that the BBs overlap
# 平移图像,以重叠图像
bbs_shifted = ia.BoundingBoxesOnImage([
    bbs.bounding_boxes[0],
    bbs.bounding_boxes[1].shift(y=100),
], shape=bbs.shape)

# Compute IoU without shift
# 平移前的交并比
iou = bbs.bounding_boxes[0].iou(bbs.bounding_boxes[1])
print("The IoU of the bounding boxes is: %.4f." % (iou,))

# Compute IoU after shift
# 平移后的交并比
iou_shifted = bbs.bounding_boxes[0].iou(bbs_shifted.bounding_boxes[1])
print("The IoU of the bounding boxes after shifting one box is: %.4f." % (iou_shifted,))

# Visualize unshifted and shifted BBs
ia.imshow(
    np.hstack([
        bbs.draw_on_image(image, size=3),
        bbs_shifted.draw_on_image(image, size=3),
    ])
)
The IoU of the bounding boxes is: 0.0529.
The IoU of the bounding boxes after shifting one box is: 0.1775.
3.6 将边界框投影到其他图像上
有时可能需要将边界框从一个图像投影到另一个图像。这在调整图像大小时尤其重要。在这种情况下,您可以使用BoundingBox.project(from_shape, to_shap)和BoundingBoxesImage.on(new_image)。如下所示。如果您必须补偿填充,请使用BoundingBox.shift([top]、[right]、[bottom]、[left])或相同的BoundingBoxesImage方法。对于BoundingBoxesImage,请确保在填充后使用新的图像形状更新.shape属性。
# we limit the example here to the bounding box of the bird
# #我们将这里的例子局限于鸟的边界框
bb_bird = bbs.bounding_boxes[1]
bbsoi_bird = ia.BoundingBoxesOnImage([bbs.bounding_boxes[1]], shape=image.shape)

# lets resize the original image to twice its width
# 扩大图像的宽为原来的两倍
image_larger = ia.imresize_single_image(image, (1.0, 2.0))

# we draw what would happen without any change to the bounding box
# 原始框绘制
print("BoundingBox without changes:")
ia.imshow(bb_bird.draw_on_image(image_larger, size=3))

# now the change it using project()
# 使用project扩充绘制框
print("BoundingBox with project(from, to):")
ia.imshow(bb_bird.project(from_shape=image.shape, to_shape=image_larger.shape).draw_on_image(image_larger, size=3))
BoundingBox without changes:
BoundingBox with project(from, to):

也可以用on方法绘制框
# and now we do the same two steps for BoundingBoxesOnImage, though here the method is called .on()
print("BoundingBoxesOnImage without changes:")
ia.imshow(bbsoi_bird.draw_on_image(image_larger, size=3))

print("BoundingBoxesOnImage with on(shape):")
ia.imshow(bbsoi_bird.on(image_larger.shape).draw_on_image(image_larger, size=3))
BoundingBoxesOnImage without changes:

BoundingBoxesOnImage with on(shape):


 1万+
1万+


 被折叠的 条评论
为什么被折叠?
被折叠的 条评论
为什么被折叠?
 到【灌水乐园】发言


