


Mybatis实战教程(mybatis in action)之六:Mybatis与 Spring4 MVC 集成例子
我的思维导图里的步骤如下:
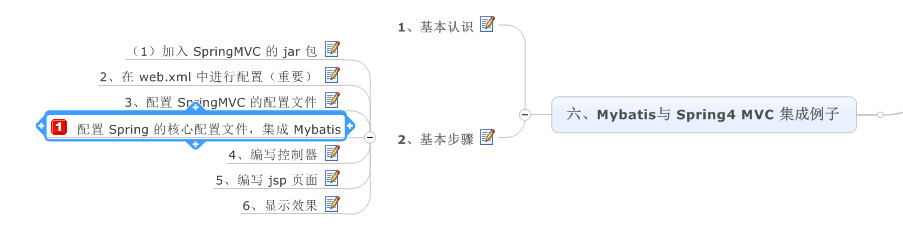
前面几篇文章已经讲到了 Mybatis 与 Spring 的集成。但这个时候,所有的工程还不是 web 工程,虽然我一直是创建的 web 工程。今天将直接用 Mybatis 与 SpringMvc 的方式集成起来。主要有以下几个方面的配置。
1、web.xml 配置 spring dispatchservlet ,比如为:mvc-dispatcher;
2、mvc-dispatcher-servlet.xml 文件配置;
3、spring 的 applicationContext.XML文件配置(与数据库相关,与mybatis sqlSessionFaction 整合,扫描所有mybatis mapper 文件等);
4、编写controller 类;
5、编写页面代码。
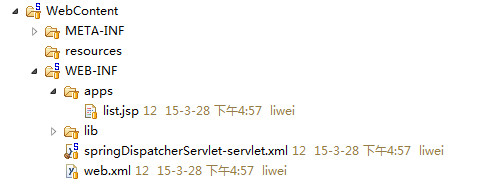
先有个大概映像,整个工程图如下:
1、Java 类和配置

2、服务器端 jsp 文件和配置
下面是具体的步骤:
1、web.xml 配置 springDispatcherServlet
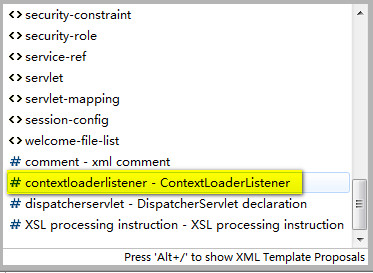
<!-- 可以用 sts 帮助我们生成这段代码 -->
    <!-- The front controller of this Spring Web application, responsible for handling all application requests -->
    <servlet>
        <servlet-name>springDispatcherServlet</servlet-name>
        <servlet-class>org.springframework.web.servlet.DispatcherServlet</servlet-class>
        <!-- <init-param>
            <param-name>contextConfigLocation</param-name>
            <param-value>location</param-value>
        </init-param> -->
        <load-on-startup>1</load-on-startup>
    </servlet>

    <!-- Map all requests to the DispatcherServlet for handling -->
    <servlet-mapping>
        <servlet-name>springDispatcherServlet</servlet-name>
        <url-pattern>/</url-pattern>
    </servlet-mapping>
2、在 web.xml 同目录下配置 springDispatcherServlet-servlet.xml 文件,这个文件命名“-”前面部分必须与你在 web.xml 里面配置的 DispatcherServlet 的 servlet 名字一致。其内容为:
<?xml version="1.0" encoding="UTF-8"?>
<beans xmlns="http://www.springframework.org/schema/beans"
    xmlns:xsi="http://www.w3.org/2001/XMLSchema-instance"
    xmlns:mvc="http://www.springframework.org/schema/mvc"
    xmlns:context="http://www.springframework.org/schema/context"
    xsi:schemaLocation="http://www.springframework.org/schema/mvc http://www.springframework.org/schema/mvc/spring-mvc-4.0.xsd
        http://www.springframework.org/schema/beans http://www.springframework.org/schema/beans/spring-beans.xsd
        http://www.springframework.org/schema/context http://www.springframework.org/schema/context/spring-context-4.0.xsd">

    <context:component-scan base-package="com.liwei.controller"></context:component-scan>
    <mvc:annotation-driven></mvc:annotation-driven>

    <!-- 检查一下这个片段是不是有写错 -->
    <mvc:resources location="/resources/" mapping="/resources/**"/>
    <mvc:default-servlet-handler/>

    <bean class="org.springframework.web.servlet.view.InternalResourceViewResolver">
        <!-- 前缀 -->
        <property name="prefix" value="/WEB-INF/apps/"></property>
        <!-- 后缀 -->
        <property name="suffix" value=".jsp"></property>
    </bean>

</beans>
3、在源码目录 config 目录下配置 Spring 配置文件 applicationContext.xml
<?xml version="1.0" encoding="UTF-8"?>
<beans xmlns="http://www.springframework.org/schema/beans"
xmlns:xsi="http://www.w3.org/2001/XMLSchema-instance"
xsi:schemaLocation="http://www.springframework.org/schema/beans http://www.springframework.org/schema/beans/spring-beans.xsd">
<!-- 可以考虑把下面配置的数据库连接信息写在一个属性文件(properties)里 -->
<!--本示例采用 DBCP 连接池,应预先把 DBCP 的 jar 包复制到工程的 lib 目录下。 -->
<bean id="dataSource" class="org.apache.commons.dbcp.BasicDataSource">
<property name="driverClassName" value="com.mysql.jdbc.Driver"/>
<property name="url" value="jdbc:mysql://127.0.0.1:3306/mybatisinaction?characterEncoding=utf8"/>
<property name="username" value="root"/>
<property name="password" value="123456"/>
<!-- 查这里配置的意思 -->
<!-- MaxActive,连接池的最大数据库连接数。设为0表示无限制。 -->
<property name="maxActive" value="10"></property>
<!-- maxIdle,最大空闲数,数据库连接的最大空闲时间。超过空闲时间,数据库连接将被标记为不可用,然后被释放。设为 0 表示无限制。 -->
<property name="maxIdle" value="10"></property>
<!-- 查这里配置的意思 -->
</bean>
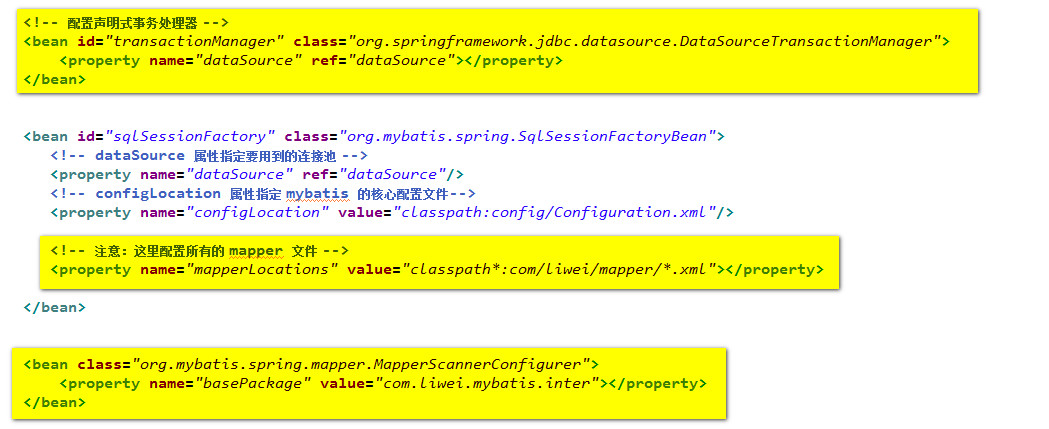
<!-- 配置声明式事务处理器 -->
<bean id="transactionManager" class="org.springframework.jdbc.datasource.DataSourceTransactionManager">
<property name="dataSource" ref="dataSource"></property>
</bean>
<bean id="sqlSessionFactory" class="org.mybatis.spring.SqlSessionFactoryBean">
<!-- dataSource 属性指定要用到的连接池 -->
<property name="dataSource" ref="dataSource"/>
<!-- configLocation 属性指定 mybatis 的核心配置文件-->
<property name="configLocation" value="classpath:config/Configuration.xml"/>
<!-- 注意:这里配置所有的 mapper 文件 -->
<property name="mapperLocations" value="classpath*:com/liwei/mapper/*.xml"></property>
</bean>
<bean class="org.mybatis.spring.mapper.MapperScannerConfigurer">
<property name="basePackage" value="com.liwei.mybatis.inter"></property>
</bean>
<!-- <bean id="userMapper" class="org.mybatis.spring.mapper.MapperFactoryBean">
sqlSessionFactory 属性指定要用到的 SqlSessionFactory 实例
<property name="sqlSessionFactory" ref="sqlSessionFactory" />
mapperInterface 属性指定映射器接口,用于实现此接口并生成映射器对象
<property name="mapperInterface" value="com.liwei.mybatis.inter.IUserOperation" />
</bean> -->
</beans>
4、编写控制器
package com.liwei.controller;

import java.util.List;

import org.springframework.beans.factory.annotation.Autowired;
import org.springframework.stereotype.Controller;
import org.springframework.web.bind.annotation.RequestMapping;
import org.springframework.web.servlet.ModelAndView;

import com.liwei.mybatis.inter.IUserOperation;
import com.liwei.mybatis.model.Article;
@Controller
@RequestMapping(value="/userController")
public class UserController {
    @Autowired
    private IUserOperation userMapper;

    // http://localhost:8080/Mybatis/userController/list
    @RequestMapping(value="/list")
    public ModelAndView listOne(){
        List<Article> articles = userMapper.getUserArticles(1);
        ModelAndView mav = new ModelAndView("list");
        return mav.addObject("articles",articles);
    }
}
5、编写 jsp 文件
<%@ page language="java" contentType="text/html; charset=UTF-8"
pageEncoding="UTF-8"%>
<%@taglib uri="http://java.sun.com/jsp/jstl/core" prefix="c"%>
<!DOCTYPE html PUBLIC "-//W3C//DTD HTML 4.01 Transitional//EN" "http://www.w3.org/TR/html4/loose.dtd">
<html>
<head>
<meta http-equiv="Content-Type" content="text/html; charset=UTF-8">
<title>Insert title here</title>
</head>
<body>
<table border="1">
<thead>
<tr>
<th>姓名</th>
<th>地址</th>
<th>作者年龄</th>
<th>文章标题</th>
<th>文章内容</th>
</tr>
</thead>
<tbody>
<c:forEach items="${articles}" var="a">
<tr>
<td>${a.user.userName}</td>
<td>${a.user.userAddress}</td>
<td>${a.user.userAge}</td>
<td>${a.title}</td>
<td>${a.content}</td>
</tr>
</c:forEach>
</tbody>
</table>
</body>
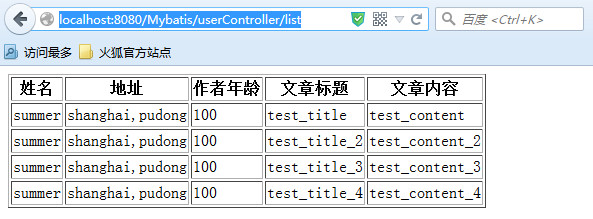
</html>6、测试
在浏览器中输入:
http://localhost:8080/Mybatis/userController/list显示:
当然还有 Mybatis 的Configure.xml 配置文件,与上一讲的差不多,唯一不同的就是不用再配置类似如下的: <mapper resource="com/yihaomen/mapper/User.xml"/> ,所有这些都交给 在配置 sqlSessionFactory 的时候,由 <property name="mapperLocations" value="classpath*:com/yihaomen/mapper/*.xml" /> 去导入了。


 16万+
16万+

 被折叠的 条评论
为什么被折叠?
被折叠的 条评论
为什么被折叠?
 到【灌水乐园】发言


