


Node.js ~ 从入门到入坑。
文章目录
进程 & 线程。
- 进程。
进程为程序的运行提供必备有环境。
进程就相当于工厂中的车间。
- 线程。
计算机中最小的计算单位,线程负责执行进程中的程序。
线程就相当于工厂中的工人。
Node.js。
Node.js 是一个能够在服务器端运行的 JavaScript 的开放源代码、跨平台 JavaScript 运行环境。
Node 采用 Google 开发的 V8 引擎运行代码,使用事件驱动、非阻塞和异步 I / O 模型等技术来提高性能,可优化应用程序的传输量和规模。
Node 在部分基本模块都用 JavaScript 编写。在 Node 出现之前,js 通常作为客户端设计语言使用,以 js 写出的程序常在用户浏览器上运行。
目前,Node 已被 IBM、Microsoft、Yahoo!、WaImart、Groupon、SAP、LinkedIn、Rakuten、PayPaIs、Voxer 和 GoDaddy 等企业采用。
- 传统的服务器都是多线程的。
每进来一个请求,就创建一个线程去处理请求。
- Node 的服务器是单线程的。
Node 处理请求时是单线程的。但是在后台有一个 I/O 线程池。
安装。
http://nodejs.cn/learn/how-to-install-nodejs
Hello, World.
geek@geek-PC:~/Desktop/nodejs$ vim hello.js
console.log('hello, Node');

var a = 123;
var b = 456;

console.log(a + b);
geek@geek-PC:~/Desktop/nodejs$ node hello.js
hello, Node
579
模块化。
如果程序设计的规模达到了一定程度,则必须对其进行模块化。
模块化可以有多种形式,但至少应该提供能够将代码分割为多个源文件的机制。
CommonJS 的模块功能可以帮我们解决该问题。
CommonJS。
CommonJS 规范的提出主要是为了弥补当前 js 没有标准的缺陷
CommonJS 规范为 js 指定了一个美好的愿景,希望 js 能够在任何地方运行
CommonJS 模块的定义十分简单。
模块引用。
模块定义。
模块标识。
- module_01.js。
/*
* 模块化。
* 在 node 中,一个 js 文件就是一个模块。
*
* 在 node 中,每一个 js 文件中的 js 代码都是独立运行在一个函数中的。
* 而不是全局作用域。
* */

console.log("我是一个模块。");

var x = 10;
var y = 20;

// 向外部暴露属性或方法。exports。

exports.x = "我是 module_01.js 中的 x。";
exports.y = '我是 y。'
- module_02.js。
// 引入其他的模块。

/*
* 在 node 中,通过 require() 函数来引入外部的模块。
* require() 可以传递一个文件的路径作为参数,node 将会自动根据该路径来引入外部模块。
* 如果使用相对路径,必须以 . 或 .. 开头。
*
* 使用 require() 引入模块,该函数会返回一个对象,这个对象代表的是引入的模块。
* */

var require1 = require("./module_01");/* 我是一个模块。*/

// console.log(x)/* ReferenceError: x is not defined*/
// console.log(require1.x)// undefined。

// exports.x = "我是 module_01.js 中的 x。";
// exports.y = '我是 y。'
console.log(require1.x);/* 我是 module_01.js 中的 x。*/
console.log(require1.y);/* 我是 y,*/
- math.js。
exports.add = function (a, b) {
    return a + b;
}

exports.mul = function (a, b) {
    return a * b;
}
var require1 = require('./math');

console.log(require1.add(1, 2))// 3
console.log(require1.mul(1, 2))// 2
模块标识。
使用 require() 引入外部模块时,使用的就是模块标识。可以通过模块标识来找到指定的模块。
核心模块。
由 node 引擎提供的模块。
核心模块的标识就是模块的名字。(不需要写路径)。
文件模块。
由用户自己创建的模块。
使用相对路径或绝对路径。
global。
/*
* 在 node 中有一个全局对象 global。
* 在全局中创建的变量都会作为 global 的属性保存。
* 在全局中创建的函数都会作为 global 的方法保存。
* */

// var a = 10;
// console.log(global.a);// undefined。

// a = 10;
// console.log(global.a);// 10。

var a = 10;

// arguments.callee
//    保存的是当前执行的函数对象。
console.log(arguments.callee + '');

// 用 function (exports, require, module, __filename, __dirname) {   } 包起来了。

///usr/bin/node /home/geek/WebstormProjects/untitled/01_node/global.js
// function (exports, require, module, __filename, __dirname) {
// /*
// * 在 node 中有一个全局对象 global。
// * 在全局中创建的变量都会作为 global 的属性保存。
// * 在全局中创建的函数都会作为 global 的方法保存。
// * */
//
// // var a = 10;
// // console.log(global.a);// undefined。
//
// // a = 10;
// // console.log(global.a);// 10。
//
// var a = 10;
//
// // arguments.callee
// //    保存的是当前执行的函数对象。
// console.log(arguments.callee + '')
//
// console.log(arguments);
// }

console.log(arguments);
/*
/usr/bin/node /home/geek/WebstormProjects/untitled/01_node/global.js
[Arguments] {
  '0': {},
  '1':
   { [Function: require]
     resolve: { [Function: resolve] paths: [Function: paths] },
     main:
      Module {
        id: '.',
        exports: {},
        parent: null,
        filename: '/home/geek/WebstormProjects/untitled/01_node/global.js',
        loaded: false,
        children: [],
        paths: [Array] },
     extensions:
      [Object: null prototype] { '.js': [Function], '.json': [Function], '.node': [Function] },
     cache:
      [Object: null prototype] {
        '/home/geek/WebstormProjects/untitled/01_node/global.js': [Module] } },
  '2':
   Module {
     id: '.',
     exports: {},
     parent: null,
     filename: '/home/geek/WebstormProjects/untitled/01_node/global.js',
     loaded: false,
     children: [],
     paths:
      [ '/home/geek/WebstormProjects/untitled/01_node/node_modules',
        '/home/geek/WebstormProjects/untitled/node_modules',
        '/home/geek/WebstormProjects/node_modules',
        '/home/geek/node_modules',
        '/home/node_modules',
        '/node_modules' ] },
  '3': '/home/geek/WebstormProjects/untitled/01_node/global.js',
  '4': '/home/geek/WebstormProjects/untitled/01_node' }

Process finished with exit code 0

*/
// arguments.callee
//    保存的是当前执行的函数对象。
console.log(arguments.callee + '');// [Function]

// 用 function (exports, require, module, __filename, __dirname) {   } 包起来了。

// 实际上模块中的代码都是包装在一个函数中执行的,并且在函数执行时传递给了 5 个实参。

/*
exports
    该对象将变量或函数暴露到外部。

require
    函数,引入外部的函数。

module
    当前模块本身。
    exports 就是 module 的属性。
    既可以使用 exports 导出,也可以使用 module.exports 导出。

__filename
    /home/geek/WebstormProjects/untitled/01_node/global.js

__dirname
    /home/geek/WebstormProjects/untitled/01_node
 */
exports v.s. module.exports。
(栈内存 v.s. 堆内存)。
exports 是对象。存在堆内存。
只能使用 . 的方式向外暴露内部变量。
module.exports 是对象的属性(变量)。存在堆内存。
既能使用 . 的方式,也可以通过直接赋值。
exports.name = '孙悟空';
exports.age = 18;
exports.sayName = function () {
    console.log('我是孙悟空。。。');
}
var hello = require('./helloModule');

console.log(hello.name);
// exports.name = '孙悟空';
// module.exports.name = '孙悟空';
// exports.age = 18;
// module.exports.age = 18;
// exports.sayName = function () {
// module.exports.sayName = function () {
//     console.log('我是孙悟空。。。');
// }

module.exports = {
    name: '猪八戒',
    age: 28,
    sayName: function () {
        console.log('我是猪八戒');
    }
}
包 package。
CommonJS 包规范允许我们将一组相关的模块组合到一起,形成一组完整的工具。
CommonJS 的包规范由包结构和包描述文件两个部分组成。
- 包结构。
用于组织包中的各种文件。
- 包描述文件。
描述包的相关信息,以供外部读取分析。
包结构。
-
package.json。
描述文件。 -
bin。
可执行二进制文件。 -
lib。
js 代码。 -
doc。
文档。 -
test。
单元测试。
npm~Node Package Manager。
(软件管家、Yum、apt、maven)。
geek@geek-PC:~$ npm -v
5.8.0

geek@geek-PC:~$ npm
npm WARN npm npm does not support Node.js v10.19.0
npm WARN npm You should probably upgrade to a newer version of node as we
npm WARN npm can't make any promises that npm will work with this version.
npm WARN npm Supported releases of Node.js are the latest release of 4, 6, 7, 8, 9.
npm WARN npm You can find the latest version at https://nodejs.org/

Usage: npm <command>

where <command> is one of:
    access, adduser, bin, bugs, c, cache, ci, completion,
    config, ddp, dedupe, deprecate, dist-tag, docs, doctor,
    edit, explore, get, help, help-search, i, init, install,
    install-test, it, link, list, ln, login, logout, ls,
    outdated, owner, pack, ping, prefix, profile, prune,
    publish, rb, rebuild, repo, restart, root, run, run-script,
    s, se, search, set, shrinkwrap, star, stars, start, stop, t,
    team, test, token, tst, un, uninstall, unpublish, unstar,
    up, update, v, version, view, whoami

npm <command> -h     quick help on <command>
npm -l           display full usage info
npm help <term>  search for help on <term>
npm help npm     involved overview

Specify configs in the ini-formatted file:
    /home/geek/.npmrc
or on the command line via: npm <command> --key value
Config info can be viewed via: npm help config

npm@5.8.0 /usr/share/npm
geek@geek-PC:~$

geek@geek-PC:~$ sudo n stable

  installing : node-v12.18.2
       mkdir : /usr/local/n/versions/node/12.18.2
       fetch : https://nodejs.org/dist/v12.18.2/node-v12.18.2-linux-x64.tar.xz
   installed : v12.18.2 (with npm 6.14.5)

Note: the node command changed location and the old location may be remembered in your current shell.
         old : /usr/bin/node
         new : /usr/local/bin/node
To reset the command location hash either start a new shell, or execute PATH="$PATH"
npm init。
geek@geek-PC:~/geek/npm_geek/helloNpm$ npm init
This utility will walk you through creating a package.json file.
It only covers the most common items, and tries to guess sensible defaults.
See `npm help init` for definitive documentation on these fields
and exactly what they do.
Use `npm install <pkg>` afterwards to install a package and
save it as a dependency in the package.json file.
Press ^C at any time to quit.
package name: (hellonpm) helloNpm
Sorry, name can no longer contain capital letters.
package name: (hellonpm) hello_npm
version: (1.0.0)
description: hello npm.
entry point: (index.js)
test command:
git repository:
keywords:
author: geek
license: (ISC)
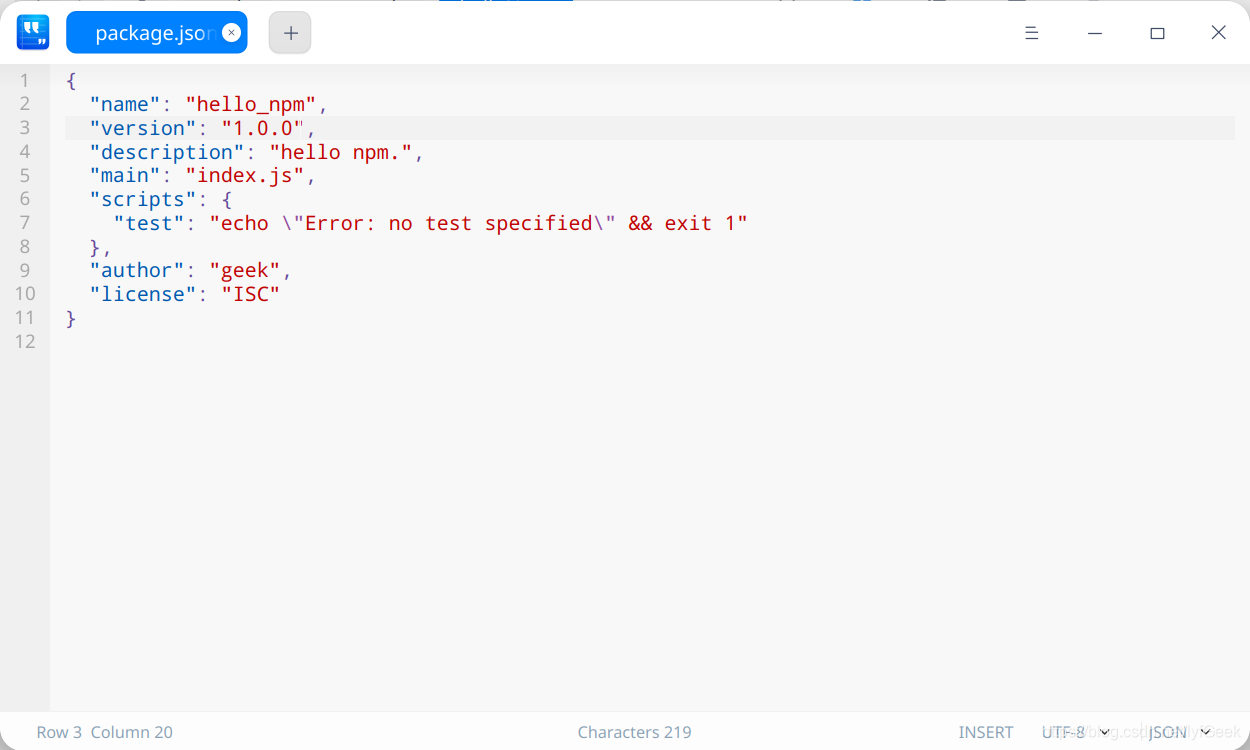
About to write to /home/geek/geek/npm_geek/helloNpm/package.json:
{
"name": "hello_npm",
"version": "1.0.0",
"description": "hello npm.",
"main": "index.js",
"scripts": {
"test": "echo \"Error: no test specified\" && exit 1"
},
"author": "geek",
"license": "ISC"
}
Is this OK? (yes)
geek@geek-PC:~/geek/npm_geek/helloNpm$ ls
package.json
geek@geek-PC:~/geek/npm_geek/helloNpm$
会自动生成一个 package.json。
此时可以下载其他包了。
geek@geek-PC:~/geek/npm_geek/helloNpm$ npm install math
npm notice created a lockfile as package-lock.json. You should commit this file.
npm WARN hello_npm@1.0.0 No repository field.

- math@0.0.3
added 1 package from 1 contributor and audited 1 package in 2.325s
found 0 vulnerabilities
geek@geek-PC:~/geek/npm_geek/helloNpm$ tree
.
├── node_modules
│   └── math
│       ├── AUTHORS
│       ├── Cakefile
│       ├── math.coffee
│       ├── math.js
│       └── package.json
├── package.json
└── package-lock.json

2 directories, 7 files
- 使用 Math。
geek@geek-PC:~/geek/npm_geek/helloNpm$ vim index.js
geek@geek-PC:~/geek/npm_geek/helloNpm$ cat index.js
let math = require('math');

console.log(math)
geek@geek-PC:~/geek/npm_geek/helloNpm$ node index.js
Object [Math] {
  samesign: [Function],
  copysign: [Function],
  add: [Function],
  sum: [Function],
  mul: [Function],
  prod: [Function],
  factorial: [Function],
  gcd: [Function],
  lcm: [Function]
}
geek@geek-PC:~/geek/npm_geek/helloNpm$ cat index.js
let math = require('math');

console.log(math);

console.log(math.add(111, 111));
geek@geek-PC:~/geek/npm_geek/helloNpm$ node index.js
Object [Math] {
  samesign: [Function],
  copysign: [Function],
  add: [Function],
  sum: [Function],
  mul: [Function],
  prod: [Function],
  factorial: [Function],
  gcd: [Function],
  lcm: [Function]
}
222
npm 命令。
- npm -v
查看 npm 的版本。- npm version
查看所有模块的版本。- npm search 包名
搜素包。- npm install / i 包名
安装包。- npm remove / r 包名
删除包。- npm install 包名 --save
安装包并添加到依赖中。(如果不加 --save,只是下载所需的包到本地,并没有加入项目 package.json 中的 dependencies)- npm install
下载当前项目所依赖的包。(根据 package.json 中的 dependencies)。- npm install 包名 -g
全局安装包。(一般把工具包下载到全局)。- npm install 包名 --registry=地址
从镜像源安装。- npm config set registry 地址
设置镜像源。
cnpm。
中国人自己的镜像服务器。
淘宝 NPM 镜像。
这是一个完整 npmjs.org 镜像,你可以用此代替官方版本(只读),同步频率目前为 10 分钟 一次以保证尽量与官方服务同步。
https://developer.aliyun.com/mirror/NPM?from=tnpm
使用说明。
你可以使用我们定制的 cnpm (gzip 压缩支持) 命令行工具代替默认的 npm:
$ npm install -g cnpm --registry=https://registry.npm.taobao.org
或者你直接通过添加 npm 参数 alias 一个新命令:
alias cnpm="npm --registry=https://registry.npm.taobao.org \
--cache=$HOME/.npm/.cache/cnpm \
--disturl=https://npm.taobao.org/dist \
--userconfig=$HOME/.cnpmrc"

# Or alias it in .bashrc or .zshrc
$ echo '\n#alias for cnpm\nalias cnpm="npm --registry=https://registry.npm.taobao.org \
  --cache=$HOME/.npm/.cache/cnpm \
  --disturl=https://npm.taobao.org/dist \
  --userconfig=$HOME/.cnpmrc"' >> ~/.zshrc && source ~/.zshrc
node 搜索包。
通过 npm 下载的包都放到 node_module 文件夹中。
node 在使用模块名来引入模块时,会首先在当前目录的 node_modules 中寻找是否含有该模块。
如果有则直接使用,如果没有则去上一级目录的 node_modules中寻找。
如果有则直接使用,如果没有则再去上一级目录寻找,知道找到为止。
知道找到磁盘的根目录,如果依然没有则报错。
buffer。
Buffer 缓冲区。
Buffer 的结构和数组很像,操作的方法也和数组类似。
数组中不能存储二进制文件,而 buffer 就是专门用来存储二进制数据的。
从结构上看 Buffer 非常像一个数组,ta 的元素为十六进制的两位数。
实际上一个元素就表示内存中的一个字节。
实际上 Buffer 中的内存不是通过 JavaScript 分配的,而是在底层通过 C++ 申请的。
我们可以直接通过 Buffer 来创建内存中的空间。
/*
    Buffer 缓冲区。
        Buffer 的结构和数组很像,操作的方法也和数组类似。
        数组中不能存储二进制文件,而 buffer 就是专门用来存储二进制数据的。
*/

let str = '李';

// 将一个字符串保存到 buffer 中。
let buf = Buffer.from(str);

console.log(buf);
// <Buffer 48 65 6c 6c 6f 20 47 65 65 6b>

// let str = 'Hello Geek';
// console.log(str.length);// 10。占用内存的大小。
// console.log(buf.length);// 10。字符串的长度。

// let str = '李';
console.log(str.length);// 1。占用内存的大小。
console.log(buf.length);// 3。字符串的长度。

// buffer 中存储的都是二进制数据。
// 计算机显示十六进制数据。
// buffer 中的每一个元素的范围是 00 - ff(0 ~ 255) 00000000 ~ 11111111。
// 创建指定大小的 buffer。
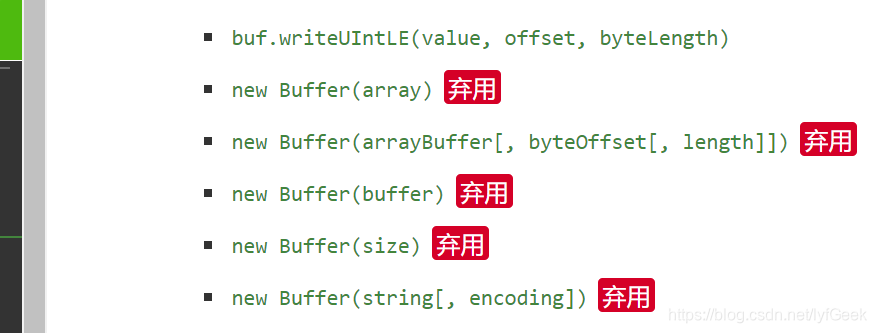
// let buffer = new Buffer(10);
// console.log(buffer.length);
// 构造函数不推荐使用。
let buf2 = Buffer.alloc(10);
console.log(buf2);
// <Buffer 00 00 00 00 00 00 00 00 00 00>
let buf3 = Buffer.allocUnsafe(10);
console.log(buf3);
// <Buffer 01 00 00 00 00 00 00 00 2e e1>
let buf4 = Buffer.from('我是一段文本数据');
console.log(buf4);
console.log(buf4.toString());
// <Buffer e6 88 91 e6 98 af e4 b8 80 e6 ae b5 e6 96 87 e6 9c ac e6 95 b0 e6 8d ae>
// 我是一段文本数据
fs ~ 文件系统。
服务器的本质就是将本地的文件发送给远程的客户端。
const fs = require(‘fs’);
fs 中所有的操作都有两种形式可供选择。同步和异步。
同步 fs 会阻塞程序的执行,也就是除非操作完毕,否则不会向下执行代码。
异步文件系统不会阻塞程序的执行,而是在操作完成时,通过回调函数将结果返回。
文件的写入。
同步。
/*
    同步文件写入。
    文件的打开。
        fs.openSync(path, flags[, mode])
            flags。
                r 只读的。
                w 可写的。
            mode    设置文件的操作权限。

        返回一个文件的描述符作为结果。我们可以通过该描述符来对文件进行各种操作。

    向文件写入内容。
        fs.writeSync(fd, buffer[, offset[, length[, position]]])
            fd。要写入文件的文件描述符。
            buffer。写入内容。
    保存并关闭文件。
*/

let fs = require('fs');

// 打开文件。
let fd = fs.openSync('hello.txt', 'w');

console.log(fd);// 17

// 向文件写入内容。
fs.writeSync(fd, '你好。')

// 关闭文件。
fs.closeSync(fd);
异步。
/**
 * 异步文件写入。
 * fs.open(path[, flags[, mode]], callback)
 * 异步调用的方法。结果都是通过回调函数的参数返回的。
 * 回调函数的两个参数。
 *      err ~ 错误对象,如果没有错误则为 null。
 *      id ~ 文件的描述符。
 *
 *
 */

let fs = require('fs');

let f;

// 打开文件。。
fs.open('hello2.txt', 'w', function (err, fd) {
    console.log('回调函数中的代码。')
    console.log(arguments);
    // [Arguments] { '0': null, '1': 17 }
    if (!err) {
        // console.log(fd);
        f = fd;
    } else {
        console.log(err);
    }

})

console.log('open 后的代码。')

// open 后的代码。
// 回调函数中的代码。
// [Arguments] { '0': null, '1': 17 }
/**
 * 异步文件写入。
 * fs.open(path[, flags[, mode]], callback)
 * 异步调用的方法。结果都是通过回调函数的参数返回的。
 * 回调函数的两个参数。
 *      err ~ 错误对象,如果没有错误则为 null。
 *      id ~ 文件的描述符。
 *
 *
 */

let fs = require('fs');

let f;

// 打开文件。。
fs.open('hello2.txt', 'w', function (err, fd) {
    console.log('回调函数中的代码。')
    console.log(arguments);
    // [Arguments] { '0': null, '1': 17 }
    if (!err) {
        // console.log(fd);
        // f = fd;

        fs.write(fd, '这是异步写入的内容。', function (err) {
            if (!err) {
                console.log('写入成功。')
            }

            // 关闭文件。
            fs.close(fd, function (err) {
                if (!err) {
                    console.log('文件已关闭。');
                }
            });
        });

    } else {
        console.log(err);
    }

})

console.log('open 后的代码。')

// open 后的代码。
// 回调函数中的代码。
// [Arguments] { '0': null, '1': 17 }
简单文件写入。
/*
    简单文件写入。
    fs.writeFile(file, data[, options], callback)
    fs.writeFileSync(file, data[, options])
        - file 要操作的文件路径。
        - data 要写入的数据。
        - options 选项,可以对写入进行一些设置。
        - callback 当写入完成后执行的函数。
 */


let fs = require('fs');

fs.writeFile('hello3.txt', '这是通过 writeFile(); 写入的内容。', function (err) {
    if (!err) {
        console.log('写入成功。');
    }
})
流式文件写入。
/*
    同步、异步、简单文件的写入不适合大文件的写入,性能较差,容易导致内存溢出。
*/

let fs = require('fs');

// 流式文件写入。
// 创建一个可写流。
/*
    fs.createWriteStream(path[, options])
    创建一个可写流。
*/

let ws = fs.createWriteStream('hello3.txt');

// 通过监听流的 open 和 close 事件来监听流的打开和关闭。
/*
    on(事件字符串,回调函数)
        可以为对象绑定一个事件。

    once(事件字符串,回调函数)
        可以为对象绑定一个一次性的事件,该事件将会在触发一次后自动失效。
 */
ws.once('open', function () {
    console.log('流打开了。');
});
ws.once('close', function () {
    console.log('流关闭了。');
});

// 通过 ws 向文件中输出内容。
ws.write('通过可写流写入文件的内容。');
ws.write('锄禾日当午。');
ws.write('通过可写流写入文件的内容。');
ws.write('通过可写流写入文件的内容。');
ws.write('通过可写流写入文件的内容。');

// 关闭流。
// ws.close();
ws.end();
简单文件读取。
let fs = require('fs');

fs.readFile('hello3.txt', function (err, data) {
    if (!err) {
        console.log(data);
        // <Buffer e9 80 9a e8 bf 87 e5 8f af e5 86 99 e6 b5 81 e5 86 99 e5 85 a5 e6 96 87 e4 bb b6 e7 9a 84 e5 86 85 e5 ae b9 e3 80 82 e9 94 84 e7 a6 be e6 97 a5 e5 bd ... 124 more bytes>
        console.log(data.toString());
        // 通过可写流写入文件的内容。锄禾日当午。通过可写流写入文件的内容。通过可写流写入文件的内容。通过可写流写入文件的内容。

        // 将 data 写入到文件。
        fs.writeFile('hello.jpg', data, function (err) {
            if (!err) {
                console.log('文件写入成功。')
            }
        })
    }
})
流式文件读取。
let fs = require('fs');

// 创建一个可读流。
let rs = fs.createReadStream('a.jpg');
// 创建一个可写流。
let ws = fs.createWriteStream('b.jpg');

// 监听流的开启和关闭。
rs.once('open', function () {
    console.log('可读流打开了。')
})
rs.once('close', function () {
    console.log('可读流关闭了。')
    // 数据读取完毕,关闭可写流。
    ws.end();
})

// 监听流的开启和关闭。
ws.once('open', function () {
    console.log('可写流打开了。')
})
ws.once('close', function () {
    console.log('可写流关闭了。')
})


// 如果要读取一个可读流中的数据,必须要为可读流绑定一个 data 事件,data 事件绑定完成,ta 会自动开始读取数据。
rs.on('data', function (data) {
    // console.log(data);
    // 将读取到的数据写入到可写流中。
    ws.write(data);
})


/*
/usr/local/bin/node /home/geek/WebstormProjects/untitled/02_文件系统。/流式文件读取。.js
可读流打开了。
<Buffer ff d8 ff e0 00 10 4a 46 49 46 00 01 01 00 00 01 00 01 00 00 ff db 00 43 00 01 01 01 01 01 01 01 01 01 01 01 01 01 01 01 01 01 01 01 01 01 01 01 01 01 ... 39606 more bytes>
可读流关闭了。

Process finished with exit code 0
 */
let fs = require('fs');

// 创建一个可读流。
let rs = fs.createReadStream('a.jpg');
// 创建一个可写流。
let ws = fs.createWriteStream('b.jpg');

// 监听流的开启和关闭。
rs.once('open', function () {
    console.log('可读流打开了。')
})
rs.once('close', function () {
    console.log('可读流关闭了。')
    // 数据读取完毕,关闭可写流。
    // ws.end();
})

// 监听流的开启和关闭。
ws.once('open', function () {
    console.log('可写流打开了。')
})
ws.once('close', function () {
    console.log('可写流关闭了。')
})

// 将可读流中的内容直接输出到可写流中。
rs.pipe(ws);


 717
717


 被折叠的 条评论
为什么被折叠?
被折叠的 条评论
为什么被折叠?
 到【灌水乐园】发言


