前边简单介绍了Maven,而Maven默认提供的中央仓库是在远程网络服务Appache提供的,这对于我们开发时不合理的。如果我们没网了或者什么情况,我们怎么办?也就是说我们队中央仓库的依赖性太大。而Nexus私服则可以解决我们这个问题。先看下这张图应该大家就非才明白了:
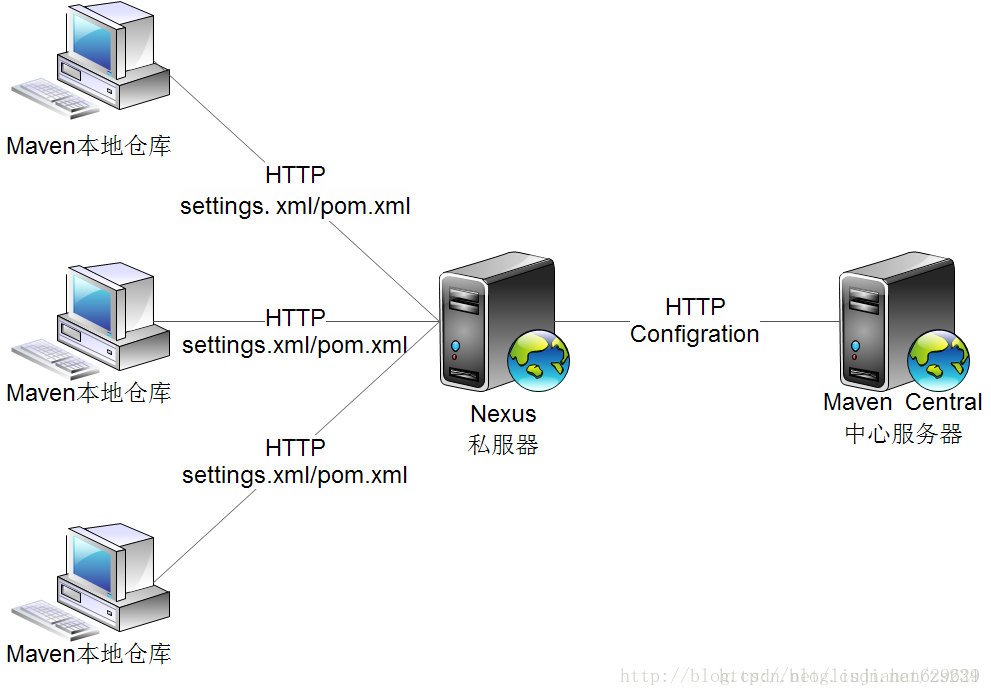
这样就相当于在我们本地的局域网搭建了一个类似中央仓库的服务器,我们开始将中央仓库的一些资料下载到私服务器上,然后平时我们的maven项目就是直接访问局域网内的私服即可,既节省了网络带宽也会加速项目搭建的进程,这样对我们开发来说,对公司来说都是非常好的选择。下边简单看一下Nexus私服的简单使用:
1、Nexus下载
下载地址:http://www.sonatype.org/nexus/go
2、Nexus启动
我下载的是zip包,解压后进入\nexus-2.1.2-bundle\nexus-2.1.2\bin\jsw\,根据操作系统类型选择文件夹,我选的是windows-x86-32文件夹,进入后可看到如下所示bat文件。
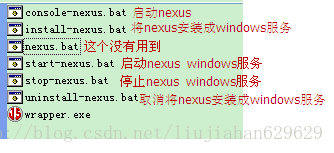
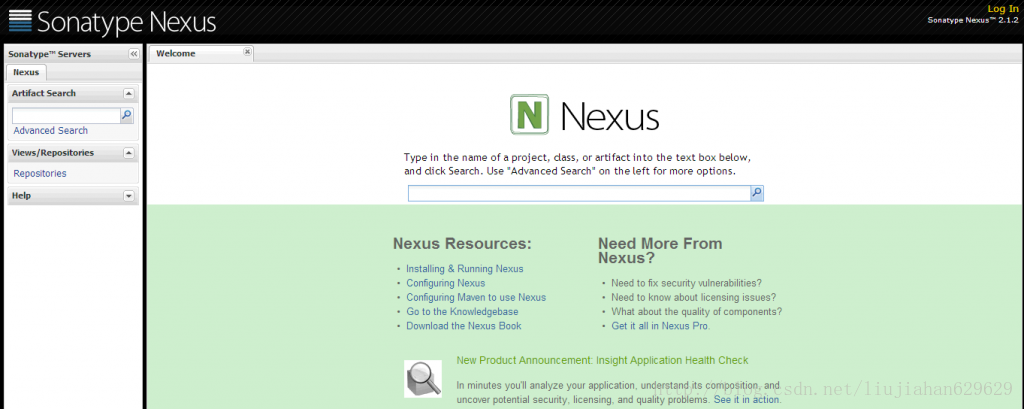
双击console-nexus.bat运行。游览器中输入http://127.0.0.1:8081/nexus/,出现如下图所示就代表nexus已经启动成功。
8081为默认的端口号,要修改端口号可进入nexus-2.1.2-bundle\nexus-2.1.2\conf\打开nexus.properties文件,修改application-port属性值就可以了。
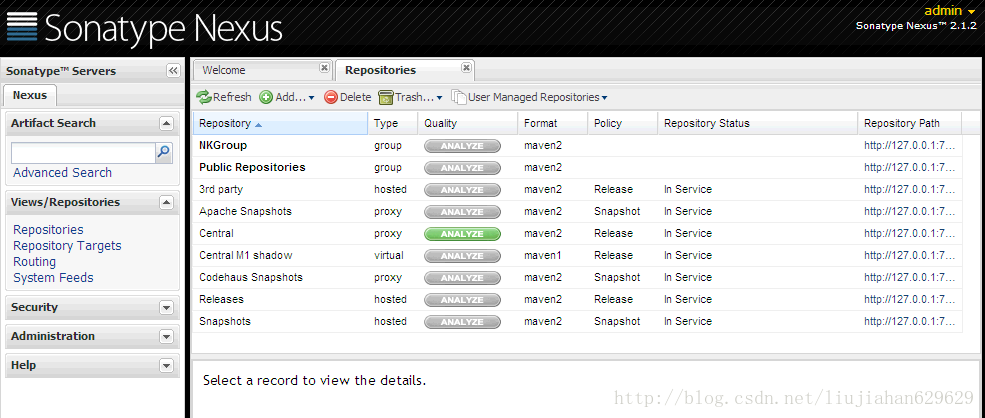
默认的用户名和密码:admin/admin123,登录后看到如下图所示:
3、Nexus仓库
nexus的仓库类型分为以下四种:
group: 仓库组
hosted:宿主
proxy:代理
virtual:虚拟
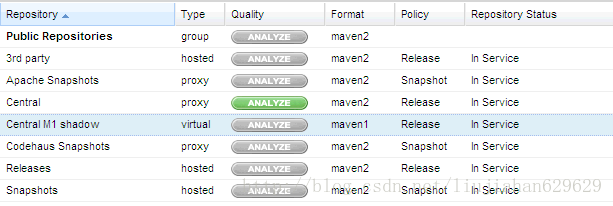
首次登陆nexus后可以看到以下一个仓库组和多个仓库。
PublicRepositories: 仓库组
3rd party: 无法从公共仓库获得的第三方发布版本的构件仓库
Apache Snapshots: 用了代理ApacheMaven仓库快照版本的构件仓库
Central: 用来代理maven中央仓库中发布版本构件的仓库
Central M1 shadow: 用于提供中央仓库中M1格式的发布版本的构件镜像仓库
Codehaus Snapshots: 用来代理CodehausMaven 仓库的快照版本构件的仓库
Releases: 用来部署管理内部的发布版本构件的宿主类型仓库
Snapshots:用来部署管理内部的快照版本构件的宿主类型仓库
4、配置nexus
4.1、开启远程索引
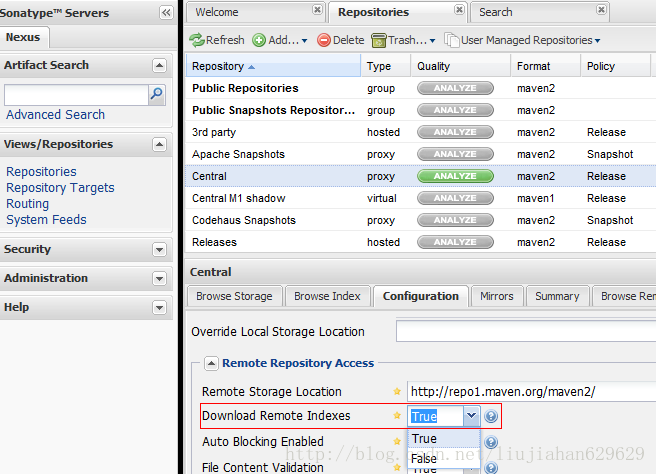
新搭建的neuxs环境只是一个空的仓库,需要手动和远程中心库进行同步,nexus默认是关闭远程索引下载,最重要的一件事情就是开启远程索引下载。登陆nexus系统,默认用户名密码为admin/admin123。
点击左边Administration菜单下面的Repositories,找到右边仓库列表中的三个仓库Apache Snapshots,Codehaus Snapshots和Maven Central,然后再没有仓库的configuration下把Download Remote Indexes修改为true。如下图
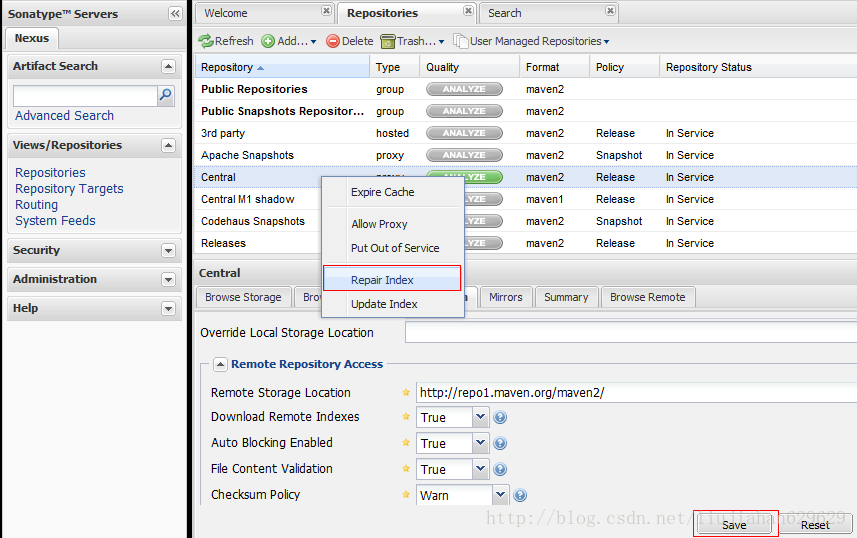
然后在Apache Snapshots,Codehaus Snapshots和Maven Central这三个仓库上分别右键,选择Repari Index,这样Nexus就会去下载远程的索引文件。
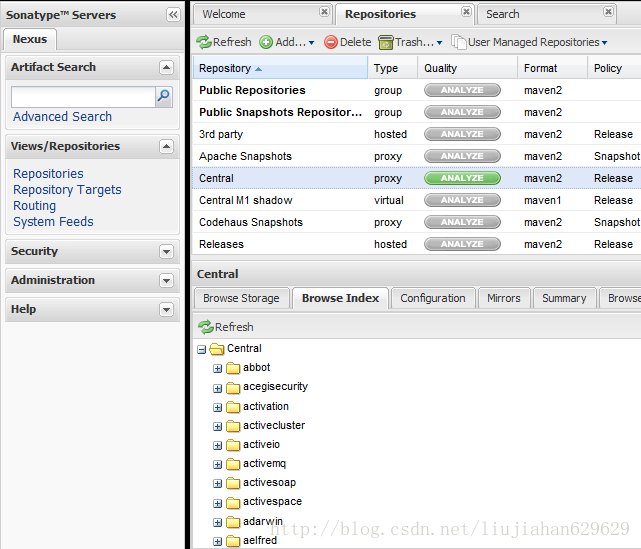
这样设置以后, Nexus会自动从远程中央仓库下载索引文件, 为了检验索引文件自动下载是否生效,可以却换到Browse Index
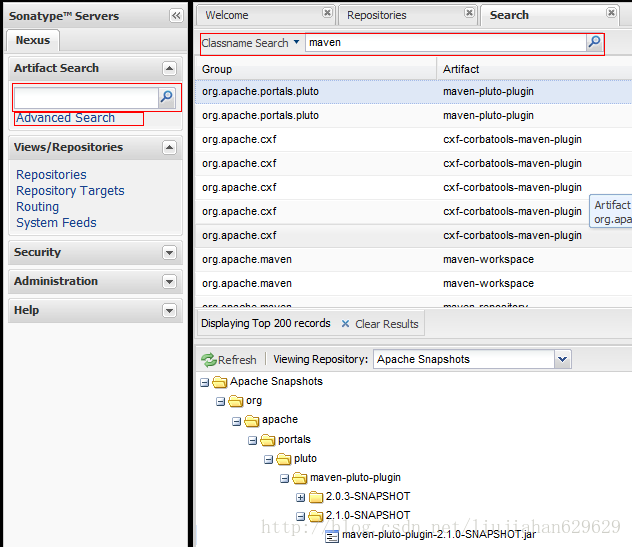
在左边菜单栏里面有个Artifact Search, 在输入框里面输入你想要搜索的构件名字,比如:maven, 那么查询结果如下:
4.2建立宿主仓库
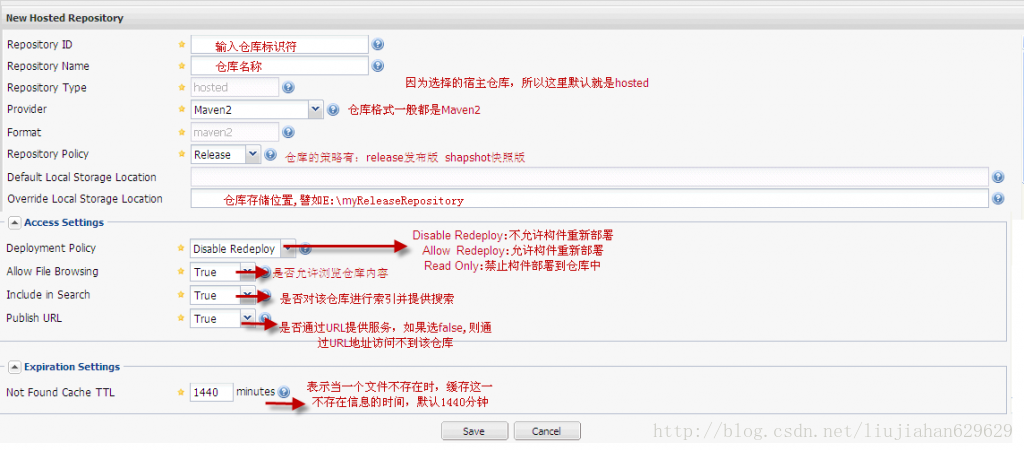
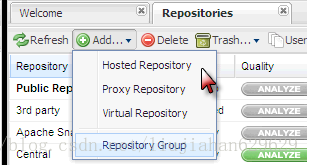
新 建公司的内部仓库,步骤为Repositories –> Add –>Hosted Repository,在页面的下半部分输入框中填入Repository ID和Repository Name即可,比如分别填入zfy 和 zfy repostiory,另外把Deployment Policy设置为Allow Redeploy,点击save就创建完成了。
这里我点击添加宿主类型的仓库,在仓库列表的下方会出现新增仓库的配置,如下所示:
点击save按钮后就会在仓库列表中看到刚才新增的仓库。
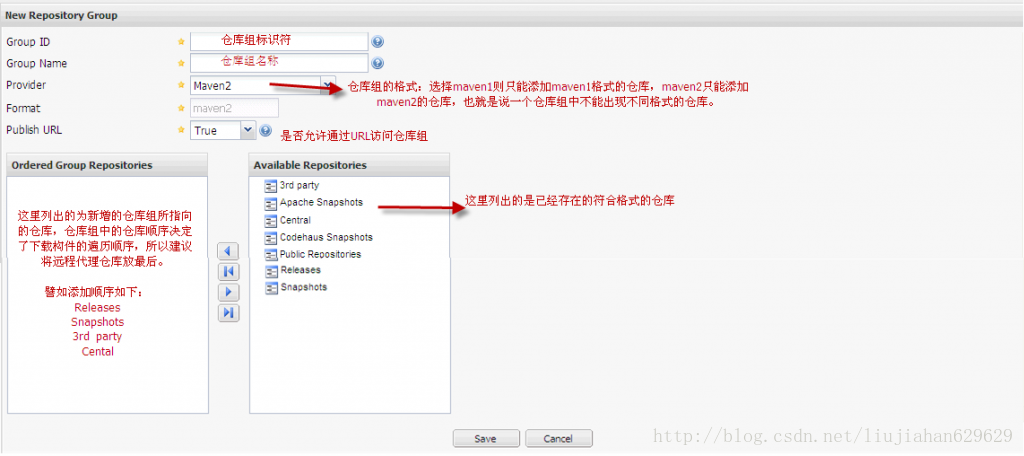
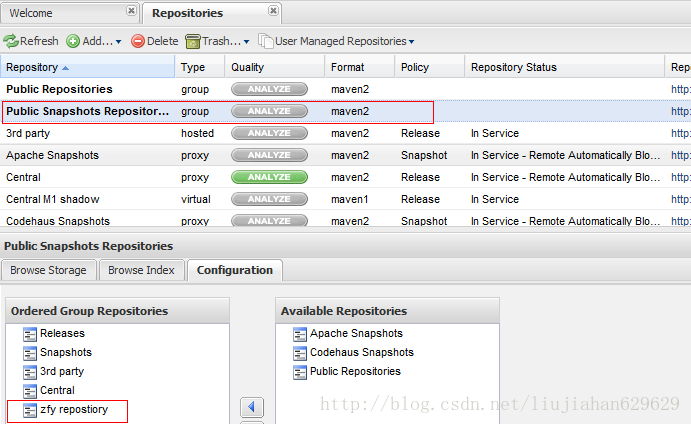
4.3、创建Nexus仓库组
Nexus 中仓库组的概念是Maven没有的,在Maven看来,不管你是hosted也好,proxy也好,或者group也好,对我都是一样的,我只管根据 groupId,artifactId,version等信息向你要构件。为了方便Maven的配置,Nexus能够将多个仓库,hosted或者 proxy合并成一个group,这样,Maven只需要依赖于一个group,便能使用所有该group包含的仓库的内容。
neuxs- 1.9.2.3中默认自带了一个名为“Public Repositories”组,点击该组可以对他保护的仓库进行调整,把刚才建立的公司内部仓库zfy repostiory加入其中,这样就不需要再在maven中明确指定内部仓库 的地址了。同时创建一个Group ID为public-snapshots、Group Name为Public SnapshotsRepositories的组,把Apache Snapshots、Codehaus Snapshots、Snapshots和zfy repostiory加入其中。
到这里neuxs的安装配置就完成了,下面介绍如何在maven中使用自己的私服。
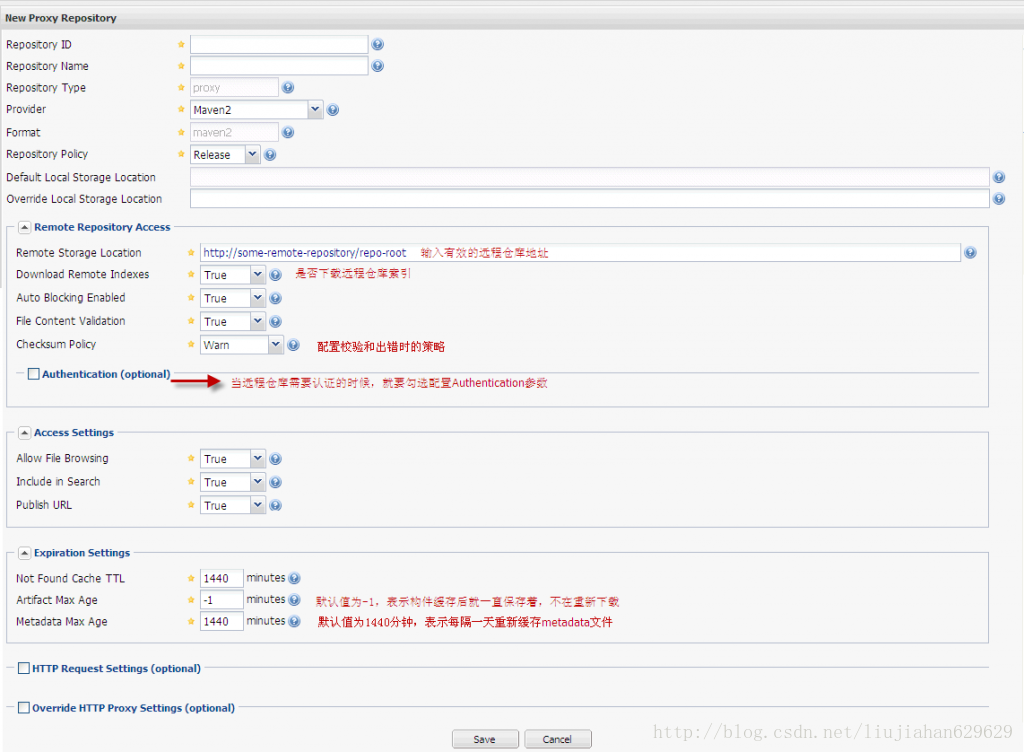
4.4、创建Nexus代理仓库
点击菜单栏上的Add按钮后选择Proxy Repository,看到如下所示配置界面:
5、settings.xml的配置
- <span style="font-size:18px;">1. <?xml version="1.0" encoding="UTF-8"?>
- 2. <settings xmlns="http://maven.apache.org/SETTINGS/1.0.0"
- 3. xmlns:xsi="http://www.w3.org/2001/XMLSchema-instance"
- 4. xsi:schemaLocation="http://maven.apache.org/SETTINGS/1.0.0 http://maven.apache.org/xsd/settings-1.0.0.xsd">
- 5.
- 6. <pluginGroups></pluginGroups>
- 7. <proxies></proxies>
- 8.
- 9. <servers>
- 10. <server>
- 11. <id>nexus-releases</id>
- 12. <username>admin</username>
- 13. <password>admin123</password>
- 14. </server>
- 15. <server>
- 16. <id>nexus-snapshots</id>
- 17. <username>admin</username>
- 18. <password>admin123</password>
- 19. </server>
- 20. </servers>
- 21.
- 22. <mirrors>
- 23. <mirror>
- 24. <id>nexus-releases</id>
- 25. <mirrorOf>*</mirrorOf>
- 26. <url>http://localhost:8081/nexus/content/groups/public</url>
- 27. </mirror>
- 28. <mirror>
- 29. <id>nexus-snapshots</id>
- 30. <mirrorOf>*</mirrorOf>
- 31. <url>http://localhost:8081/nexus/content/groups/public-snapshots</url>
- 32. </mirror>
- 33. </mirrors>
- 34.
- 35. <profiles>
- 36. <profile>
- 37. <id>nexus</id>
- 38. <repositories>
- 39. <repository>
- 40. <id>nexus-releases</id>
- 41. <url>http://nexus-releases</url>
- 42. <releases><enabled>true</enabled></releases>
- 43. <snapshots><enabled>true</enabled></snapshots>
- 44. </repository>
- 45. <repository>
- 46. <id>nexus-snapshots</id>
- 47. <url>http://nexus-snapshots</url>
- 48. <releases><enabled>true</enabled></releases>
- 49. <snapshots><enabled>true</enabled></snapshots>
- 50. </repository>
- 51. </repositories>
- 52. <pluginRepositories>
- 53. <pluginRepository>
- 54. <id>nexus-releases</id>
- 55. <url>http://nexus-releases</url>
- 56. <releases><enabled>true</enabled></releases>
- 57. <snapshots><enabled>true</enabled></snapshots>
- 58. </pluginRepository>
- 59. <pluginRepository>
- 60. <id>nexus-snapshots</id>
- 61. <url>http://nexus-snapshots</url>
- 62. <releases><enabled>true</enabled></releases>
- 63. <snapshots><enabled>true</enabled></snapshots>
- 64. </pluginRepository>
- 65. </pluginRepositories>
- 66. </profile>
- 67. </profiles>
- 68.
- 69. <activeProfiles>
- 70. <activeProfile>nexus</activeProfile>
- 71. </activeProfiles>
- 72.
- 73. </settings>
- </span>
6、 maven 项目 的pom.xml配置
- <span style="font-size:18px;">1. <pre class="html" name="code"> <distributionManagement>
- 2.
- 3. <repository>
- 4. <id>nexus-releases</id>
- 5. <name>Nexus Release Repository</name>
- 6. <url>http://localhost:8081/nexus/content/repositories/releases</url>
- 7. </repository>
- 8. <snapshotRepository>
- 9. <id>nexus-snapshots</id>
- 10. <name>Nexus Snapshot Repository</name>
- 11. <url>http://localhost:8081/nexus/content/repositories/snapshots</url>
- 12. </snapshotRepository>
- 13. </distributionManagement></pre><pre class="html" name="code"> </pre><pre class="html" name="code">8、mvn:deploy命令上传包,会发现下载路径必不是中央库的路径,而是nexus里面的仓库组路径。这个说明配置环境成功。</pre><pre class="html" name="code"><img alt="" src="https://img-my.csdn.net/uploads/201301/10/1357787083_3866.png"><img alt="" src="https://img-my.csdn.net/uploads/201301/10/1357787109_8992.png"></pre><pre class="html" name="code"> </pre>
- 14. <pre></pre>
- 15. <pre></pre>
- </span>
嗯,以后部分是来自网络资料,总而言之知道了其中的原理,Nexus只不过是一个工具而已,我们搭建使用实践即可。学习中……


 1092
1092

 被折叠的 条评论
为什么被折叠?
被折叠的 条评论
为什么被折叠?
 到【灌水乐园】发言


