


Android App组件之Fragment说明和示例
1 Fragement介绍
Android从3.0开始引入Fragment,主要是为了支持更动态更灵活的界面设计。
Fragment是activity的界面中的一部分或一种行为。你可以把多个Fragment们组合到一个activity中来创建一个多面界面,你也可以在多个activity中重用一个Fragment。你可以把Fragment认为模块化的一段activity,它具有自己的生命周期,接收它自己的事件,并可以在activity运行时被添加或删除。
需要注意的是:Fragment不能独立存在,它必须嵌入到activity中,而且Fragment的生命周期直接受所在的activity的影响。例如:当activity暂停时,它拥有的所有的Fragment们都暂停了,当activity销毁时,它拥有的所有Fragment们都被销毁。
2 Fragment生命周期

3 Fragment实现方法
一般情况下,fragment把它的layout作为activitiy的loyout的一部分合并到activity中,有两种方法将一个fragment添加到activity中。
方法1:在activity的layout.xml文件中声明fragment
下面以一个应用实例来说明方法1。应用实例要求:创建一个activity,activity中包含Fragment。
layout文件fragment_layout_test.xml的代码如下:
<LinearLayout xmlns:android="http://schemas.android.com/apk/res/android"
    xmlns:tools="http://schemas.android.com/tools"
    android:layout_width="match_parent"
    android:layout_height="match_parent"
    android:orientation="vertical" >


   <fragment android:name="com.skywang.app.FragmentLayoutTest$ExampleFragment"
        android:id="@+id/list"
        android:layout_weight="1"
        android:layout_width="match_parent"
        android:layout_height="match_parent"/>

</LinearLayout>
说明:
(01) 该layout仅仅只包含了一个fragment元素。
(02) fragment的属性 android:name="com.skywang.app.FragmentLayoutTest$ExampleFragment" 。意思是该layout包含一个fragment,这个fragment是定义在包名为"com.skywang.app"中类"FragmentLayoutTest""的内部类"ExampleFragment"中的。
FragmentLayoutTest.java的代码如下:
package com.skywang.app;

import android.os.Bundle;
import android.app.Activity;
import android.view.View;
import android.view.ViewGroup;
import android.view.LayoutInflater;
import android.widget.TextView;
import android.app.Fragment;

public class FragmentLayoutTest extends Activity {

    @Override
    protected void onCreate(Bundle savedInstanceState) {
        super.onCreate(savedInstanceState);
        // fragment_layout_test只包括ExampleFragment对象。
        setContentView(R.layout.fragment_layout_test);
    }

    // 继承与Fragment
    public static class ExampleFragment extends Fragment {
        @Override
        public View onCreateView(LayoutInflater inflater, ViewGroup container,
                                 Bundle savedInstanceState) {

            return inflater.inflate(R.layout.example_fragment, container, false);
        }
    }
}
说明:
(01) FragmentLayoutTest通过 setContentView(R.layout.fragment_layout_test) 来调用fragment_layout_test.xml来作为布局文件。
(02) 而上面的fragment_layout_test.xml布局文件仅仅值包括1个Fragment,该Fragment是通过ExampleFragment实现的。
(03) ExampleFragment继承于Fragment,在onCreateView()方法中通过 return inflater.inflate(R.layout.example_fragment, container, false); 来将example_fragment.xml作为其布局文件。
所以,相当于FragmentLayoutTest直接调用example_fragment.xml来显示。那为什么要费这么大劲,非要用到Fragment呢?原因是因为Fragment的可扩展性,它能作为一个独立的显示单元添加到activity中。本文仅仅只是为了说明fragment的layout实现方法;实际应用中,可能比这复杂很多。
layout文件example_fragment.xml的代码如下:
<LinearLayout xmlns:android="http://schemas.android.com/apk/res/android"
    xmlns:tools="http://schemas.android.com/tools"
    android:layout_width="match_parent"
    android:layout_height="match_parent"
    android:orientation="vertical" >

    <TextView
        android:text="@string/example_fragment"
        android:layout_width="wrap_content"
        android:layout_height="wrap_content"/>

</LinearLayout>
说明:
(01) 采用LinearLayout线性布局,仅仅显示一个TextView。
点击下载:源代码
效果图:

方法2:在activity的layout.xml文件中声明包含
下面以一个应用实例来说明方法1。应用实例要求:创建一个activity,activity中包含一个Fragment,该Fragment采用动态加载的方式。
FragmentTransactionTest的代码:
package com.skywang.app;

import android.os.Bundle;
import android.view.LayoutInflater;
import android.view.View;
import android.view.ViewGroup;
import android.app.Activity;
import android.app.Fragment;
import android.app.FragmentManager;
import android.app.FragmentTransaction;

public class FragmentTransactionTest extends Activity {

    @Override
    protected void onCreate(Bundle savedInstanceState) {
        super.onCreate(savedInstanceState);
        setContentView(R.layout.fragment_transaction_test);

        // 获取FragmentManager
        FragmentManager fragmentManager = getFragmentManager();
        // 获取FragmentTransaction
        FragmentTransaction fragmentTransaction = fragmentManager.beginTransaction();

        // 获取ExampleFragment
        ExampleFragment fragment = new ExampleFragment();
        // 将fragment添加到容器about_fragment_container中
        fragmentTransaction.add(R.id.about_fragment_container, fragment);
        fragmentTransaction.commit();
    }

    // 继承与Fragment
    public static class ExampleFragment extends Fragment {
        @Override
        public View onCreateView(LayoutInflater inflater, ViewGroup container,
                                 Bundle savedInstanceState) {

            return inflater.inflate(R.layout.example_fragment, container, false);
        }
    }
}
说明:
(01) 在onCreate()中该activit调用fragment_transaction_test作为其布局文件。
(02) 在onCreate()中,通过获取FragmentManager和FragmentTransaction,来将ExampleFragment对象添加到R.id.about_fragment_container中,about_fragment_container是一个Fragment。
(03) ExampleFragment的onCreateView()中,将example_fragment作为其布局文件。
fragment_transaction_test.xml的代码:
<LinearLayout xmlns:android="http://schemas.android.com/apk/res/android"
    android:layout_width="match_parent"
    android:layout_height="match_parent"
    android:orientation="vertical" >

    <FrameLayout
        android:id="@+id/about_fragment_container"
        android:layout_width="match_parent"
        android:layout_height="match_parent"/>

</LinearLayout>
example_fragment.xml的代码:
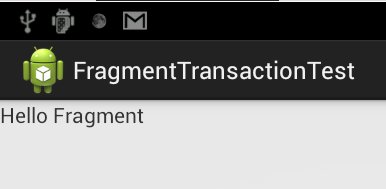
<LinearLayout xmlns:android="http://schemas.android.com/apk/res/android"
    xmlns:tools="http://schemas.android.com/tools"
    android:layout_width="match_parent"
    android:layout_height="match_parent"
    android:orientation="vertical" >


    <TextView
        android:text="Hello Fragment"
        android:layout_width="wrap_content"
        android:layout_height="wrap_content"/>

</LinearLayout>
点击下载:源代码
效果图:


 769
769


 被折叠的 条评论
为什么被折叠?
被折叠的 条评论
为什么被折叠?
 到【灌水乐园】发言


