


Spring中@Autowired 注解的注入规则
默认根据类型,匹配不到则根据bean名字
1.声明一个service接口
public interface HelloService {
    void sayHello();
}
2.service接口的实现类,此时bean名字是 helloServiceImpl
@Service
public class HelloServiceImpl implements HelloService {
    @Override
    public void sayHello() {
        System.out.println("say hello impl");
    }
}
3.增加一个Controller,注入service
// 生成一个bean,名字为 helloController
@Controller
public class HelloController {
    @Autowired
    private HelloService helloService;

    public void hello() {
        helloService.sayHello();
    }
}
4.测试①:
public class AppTest {

    public static void main(String[] args) {
        ApplicationContext context = new ClassPathXmlApplicationContext("applicationContext.xml");
        HelloController controller = (HelloController) context.getBean("helloController");
        controller.hello();
    }
}
结果如下
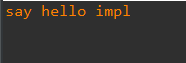
成功将Service层的实现类注入到Controller层中,可以把步骤3 代码修改一下
// 生成一个bean,名字为 helloController
@Controller
public class HelloController {
    @Autowired
    private HelloService abc;

    public void hello() {
        abc.sayHello();
    }
}
结果也是可以的,因为@Autowired 第一是按照类型去匹配的,此时IoC容器中HelloService 接口只有一个实现类,所以属性名字怎么写都没关系,都可以注入进去
测试②:增加一个实现类,此时bean名字是 newServiceImpl
@Service
public class NewHelloServiceImpl implements HelloService {
    @Override
    public void sayHello() {
        System.out.println("new say hello impl");
    }
}
现在IoC容器中有两个 HelloService接口的实现类,继续运行测试方法,结果为
Caused by: org.springframework.beans.factory.UnsatisfiedDependencyException:
 Error creating bean with name 'helloController':
 Unsatisfied dependency expressed through field 'abc';
 nested exception is org.springframework.beans.factory.NoUniqueBeanDefinitionException:
  No qualifying bean of type 'com.convict.service.HelloService' available:
  expected single matching bean but found 2: helloServiceImpl,newHelloServiceImpl
因为一个接口有多个实现,所以@Autowired 就按照属性名字去找,即找一个名字为 abc的bean注入,然而IoC容器不存在一个名字叫abc的 bean,因此报错,把属性名改为下面任意一种就可以匹配到了
// 生成一个bean,名字为 helloController
@Controller
public class HelloController {
@Autowired
private HelloService helloServiceImpl;
@Autowired
private HelloService newHelloServiceImpl;
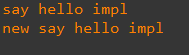
public void hello() {
helloServiceImpl.sayHello();
newHelloServiceImpl.sayHello();
}
}
测试③:
那我就要把属性名叫 abc,同时有多个实现,而且还能注入,那么在声明组件的时候取个名字就好了,比如
@Service("abc")
public class HelloServiceImpl implements HelloService {
    @Override
    public void sayHello() {
        System.out.println("say hello impl");
    }
}
然后Controller 注入的还是abc,结果注入成功
// 生成一个bean,名字为 helloController
@Controller
public class HelloController {
    @Autowired
    private HelloService abc;

    public void hello() {
        abc.sayHello();
    }
}

测试④:
属性名叫 abc,同时有多个实现,同时可以注入,且不在注解处声明bean 的名字,那么这时候使用新的注解@Qualifier 配合@Autowired 一起使用
// 生成一个bean,名字为 helloController
@Controller
public class HelloController {
    @Autowired
    @Qualifier("helloServiceImpl")
    private HelloService abc;

    public void hello() {
        abc.sayHello();
    }
}

@Qualifier是指定 一个bean的名字
总结:
1.一个接口只有一个实现的情况下,属性名字怎么写都无所谓,因为按照类型匹配就只有一个bean
2.一个接口多个实现的情况下:
① 属性名字跟组件名字一致,组件名字可以在声明的时候指定,比如 @Service(“abc”)
② 属性名字跟组件名字不一致,配合@Qualifier 注解指定组件名字


 817
817


 被折叠的 条评论
为什么被折叠?
被折叠的 条评论
为什么被折叠?
 到【灌水乐园】发言


