


一 文件下载
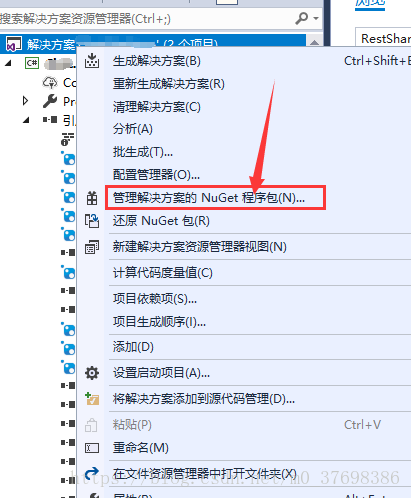
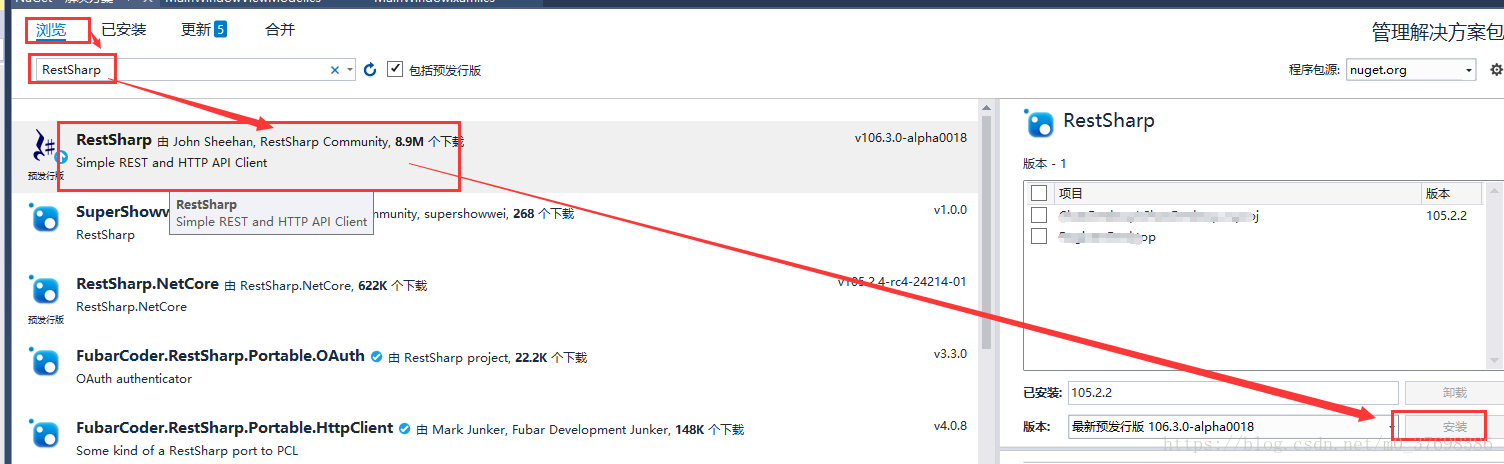
首先,添加RestSharp的引用。这里我已经引用了RestSharp,所以“安装”按钮不可点击。
有的附件(即文件)下载时需根据MediaID文件标识以及身份验证条件符合才能下载,以下为程序内容:
 /// <summary>
        /// 获取图片保存到本地并返回本地地址
        /// </summary>
        /// <param name="mediaId">文件标识</param>
        /// <returns></returns>
        public static DownloadFileModel DownloadFile(string mediaId)
        {
            var client = new RestClient("http://....这里为下载地址的域名");

            DownloadFileModel result = new DownloadFileModel();//自定义的模型,包括MemoryStream类型的数据流及string类型的文件名称

            try
            {
                client.Timeout = 20000;//超时限制
                client.Authenticator = new HttpBasicAuthenticator("账号", "密码");//添加身份验证,具体根据接口需求定义
                var request = new RestRequest("API接口"), Method.GET);
                IRestResponse response = client.Execute(request);

                if (response.ErrorException != null)
                {
                    throw new Exception(response.ErrorMessage);
                }

                if (response.StatusCode == HttpStatusCode.OK && response.ResponseStatus == ResponseStatus.Completed)
                {
                    var item = response.Headers.Where(h => h.Name == "Content-Disposition").FirstOrDefault();
                    if (item != null)
                    {
                        ContentDisposition contentDisposition = new ContentDisposition(item.Value.ToString());
                        result.Filename = HttpUtility.UrlDecode(contentDisposition.FileName);
                    }
                }

                result.DownloadStream = new MemoryStream(response.RawBytes);//获得数据流

                return result;
            }

            catch (Exception ex)
            {
                Console.WriteLine(ex.Message);
            }
            return null;
        }
或者直接根据文件完整地址URL下载,程序如下:
 /// <summary>
        /// 根据URl下载图片
        /// </summary>
        /// <param name="downloadUrl">文件下载地址</param>
        /// <returns></returns>
        public static  DownloadFileModel DownloadPic(string downloadUrl)
        {
            DownloadFileModel result = new DownloadFileModel();//自定义数据模型,包括MemoryStream类型的数据流及string类型的文件名称

            try
            {
                WebClient web = new WebClient();
                byte[] fileBytes = web.DownloadData(downloadUrl);

                var filename = Convert.ToString(DateTime.Now.Ticks);//文件名称以当前时间戳命名
                result.DownloadStream = new MemoryStream(fileBytes);//获得数据流
                result.Filename = filename;
                return result;
            }
            catch (Exception ex)
            {
                Console.WriteLine(ex.Message);
                return null;
            }

        }
二 保存文件
保存图片时,给出文件选择框,以便让用户自行选择将文件保存到哪个路径下。
 /// <summary>
        /// 选择路径并保存文件
        /// </summary>
        /// <param name="fileName">文件名,带后缀</param>
        /// <param name="stream">文件流</param>
        /// <returns></returns>
        public static string SaveStream(string fileName, MemoryStream stream)
        {
            if (stream == null) return null;
                     Microsoft.Win32.SaveFileDialog saveFileDialog = new Microsoft.Win32.SaveFileDialog();
                    //设置文件类型
                    //书写规则例如:txt files(*.txt)|*.txt
                    //saveFileDialog.Filter = "txt files(*.txt)|*.txt|xls files(*.xls)|*.xls|All files(*.*)|*.*|图片|*.jpg;*.png;*.gif;*.bmp;*.jpeg";
                    //可能要获取的路径名
                    string localFilePath = "";
                    //设置默认文件名(可以不设置)
                    saveFileDialog.FileName = fileName;
                    //保存对话框是否记忆上次打开的目录
                    saveFileDialog.RestoreDirectory = true;
                    // Show save file dialog box
                    bool? result = saveFileDialog.ShowDialog();
                    //点了保存按钮进入
                    if (result == true)
                    {
                        //获得文件路径
                        localFilePath = saveFileDialog.FileName;

                        using (var fs = new FileStream(localFilePath, FileMode.Create, FileAccess.ReadWrite))
                        {
                            fs.Write(stream.ToArray(), 0, ((int)stream.Length));
                        }
                return localFilePath;
                    }
            return null;
        }
三 打开文件
一般指定openFileDialog对象的默认路径及选中的文件,openFileDialog.ShowDialog()方法调用后,会弹出指定路径的文件选择框,当用户点击“打开”按钮时,此处result会为true,然后再根据openFileDialog.FileName获得选中的文件路径(路径+文件名称+后缀),最后调用Process.Start()方法打开目标文件。注意。如果当前系统中不存在打开此文件的应用程序,则调用Process.Start()方法后会抛出异常,异常信息可在catch中查看。
  /// <summary>
        /// 打开文件目录
        /// </summary>
        /// <param name="fileName">文件名,带后缀</param>
        /// <returns></returns>
        public static OpenFileModel OpenFilePath(string filePath)
        {
            var openFileModel = new OpenFileModel(); //自定义的数据模型,有bool类型的是否打开成功状态以及string类型的错误提示信息
            if (filePath == null || filePath.Length == 0) {
                openFileModel.status = false;
                return openFileModel;
            }
            bool exits = File.Exists(filePath);
            if (!exits)
            {
                openFileModel.status = false;
                return openFileModel;
            }
            int index = filePath.LastIndexOf('.');
            if (index < 0) {
                    openFileModel.status = false;
                    return openFileModel;
            }

            var fileName = filePath.Substring(filePath.LastIndexOf("\\") + 1);//获得文件名称
            var path = filePath.Substring(0, filePath.LastIndexOf("\\"));//获得文件路径
            try {

                Microsoft.Win32.OpenFileDialog openFileDialog = new Microsoft.Win32.OpenFileDialog();
                openFileDialog.FileName = fileName;
                openFileDialog.InitialDirectory = path;
                // Show save file dialog box
                bool? result = openFileDialog.ShowDialog();//打开目标文件所在目录
                if (result == true)//
                {
                    Console.WriteLine(openFileDialog.FileName);
                    System.Diagnostics.Process.Start(openFileDialog.FileName);//打开用户选择的文件
                }
                openFileModel.status = true;
                return openFileModel;
            }
            catch (Exception e) {
                openFileModel.status = true;
                openFileModel.message = e.Message;
                return openFileModel;
            }


        }
四 选择文件
这里借助OpenFileDialog实现筛选图片的功能。
程序说明:Filter为过滤条件,默认筛选所有文件;InitialDirectory为默认打开的路径。
private async void btnChooseFile(object sender, RoutedEventArgs e)
        {
            System.Windows.Forms.OpenFileDialog dialog = new System.Windows.Forms.OpenFileDialog();
            dialog.AddExtension = true;
            dialog.Filter = "所有图片|*.bmp;*.ico;*.gif;*.jpeg;*.jpg;*.png;*.tif;*.tiff";
            dialog.InitialDirectory = "c:\\";
            dialog.RestoreDirectory = true;
            if (dialog.ShowDialog() == System.Windows.Forms.DialogResult.OK)
            {
                var filePath = dialog.FileName;
                if (!string.IsNullOrWhiteSpace(filePath))
                {
                    var ext = Path.GetExtension(filePath);
                    bool isImage = ".jpg|.jpeg|.bmp|.gif|.png|.tiff".Contains(ext.ToLower());
                    //以下根据获得到的文件路径进行其他具体操作
                }
            }


        }
五 上传文件
程序说明:OperationStatus为我自定义的请求状态模型,包括请求结果状态(成功/失败)以及文字信息。
 public async Task<OperationStatus> DoUpload(string path) {
            var operationStatus = new OperationStatus();
            if (path == null || !File.Exists(path))
            {
                operationStatus.Status = false;
                operationStatus.Message = "文件不存在";
                return operationStatus;
            }
            try
            {
                var fileName = Path.GetFileName(path);
                var model = new MediaFileModel
                {
                    ThumbUrl = path,
                    MediaLength = new FileInfo(path).Length,
                    RealName = fileName
                };
                var stream = File.OpenRead(path);
                var bytes = new byte[stream.Length];
                stream.Read(bytes, 0, bytes.Length);
                //以下根据获得的文件路径及字节流进行具体上传操作
                stream.Close();
            }
            catch (Exception e)
            {
                operationStatus.Message = e.Message;
                operationStatus.Status = false;
            }

            return operationStatus;
        }


 1398
1398


 被折叠的 条评论
为什么被折叠?
被折叠的 条评论
为什么被折叠?
 到【灌水乐园】发言


