


转载地址:http://www.itread01.com/articles/1476620139.html
最近在搞爬蟲的時候在好幾個網站都碰到了一種叫做geetest的滑動條驗證碼,一直沒有太好的辦法只能在觸發這個驗證碼後發個報警去手動處理一下。http://www.geetest.com/exp_embed是他們官網的樣例。

後來研究了下覺得要破解這個驗證碼有這麽幾個問題:
- 無法直接通過發送url請求來實現鼠標拖動的動作;
- 實際的背景圖片是亂的,並不是我們實際肉眼看到的圖像,如下圖;
- “開創行為判別算法,利用數據挖掘和機器學習,提取超過200多個行為判別特征,建立堅若磐石的多維驗證防禦體系。”這是官網的描述,聽上去就已經很高大上,查了些資料也都說拖動軌跡的識別是geetest的核心內容而無過多的表述,那麽這也應該是主要的難點了。

後面我也就基於了以上的問題去一步一步研究如何實現模擬這一操作:
一.安裝配置geetest的樣例
首先自己安裝配置一份geetest的樣例。雖然geetest官網上有樣例,但有時候反應比較慢,而且後面研究拖動軌跡的時候還需要對樣例做一定的改動。編程語言我使用的是python2.7,所以這裏選擇的也是python版本的。
參考內容:http://www.geetest.com/install/sections/idx-server-sdk.html#python
安裝git:
[root@mysql-test1 ~]# yum install git
在github中clone出最新Demo項目:
[root@mysql-test1 ~]# git clone https://github.com/GeeTeam/gt-python-sdk.git
安裝GeetestSDK:
[root@mysql-test1 ~]# cd gt-python-sdk/
[root@mysql-test1 gt-python-sdk]# python setup.py install
安裝Django,要註意的是最新的Django-1.10.1和當前的GeetestSDK是有兼容性問題的,要用Django-1.8.14:
[root@mysql-test1 ~]# wget --no-check-certificate https://www.djangoproject.com/download/1.8.14/tarball/ [root@mysql-test1 ~]# tar zxvf Django-1.8.14.tar.gz [root@mysql-test1 ~]# cd Django-1.8.14 [root@mysql-test1 Django-1.8.14]# python setup.py installADVERTISEMENT
後面就可以直接運行了:
[root@mysql-test1 ~]# cd gt-python-sdk/demo/django_demo/
[root@mysql-test1 django_demo]# python manage.py runserver 0.0.0.0:8000
另外如果安裝啟動的時候報sqlite相關的錯誤,那就要安裝linux的sqlite-devel包,然後再編譯安裝python就可以了。
現在在瀏覽器裏打開http://192.168.161.51:8000/就可以看到安裝的geetest樣例了。
另外還可以把gt-python-sdk/demo/django_demo/static/index.html裏面41-61行註釋掉,只保留嵌入式的Demo。

二.在瀏覽器上模擬鼠標拖動的操作
參考內容:http://www.cnblogs.com/wangly/p/5630069.html
這裏要實現鼠標拖動的動作靠直接發送url請求是無法實現的,需要有個真的瀏覽器再去模擬鼠標拖動的動作。根據參考的內容使用了Selenium(也有python版本的)可以實現這一操作。
通過python的pip可以直接安裝,我這裏顯示的版本是selenium-2.53。除此之外還需要根據瀏覽器下載webdriver。我使用的是chrome,驅動在http://download.csdn.net/detail/paololiu/9620177有下載,下載完後解壓放到chrome的安裝目錄即可。另外還要註意chrome的版本,我這裏使用的是52.0.2743.116。
#!/usr/local/bin/python
# -*- coding: utf8 -*-

'''
Created on 2016年9月2日

@author: PaoloLiu
'''

from selenium import webdriver
from selenium.webdriver.support.ui import WebDriverWait
from selenium.webdriver.common.action_chains import ActionChains
import time

def main():

#     這裏的文件路徑是webdriver的文件路徑
    driver = webdriver.Chrome(executable_path=r"C:\Program Files (x86)\Google\Chrome\Application\chromedriver.exe")

#     打開網頁
    driver.get("http://192.168.161.51:8000/")

#     等待頁面的上元素刷新出來
    WebDriverWait(driver, 30).until(lambda the_driver: the_driver.find_element_by_xpath("//div[@class='gt_slider_knob gt_show']").is_displayed())
    WebDriverWait(driver, 30).until(lambda the_driver: the_driver.find_element_by_xpath("//div[@class='gt_cut_bg gt_show']").is_displayed())
    WebDriverWait(driver, 30).until(lambda the_driver: the_driver.find_element_by_xpath("//div[@class='gt_cut_fullbg gt_show']").is_displayed())

#     找到滑動的圓球
    element=driver.find_element_by_xpath("//div[@class='gt_slider_knob gt_show']")

#     鼠標點擊元素並按住不放
    print "第一步,點擊元素"
    ActionChains(driver).click_and_hold(on_element=element).perform()
    time.sleep(1)

    print "第二步,拖動元素"
#     拖動鼠標到指定的位置,註意這裏位置是相對於元素左上角的相對值
    ActionChains(driver).move_to_element_with_offset(to_element=element, xoffset=200, yoffset=50).perform()
    time.sleep(1)

    print "第三步,釋放鼠標"
#     釋放鼠標
    ActionChains(driver).release(on_element=element).perform()

    time.sleep(3)

if __name__ == '__main__':
    pass

    main()

三.計算圖片中缺口的偏移量
參考內容:http://www.cnblogs.com/yuananyun/p/5655019.html
上面的移動位置我寫了一個固定的值,實際情況這個值是不固定的,需要根據背景圖片的缺口來算出這個偏移量。然而要計算缺口的偏移量還要先還原圖片。
1.還原圖片
如上圖,原始的圖片是亂的,但是我們可以在html裏面可以看到把同一個圖片的位置進行重新組合就可以看到還原後的圖片了:

代碼如下:
import PIL.Image as image
import PIL.ImageChops as imagechops
import time,re,cStringIO,urllib2,random

def get_merge_image(filename,location_list):
    '''
    根據位置對圖片進行合並還原
    :filename:圖片
    :location_list:圖片位置
    '''
    pass

    im = image.open(filename)

    new_im = image.new('RGB', (260,116))

    im_list_upper=[]
    im_list_down=[]

    for location in location_list:

        if location['y']==-58:
            pass
            im_list_upper.append(im.crop((abs(location['x']),58,abs(location['x'])+10,166)))
        if location['y']==0:
            pass

            im_list_down.append(im.crop((abs(location['x']),0,abs(location['x'])+10,58)))

    new_im = image.new('RGB', (260,116))

    x_offset = 0
    for im in im_list_upper:
        new_im.paste(im, (x_offset,0))
        x_offset += im.size[0]

    x_offset = 0
    for im in im_list_down:
        new_im.paste(im, (x_offset,58))
        x_offset += im.size[0]

    return new_im

def get_image(driver,div):
    '''
    下載並還原圖片
    :driver:webdriver
    :div:圖片的div
    '''
    pass

    #找到圖片所在的div
    background_images=driver.find_elements_by_xpath(div)

    location_list=[]

    imageurl=''

    for background_image in background_images:
        location={}

        #在html裏面解析出小圖片的url地址,還有長高的數值
        location['x']=int(re.findall("background-image: url\(\"(.*)\"\); background-position: (.*)px (.*)px;",background_image.get_attribute('style'))[0][1])
        location['y']=int(re.findall("background-image: url\(\"(.*)\"\); background-position: (.*)px (.*)px;",background_image.get_attribute('style'))[0][2])
        imageurl=re.findall("background-image: url\(\"(.*)\"\); background-position: (.*)px (.*)px;",background_image.get_attribute('style'))[0][0]

        location_list.append(location)

    imageurl=imageurl.replace("webp","jpg")

    jpgfile=cStringIO.StringIO(urllib2.urlopen(imageurl).read())

    #重新合並圖片
    image=get_merge_image(jpgfile,location_list )

    return image
2.計算缺口位置
通過python的PIL.ImageChops可以計算出兩個圖片不同地方的位置,方法如下:
import PIL.ImageChops as imagechops
diff=imagechops.difference(image1, image2)
diff.show()
print diff.getbbox()
但是這在我們這裏並不適用。因為我們得到的兩個圖片是通過拼接而成的,並且兩張原圖在背景上也還是稍有區別的,而difference方法計算得過於精確,所以這裏得到的位置並不會是我們要的缺口的位置。這裏我借用的參考內容的方法:兩張原始圖的大小都是相同的260*116,那就通過兩個for循環依次對比每個像素點的RGB值,如果相差超過50則就認為找到了缺口的位置:
def is_similar(image1,image2,x,y):
    '''
    對比RGB值
    '''
    pass

    pixel1=image1.getpixel((x,y))
    pixel2=image2.getpixel((x,y))

    for i in range(0,3):
        if abs(pixel1[i]-pixel2[i])>=50:
            return False

    return True

def get_diff_location(image1,image2):
    '''
    計算缺口的位置
    '''

    i=0

    for i in range(0,260):
        for j in range(0,116):
            if is_similar(image1,image2,i,j)==False:
                return  i
四.鼠標拖動的軌跡
1.輸出鼠標滑動軌跡
參考內容:http://blog.csdn.net/ieternite/article/details/51483491
如果我們直接把上面算出來的缺口位置放到前面腳本裏,你會發現即使移動的位置正確了,提示卻是“怪物吃了餅圖”,驗證不通過。很顯然,geetest識別出了這個動作並不是人的行為。這我們就需要去查看自然人滑動鼠標和我們代碼實現的滑動在軌跡上有什麽不同。
geetest目前版本客戶端最核心的是geetest.5.5.36.js,我們可以把它復制出來加以改造。首先找個工具把原代碼格式化一下,然後再加入以下的內容:

index.html頁面的上直接調用的是gt.js,再由gt.js去調用geetest.5.5.36.js。我用的土辦法是自己搭建一個簡易的web server,並在host裏面把static.geetest.com域名指向到我自己的web server,然後再把頁面上要調用的static.geetest.com裏的內容都放到我自己搭建的web server上,當然geetest.5.5.36.js是要用我剛才改造過的那個。
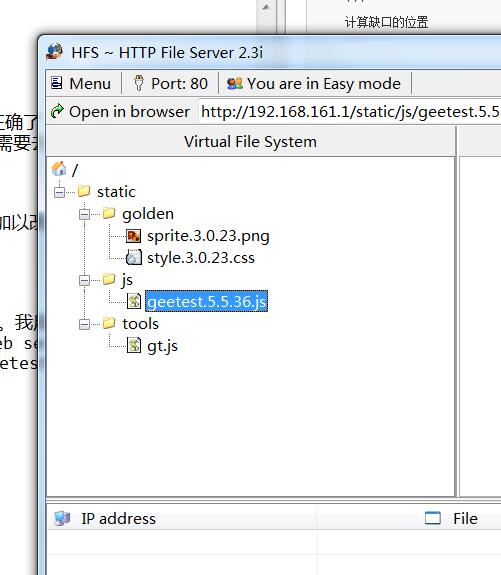
static.geetest.com裏面只要static目錄裏的內容即可,pictures裏面的圖片找不到會自動指向到他們備用的網站的。我用的簡易web server是HTTP File Server,可以在下載。
如此一來,我們每次滑動鼠標包括代碼實現的滑動操作在瀏覽器裏都能顯示出滑動的軌跡:

2.模擬人的行為
有了軌跡的數據,我們就可以進行對比分析了。上圖的是我手動滑動的軌跡,而下圖的是我通過代碼拖動的軌跡,其實根本就不需要涉及到什麽復雜的數據挖掘機器學習的算法,兩眼一看就能識別出不同來:

這裏我總結了一下差別(一個{x,y,z}是一個軌跡記錄點,x代表x軸,y代表y軸,z代表累計時間毫秒):
1.時間不宜太長又或者太短,最好能控制在1-5秒之內,另外兩個相鄰的記錄點的時間也最好能控制在50ms以內,並且間隔的時間也不宜相同;
2.鄉鄰的x值差值也不宜太大,最好控制在以5內,並且差值也不要是一層不變的;
3.geetest雖然是橫向拖動的,不會涉及到縱向移動,所以這部分很容易是被忽略的:y軸的值要控制在[-5,5]範圍內,不能過大。而且上下抖動的頻率不能高,要平緩一點。我試下來最好的辦法就是平穩固定的0上,也不要上下抖動了。
完整代碼如下:
#!/usr/local/bin/python
# -*- coding: utf8 -*-

'''
Created on 2016年9月2日

@author: PaoloLiu
'''

from selenium import webdriver
from selenium.webdriver.support.ui import WebDriverWait
from selenium.webdriver.common.action_chains import ActionChains
import PIL.Image as image
import time,re,cStringIO,urllib2,random

def get_merge_image(filename,location_list):
    '''
    根據位置對圖片進行合並還原
    :filename:圖片
    :location_list:圖片位置
    '''
    pass

    im = image.open(filename)

    new_im = image.new('RGB', (260,116))

    im_list_upper=[]
    im_list_down=[]

    for location in location_list:

        if location['y']==-58:
            pass
            im_list_upper.append(im.crop((abs(location['x']),58,abs(location['x'])+10,166)))
        if location['y']==0:
            pass

            im_list_down.append(im.crop((abs(location['x']),0,abs(location['x'])+10,58)))

    new_im = image.new('RGB', (260,116))

    x_offset = 0
    for im in im_list_upper:
        new_im.paste(im, (x_offset,0))
        x_offset += im.size[0]

    x_offset = 0
    for im in im_list_down:
        new_im.paste(im, (x_offset,58))
        x_offset += im.size[0]

    return new_im

def get_image(driver,div):
    '''
    下載並還原圖片
    :driver:webdriver
    :div:圖片的div
    '''
    pass

    #找到圖片所在的div
    background_images=driver.find_elements_by_xpath(div)

    location_list=[]

    imageurl=''

    for background_image in background_images:
        location={}

        #在html裏面解析出小圖片的url地址,還有長高的數值
        location['x']=int(re.findall("background-image: url\(\"(.*)\"\); background-position: (.*)px (.*)px;",background_image.get_attribute('style'))[0][1])
        location['y']=int(re.findall("background-image: url\(\"(.*)\"\); background-position: (.*)px (.*)px;",background_image.get_attribute('style'))[0][2])
        imageurl=re.findall("background-image: url\(\"(.*)\"\); background-position: (.*)px (.*)px;",background_image.get_attribute('style'))[0][0]

        location_list.append(location)

    imageurl=imageurl.replace("webp","jpg")

    jpgfile=cStringIO.StringIO(urllib2.urlopen(imageurl).read())

    #重新合並圖片
    image=get_merge_image(jpgfile,location_list )

    return image

def is_similar(image1,image2,x,y):
    '''
    對比RGB值
    '''
    pass

    pixel1=image1.getpixel((x,y))
    pixel2=image2.getpixel((x,y))

    for i in range(0,3):
        if abs(pixel1[i]-pixel2[i])>=50:
            return False

    return True

def get_diff_location(image1,image2):
    '''
    計算缺口的位置
    '''

    i=0

    for i in range(0,260):
        for j in range(0,116):
            if is_similar(image1,image2,i,j)==False:
                return  i

def get_track(length):
    '''
    根據缺口的位置模擬x軸移動的軌跡
    '''
    pass

    list=[]

#     間隔通過隨機範圍函數來獲得
    x=random.randint(1,3)

    while length-x>=5:
        list.append(x)

        length=length-x
        x=random.randint(1,3)

    for i in xrange(length):
        list.append(1)

    return list

def main():

#     這裏的文件路徑是webdriver的文件路徑
    driver = webdriver.Chrome(executable_path=r"C:\Program Files (x86)\Google\Chrome\Application\chromedriver.exe")
#     driver = webdriver.Firefox()

#     打開網頁
    driver.get("http://172.16.2.7:8000/")

#     等待頁面的上元素刷新出來
    WebDriverWait(driver, 30).until(lambda the_driver: the_driver.find_element_by_xpath("//div[@class='gt_slider_knob gt_show']").is_displayed())
    WebDriverWait(driver, 30).until(lambda the_driver: the_driver.find_element_by_xpath("//div[@class='gt_cut_bg gt_show']").is_displayed())
    WebDriverWait(driver, 30).until(lambda the_driver: the_driver.find_element_by_xpath("//div[@class='gt_cut_fullbg gt_show']").is_displayed())

#     下載圖片
    image1=get_image(driver, "//div[@class='gt_cut_bg gt_show']/div")
    image2=get_image(driver, "//div[@class='gt_cut_fullbg gt_show']/div")

#     計算缺口位置
    loc=get_diff_location(image1, image2)

#     生成x的移動軌跡點
    track_list=get_track(loc)

#     找到滑動的圓球
    element=driver.find_element_by_xpath("//div[@class='gt_slider_knob gt_show']")
    location=element.location
#     獲得滑動圓球的高度
    y=location['y']

#     鼠標點擊元素並按住不放
    print "第一步,點擊元素"
    ActionChains(driver).click_and_hold(on_element=element).perform()
    time.sleep(0.15)

    print "第二步,拖動元素"
    track_string = ""
    for track in track_list:
        track_string = track_string + "{%d,%d}," % (track, y - 445)
#         xoffset=track+22:這裏的移動位置的值是相對於滑動圓球左上角的相對值,而軌跡變量裏的是圓球的中心點,所以要加上圓球長度的一半。
#         yoffset=y-445:這裏也是一樣的。不過要註意的是不同的瀏覽器渲染出來的結果是不一樣的,要保證最終的計算後的值是22,也就是圓球高度的一半
        ActionChains(driver).move_to_element_with_offset(to_element=element, xoffset=track+22, yoffset=y-445).perform()
#         間隔時間也通過隨機函數來獲得
        time.sleep(random.randint(10,50)/100)
    print track_string
#     xoffset=21,本質就是向後退一格。這裏退了5格是因為圓球的位置和滑動條的左邊緣有5格的距離
    ActionChains(driver).move_to_element_with_offset(to_element=element, xoffset=21, yoffset=y-445).perform()
    time.sleep(0.1)
    ActionChains(driver).move_to_element_with_offset(to_element=element, xoffset=21, yoffset=y-445).perform()
    time.sleep(0.1)
    ActionChains(driver).move_to_element_with_offset(to_element=element, xoffset=21, yoffset=y-445).perform()
    time.sleep(0.1)
    ActionChains(driver).move_to_element_with_offset(to_element=element, xoffset=21, yoffset=y-445).perform()
    time.sleep(0.1)
    ActionChains(driver).move_to_element_with_offset(to_element=element, xoffset=21, yoffset=y-445).perform()

    print "第三步,釋放鼠標"
#     釋放鼠標
    ActionChains(driver).release(on_element=element).perform()

    time.sleep(3)

#     點擊驗證
    submit=driver.find_element_by_xpath("//input[@id='embed-submit']")
    ActionChains(driver).click(on_element=submit).perform()

    time.sleep(5)

driver.quit()

if __name__ == '__main__':
    pass

    main()
運行結果:

五.瀏覽器的兼容問題
1.最為重要的就是代碼註釋裏說的y軸的高度問題,我試了PhantomJS,Chrome和Firefox三個瀏覽器,每一種渲染出來的高度都是不一樣的,一定要保證最終的結果是拖動球高度的一半(一般都是22);
2.版權兼容性(以下是我驗證過可行的):
selenium (2.53.6)===>PhantomJS 2.1
selenium (2.53.6)===>Chrome 52
selenium (2.53.6)===>Firefox 45(註意不要用48,有兼容問題)
3.webdriver的cookie問題:
有的時候我們需要帶入cookie進行驗證,那就有了cookie的問題了。Chrome和Firefox都可以通過webdriver.add_cookie來實現,但是經我試下來這個方法和PhantomJS有兼容性問題,我是這樣解決的:
    def save_cookies(self, driver, file_path, inputcookie):
#         LINE = "document.cookie = '{name}={value}; path={path}; domain={domain}; expires={expires}';\n"

        dict_cookie = {}

        for item in inputcookie.split(";"):
            dict_cookie[item.split("=")[0].strip()] = item.split("=")[1].strip()

#         logging.info(dict_cookie)

        with open(file_path, 'w') as file :
            for cookie in driver.get_cookies() :
#                 logging.info(cookie)
                if u'expires' in cookie:
                    if cookie['name'] in dict_cookie:
                        line = "document.cookie = '%s=%s; path=%s; domain=%s; expires=%s';\n" % (cookie['name'], dict_cookie[cookie['name']], cookie['path'], cookie['domain'], cookie['expires'])
                    else:
                        line = "document.cookie = '%s=%s; path=%s; domain=%s; expires=%s';\n" % (cookie['name'], cookie['value'], cookie['path'], cookie['domain'], cookie['expires'])
                else:
                    if cookie['name'] in dict_cookie:
                        line = "document.cookie = '%s=%s; path=%s; domain=%s';\n" % (cookie['name'], dict_cookie[cookie['name']], cookie['path'], cookie['domain'])
                    else:
                        line = "document.cookie = '%s=%s; path=%s; domain=%s';\n" % (cookie['name'], cookie['value'], cookie['path'], cookie['domain'])
#                 logging.info(line)
                file.write(line.encode("utf8"))

    def load_cookies(self, driver, file_path):
        with open(file_path, 'r') as file:
            driver.execute_script(file.read())
再如此調用就可以解決cookie的兼容性問題了:
driver.get(url)

# save the cookies to a file
self.save_cookies(driver, r"cookies.js", cookies)

# delete all the cookies
driver.delete_all_cookies()

# load the cookies from the file
self.load_cookies(driver, r"cookies.js")

# reopen url
driver.get(url)
4.PhantomJS瀏覽器解析出來的圖片url是不帶引號的,而Firefox和Chrome解析出來的是帶引號的,這裏正則過濾的時候要註意一下的。
我最終使用的是selenium+Firefox。我實際運行的環境是centos,PhantomJS確實是個不錯的選擇,直接在shell裏運行就可以了,不需要配置圖形界面。但是使用下來破解的成功率不高,因為沒有界面,也看不出運行的情況。Chrome在centos6.5裏面沒有現成的安裝包,安裝使用比較復雜。最終也就只有Firefox了。
centos配置firefox方法如下:
[root@db2-test1 ~]# yum groupinstall "X Window system" -y
[root@db2-test1 ~]# yum groupinstall "Desktop" -y
[root@db2-test1 ~]# yum install firefox -y
註意不要純shell環境下運行,要在圖形界面的運行。運行init 5可以從字符界面切換到圖形界面。


 1万+
1万+


 被折叠的 条评论
为什么被折叠?
被折叠的 条评论
为什么被折叠?
 到【灌水乐园】发言


