当ListView条目点击时,往往需要改变条目里面控件的颜色,如改变文字颜色、条目的背景颜色或是图片颜色。
而这些颜色的改变又分三大类为:

1.点击时颜色改变,点击后颜色还原

2.点击时颜色不变,点击后颜色改变,点击别的条目时颜色还原

3.点击时颜色改变,点击后颜色保持不变,点击别的条目时颜色还原
而在网上查找的都是零零散散,而且不很详细。于是,现在就总结一下,和大家分享。
首先把框架搭好,因为像这样的颜色改变,ListView放在侧边菜单栏的比较多。而在完整页面中展示数据信息的ListView通常是点击后,将TextView文字颜色改为灰色,标记为已读。而这种实现与Json数据和数据存储相关,简单的说就是把条目上对应的Json字段的id存储下来,在getView()方法里更改TextView的颜色,实现局部刷新。所以此方法在这里不实现,以后总结
方便起见,还是按照上一篇博客的知乎框架为案例:
9.在ManiActivity中编写代码,展示ListView
(为了显示重点,前面的八步放在了最后面)
package com.example.acer.zhihu;
import android.graphics.Color;
import android.os.Bundle;
import android.support.v4.widget.DrawerLayout;
import android.support.v7.app.ActionBarDrawerToggle;
import android.support.v7.app.AppCompatActivity;
import android.support.v7.widget.Toolbar;
import android.view.View;
import android.view.ViewGroup;
import android.widget.BaseAdapter;
import android.widget.ImageView;
import android.widget.ListView;
import android.widget.TextView;
public class MainActivity extends AppCompatActivity {
private Toolbar mToolbar;
private DrawerLayout mDrawerLayout;
private int[] imagesId = {R.drawable.rb_home, R.drawable.rb_find, R.drawable.rb_focus,
R.drawable.rb_collection, R.drawable.rb_draft, R.drawable.rb_question};
private String[] titles = {"首页", "发现", "关注", "收藏", "草稿", "提问"};
private ListView mLv_titles;
private MyAdapter mMyAdapter;
@Override
protected void onCreate(Bundle savedInstanceState) {
super.onCreate(savedInstanceState);
setContentView(R.layout.activity_main);
initView();
initData();
}
private void initView() {
mToolbar = (Toolbar) findViewById(R.id.toolbar);
mDrawerLayout = (DrawerLayout) findViewById(R.id.drawerLayout);
mLv_titles = (ListView) findViewById(R.id.lv_title);
mMyAdapter = new MyAdapter();
mLv_titles.setAdapter(mMyAdapter);
}
private void initData() {
mToolbar.setTitle("首页");
mToolbar.setTitleTextColor(Color.TRANSPARENT);
setSupportActionBar(mToolbar);
initDrawerToggle();
}
private void initDrawerToggle() {
ActionBarDrawerToggle drawerToggle = new ActionBarDrawerToggle(this, mDrawerLayout, mToolbar, R.string.open, R.string.close);
drawerToggle.syncState();
mDrawerLayout.setDrawerListener(drawerToggle);
}
class MyAdapter extends BaseAdapter {
@Override
public int getCount() {
return titles.length;
}
@Override
public Object getItem(int position) {
return titles[position];
}
@Override
public long getItemId(int position) {
return position;
}
@Override
public View getView(int position, View convertView, ViewGroup parent) {
View view = View.inflate(getApplicationContext(), R.layout.left_list, null);
ImageView iv_photo = (ImageView) view.findViewById(R.id.iv_photo);
TextView tv_title = (TextView) view.findViewById(R.id.tv_title);
iv_photo.setBackgroundResource(imagesId[position]);
tv_title.setText(titles[position]);
return view;
}
}
}
- 1
- 2
- 3
- 4
- 5
- 6
- 7
- 8
- 9
- 10
- 11
- 12
- 13
- 14
- 15
- 16
- 17
- 18
- 19
- 20
- 21
- 22
- 23
- 24
- 25
- 26
- 27
- 28
- 29
- 30
- 31
- 32
- 33
- 34
- 35
- 36
- 37
- 38
- 39
- 40
- 41
- 42
- 43
- 44
- 45
- 46
- 47
- 48
- 49
- 50
- 51
- 52
- 53
- 54
- 55
- 56
- 57
- 58
- 59
- 60
- 61
- 62
- 63
- 64
- 65
- 66
- 67
- 68
- 69
- 70
- 71
- 72
- 73
- 74
- 75
- 76
- 77
- 78
- 79
- 80
- 81
- 82
- 83
- 84
- 85
- 86
- 87
- 88
- 89
- 90
- 91
- 92
- 93
- 94
- 95
- 96
- 97
- 98
- 99
- 100
- 101
- 102
- 103
- 104
- 105
- 106
- 107
- 108
- 109
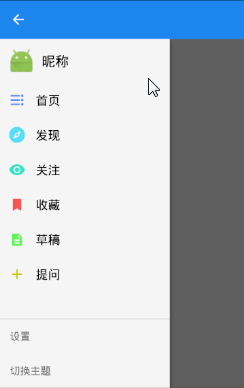
效果图:
现在开始更改颜色:
更改文字颜色1:点击时成白色,点击后还原成黑色(通过颜色选择器实现)
在res目录下创建color目录,再创建text_color_select.xml文件
<?xml version="1.0" encoding="utf-8"?>
<selector xmlns:android="http://schemas.android.com/apk/res/android">
    <item android:color="#fff" android:state_pressed="true"/>
    <item android:color="#000"/>
</selector>
在left_list.xml文件中将:
android:textColor="#000"改为android:textColor="@color/text_color_select"
效果动态图:

更改文字颜色2:点击时颜色不变,点击后颜色改变,点击别的条目时颜色还原(状态选择器+条目点击事件+更新位置)
在text_color_select.xml文件中将pressed改为enable
在MainActivity中添加代码:
private int mCurrentPos = 0;
...
private void initView() {
mToolbar = (Toolbar) findViewById(R.id.toolbar);
mDrawerLayout = (DrawerLayout) findViewById(R.id.drawerLayout);
mLv_titles = (ListView) findViewById(R.id.lv_title);
mMyAdapter = new MyAdapter();
mLv_titles.setAdapter(mMyAdapter);
mLv_titles.setOnItemClickListener(new AdapterView.OnItemClickListener() {
@Override
public void onItemClick(AdapterView<?> parent, View view, int position, long id) {
mCurrentPos = position;
mMyAdapter.notifyDataSetChanged();
}
});
}
...
@Override
public View getView(int position, View convertView, ViewGroup parent) {
View view = View.inflate(getApplicationContext(), R.layout.left_list, null);
ImageView iv_photo = (ImageView) view.findViewById(R.id.iv_photo);
TextView tv_title = (TextView) view.findViewById(R.id.tv_title);
iv_photo.setBackgroundResource(imagesId[position]);
tv_title.setText(titles[position]);
if(mCurrentPos == position){
tv_title.setEnabled(true);
} else {
tv_title.setEnabled(false);
}
return view;
}
- 1
- 2
- 3
- 4
- 5
- 6
- 7
- 8
- 9
- 10
- 11
- 12
- 13
- 14
- 15
- 16
- 17
- 18
- 19
- 20
- 21
- 22
- 23
- 24
- 25
- 26
- 27
- 28
- 29
- 30
- 31
- 32
- 33
- 34
- 35
- 36
- 37
- 38
- 39
- 40
- 41
- 42
- 43
- 44
- 1
- 2
- 3
- 4
- 5
- 6
- 7
- 8
- 9
- 10
- 11
- 12
- 13
- 14
- 15
- 16
- 17
- 18
- 19
- 20
- 21
- 22
- 23
- 24
- 25
- 26
- 27
- 28
- 29
- 30
- 31
- 32
- 33
- 34
- 35
- 36
- 37
- 38
- 39
- 40
- 41
- 42
- 43
- 44
动态效果图:

更改文字颜色3:点击时颜色改变,点击后颜色保持不变,点击别的条目时颜色还原(上诉的两个结合)
只需要在text_color_select.xml文件中添加一行原被修改的代码:
<item android:color="#fff" android:state_pressed="true"/>
效果图:

更改条目颜色1:点击时成浅蓝色,点击后还原成无色(listSelector+点击刷新)
(为了避免造成干扰,将之前改变TextView颜色的代码全部清除)
在custom_drawer.xml文件的ListView控件中插入:
设置listSelector颜色--android:listSelector="#1C86EE"
在MainActivity中设置条目点击事件,刷新ListView即可
mLv_titles.setOnItemClickListener(new AdapterView.OnItemClickListener() {
            @Override
            public void onItemClick(AdapterView<?> parent, View view, int position, long id) {
                mMyAdapter.notifyDataSetChanged();

            }
        });
此方法4.4版本有效运行,5.0版本效果是更改条目颜色3的效果
更改条目颜色2:点击时颜色不变,点击后颜色改变,点击别的条目时颜色还原()
在left_list.xml文件中,给最外层RelativeLayout添加id
android:id="@+id/rl_list_background"
在MainActivity中添加代码,和更改文字颜色2非常相似
mLv_titles.setOnItemClickListener(new AdapterView.OnItemClickListener() {
@Override
public void onItemClick(AdapterView<?> parent, View view, int position, long id) {
// 更新当前被选中的位置
mCurrentPos = position
// 刷新listview
mMyAdapter.notifyDataSetChanged()
}
})
@Override
public View getView(int position, View convertView, ViewGroup parent) {
View view = View.inflate(getApplicationContext(), R.layout.left_list, null)
ImageView iv_photo = (ImageView) view.findViewById(R.id.iv_photo)
TextView tv_title = (TextView) view.findViewById(R.id.tv_title)
mRl_list_background = (RelativeLayout) view.findViewById(R.id.rl_list_background)
iv_photo.setBackgroundResource(imagesId[position])
tv_title.setText(titles[position])
// 只有当更新的位置等于当前位置时,更改颜色
if(mCurrentPos == position){
rl_list_background.setBackgroundColor(Color.rgb(35, 154, 237))
} else {
mRl_list_background.setBackgroundColor(Color.TRANSPARENT)
}
return view
}
...
- 1
- 2
- 3
- 4
- 5
- 6
- 7
- 8
- 9
- 10
- 11
- 12
- 13
- 14
- 15
- 16
- 17
- 18
- 19
- 20
- 21
- 22
- 23
- 24
- 25
- 26
- 27
- 28
- 29
- 30
- 31
- 32
- 1
- 2
- 3
- 4
- 5
- 6
- 7
- 8
- 9
- 10
- 11
- 12
- 13
- 14
- 15
- 16
- 17
- 18
- 19
- 20
- 21
- 22
- 23
- 24
- 25
- 26
- 27
- 28
- 29
- 30
- 31
- 32
效果图:

更改条目颜色3:点击时颜色改变,点击后颜色保持不变,点击别的条目时颜色还原(listSelector)
只需一行代码,就是这么简单--android:listSelector="#1C86EE"
效果图:

更改ImageView图片颜色:点击时不变,点击后改变,切换时还原
// 添加图片数组
private int[] imagesEnableId =
{R.drawable.rb_home_enable, R.drawable.rb_find_enable, R.drawable.rb_focus_enable,
R.drawable.rb_collection_enable, R.drawable.rb_draft_enable, R.drawable.rb_question_enable}
...
private void initView() {
// 初始化Toolbar、DrawerLayout,生成相应的对象
mToolbar = (Toolbar) findViewById(R.id.toolbar)
mDrawerLayout = (DrawerLayout) findViewById(R.id.drawerLayout)
// 初始化ListView
mLv_titles = (ListView) findViewById(R.id.lv_title)
mMyAdapter = new MyAdapter()
mLv_titles.setAdapter(mMyAdapter)
mLv_titles.setOnItemClickListener(new AdapterView.OnItemClickListener() {
@Override
public void onItemClick(AdapterView<?> parent, View view, int position, long id) {
// 更新当前被选中的位置
mCurrentPos = position
// 刷新listview
mMyAdapter.notifyDataSetChanged()
}
})
}
...
@Override
public View getView(int position, View convertView, ViewGroup parent) {
View view = View.inflate(getApplicationContext(), R.layout.left_list, null)
ImageView iv_photo = (ImageView) view.findViewById(R.id.iv_photo)
TextView tv_title = (TextView) view.findViewById(R.id.tv_title)
mRl_list_background = (RelativeLayout) view.findViewById(R.id.rl_list_background)
System.out.println("------条目点击后")
iv_photo.setBackgroundResource(imagesId[position])
tv_title.setText(titles[position])
// 只有当更新的位置等于当前位置时,更改颜色
if(mCurrentPos == position){
mRl_list_background.setBackgroundColor(Color.rgb(35, 154, 237))
iv_photo.setBackgroundResource(imagesEnableId[position])
} else {
mRl_list_background.setBackgroundColor(Color.TRANSPARENT)
iv_photo.setBackgroundResource(imagesId[position])
}
return view
}
- 1
- 2
- 3
- 4
- 5
- 6
- 7
- 8
- 9
- 10
- 11
- 12
- 13
- 14
- 15
- 16
- 17
- 18
- 19
- 20
- 21
- 22
- 23
- 24
- 25
- 26
- 27
- 28
- 29
- 30
- 31
- 32
- 33
- 34
- 35
- 36
- 37
- 38
- 39
- 40
- 41
- 42
- 43
- 44
- 45
- 46
- 47
- 48
- 49
- 1
- 2
- 3
- 4
- 5
- 6
- 7
- 8
- 9
- 10
- 11
- 12
- 13
- 14
- 15
- 16
- 17
- 18
- 19
- 20
- 21
- 22
- 23
- 24
- 25
- 26
- 27
- 28
- 29
- 30
- 31
- 32
- 33
- 34
- 35
- 36
- 37
- 38
- 39
- 40
- 41
- 42
- 43
- 44
- 45
- 46
- 47
- 48
- 49
效果图:

1.创建项目,检查是否有v7包
dependencies {
    compile fileTree(dir: 'libs', include: ['*.jar'])
    testCompile 'junit:junit:4.12'
    compile 'com.android.support:appcompat-v7:24.2.1'
}
2.修改styles的theme样式
<resources>
<resources>
<style name="AppTheme.Base" parent="Theme.AppCompat.Light.NoActionBar">
<!
<item name="colorPrimary">@color/colorPrimary</item>
<item name="colorPrimaryDark">@color/colorPrimaryDark</item>
<item name="colorAccent">@color/colorAccent</item>
<!
<item name="drawerArrowStyle">@style/AppTheme.DrawerArrowToggle</item>
<item name="windowActionBar">false</item>
<item name="android:windowNoTitle">true</item>
<!
<item name="windowNoTitle">true</item>
</style>
<!
<style name="AppTheme" parent="AppTheme.Base"></style>
<style name="AppTheme.DrawerArrowToggle" parent="Base.Widget.AppCompat.DrawerArrowToggle">
<item name="color">@android:color/white</item>
</style>
</resources>
</resources>
- 1
- 2
- 3
- 4
- 5
- 6
- 7
- 8
- 9
- 10
- 11
- 12
- 13
- 14
- 15
- 16
- 17
- 18
- 19
- 20
- 21
- 22
- 23
- 24
- 25
- 26
- 27
- 28
- 29
- 30
- 1
- 2
- 3
- 4
- 5
- 6
- 7
- 8
- 9
- 10
- 11
- 12
- 13
- 14
- 15
- 16
- 17
- 18
- 19
- 20
- 21
- 22
- 23
- 24
- 25
- 26
- 27
- 28
- 29
- 30
3.给strings.xml文件添加值
<resources>
    <string name="app_name">ZhiHu</string>
    <string name="open">open</string>
    <string name="close">close</string>
</resources>
4.创建ToolBar标题栏的布局文件:tool_bar.xml
<?xml version="1.0" encoding="utf-8"?>
<android.support.v7.widget.Toolbar xmlns:android="http://schemas.android.com/apk/res/android"
     android:id="@+id/toolbar"
     android:layout_width="match_parent"
     android:layout_height="wrap_content"
     android:background="?attr/colorPrimary"
     android:minHeight="?attr/actionBarSize">

</android.support.v7.widget.Toolbar>
前四步一模一样,在这里粘贴出来是为了让大家方便看代码,如有不解,请参考上一篇博文
5.创建DrawerLayout侧滑面板的布局:custom_drawer.xml
<?xml version="1.0" encoding="utf-8"?>
<android.support.v4.widget.DrawerLayout xmlns:android="http://schemas.android.com/apk/res/android"
android:id="@+id/drawerLayout"
android:layout_width="match_parent"
android:layout_height="match_parent">
<RelativeLayout
android:layout_width="match_parent"
android:layout_height="match_parent">
<TextView
android:layout_width="wrap_content"
android:layout_height="wrap_content"
android:text="首页"
android:textSize="30dp"
android:textColor="@android:color/darker_gray"
android:layout_centerInParent="true"/>
</RelativeLayout>
<RelativeLayout
android:id="@+id/rl_left_content"
android:layout_width="250dp"
android:layout_height="match_parent"
android:background="#F5F5F5"
android:orientation="vertical"
android:layout_gravity="start">
<RelativeLayout
android:id="@+id/rl_photo"
android:layout_width="match_parent"
android:layout_height="wrap_content"
android:orientation="horizontal"
android:padding="12dp">
<ImageButton
android:id="@+id/ib_photo"
android:layout_width="40dp"
android:layout_height="40dp"
android:background="@drawable/ic_launcher"
android:scaleType="center"/>
<TextView
android:layout_width="match_parent"
android:layout_height="wrap_content"
android:layout_toRightOf="@id/ib_photo"
android:layout_marginLeft="10dp"
android:layout_centerVertical="true"
android:text="昵称"
android:textColor="#000"
android:textSize="20sp"/>
</RelativeLayout>
<ListView
android:id="@+id/lv_title"
android:layout_below="@id/rl_photo"
android:layout_width="match_parent"
android:layout_height="wrap_content"
android:divider="@null"/>
<View
android:layout_above="@+id/rl_setting"
android:layout_width="match_parent"
android:layout_height="1px"
android:background="#888"/>
<RelativeLayout
android:id="@+id/rl_setting"
android:layout_above="@+id/rl_theme"
android:layout_width="match_parent"
android:layout_height="wrap_content"
android:padding="15dp">
<TextView
android:text="设置"
android:layout_width="match_parent"
android:layout_height="wrap_content"
android:layout_centerVertical="true"
android:textColor="#8000"
android:textSize="15sp"/>
</RelativeLayout>
<RelativeLayout
android:id="@+id/rl_theme"
android:layout_alignParentBottom="true"
android:layout_width="match_parent"
android:layout_height="wrap_content"
android:padding="15dp">
<TextView
android:text="切换主题"
android:layout_width="match_parent"
android:layout_height="wrap_content"
android:layout_centerVertical="true"
android:textColor="#8000"
android:textSize="15sp"/>
</RelativeLayout>
</RelativeLayout>
</android.support.v4.widget.DrawerLayout>
- 1
- 2
- 3
- 4
- 5
- 6
- 7
- 8
- 9
- 10
- 11
- 12
- 13
- 14
- 15
- 16
- 17
- 18
- 19
- 20
- 21
- 22
- 23
- 24
- 25
- 26
- 27
- 28
- 29
- 30
- 31
- 32
- 33
- 34
- 35
- 36
- 37
- 38
- 39
- 40
- 41
- 42
- 43
- 44
- 45
- 46
- 47
- 48
- 49
- 50
- 51
- 52
- 53
- 54
- 55
- 56
- 57
- 58
- 59
- 60
- 61
- 62
- 63
- 64
- 65
- 66
- 67
- 68
- 69
- 70
- 71
- 72
- 73
- 74
- 75
- 76
- 77
- 78
- 79
- 80
- 81
- 82
- 83
- 84
- 85
- 86
- 87
- 88
- 89
- 90
- 91
- 92
- 93
- 94
- 95
- 96
- 97
- 98
- 99
- 100
- 101
- 102
6.在activity.xml文件中插入ToolBar布局、DrawerLayout布局
<?xml version="1.0" encoding="utf-8"?>
<LinearLayout xmlns:android="http://schemas.android.com/apk/res/android"
xmlns:tools="http://schemas.android.com/tools"
android:layout_width="match_parent"
android:layout_height="match_parent"
android:orientation="vertical"
tools:context=".MainActivity">
<include layout="@layout/tool_bar" />
<include layout="@layout/custom_drawer" />
</LinearLayout>
7.修改colors.xml标题栏颜色
<?xml version="1.0" encoding="utf-8"?>
<resources>
    <color name="colorPrimary">#1C86EE</color>
    <color name="colorPrimaryDark">#000000</color>
    <color name="colorAccent">#FF4081</color>
</resources>
8.给ListView创建left_list.xml布局
<?xml version="1.0" encoding="utf-8"?>
<RelativeLayout xmlns:android="http://schemas.android.com/apk/res/android"
                android:layout_width="match_parent"
                android:layout_height="wrap_content"
                android:orientation="horizontal"
                android:padding="13dp">

    <ImageView
        android:id="@+id/iv_photo"
        android:layout_width="25dp"
        android:layout_height="25dp"
        android:scaleType="center"/>
    <TextView
        android:text="首页"
        android:id="@+id/tv_title"
        android:layout_toRightOf="@id/iv_photo"
        android:layout_width="match_parent"
        android:layout_height="wrap_content"
        android:layout_marginLeft="15dp"
        android:layout_centerVertical="true"
        android:textColor="#000"
        android:textSize="18sp"/>

</RelativeLayout>


 2185
2185

 被折叠的 条评论
为什么被折叠?
被折叠的 条评论
为什么被折叠?
 到【灌水乐园】发言


