


一、创建项目
1.创建一个maven项目
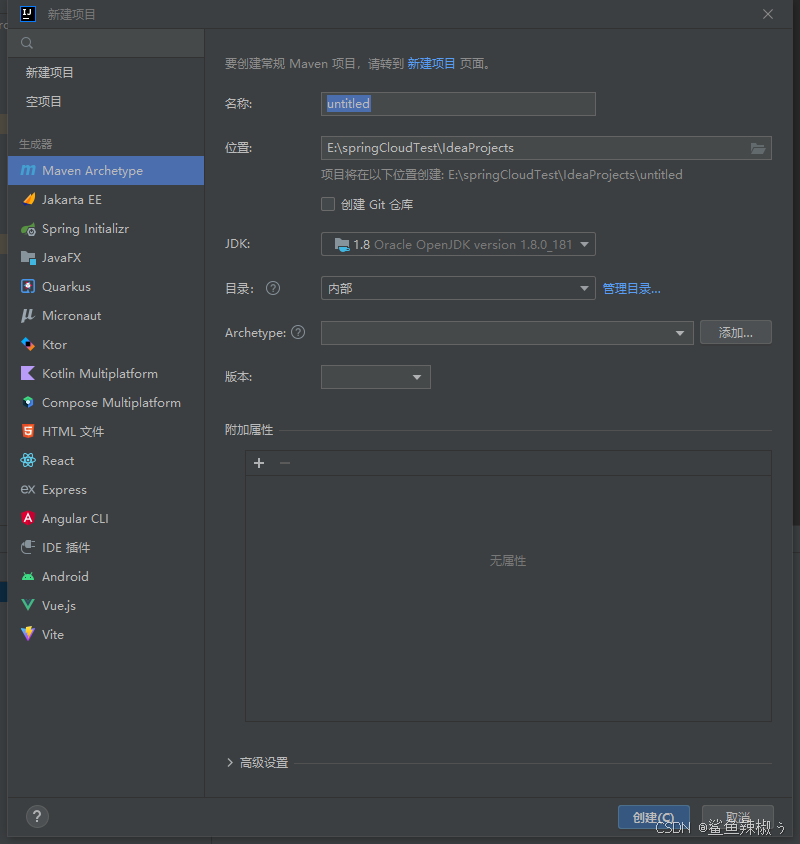
2.添加对应的pom参数
2.1添加工程对应的jar包
  <!-- 父工程 -->
  <parent>
    <groupId>org.springframework.boot</groupId>
    <artifactId>spring-boot-starter-parent</artifactId>
    <version>2.6.7</version>
  </parent>

  <dependencies>
    <!-- lombok -->
    <dependency>
      <groupId>org.projectlombok</groupId>
      <artifactId>lombok</artifactId>
    </dependency>


  </dependencies>

  <dependencyManagement>
    <dependencies>
      <!-- springcloud的资源 -->
      <dependency>
        <groupId>org.springframework.cloud</groupId>
        <artifactId>spring-cloud-dependencies</artifactId>
        <version>2021.0.5</version>
        <type>pom</type>
        <scope>import</scope>
      </dependency>
      <!-- springcloudalibaba的资源 -->
      <dependency>
        <groupId>com.alibaba.cloud</groupId>
        <artifactId>spring-cloud-alibaba-dependencies</artifactId>
        <version>2.2.5.RELEASE</version>
        <type>pom</type>
        <scope>import</scope>
      </dependency>

    </dependencies>
  </dependencyManagement>
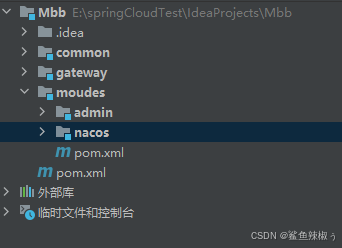
3.查看项目整体结构
二、安装配置nacos
1.下载nacos
下载地址:https://nacos.io/download/nacos-server/

2.windows安装nacos
2.1解压文件

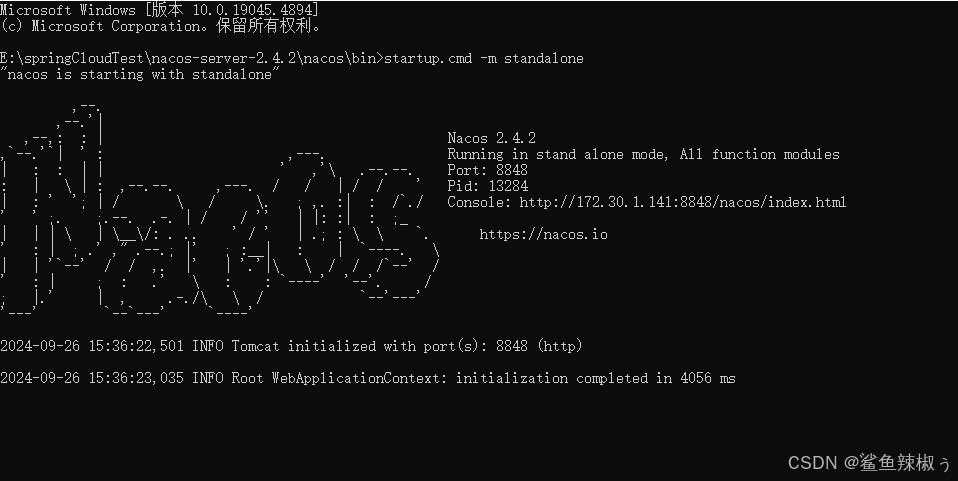
2.2执行nacos
注意: 保证你的8848端口没有被占用;默认启动为集群服务,单个启动;
#到对应的bin目录下执行命令,单个启动nacos
startup.cmd -m standalone
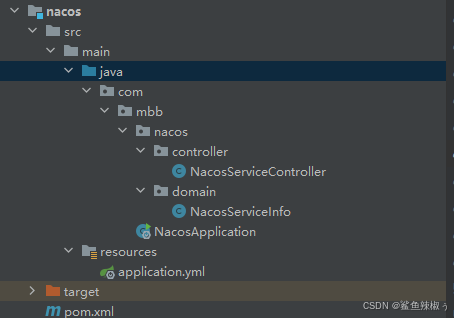
3.创建nacos模块,发现服务列表
3.1服务结构
3.2发现服务代码
3.2.1返回实体类
@Data
public class NacosServiceInfo {
    //服务名称
    private String serviceName;
    //服务IP
    private String serviceIp;
    //服务端口
    private Integer servicePort;
    //所属集群
    private String clusterName;
    //服务权重
    private Double serviceWeight;
}
3.2.1代码实现
@RestController
@RequestMapping("nacos")
public class NacosServiceController {

    //Nacos的ip地址
    @Value("${spring.cloud.nacos.server-addr}")
    private String serverAddr;

    @GetMapping("getService")
    public ResultJson getService() {
        try {
            List<NacosServiceInfo> nacosServiceInfoList = new ArrayList<>();
            // Nacos 配置
            Properties properties = new Properties();
            properties.put("serverAddr", serverAddr);

            // 创建 NamingService 实例
            NamingService namingService = NacosFactory.createNamingService(properties);

            // 分页获取服务名称
            int pageNo = 1;
            int pageSize = 1000;
            boolean hasMore = true;

            while (hasMore) {
                // 获取服务名称列表
                List<String> serviceNames = namingService.getServicesOfServer(pageNo, pageSize).getData();
                hasMore = serviceNames.size() == pageSize;  // 如果返回的数据大小等于 pageSize,说明还有更多数据
                for (String serviceName : serviceNames) {
                    // 获取每个服务的所有实例
                    List<Instance> instances = namingService.getAllInstances(serviceName);
                    for (Instance instance : instances) {
                        NacosServiceInfo nacosServiceInfo = new NacosServiceInfo();
                        nacosServiceInfo.setServiceName(serviceName);
                        nacosServiceInfo.setServiceIp(instance.getIp());
                        nacosServiceInfo.setServicePort(instance.getPort());
                        nacosServiceInfo.setClusterName(instance.getClusterName());
                        nacosServiceInfo.setServiceWeight(instance.getWeight());
                        nacosServiceInfoList.add(nacosServiceInfo);
                    }
                }

                pageNo++;
            }
            return new ResultJson(nacosServiceInfoList);
        } catch (Exception e) {
            throw new ServiceException(e.getMessage());
        }
    }
}
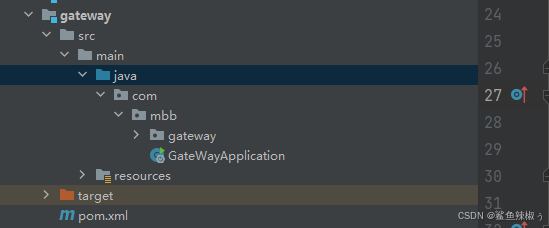
三、集成gateway
1.创建getaway模块
2.pom文件编写
<!-- springcloud里面的gateway集成 -->
<dependency>
    <groupId>org.springframework.cloud</groupId>
    <artifactId>spring-cloud-starter-gateway</artifactId>
</dependency>
<!-- nacos服务发现 -->
<dependency>
    <groupId>com.alibaba.cloud</groupId>
    <artifactId>spring-cloud-starter-alibaba-nacos-discovery</artifactId>
</dependency>
<!-- 负载均衡loadbalancer -->
<dependency>
    <groupId>org.springframework.cloud</groupId>
    <artifactId>spring-cloud-starter-loadbalancer</artifactId>
</dependency>
3.配置路由分发
在yml中配置
spring:
  application:
    name: gateway
  cloud:
    nacos:
      server-addr: 127.0.0.1:8848 #nacos注册地址
    gateway:
      routes:
        - id: nacos-service #服务名称不可重复
          uri: lb://nacos #路由地址
          predicates: #路径匹配
            - Path=/nacos/**
          filters: #过滤器
            - AddRequestHeader= titleColor, blue
4.跨域访问
4.1yml配置文件
spring:
  application:
    name: gateway
  cloud:
    nacos:
      server-addr: 127.0.0.1:8848 #nacos注册地址
    gateway:
      globalcors:
        corsConfigurations:
          '[/**]':
            allowedOrigins:
              - "*"
            allowedMethods:
              - GET
              - POST
              - PUT
              - DELETE
              - OPTIONS
            allowedHeaders:
              - "*"
            allowCredentials: true
4.2config配置
@Configuration
public class WebConfig implements WebMvcConfigurer {

    @Override
    public void addCorsMappings(CorsRegistry registry) {
        registry.addMapping("/**") // 允许所有路径
                .allowedOrigins("http://example.com") // 允许的源地址
                .allowedMethods("GET", "POST", "PUT", "DELETE") // 允许的方法
                .allowedHeaders("*") // 允许的请求头
                .allowCredentials(true); // 是否允许携带凭证
    }
}
注意: 这个需要spring-boot-starter-web这个jar包,但是与gateway不兼容,我们在子项目中加入这个配置来处理跨域,而不是在gateway来添加跨域;
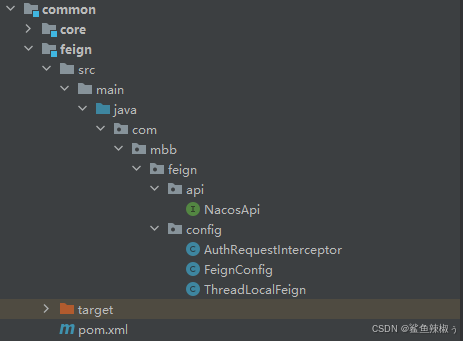
四、集成feign
1.创建feign项目
2.引入对应pom配置
<!-- feign客户端依赖 -->
<dependency>
    <groupId>org.springframework.cloud</groupId>
    <artifactId>spring-cloud-starter-openfeign</artifactId>
</dependency>
<!-- 引入httpClient依赖 -->
<dependency>
    <groupId>io.github.openfeign</groupId>
    <artifactId>feign-httpclient</artifactId>
</dependency>
3.编写对应api
@FeignClient(value = "nacos",contextId = "nacos",configuration = FeignConfig.class)
public interface NacosApi {
    @GetMapping("/nacos/getService")
    String getService();
}
4.对应启动类添加注解
@SpringBootApplication
@EnableDiscoveryClient
@EnableFeignClients
public class NacosApplication {
    public static void main(String[] args) {
        SpringApplication.run(NacosApplication.class, args);
    }

}
5.feign调用
@RestController
@RequestMapping("admin")
public class TestController {

    @Resource
    private NacosApi nacosApi;

    @GetMapping("getService")
    public ResultJson getService(){
        System.out.println("----------------");
        ThreadLocalFeign.set("aaaaaaaaaaaaa");
        String nacosApiService = nacosApi.getService();
        return new ResultJson(JSONObject.parseObject(nacosApiService, ResultJson.class));
    }
}
注意: 调用会出现NacosApi 找不到,解决方案有两种
1.在启动类·添加注解,扫描包
@SpringBootApplication
@EnableDiscoveryClient
@EnableFeignClients(basePackages = "com.mbb.feign.api")
public class AdminApplication {
    public static void main(String[] args) {
        SpringApplication.run(AdminApplication.class, args);
    }

}
2.在注解添加类扫描
@SpringBootApplication
@EnableDiscoveryClient
@EnableFeignClients(clients = {NacosApi.class})
public class AdminApplication {
    public static void main(String[] args) {
        SpringApplication.run(AdminApplication.class, args);
    }

}
后面整合springsecurity和oauth2,上面不足之处望海涵,希望博友多多指教!


 386
386

 被折叠的 条评论
为什么被折叠?
被折叠的 条评论
为什么被折叠?
 到【灌水乐园】发言


