


上一篇博客学习了如何在windows下搭建reactnative开发环境,先来简单总结一下吧:
- 安装react-native命令:
#在终端输入如下命令来安装react-native命令
npm install -g react-native-cli- 创建react native工程
 #同样在终端下输入如下命令来创建react native工程
react-native init 工程名- 开启react native服务
进入工程的根目录,执行如下命令,开启服务
react-native start使用谷歌浏览器测试服务是否开启成功,输入:
http://localhost:8081/index.android.bundle?platform=android
具体的搭建步骤,以及遇到的错误,可以参考我的上一篇博客windows下搭建react native开发环境
简单修改
作为android开发,先简单修改项目根目录下的index.android.js文件,看下效果:
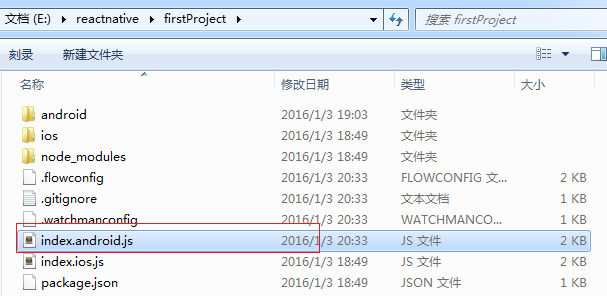
index.android.js
/**
 * Sample React Native App
 * https://github.com/facebook/react-native
 */
'use strict';

var React = require('react-native');
var {
  AppRegistry,
  StyleSheet,
  Text,
  View,
} = React;

var firstProject = React.createClass({
  render: function() {
    return (
      <View style={styles.container}>
        <Text style={styles.welcome}>
          Welcome to React Native!
        </Text>
        <Text style={styles.instructions}>
          To get started, edit index.android.js
        </Text>
        <Text style={styles.instructions}>
          Shake or press menu button for dev menu
        </Text>
      </View>
    );
  }
});

var styles = StyleSheet.create({
  container: {
    flex: 1,
    justifyContent: 'center',
    alignItems: 'center',
    backgroundColor: '#F5FCFF',
  },
  welcome: {
    fontSize: 20,
    textAlign: 'center',
    margin: 10,
  },
  instructions: {
    textAlign: 'center',
    color: '#333333',
    marginBottom: 5,
  },
});

AppRegistry.registerComponent('firstProject', () => firstProject);
这里我先简单的将欢迎语改为”hello my firstProject”,然后点击menu,或者摇一摇手机,点击”Reload JS”选项,重新加载就可以看到效果了。
简单的数据显示
这里我先本地模拟一些数据用来显示。打开index.android.js文件,在该文件中创建如下变量:
模拟简单数据
var androidinfo = [
  {title: 'android', year: '2016', pic: {thumbnail: 'https://gss1.bdstatic.com/5eN1dDebRNRTm2_p8IuM_a/res/img/logo/logo201509091.png'}},
];
这里就是一个javascript数组变量。
声明并赋值需要的变量
var {
  AppRegistry,
  StyleSheet,
  Text,
  Image,
  View,
} = React;
这里声明了五个对象。相当于:
var AppRegistry = React.AppRegistry;
var StyleSheet = React.StyleSheet;
var Text = React.Text;
var Image = React.Image;
var View = React.View;
的简写,这里说明一下:
- AppRegistry 是React Native应用的入口
- StyleSheet 提供了一种类似CSS样式表的抽象
- Text 一个用于显示文本的React组件
- Image 一个用来线束图片的React组件
- View 作为创建UI时最基础的组件,类似于android中的android.view.view
创建需要的样式
var styles = StyleSheet.create({
  container: {
    flex: 1,
    justifyContent: 'center',
    alignItems: 'center',
    backgroundColor: '#F5FCFF',
  },
    thumbnail: {
    width: 190,
    height: 60,
  },
});
这里通过React native为我们提供的StyleSheet组件的create方法来创建样式,这个方法不是必须的,但是如果加上的话,其会检查我们的样式代码是否符合react样式规范。 这里定义了两个样式container和thumbnail
添加显示组件
var firstProject = React.createClass({
  render: function() {
    // 获取androidinfo数组中的内容
    var info = androidinfo[0];
    return (
      <View style={styles.container}>
        <Text>
          {info.title}
        </Text>
        <Text>
          {info.year}
        </Text>
        <Image
            source={{uri: info.pic.thumbnail}}
            style={styles.thumbnail}
         />
      </View>
    );
  }
});可以看到,这里整个显示的样式是container,通过<Text>组件来显示文字,以及<Image />组件来显示图片
完整的代码如下:
/**
 * Sample React Native App
 * https://github.com/facebook/react-native
 */
'use strict';

var React = require('react-native');

var androidinfo = [
  {title: 'android', year: '2016', pic: {thumbnail: 'https://gss1.bdstatic.com/5eN1dDebRNRTm2_p8IuM_a/res/img/logo/logo201509091.png'}},
];

var {
  AppRegistry,
  StyleSheet,
  Text,
  Image,
  View,
} = React;

var firstProject = React.createClass({
  render: function() {
    var info = androidinfo[0];
    return (
      <View style={styles.container}>
        <Text>
          {info.title}
        </Text>
        <Text>
          {info.year}
        </Text>
        <Image
            source={{uri: info.pic.thumbnail}}
            style={styles.thumbnail}
         />
      </View>
    );
  }
});

var styles = StyleSheet.create({
  container: {
    flex: 1,
    justifyContent: 'center',
    alignItems: 'center',
    backgroundColor: '#F5FCFF',
  },
    thumbnail: {
    width: 190,
    height: 60,
  },
});

AppRegistry.registerComponent('firstProject', () => firstProject);
此时点击menu->reload js,效果如下:


 2409
2409


 被折叠的 条评论
为什么被折叠?
被折叠的 条评论
为什么被折叠?
 到【灌水乐园】发言


