


 没有检索到摘要
背景
1、使用jdk自带Keytool+tomcat项目http转单向https
2、使用Keytool生成双向https证书提供请求工具类
3、安装生成的https证书详细步骤少走弯路
上面的三个文章值之前分享的生成单向和双向https证书已经证书安装的详细步骤。
但是生成的步骤比较繁琐,每次要手动收入很多命令,一不小心错了还有从来。
工作中项目安装的地点也比较多每次的IP地址也不一样,所以想着做一个一劳永逸的小工具。
环境准备
- 电脑中已经安装jdk并配置好环境变量
- 电脑中安装Python3
- 安装Python中的一个模块eel
关于Python的学习有兴趣的可以看之前分享的汇总文章。
部分源码展示
开发中主要用到的技术 Python3 + eel + html 。下面展示的是后端源码有详细的注释,全部的源码和完整的一个https.exe的软件文章底部原文下载。如果自己不想了解这些可以直接使用里面我做好的小工具。已经打好exe的可执行软件,详细的打包方法完整源码中都已提供。
#!/usr/bin/python3
# -*- encoding: utf-8 -*-
__author__ = 'select957'
__wei_xin_gong_zhong_hao__ = '快乐学习与分享'

import os
import eel
import time
import subprocess

key_path = 'C:\key'


# 检查目录
def check_dir_path():
    file_names = ('clientcert.cer', 'clientcert.p12', 'server.cer', 'server.keystore')
    exists = os.path.exists(key_path)
    if exists:
        for file in os.listdir(key_path):
            if file in file_names:
                os.remove(key_path + '\\' + file)
    else:
        os.mkdir(key_path)


# 生成证书
def create_key(expiration_date, ip_or_ym, cn, pwd):

    check_dir_path()

    # 1、生成服务器证书库
    a = 'keytool -validity {expiration_date} -genkey -v -alias servercert -keyalg RSA -ext SAN={ip_or_ym} -keystore ' \
        '{key_path}\server.keystore -dname CN={cn},OU=server,O=server,L=server,ST=server,c=CN -storepass {pwd} ' \
        '-keypass {pwd} '.format(expiration_date=expiration_date, key_path=key_path, ip_or_ym=ip_or_ym, cn=cn, pwd=pwd)
    # os.system(a)
    subprocess.run(a, shell=True, stdin=subprocess.PIPE, stdout=subprocess.PIPE, stderr=subprocess.PIPE)
    time.sleep(0.1)

    # 2、生成客户端证书库
    b = 'keytool -validity {expiration_date} -genkeypair -v -alias clientcert -keyalg RSA -storetype PKCS12 -keystore ' \
        '{key_path}\clientcert.p12 -dname "CN=client,OU=client,O=client,L=client,ST=client,c=CN" -storepass {pwd} ' \
        '-keypass {pwd} '.format(expiration_date=expiration_date, key_path=key_path, pwd=pwd)
    # os.system(b)
    subprocess.run(b, shell=True, stdin=subprocess.PIPE, stdout=subprocess.PIPE, stderr=subprocess.PIPE)
    time.sleep(0.1)

    # 3、从客户端证书库中导出客户端证书
    c = 'keytool -export -v -alias clientcert -keystore {key_path}\clientcert.p12 -storetype PKCS12 -storepass {pwd} ' \
        '-rfc -file {key_path}\clientcert.cer '.format(key_path=key_path, pwd=pwd)
    # os.system(c)
    subprocess.run(c, shell=True, stdin=subprocess.PIPE, stdout=subprocess.PIPE, stderr=subprocess.PIPE)
    time.sleep(0.1)

    # 4、将客户端证书导入到服务器证书库(使得服务器信任客户端证书)
    d = 'keytool -import -v -alias clientcert -file {key_path}\clientcert.cer -keystore {key_path}\server.keystore ' \
        '-storepass {pwd} -noprompt '.format(key_path=key_path, pwd=pwd)
    # os.system(d)
    subprocess.run(d, shell=True, stdin=subprocess.PIPE, stdout=subprocess.PIPE, stderr=subprocess.PIPE)
    time.sleep(0.1)

    # 5、导出让客户端信任的服务器证书
    e = 'keytool -keystore {key_path}\server.keystore -export -alias servercert -file {key_path}\server.cer ' \
        '-storepass {pwd} '.format(key_path=key_path, pwd=pwd)
    # os.system(e)
    subprocess.run(e, shell=True, stdin=subprocess.PIPE, stdout=subprocess.PIPE, stderr=subprocess.PIPE)


eel.init('web')


@eel.expose
def py_submit(data):
    print(data)
    cn = data['cn']
    pwd = data['pwd']
    ip_or_ym = data['ip_or_ym']
    expiration_date = data['expiration_date']
    create_key(expiration_date, ip_or_ym, cn, pwd)
    return {'code': 0, 'msg': '证书生成成功请去 C:\key 目录下获取。'}


# 启动的函数调用放在最后,port=0表示使用随机端口,size=(宽,高)
eel.start('https.html', port=0, size=(560, 400))
效果演示
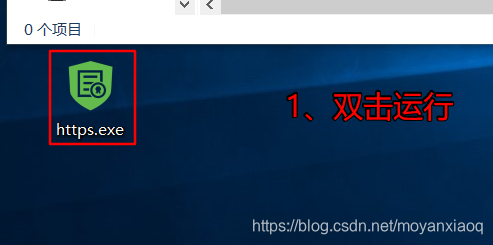
1、拿到软件后直接双击运行即可
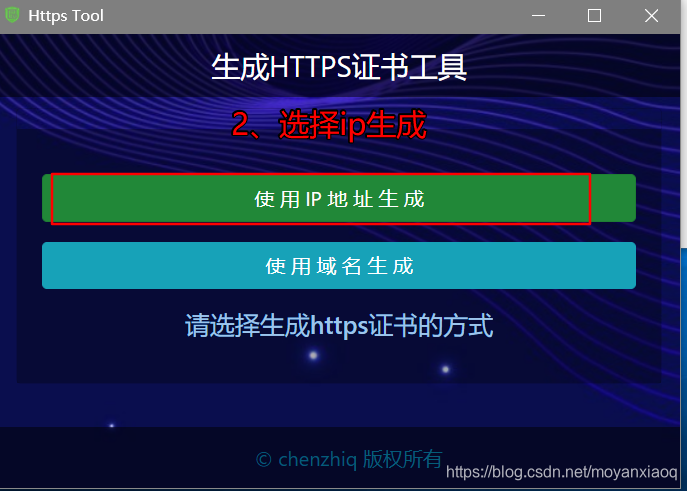
2、根据你的业务需求,可以选择使用ip生成也可以选择域名生成
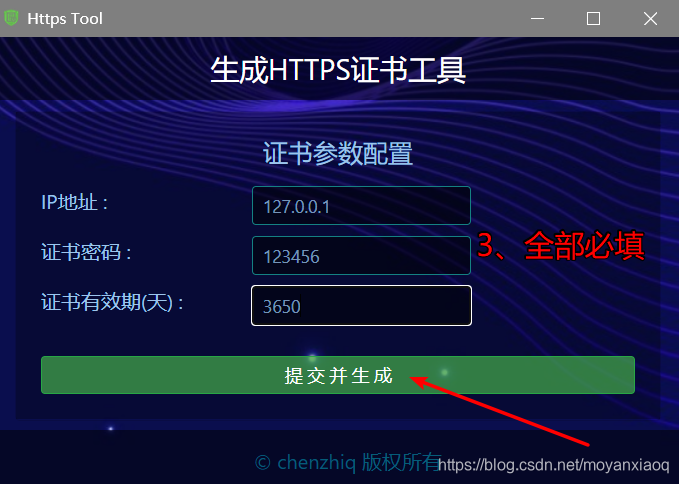
3、这里证书密码是服务端证书和客户端证书密码设置一样了
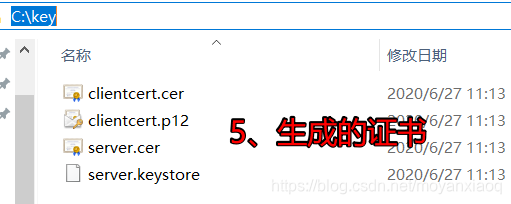
4、证书生成完成会提示去相应的目录获取
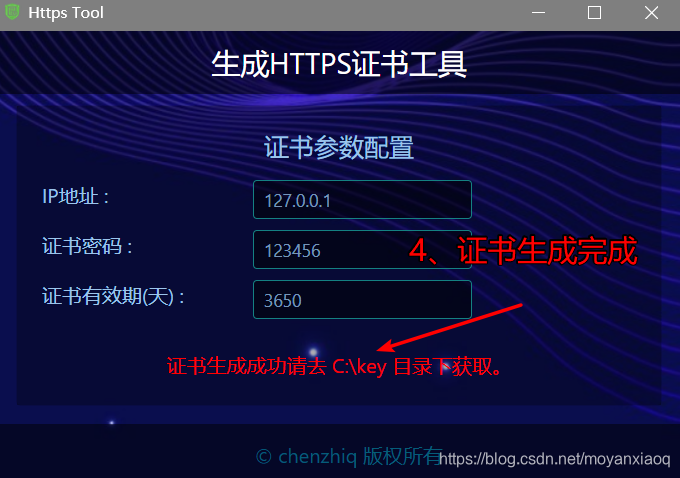
5、代码里默认将证书生成在C:\key目录下
相信聪明的你已经看懂了吧,非常简单。本来做了GIF图可是放不到文章知道**阅读原文**看了。
了解更多:


 8万+
8万+

 被折叠的 条评论
为什么被折叠?
被折叠的 条评论
为什么被折叠?
 到【灌水乐园】发言


