


原网址:http://www.devineloper.com/2013/08/28/setup-socks-proxy-android-without-root/
As the number of mobile Internet-connected devices continues to rise, so does the number of public-WiFi access points. “WiFi” window stickers are all over the place, advertising a “bonus” reason to stop by your local coffee shop, bookstore or Home Depot. While this may make multi-task shopping easier, it also exposes your activities to anyone else on the public network. All browsing data is broadcast to everyone on the public network who wants to see what you’re up to.
To remedy this, you can create an encrypted SSH tunnel to a computer at home. The tunnel encrypts all of your web browsing data and sends it home first. The home computer then completes the browsing request and forwards the results back through the encrypted tunnel to your mobile device. This gives you the same security you’d have if browsing from your couch at home. This post explains how to setup a SOCKS proxy for an Android device without root.翻译:了解到这些后,你可以创建一个加密通道链接到你家里的电脑。这个通道加密了你的所有网络请求数据并且发送首先发送到家里的电脑上。然后,你的家用电脑完成网络请求并且通过那个加密通道把结果返回到手机上。这就给了同你在家上网一样的安全性。本文讲解一下如何在一个没有root的Android设备上安装一个防火墙安全会话转换协议代理。
NOTE: There are better solutions for rooted Android devices, but this article assumes you don’t want to root your device. You can also use this article as a guideline to setup non-Android devices with similar software. After a long search for a non-root encrypted proxy solution, I found articles onmichaelchelen.net and calgarytech.blogspot.com that allowed me to do and write the below.
What you’ll need:
- A Linux server or desktop that you can connect to remotely using SSH
- An Android phone or tablet
Step 1: If you have a dynamic IP address for the Linux machine, first setup dynamic DNS so you can always get back to your server. Otherwise, you’ll need to write down your IP address every time you leave the house. Here’s an old Wired article that still seems relevant, though the recommended DynDNS.com is no longer very “Free”.
Edit: DynDNS has axed their free service completely.
Step 2: On your [Android] device, download and install ConnectBot and Firefox.
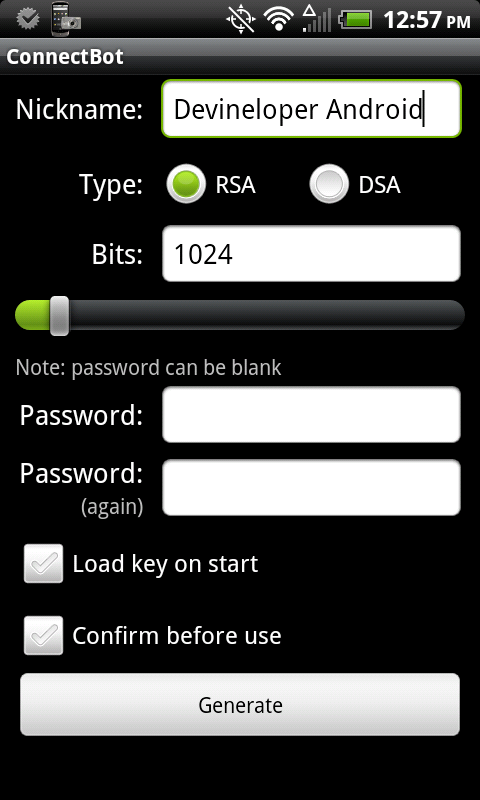
Step 3: Open ConnectBot and generate a public/private key pair. You’ll use the keys to login to your server without having to enter a password every time. To generate a key pair, hit menu and select “Manage Pubkeys”. Then hit menu again and select “Generate”. You’ll be prompted to setup your key details. The settings are up to you. If you set a password for your key pair, you’ll be prompted to enter it to unlock the key the first time you want to connect to your server. Hit “Generate” when you’re done with your settings to generate your key. You’ll be prompted with a blue box to help randomize the key. Just move your finger in a random manner in the blue box until it starts to generate your keys. Once complete, you’ll see the nickname you gave your key, along with a red lock icon.
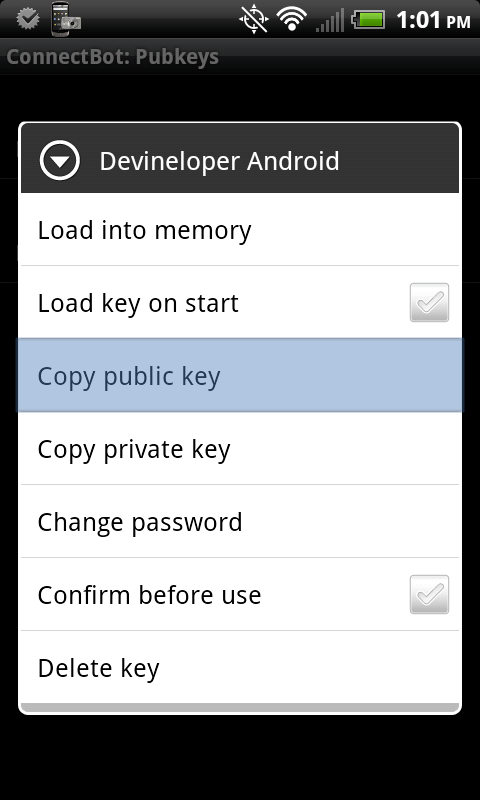
Step 4: In ConnectBot->Manage Pubkeys, long press on the key you generated in step 3 until a menu appears, then select “Copy public key” to copy the public key to memory. You’ll paste this onto your SSH server in step 6 to avoid having to enter a password. You can also optionally unlock your key here by tapping the red icon and entering your password. If you don’t, you’ll have to enter it the first time you try to connect to your server using your key.
Step 5: Create a connection to your Linux server using ConnectBot. Just enter your username@yourURL:port in the box at the bottom of the main screen and hit the enter key. Enter the password for your username when prompted and hit the enter key again to complete the connection.
Step 6: (Optional) Copy your public key to your Linux server to avoid having to enter your password in the future. After you connect in step 4, enter the following, making sure to paste the public key you copied in step 3 by hitting Menu and “Paste” (Keep the quotes shown below):
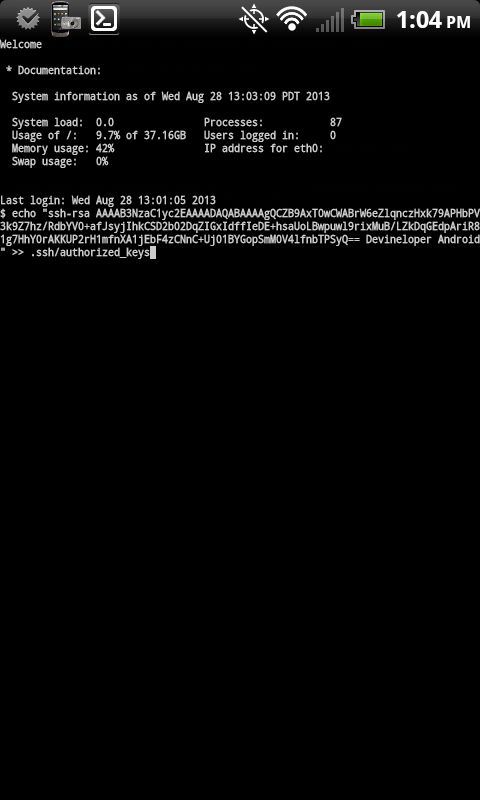
After you copy your key, type exit or hit menu and select “Disconnect”. Then try to connect again. You shouldn’t be prompted for a password.
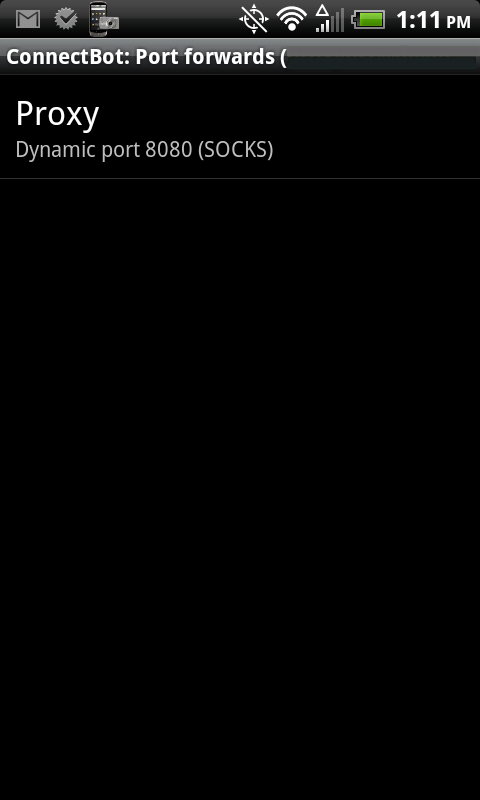
Step 7: Hit Menu and select “Port Forwards”. Then hit Menu again and select “Add port forward”.
- Nickname: Anything you want
- Type: Dynamic (SOCKS)
- Source port: 8080 (Make sure you enter a port. The default is greyed out and just a placeholder. If you don’t enter a port, your Port Forward will disappear and you’ll be left scratching your head as to why)
- Tap “Create port forward” and make sure you see your new port forward listed. If not, double-check that you entered a port.

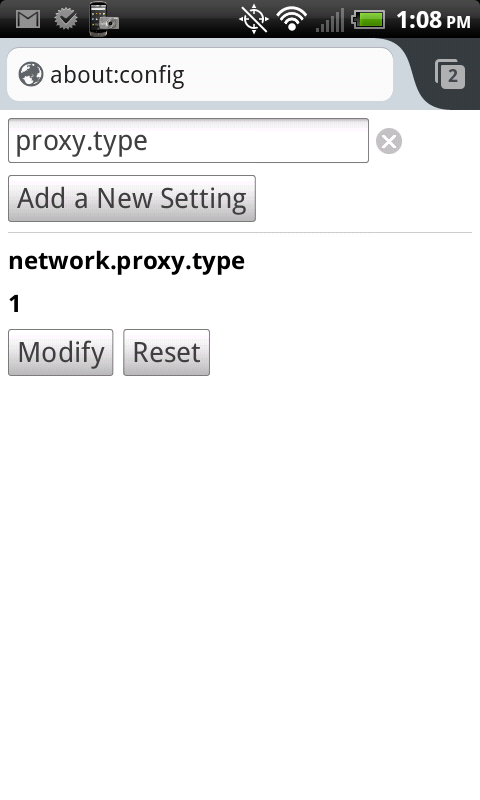
Step 8: Configure Firefox to use your newly created SSH tunnel. Open Firefox and type “about:config” in the address bar. Search for and set the following values:
- network.proxy.socks: 127.0.0.1
- network.proxy.socks_port: 8080 (or whatever port you chose in step 7)
- network.proxy.socks_remote_dns: true
- network.proxy.type: 1 (this tells Firefox to use your manual proxy settings)

Step 9: Done! There are a couple of things you can do to check if your proxy is working.
- Check your IP address
- When connected to a WiFi or mobile network that’s different from your Linux server’s network, google “what’s my ip” in Firefox and note your IP address.
- Open another browser (one that you haven’t set up to use the proxy) and do the same. The IP address in Firefox should match the IP address of your Linux server, while the IP address in the other browser should be your device’s external IP. The two IP addresses should not match.
- Close the SSH tunnel and try to browse the Internet
- Open ConnectBot and disconnect the SSH tunnel by typing
exitin the shell and hitting the enter key, or by tapping menu and selecting “Disconnect”. - Open Firefox and attempt to browse the internet. You should see a proxy refused connection error.
- Open ConnectBot and disconnect the SSH tunnel by typing

Once you verify your new SOCKS proxy is working, you can be confident that your nosy fellow shoppers can’t see where you’re browsing. Unless, of course, they’re standing over your shoulder.


 373
373

 被折叠的 条评论
为什么被折叠?
被折叠的 条评论
为什么被折叠?
 到【灌水乐园】发言


