


集群 的必要条件:
1) 资源管理器(pacemaker)
2)心跳(corosync)
pacemaker简介
pacemaker作为linux系统高可用HA的资源管理器,位于HA集群架构中的资源管理,资源代理层,它不提供底层心跳信息传递功能。(心跳信息传递是通过corosync来处理的这个使用有兴趣的可以在稍微了解一下,其实corosync并不是心跳代理的唯一组件,可以用hearbeat等来代替)。pacemaker管理资源是通过脚本的方式来执行的。我们可以将某个服务的管理通过shell,python等脚本语言进行处理,在多个节点上启动相同的服务时,如果某个服务在某个节点上出现了单点故障那么pacemaker会通过资源管理脚本来发现服务在改节点不可用。
pacemaker只是作为HA的资源管理器,所以不要想当然理解它能够直接管控资源,如果你的资源没有做脚本配置那么对于pacemaker来说它就是不可管理的。
一、配置集群
实验环境: vm1: node1 ip:172.25.38.1
vm2: node2 ip:172.25.38.2
vm3: 为server6、server7提供共享目录 ip:172.25.38.3
1.yum源
[root@vm1 ~]# vim /etc/yum.repos.d/rhel-source.repo

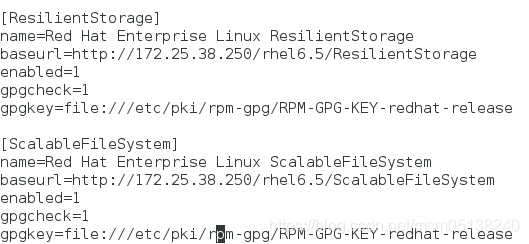
[root@vm1 ~]# scp /etc/yum.repos.d/rhel-source.repo root@172.25.38.2:/etc/yum.repos.d/rhel-source.repo
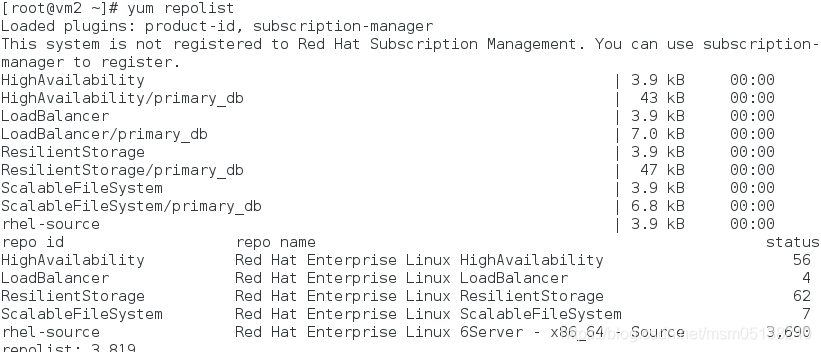
[root@vm1 ~]# yum repolist

[root@vm2 ~]# yum repolist
2.安装软件
[root@vm1 ~]# yum install pacemaker -y ##资源管理器
[root@vm2 ~]# yum install pacemaker -y
[root@foundation38 Desktop]# scp pssh-2.3.1-2.1.x86_64.rpm crmsh-1.2.6-0.rc2.2.1.x86_64.rpm root@172.25.38.1:/root/
[root@foundation38 Desktop]# scp pssh-2.3.1-2.1.x86_64.rpm crmsh-1.2.6-0.rc2.2.1.x86_64.rpm root@172.25.38.2:/root/
[root@vm1 ~]# yum install crmsh-1.2.6-0.rc2.2.1.x86_64.rpm pssh-2.3.1-2.1.x86_64.rpm -y ##必须一起下,否则依赖性无法解决
[root@vm2 ~]# yum install crmsh-1.2.6-0.rc2.2.1.x86_64.rpm pssh-2.3.1-2.1.x86_64.rpm -y ##心跳
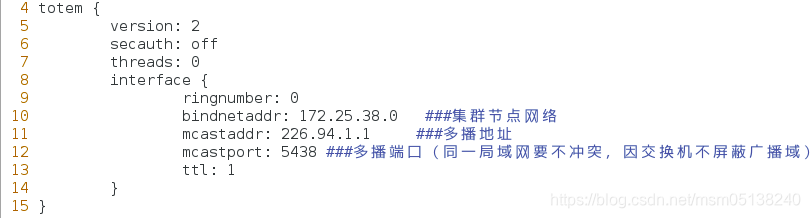
3.编辑配置文件
[root@vm1 ~]# cd /etc/corosync/
[root@vm1 corosync]# ls
corosync.conf.example corosync.conf.example.udpu service.d uidgid.d
[root@vm1 corosync]# cp corosync.conf.example corosync.conf
[root@vm1 corosync]# vim corosync.conf

[root@vm1 corosync]# scp corosync.conf root@172.25.38.2:/etc/corosync/
4.开启心跳服务
[root@vm1 corosync]# /etc/init.d/corosync start
[root@vm2 corosync]# /etc/init.d/corosync start
5.做解析(两个都做)
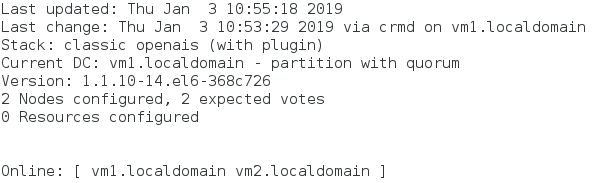
6.用命令界面集群(之前用luci的web页面集群)
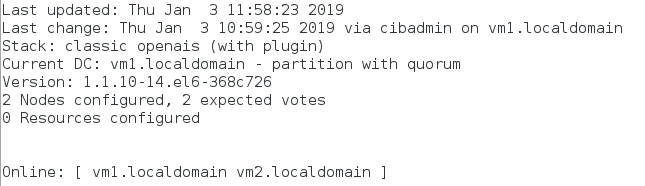
[root@vm1 corosync]# crm_mon ##监控节点连接状态
[root@vm2 corosync]# crm ##进入交互式
crm(live)# configure ###进入设置
crm(live)configure# verify ###因为没有下fence,报错
error: unpack_resources: Resource start-up disabled since no STONITH resources have been defined
error: unpack_resources: Either configure some or disable STONITH with the stonith-enabled option
error: unpack_resources: NOTE: Clusters with shared data need STONITH to ensure data integrity
Errors found during check: config not valid
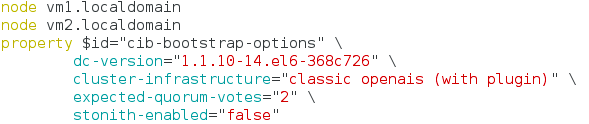
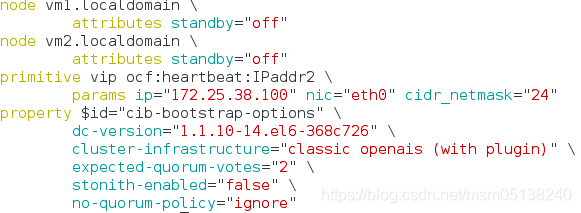
crm(live)configure# property stonith-enabled=false ##实验中关闭fence模块
crm(live)configure# verify ###检查语法
crm(live)configure# commit ###一定要保存提交,才可以使命令生效
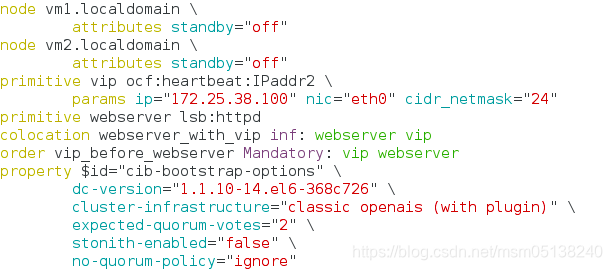
crm(live)configure# show ###显示添加;相当于页面集群的查看.conf文件
二、在没有配服务器优先级前对选举机制的实验
pacemaker资源管理器在一个节点宕机后进行资源切换时,要遵从选举机制,它规定法定票数要大于等于2.若没有一个节点达到2,则整个集群坏掉。
在正常standby时,则不会出现此问题
standby————移出集群 online————加入集群
1.standby下线实验
[root@vim corosync.conf
[root@vm1 corosync]# crm
crm(live)# node
crm(live)node# show
vm1.localdomain: normal
vm2.localdomain: normal
监控:crm_mon
1)vm1的资源管理器让自己下线
crm(live)node# standby ##让vm1下线
监控: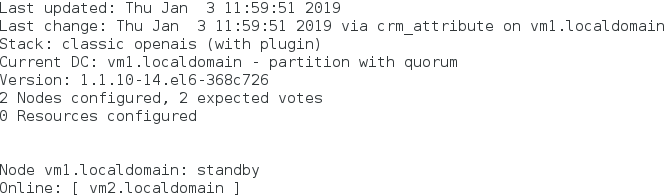
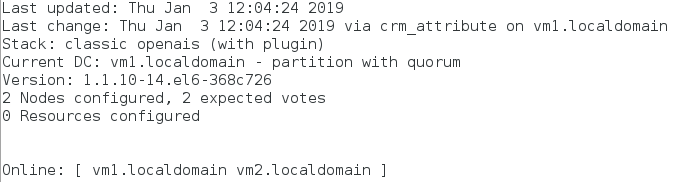
2)vm1让自己上线
crm(live)node# online
监控:crm_mon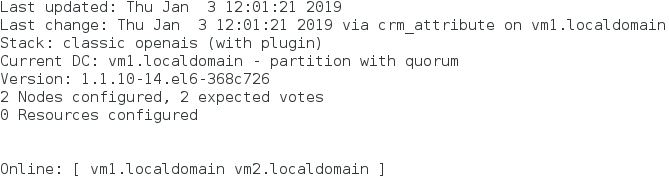
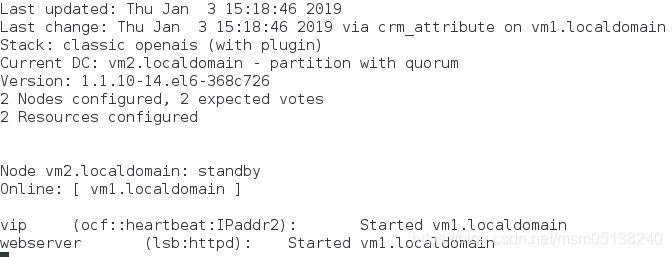
3)让vm2下线
crm(live)node# standby vm2.localdomain
监控:crm_mon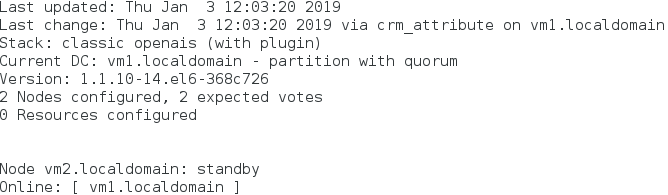
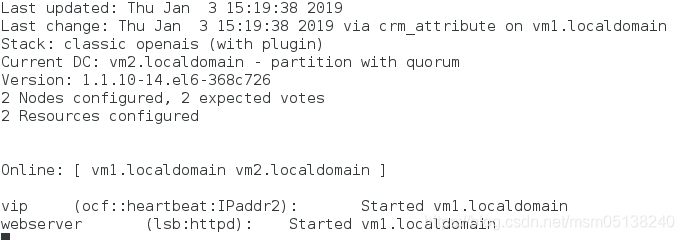
4)让vm2上线
crm(live)node# online vm2.localdomain
监控:crm_mon
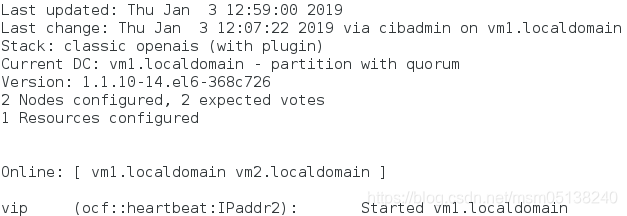
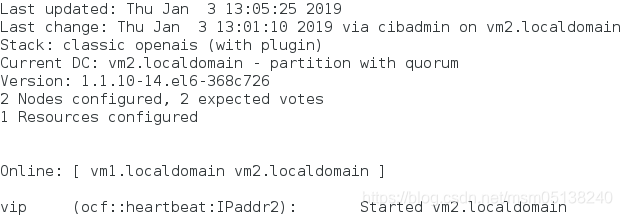
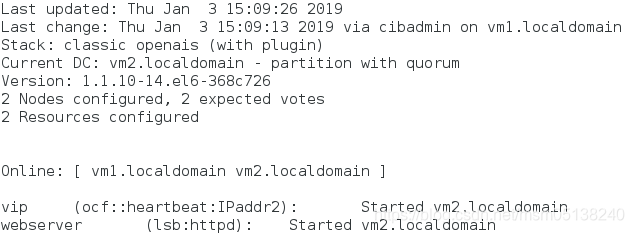
2.配置资源vip(此时未加监控,不提倡这样做)
crm(live)# configure
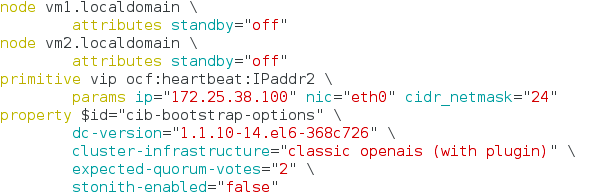
crm(live)configure# primitive vip ocf:heartbeat:IPaddr2 params ip=172.25.38.100 nic=eth0 cidr_netmask=24 ##ocf:heartbeat:IPaddr2类型;params ip=真实ip;nic=配到哪
crm(live)configure# verify ###检查语法
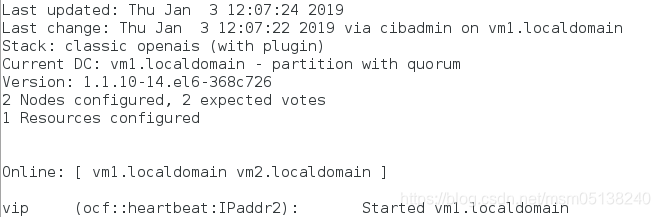
crm(live)configure# commit ##保存提交
crm(live)configure# show
监控:
3.测试
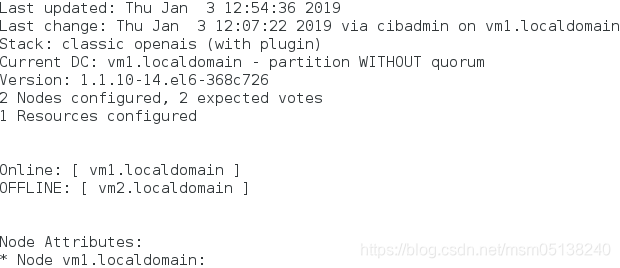
1)vm2宕机
[root@vm2 corosync]# poweroff
监控: ##整个集群坏掉
2)vm2重启
[kiosk@foundation38 ~]$ ssh root@172.25.38.2
root@172.25.38.2's password:
Last login: Thu Jan 3 09:46:32 2019 from 172.25.38.250
[root@vm2 ~]# /etc/init.d/corosync start
监控: ##恢复正常
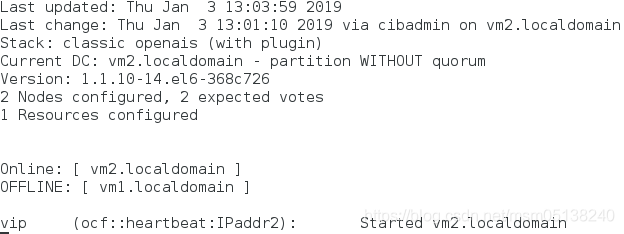
4.在不拥有法定票数时,忽略票数
[root@vm2 ~]# crm
crm(live)# configure
crm(live)configure# property no-quorum-policy=ignore ##忽略投票结果
crm(live)configure# verify
crm(live)configure# commit
crm(live)configure# show
监控:

1)vm1宕机
[root@vm1 corosync]# poweroff
监控: ##集群正常,vm2使用中
2)vm1恢复正常
[kiosk@foundation38 ~]$ ssh root@172.25.38.1
root@172.25.38.1's password:
Last login: Thu Jan 3 09:46:06 2019 from 172.25.38.250
[root@vm1 ~]# /etc/init.d/corosync start
监控: ###不回切
三、再添加httpd资源
1.下载httpd服务 一定不要手动去启动
[root@vm1 ~]# yum install httpd -y
[root@vm1 ~]# cd /var/www/html/
[root@vm1 html]# vim index.html
[root@vm2 ~]# yum install httpd -y
[root@vm2 ~]# cd /var/www/html/
[root@vm2 html]# vim index.html
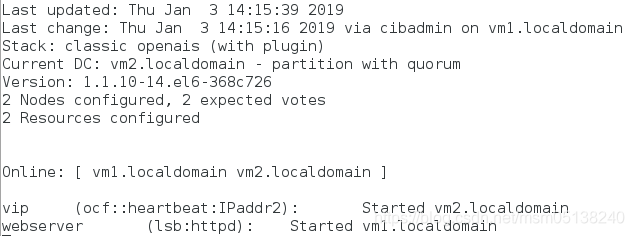
2.添加资源
[root@vm1 html]# crm
crm(live)# configure
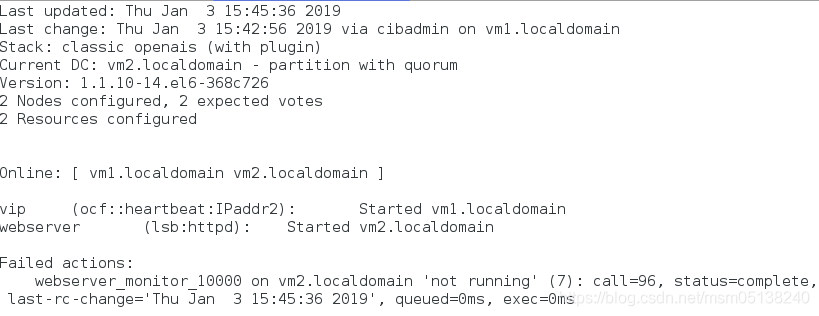
crm(live)configure# primitive webserver lsb:httpd
crm(live)configure# verify
crm(live)configure# commit
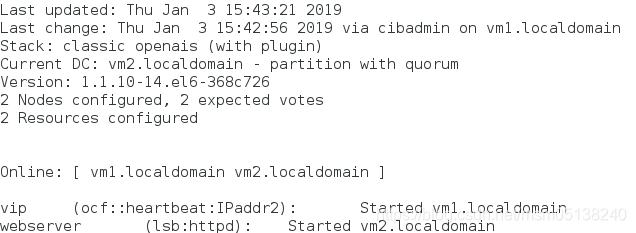
监控:此时资源平均分配在了不同节点上
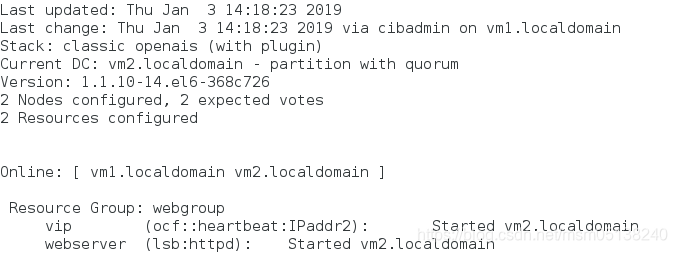
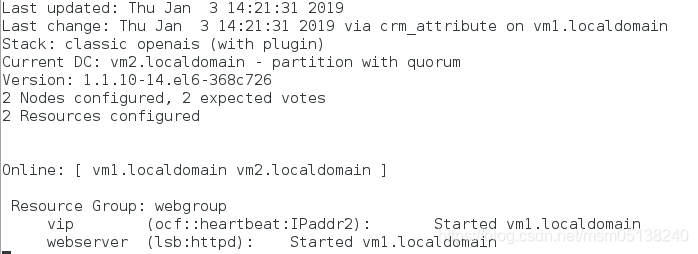
2.让资源在一起——方法1:加在同一资源组
crm(live)configure# group webgroup vip webserver
crm(live)configure# verify
crm(live)configure# commit
crm(live)configure# cd ..
crm(live)# resource
crm(live)resource# show
Resource Group: webgroup
vip (ocf::heartbeat:IPaddr2): Started
webserver (lsb:httpd): Started
监控:
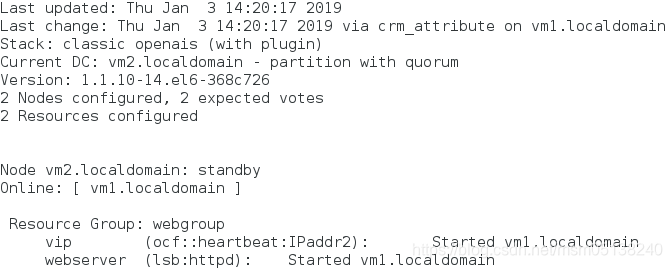
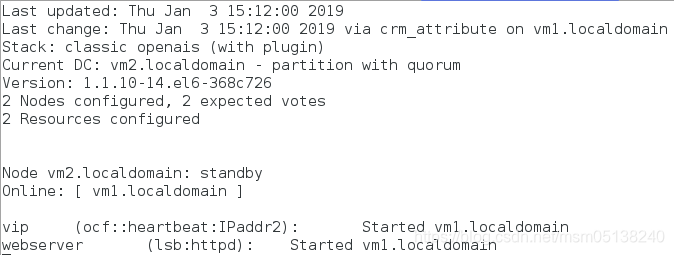
1)vm2下线
crm(live)node# standby vm2.localdomain
监控:
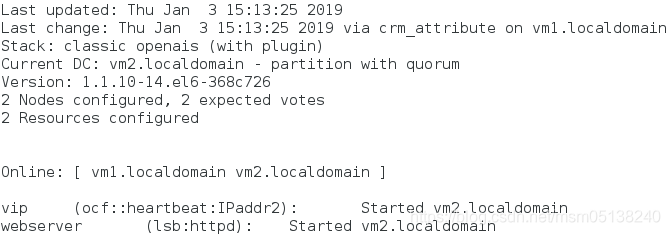
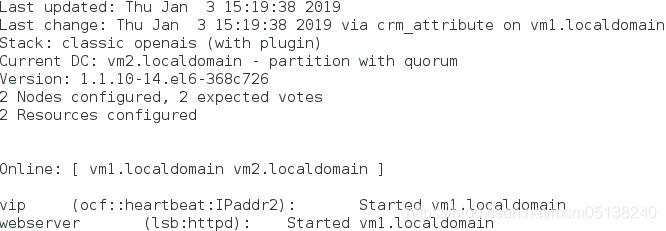
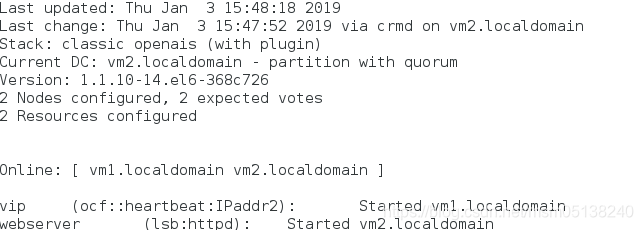
2)vm2上线
crm(live)node# online vm2.localdomain
监控: 不回切
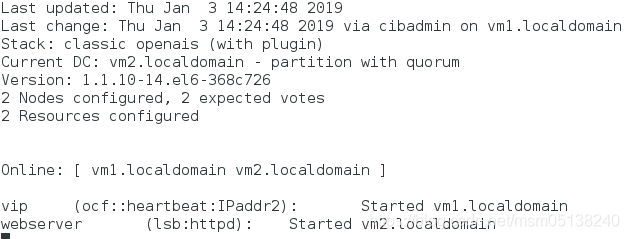
3.删除组
crm(live)# resource
crm(live)resource# show
Resource Group: webgroup
vip (ocf::heartbeat:IPaddr2): Started
webserver (lsb:httpd): Started
crm(live)resource# stop webgroup ###一定先stop
crm(live)resource# cd ..
crm(live)# configure
crm(live)configure# delete webgroup
crm(live)configure# verify
crm(live)configure# commit
监控: 资源又分配了
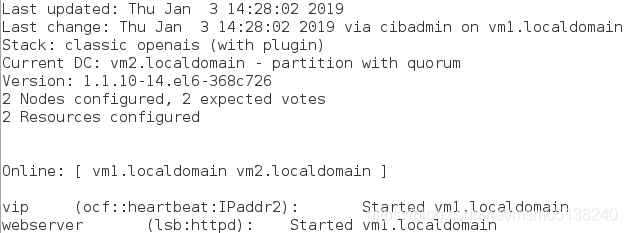
4.资源永远在一起方法2:克隆 ###这种方法只有pacemaker可用;资源也不回切
crm(live)configure# colocation webserver_with_vip inf: webserver vip
crm(live)configure# verify
crm(live)configure# commit
crm(live)configure# cd ..
crm(live)# resource
crm(live)resource# show
vip (ocf::heartbeat:IPaddr2): Started
webserver (lsb:httpd): Started
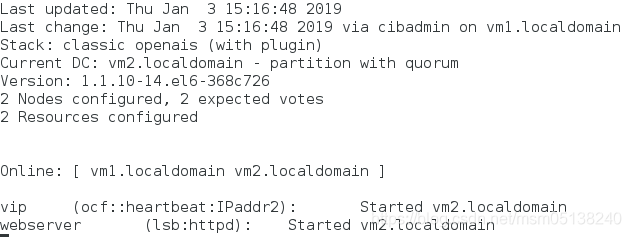
监控:
四、回切,谁的权重大,使用谁
1.定义资源启动顺序 一定先ip再httpd
crm(live)configure# order vip_before_webserver Mandatory: vip webserver
crm(live)configure# verify
crm(live)configure# commit
crm(live)configure# show
2.定义资源对节点的倾向性——权重给节点
测试:只要权重大的在线,就使用权重大的
crm(live)configure# location vip_on_vm2 vip rule 50: #uname eq vm2.localdomain ##定义了vm2的权重为50,vm1未设置则默认为0
crm(live)configure# verify
crm(live)configure# commit
1)vm1、vm2都在线
监控:vm2(50)> vm1(0)
2)crm(live)node# standby vm2.localdomain
监控: vm2下线
3)crm(live)node# online vm2.localdomain
监控:vm2(50)> vm1(0)
若不想资源一直这样来回回切:
3.定义资源对节点的黏性——权重给资源,资源目前在哪个节点上,哪个节点权重 =+ 资源权重
定义资源对节点的黏性后,倾向性就只在服务上线时起作用
1)定义资源对节点黏性
pcrm(live)configure# property default-resource-stickiness=50 ##两个资源权重50*2=100
crm(live)configure# verify
crm(live)configure# commit
监控:vm2(50)> vm1(0)
2)vm2下线
crm(live)node# standby vm2.localdomain
监控:
3)vm2上线
crm(live)node# online vm2.localdomain
监控: 此时资源在vm1上; vm1(100)> vm2(50)
五、对资源加监控
1.若没有加,资源挂了,监控并不会发现。但是却访问不了
[root@vm1 html]# killall httpd
监控:一切正常
访问:
[root@foundation38 Desktop]# curl 172.25.38.100
curl: (7) Failed connect to 172.25.38.100:80; Connection refused
2.删除之前加的无监控的资源
[root@vm1 html]# crm
crm(live)# resource
crm(live)resource# show
vip (ocf::heartbeat:IPaddr2): Started
webserver (lsb:httpd): Started
crm(live)resource# stop vip
crm(live)resource# stop webserver
crm(live)resource# cd ..
crm(live)# configure
crm(live)configure# show

crm(live)configure# delete vip
INFO: hanging location:vip_on_vm2 deleted
INFO: hanging colocation:webserver_with_vip deleted
INFO: hanging order:vip_before_webserver deleted
crm(live)configure# delete webserver
crm(live)configure# verify
crm(live)configure# show

crm(live)configure# commit
3.添加带有监控的资源
监控每10s检查一次,检查到vm1的httpd运行出错,然后在20s内看httpd是否能够再次正常启动,如果能够正常启动,则依旧将资源交给vm1,若不能正常启动,则将资源交给vm2。
crm(live)configure# primitive vip ocf:heartbeat:IPaddr2 params ip=172.25.38.100 nic=eth0 cidr_netmask=24 op monitor interval=10s timeout=20s ###每10s监控检查一次;给20s的延迟时间
crm(live)configure# verify
crm(live)configure# commit
crm(live)configure# primitive webserver lsb:httpd op monitor interval=10s timeout=20s
crm(live)configure# verify
crm(live)configure# commit
监控:
4.测试
[root@vm2 html]# killall httpd
[root@vm2 html]# netstat -antlpe|grep httpd
[root@vm2 html]# netstat -antlpe|grep httpd
[root@vm2 html]# netstat -antlpe|grep httpd ##监控到资源挂了,重新自动开启
tcp 0 0 :::80 :::* LISTEN 0 12017 1917/httpd
监控: ##有报错
5.清除webserver资源的报错信息
[root@vm2 html]# crm
crm(live)# resource
crm(live)resource# cleanup webserver
监控:
六、给集群添加后端存储——nfs远程共享一个目录(文件系统)
1.在vm3上下载nfs-utils、 rpcbind1并启动:
[root@vm3 ~]# yum install nfs-utils rpcbind -y
[root@vm3 ~]# /etc/init.d/rpcbind start
[root@vm3 ~]# /etc/init.d/nfs start
2.创建vm3上的nfs共享目录
[root@vm3 ~]# mkdir -p /web/httpdocs
[root@vm3 ~]# chmod o+w /web/httpdocs/
[root@vm3 ~]# ll -d /web/httpdocs/
drwxr-xrwx 2 root root 4096 Jan 3 16:38 /web/httpdocs/
[root@vm3 ~]# vim /etc/exports ##共享策略
![]()
[root@vm3 ~]# exportfs -r
[root@vm3 ~]# showmount -e ##识别导入
[root@vm3 ~]# cd /web/httpdocs/
[root@vm3 httpdocs]# vim index.html
3.测试是否可以远程挂载
[root@vm1 html]# mount -t nfs 172.25.38.3:/web/httpdocs /mnt
[root@vm1 html]# df
Filesystem 1K-blocks Used Available Use% Mounted on
/dev/mapper/VolGroup-lv_root 8813300 982296 7383312 12% /
tmpfs 251136 21744 229392 9% /dev/shm
/dev/sda1 495844 33475 436769 8% /boot
172.25.38.3:/web/httpdocs 8813312 905728 7459904 11% /mnt
[root@vm1 html]# umount /mnt
[root@vm2 html]# mount -t nfs 172.25.38.3:/web/httpdocs /mnt
[root@vm2 html]# df
Filesystem 1K-blocks Used Available Use% Mounted on
/dev/mapper/VolGroup-lv_root 8813300 982492 7383116 12% /
tmpfs 251136 37152 213984 15% /dev/shm
/dev/sda1 495844 33475 436769 8% /boot
172.25.38.3:/web/httpdocs 8813312 905728 7459904 11% /mnt
[root@vm2 html]# umount /mnt
4.配置为集群添加nfs共享存储资源
[root@vm2 html]# crm
crm(live)# configure
pcrm(live)configure#primitive webdata ocf:heartbeat:Filesystem params device="172.25.38.3:/web/httpdocs" directory='/var/www/html' fstype='nfs' op monitor interval=20s timeout=40s op start timeout=60s stop timeout=60s
crm(live)configure# verify
WARNING: webdata: default timeout 20s for stop is smaller than the advised 60
crm(live)configure# commit
WARNING: webdata: default timeout 20s for stop is smaller than the advised 60
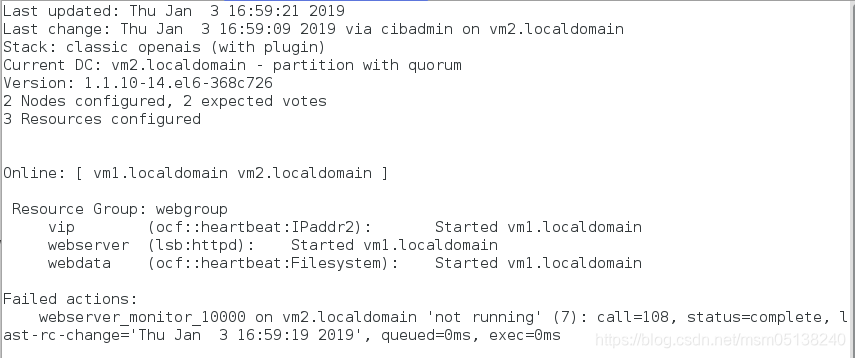
crm(live)configure# group webgroup vip webserver webdata ###配置资源组webgroup
crm(live)configure# commit
监控:
测试:
[root@foundation38 Desktop]# curl 172.25.38.100
vm3
[root@foundation38 Desktop]# curl 172.25.38.100
vm3
[root@foundation38 Desktop]# curl 172.25.38.100
vm3
5.让vm1下线
crm(live)node# standby vm1.localdomain
监控: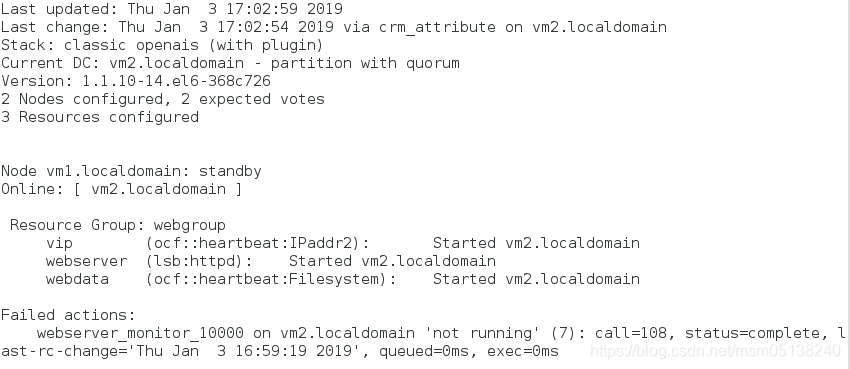
测试:
[root@foundation38 Desktop]# curl 172.25.38.100
vm3
七、Fence机制
1. 在vm1和vm2上建立/etc/cluster
[root@foundation40 ~]# systemctl start fence_virtd
[root@foundation40 cluster]# scp -r fence_xvm.key root@172.25.38.1:/etc/cluster/ #将fence的钥匙传给vm1
[root@foundation40 cluster]# scp -r fence_xvm.key root@172.25.38.2:/etc/cluster/ #将fence的钥匙传给vm2
2.在集群中添加fence机制
[root@vm1 ~]# crm
crm(live)# configure
crm(live)configure# property stonith-enabled=true #开启fence机制,更改为ture表示资源会迁移
crm(live)configure# commit
[root@vm1 cluster]# yum install -y fence-virt
[root@vm2 cluster]# yum install -y fence-virt
[root@vm2 cluster]# crm
crm(live)# configure
crm(live)configure# primitive vmfence stonith:fence_xvm params pcmk_host_map="vm1:test1;vm2:test2" op monitor interval=1min ###添加vmfence
crm(live)configure# commit
检测:
若服务起在vm2,当vm2内核崩溃,vmfence服务切换到vm1。
当vm2重新开启,vmfence服务会回切至vm2


 1851
1851


 被折叠的 条评论
为什么被折叠?
被折叠的 条评论
为什么被折叠?
 到【灌水乐园】发言


