


1、layer-list
layer-list可以将多个图片按照顺序层叠起来。如下图一种效果


贴一段实现阴影效果的代码:
<?xml version="1.0" encoding="utf-8"?>
<layer-list xmlns:android="http://schemas.android.com/apk/res/android" >

    <item >
        <shape >
            <solid android:color="#DCDCDC"/>
        </shape>
    </item>

    <item android:left="3dp" android:right="3dp" android:bottom="5dp">
        <shape >
            <solid android:color="#ffffff"/>
        </shape>
    </item>

</layer-list>2、自定义RadioButton
要实现如下效果:

步骤:在shape中设置选中和不选中图片(注意是selected不是checked),然后RadioButton去掉系统默认的按钮,最后记得不要就知道用background,drawableLeft也可以。
<?xml version="1.0" encoding="utf-8"?>
<selector xmlns:android="http://schemas.android.com/apk/res/android" >

    <item android:state_selected="true" android:drawable="@drawable/rb_sel"></item>
    <item android:state_selected="false" android:drawable="@drawable/rb_notsel"></item>

</selector>
<pre name="code" class="java"><RadioGroup
android:id="@+id/rg"
android:layout_width="match_parent"
android:layout_height="wrap_content"
android:layout_marginLeft="10dp"
android:layout_marginRight="10dp"
android:checkedButton="@+id/rb1"
android:orientation="horizontal" >
<RadioButton
android:id="@+id/rb1"
android:layout_width="0dp"
android:layout_height="wrap_content"
android:layout_weight="1"
android:button="@null"
android:drawableLeft="@drawable/radiobt_sel"
android:text="A" />
<RadioButton
android:id="@+id/rb2"
android:layout_width="0dp"
android:layout_height="wrap_content"
android:layout_weight="1"
android:button="@null"
android:drawableLeft="@drawable/radiobt_sel"
android:text="B" />
</RadioGroup>3、用shape实现虚线
对于以下的用法,你首先需要关闭硬件加速:ndroid:hardwareAccelerated="false"
1)画一条水平方向的虚线<?xml version="1.0" encoding="utf-8"?>
<shape xmlns:android="http://schemas.android.com/apk/res/android"
android:shape="line">
<!-- 显示一条虚线,破折线的宽度为dashWith,破折线之间的空隙的宽度为dashGap,当dashGap=0dp时,为实线 -->
<stroke android:width="1dp" android:color="#D5D5D5"
android:dashWidth="2dp" android:dashGap="3dp" />
<!-- 虚线的高度 -->
<size android:height="2dp" />
</shape> 设置虚线高度并没有什么卵用。
2)画一条垂直方向的虚线
<?xml version="1.0" encoding="utf-8"?>
<rotate xmlns:android="http://schemas.android.com/apk/res/android"
    android:fromDegrees="90"
    android:toDegrees="90" >

    <shape android:shape="line" >
        <stroke
            android:dashGap="2dp"
            android:dashWidth="3dp"
            android:color="#818181" />
    </shape>

</rotate>如果想实现垂直虚线放置在屏幕的左侧,只能通过margin设置为负值来实现。
3)自己绘制一条虚线
说下思路:比如绘制水平方向虚线。以宽度为界线,等间隔循环绘制线段。
if(width>10){
	for(int i=0;i<width;i+=dash){
		canvas.drawLine(i, 0, i+=dash, 0, p);
	}
}
4、spinner的onItemSelected事件
当spinner中数据只有一条时,如果你选择这条数据,你会发现它既不响应onItemSelected点击事件,也不响应onNothingSelected事件。没错,就是这样,让我纠结了好久。
5、Fragment之间传递参数
方式1:通过外部存储方式,如SharePreferences。
方式2:通过官方推荐方式。通过bundle进行参数传递,这个两个Fragment跳转时就可带上参数了,同样可以传递一个复杂的对象。
跳转时传递:
ft.hide(getActivity().getSupportFragmentManager().findFragmentByTag(""));
DemoFragment demoFragment = new DemoFragment();
Bundle bundle = new Bundle();
bundle.putString("key", "这是方法二");
demoFragment.setArguments(bundle);
ft.add(R.id.fragmentRoot, demoFragment, SEARCHPROJECT);
ft.commit(); String string = getArguments().getString("key"); 方式3:取巧方式。通过Activity的成员变量。
在Activity中定义一个字段、然后添加set和get方式。在第一个Fragment中更改其值,第二个Fragment中获取其值。
如:
public class DemoActivity extends Activity{

	private String mTitle;

	public String getmTitle() {
		return mTitle;
	}

	public void setmTitle(String title) {
		this.mTitle = title;
	}
}((DemoActivity)getActivity()).getmTitle();6、自定义checkbox--解决自定义图片居中的问题
关于怎么自定义就不说了,贴一篇连接,使用selector或者style。自己去看:http://blog.sina.com.cn/s/blog_777c69930100z6j7.html
问题描述:使用自定义图片的RadioButton时,如果文字太长,会出现图片在左侧居中的情况。试过各种属性未能解决。
解决方法:使用RadioButton和TextView两个控件,这样又引出新的问题:如果用一个线性布局把这两个控件放在一起的话,RadioGroup将不响应点击事件。又该如何解决呢?
当然是去掉LinearLayout,然后将TextView的margin属性设为负值即可。
</pre></p><pre name="code" class="java"><RadioGroup
            android:id="@+id/rg"
            android:layout_width="match_parent"
            android:layout_height="match_parent"
            android:layout_gravity="center"
            android:layout_marginLeft="10dp"
            android:checkedButton="@+id/rb1"
            android:clickable="true"
            android:gravity="left"
            android:orientation="vertical" >

            <!-- optionA -->

            <RadioButton
                android:id="@+id/rb1"
                android:layout_width="15dp"
                android:layout_height="20dp"
                android:button="@null"
                android:drawableLeft="@drawable/radiobt_sel" />

            <TextView
                android:id="@+id/tv_rb1"
                android:layout_width="wrap_content"
                android:layout_height="wrap_content"
                android:layout_marginLeft="18dp"
                android:layout_marginRight="10dp"
                android:layout_marginTop="-20dp"
                android:paddingBottom="10dp"
                android:text="很sasdfafsawef欢asdffaef"
                android:textColor="@color/blue"
                android:textSize="@dimen/BasicTextSize" />
</RadioGroup>
7、去掉GridView的边框,不是item的边框
用了这么久,一直以为GridView是没有边框的~现实无情的上了一课。就像ListView自带分隔线一样。截图看结果:
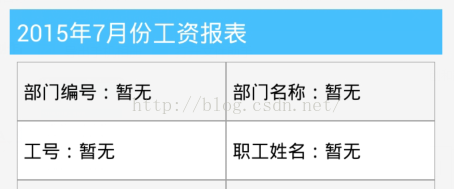
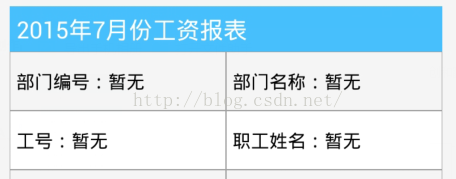
很明显,第一张图片的蓝条比底下的GridView宽,而且之间有间隔~但实际上代码上的区别仅仅是第二个图片增加了:android:listSelector="@null"。
8、关于ExpandableListView去掉默认的箭头
设置其groupIndicator属性
android:groupIndicator="@drawable/expandable_sel"<?xml version="1.0" encoding="utf-8"?>
<selector xmlns:android="http://schemas.android.com/apk/res/android" >
<item android:state_expanded="true" android:drawable="@drawable/exap_open"></item>
<item android:drawable="@drawable/exap_close"></item>
</selector>


 344
344


 被折叠的 条评论
为什么被折叠?
被折叠的 条评论
为什么被折叠?
 到【灌水乐园】发言


