


Android开发之调用google map api v2 详细图解
详细参考google官方文档:
https://developers.google.com/maps/documentation/android/start?hl=zh-CN
1、首先 安装Google Play services SDK
打开Eclipse - > Window - > Android SDK Manager
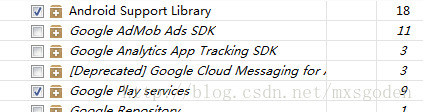
安装Android Support Library和Google Play services.
注意:1、若无法安装,显示错误:
Failed to fectch URl https://dl-ssl.google.com/android/repository/addons_list.xml, reason: Connection to https://dl-ssl.google.com refused
解决办法来源于:code.google.com
用notepad打开C:\WINDOWS\system32\drivers\etc中的hosts文件
在最后一行添加74.125.237.1 dl-ssl.google.com
成功解决问题。
2、部分国产手机阉割了Google Play service,故需下载安装,地址:http://google-play-services.softonic.cn/android
2、获取API key
运行Eclipse,然后依次选择Window - > Preferences - > Android - > Build项,这时候可以查找到debug.keystore的路径,通过路径找到debug.keystore文件后,将该文件复制到java sdk下的bin文件夹里面,与keytool同文件夹。
运行cmd进入到keytool的目录下,输入keytool -list -v -keystore debug.keystore, 提示输入密码,直接回车,显示MD5和SHA1,我们只要获取SHA1的值就可以了,记得备份下来。
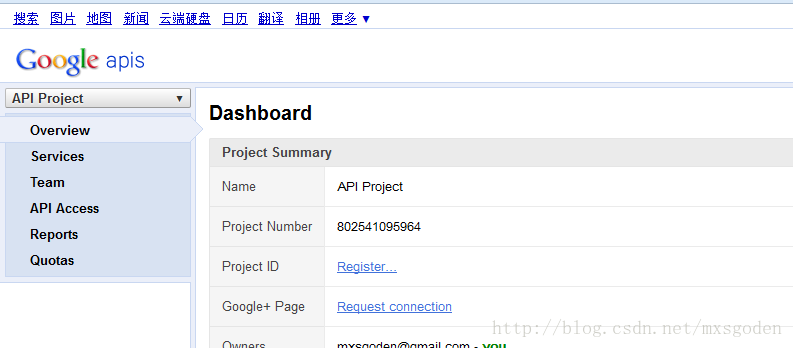
再浏览器打开Google APIs Console (https://code.google.com/apis/console/)用Gmail账号登录,如果是第一次的话,需要创建项目,默认情况下会创建一个叫做API Project的项目。
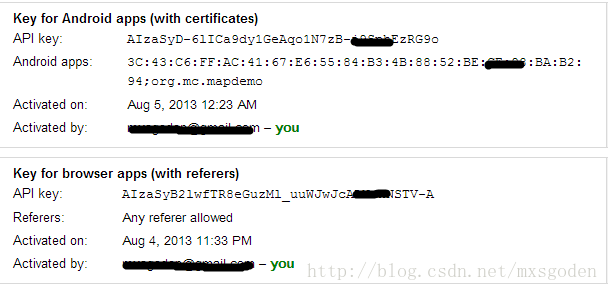
点击进入API Access

选择 Create new Android key,后

按照Example形式,填上刚才你的SHA1值和你要应用的到Google map 的包名,点击Create。
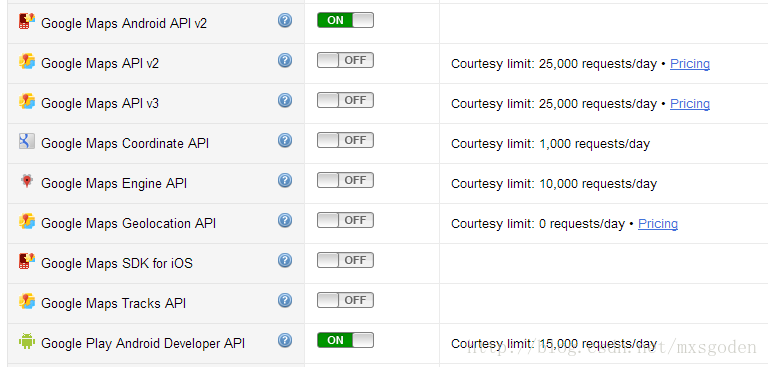
再点击进入Services,
3、创建我们自己的应用程序
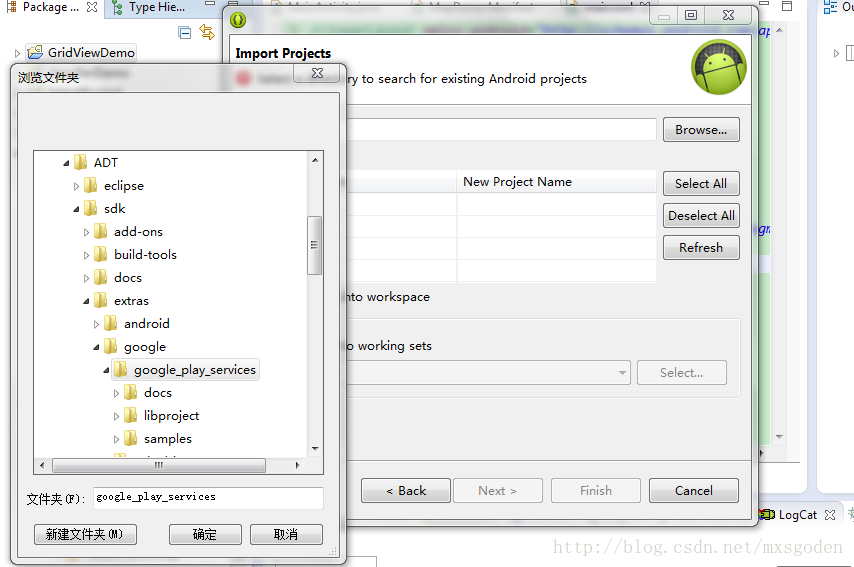
首先,eclipse上建立google-play-services-lib,File->new->others->Android->Android project from existing code,然后将你刚刚安装的google play services包导入进去(在你sdk文件下),创建完成!
创建好后你的eclipse上就会多一个google-play-services_lib项目包。

接着,创建一个你自己的google map项目,然后右击你的项目名,选择属性,在弹出来的对话框中点击android->add->选定google—play-services_lib,添加进去就ok了。


最后,添加key到你的AndroidManifest.xml中。
将下面的代码放到<application>中,就插入到</application>前面。
注意,这里的API_KEY要替换成你之前申请的秘钥,另外对于你的不同项目,如果包名不一样,得申请不同的key,因为在申请的时候需要你输入你的包名,也就是说不同包的项目对应不同的key,一个key不用应用不同包的项目。还需要注意的是在一台电脑上申请的key不能在另外一台电脑上使用,切记!
整体AndroidManifest.xml代码如下:
剩下就是布局了。代码如下(这是基本布局,如有需要可以自己添加)
在主程序中最基本的代码如下(正常显示地图),依据自己需要添加代码。
参考: http://09572.iteye.com/blog/1768865
http://www.th7.cn/Program/Android/201306/141565.shtml
1、首先 安装Google Play services SDK
打开Eclipse - > Window - > Android SDK Manager
安装Android Support Library和Google Play services.
注意:1、若无法安装,显示错误:
Failed to fectch URl https://dl-ssl.google.com/android/repository/addons_list.xml, reason: Connection to https://dl-ssl.google.com refused
解决办法来源于:code.google.com
用notepad打开C:\WINDOWS\system32\drivers\etc中的hosts文件
在最后一行添加74.125.237.1 dl-ssl.google.com
成功解决问题。
2、部分国产手机阉割了Google Play service,故需下载安装,地址:http://google-play-services.softonic.cn/android
2、获取API key
运行Eclipse,然后依次选择Window - > Preferences - > Android - > Build项,这时候可以查找到debug.keystore的路径,通过路径找到debug.keystore文件后,将该文件复制到java sdk下的bin文件夹里面,与keytool同文件夹。
运行cmd进入到keytool的目录下,输入keytool -list -v -keystore debug.keystore, 提示输入密码,直接回车,显示MD5和SHA1,我们只要获取SHA1的值就可以了,记得备份下来。
再浏览器打开Google APIs Console (https://code.google.com/apis/console/)用Gmail账号登录,如果是第一次的话,需要创建项目,默认情况下会创建一个叫做API Project的项目。
点击进入API Access
选择 Create new Android key,后
按照Example形式,填上刚才你的SHA1值和你要应用的到Google map 的包名,点击Create。
再点击进入Services,
3、创建我们自己的应用程序
首先,eclipse上建立google-play-services-lib,File->new->others->Android->Android project from existing code,然后将你刚刚安装的google play services包导入进去(在你sdk文件下),创建完成!
创建好后你的eclipse上就会多一个google-play-services_lib项目包。
接着,创建一个你自己的google map项目,然后右击你的项目名,选择属性,在弹出来的对话框中点击android->add->选定google—play-services_lib,添加进去就ok了。
最后,添加key到你的AndroidManifest.xml中。
将下面的代码放到<application>中,就插入到</application>前面。
注意,这里的API_KEY要替换成你之前申请的秘钥,另外对于你的不同项目,如果包名不一样,得申请不同的key,因为在申请的时候需要你输入你的包名,也就是说不同包的项目对应不同的key,一个key不用应用不同包的项目。还需要注意的是在一台电脑上申请的key不能在另外一台电脑上使用,切记!
<
meta-data
android:name
="com.google.android.maps.v2.API_KEY"
android:value
="API_KEY"
/>
然后将下面代码放入AndroidManifest.xml中,其中记得把com.example.mapdemo替换成你的包名。
下面接着就是添加一系列权限,下面是一系列权限,大家根据自己的需要添加,尽量不要全部复制进去,以免对程序安全性造成威胁。
google map api第二版本中用到OpenGL ES version2,所以必须在<manifest>节点里面添加以下代码。然后将下面代码放入AndroidManifest.xml中,其中记得把com.example.mapdemo替换成你的包名。
<permission
        android:name="com.example.mapdemo.permission.MAPS_RECEIVE"
        android:protectionLevel="signature"/>
<uses-permission android:name="com.example.mapdemo.permission.MAPS_RECEIVE"/>
下面接着就是添加一系列权限,下面是一系列权限,大家根据自己的需要添加,尽量不要全部复制进去,以免对程序安全性造成威胁。
<uses-permission android:name="android.permission.INTERNET"/>
<uses-permission android:name="android.permission.ACCESS_NETWORK_STATE"/>
<uses-permission android:name="android.permission.WRITE_EXTERNAL_STORAGE"/>
<uses-permission android:name="com.google.android.providers.gsf.permission.READ_GSERVICES"/>
<!-- The following two permissions are not required to use
     Google Maps Android API v2, but are recommended. -->
<uses-permission android:name="android.permission.ACCESS_COARSE_LOCATION"/>
<uses-permission android:name="android.permission.ACCESS_FINE_LOCATION"/><uses-feature android:glEsVersion="0x00020000" android:required="true"/>
整体AndroidManifest.xml代码如下:
<?xml version="1.0" encoding="utf-8"?>
<manifest xmlns:android="http://schemas.android.com/apk/res/android"
    package="com.example.googlemap"
    android:versionCode="1"
    android:versionName="1.0" >

    <uses-feature
        android:glEsVersion="0x00020000"
        android:required="true" />
    <uses-feature android:name="android.hardware.location.gps" />

    <uses-sdk
        android:minSdkVersion="8"
        android:targetSdkVersion="10" />

    <permission
        android:name="com.example.googlemap.permission.MAPS_RECEIVE"
        android:protectionLevel="signature" />

    <uses-permission android:name="android.permission.INTERNET" />
    <uses-permission android:name="android.permission.ACCESS_NETWORK_STATE" />
    <uses-permission android:name="android.permission.WRITE_EXTERNAL_STORAGE" />
    <uses-permission android:name="com.google.android.providers.gsf.permission.READ_GSERVICES" />
    <!--
     The following two permissions are not required to use
     Google Maps Android API v2, but are recommended.
    -->
    <uses-permission android:name="android.permission.ACCESS_COARSE_LOCATION" />
    <uses-permission android:name="android.permission.ACCESS_FINE_LOCATION" />

    <application
        android:allowBackup="true"
        android:icon="@drawable/ic_launcher"
        android:label="@string/app_name"
        android:theme="@style/AppTheme" >
        <activity
            android:name="com.example.googlemap.MainActivity"
            android:label="@string/app_name" >
            <intent-filter>
                <action android:name="android.intent.action.MAIN" />

                <category android:name="android.intent.category.LAUNCHER" />
            </intent-filter>
        </activity>

        <uses-library
            android:name="com.google.android.maps"
            android:required="true" />

        <meta-data
            android:name="com.google.android.maps.v2.API_KEY"
            android:value="这里填写你的key" />
    </application>

</manifest>
剩下就是布局了。代码如下(这是基本布局,如有需要可以自己添加)
<LinearLayout xmlns:android="http://schemas.android.com/apk/res/android"
    xmlns:tools="http://schemas.android.com/tools"
    android:layout_width="match_parent"
    android:layout_height="match_parent"
    android:orientation="vertical" >
    <fragment
        android:id="@+id/map"
        android:layout_width="match_parent"
        android:layout_height="0dp"
        android:layout_weight="1"
        class="com.google.android.gms.maps.SupportMapFragment" />


</LinearLayout>
在主程序中最基本的代码如下(正常显示地图),依据自己需要添加代码。
package com.example.mapdemo;

import android.app.Activity;
import android.os.Bundle;

public class MainActivity extends Activity {

    @Override
    protected void onCreate(Bundle savedInstanceState) {
        super.onCreate(savedInstanceState);
        setContentView(R.layout.main);
    }
}
参考: http://09572.iteye.com/blog/1768865
http://www.th7.cn/Program/Android/201306/141565.shtml


 673
673

 被折叠的 条评论
为什么被折叠?
被折叠的 条评论
为什么被折叠?
 到【灌水乐园】发言


