


目录
我们将构建一个Android应用程序来显示带有categories的博客列表。
使用Retrofit 2,Android应用程序将连接到我们将使用Microsoft和开源社区的最新技术构建的RESTful API:ASP.NET Core Web API 5。
我们的数据将驻留在本地SQLServer Express数据库中,并将使用Entity Framework Core 5从我们的Web API项目访问。
这是一个全栈开发教程,我们将使用不同的语言(Java、C#、SQL)和技术(Android、ASP.NET Core Web API、SQL Server Express)挖掘不同的开发层(前端、后端、数据库) .
那么让我们开始学习如何将Android与ASP.NET Core Web API连接起来。
准备数据库
我们将在安装在本地计算机上的SQL Server Express中创建我们的数据库,因此如果您尚未安装它,请继续下载并安装SQL Server Management Studio和SQL Server Express的最新更新。
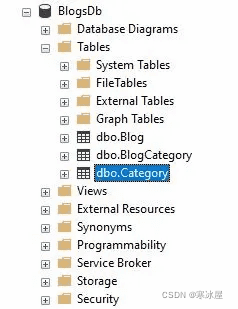
一旦您能够使用SQL Server Management Studio连接到SQL Server Express,您就可以继续创建一个新数据库并将其命名为“BlogsDb”。
创建数据库后,运行以下脚本以创建所需的表并将示例数据插入其中,这样我们就可以开始我们的教程了。
USE [BlogsDb]
GO
/****** Object:  Table [dbo].[Blog]    Script Date: 1/31/2021 5:35:24 PM ******/
SET ANSI_NULLS ON
GO
SET QUOTED_IDENTIFIER ON
GO
CREATE TABLE [dbo].[Blog](
	[Id] [int] IDENTITY(1,1) NOT NULL,
	[Name] [nvarchar](255) NOT NULL,
	[Description] [nvarchar](1000) NOT NULL,
	[Url] [nvarchar](255) NOT NULL,
	[RssFeed] [nvarchar](255) NULL,
	[TS] [smalldatetime] NOT NULL,
	[Active] [bit] NOT NULL,
 CONSTRAINT [PK_Blogs] PRIMARY KEY CLUSTERED
(
	[Id] ASC
)WITH (PAD_INDEX = OFF, STATISTICS_NORECOMPUTE = OFF, _
 IGNORE_DUP_KEY = OFF, ALLOW_ROW_LOCKS = ON, ALLOW_PAGE_LOCKS = ON) ON [PRIMARY]
) ON [PRIMARY]
GO
/****** Object:  Table [dbo].[BlogCategory]    Script Date: 1/31/2021 5:35:24 PM ******/
SET ANSI_NULLS ON
GO
SET QUOTED_IDENTIFIER ON
GO
CREATE TABLE [dbo].[BlogCategory](
	[BlogsId] [int] NOT NULL,
	[CategoriesId] [int] NOT NULL,
 CONSTRAINT [PK_BlogCategory_1] PRIMARY KEY CLUSTERED
(
	[BlogsId] ASC,
	[CategoriesId] ASC
)WITH (PAD_INDEX = OFF, STATISTICS_NORECOMPUTE = OFF, _
 IGNORE_DUP_KEY = OFF, ALLOW_ROW_LOCKS = ON, ALLOW_PAGE_LOCKS = ON) ON [PRIMARY]
) ON [PRIMARY]
GO
/****** Object:  Table [dbo].[Category]    Script Date: 1/31/2021 5:35:24 PM ******/
SET ANSI_NULLS ON
GO
SET QUOTED_IDENTIFIER ON
GO
CREATE TABLE [dbo].[Category](
	[Id] [int] IDENTITY(1,1) NOT NULL,
	[Name] [nvarchar](255) NOT NULL,
 CONSTRAINT [PK_Categories] PRIMARY KEY CLUSTERED
(
	[Id] ASC
)WITH (PAD_INDEX = OFF, STATISTICS_NORECOMPUTE = OFF, _
 IGNORE_DUP_KEY = OFF, ALLOW_ROW_LOCKS = ON, ALLOW_PAGE_LOCKS = ON) ON [PRIMARY]
) ON [PRIMARY]
GO
SET IDENTITY_INSERT [dbo].[Blog] ON
GO
INSERT [dbo].[Blog] ([Id], [Name], [Description], [Url], [RssFeed], [TS], _
       [Active]) VALUES (1, N'Coding Sonata', N'CodingSonata is the best place _
       where you can learn new technical stuff, improve your coding skills _
       and listen to amazing classical music', N'codingsonata.com', _
       N'codingsonata.com/feed', CAST(N'2020-12-31T11:39:00' AS SmallDateTime), 1)
GO
INSERT [dbo].[Blog] ([Id], [Name], [Description], [Url], [RssFeed], [TS], _
       [Active]) VALUES (2, N'ASP.NET Blog',
       N'The official blog for ASP.NET Developers and Community', _
       N'https://devblogs.microsoft.com/aspnet/', _
       N'https://devblogs.microsoft.com/aspnet/feed/', _
       CAST(N'2021-01-17T16:23:00' AS SmallDateTime), 1)
GO
INSERT [dbo].[Blog] ([Id], [Name], [Description], [Url], [RssFeed], [TS], _
       [Active]) VALUES (3, N'Android Developers Blog',
       N'The latest Android and Google Play news for app and game developers.', _
       N'https://android-developers.googleblog.com/', _
       N'https://android-developers.blogspot.com/atom.xml', _
       CAST(N'2020-12-27T08:05:00' AS SmallDateTime), 1)
GO
INSERT [dbo].[Blog] ([Id], [Name], [Description], [Url], [RssFeed], [TS], _
       [Active]) VALUES (4, N'Google Developers', _
       N'Engineering and technology articles for developers, _
       written and curated by Googlers. The views expressed are those of the authors _
       and don''t necessarily reflect those of Google.', _
       N'https://medium.com/google-developers', N'', _
       CAST(N'2021-01-26T10:53:00' AS SmallDateTime), 1)
GO
INSERT [dbo].[Blog] ([Id], [Name], [Description], [Url], [RssFeed], [TS], _
       [Active]) VALUES (5, N'Microsoft Azure Blog', N'Get the latest Azure news, _
       updates, and announcements from the Azure blog. _
       From product updates to hot topics, hear from the Azure experts.', _
       N'https://azure.microsoft.com/en-us/blog/', N'', _
       CAST(N'2020-12-03T12:13:00' AS SmallDateTime), 1)
GO
INSERT [dbo].[Blog] ([Id], [Name], [Description], [Url], [RssFeed], [TS], _
       [Active]) VALUES (6, N'SQL Server Blog', N'Learn how to unleash the power _
       in your data and get the latest Microsoft SQL Server news, updates, _
       and best practices from our Microsoft experts.', _
       N'https://cloudblogs.microsoft.com/sqlserver/', N'', _
       CAST(N'2021-01-27T09:20:00' AS SmallDateTime), 1)
GO
INSERT [dbo].[Blog] ([Id], [Name], [Description], [Url], [RssFeed], [TS], _
       [Active]) VALUES (7, N'Cisco Blogs', N'Insights on Cisco''s Global Search _
       for Innovative Technology Solutions', N'https://blogs.cisco.com/', _
       N'https://blogs.cisco.com/feed', CAST(N'2021-01-31T19:40:00' AS SmallDateTime), 1)
GO
SET IDENTITY_INSERT [dbo].[Blog] OFF
GO
INSERT [dbo].[BlogCategory] ([BlogsId], [CategoriesId]) VALUES (1, 1)
GO
INSERT [dbo].[BlogCategory] ([BlogsId], [CategoriesId]) VALUES (1, 2)
GO
INSERT [dbo].[BlogCategory] ([BlogsId], [CategoriesId]) VALUES (1, 4)
GO
INSERT [dbo].[BlogCategory] ([BlogsId], [CategoriesId]) VALUES (1, 5)
GO
INSERT [dbo].[BlogCategory] ([BlogsId], [CategoriesId]) VALUES (2, 1)
GO
INSERT [dbo].[BlogCategory] ([BlogsId], [CategoriesId]) VALUES (2, 2)
GO
INSERT [dbo].[BlogCategory] ([BlogsId], [CategoriesId]) VALUES (2, 4)
GO
INSERT [dbo].[BlogCategory] ([BlogsId], [CategoriesId]) VALUES (2, 5)
GO
INSERT [dbo].[BlogCategory] ([BlogsId], [CategoriesId]) VALUES (3, 1)
GO
INSERT [dbo].[BlogCategory] ([BlogsId], [CategoriesId]) VALUES (3, 4)
GO
INSERT [dbo].[BlogCategory] ([BlogsId], [CategoriesId]) VALUES (4, 1)
GO
INSERT [dbo].[BlogCategory] ([BlogsId], [CategoriesId]) VALUES (4, 4)
GO
INSERT [dbo].[BlogCategory] ([BlogsId], [CategoriesId]) VALUES (5, 4)
GO
INSERT [dbo].[BlogCategory] ([BlogsId], [CategoriesId]) VALUES (5, 5)
GO
INSERT [dbo].[BlogCategory] ([BlogsId], [CategoriesId]) VALUES (5, 6)
GO
INSERT [dbo].[BlogCategory] ([BlogsId], [CategoriesId]) VALUES (6, 4)
GO
INSERT [dbo].[BlogCategory] ([BlogsId], [CategoriesId]) VALUES (6, 5)
GO
INSERT [dbo].[BlogCategory] ([BlogsId], [CategoriesId]) VALUES (7, 5)
GO
INSERT [dbo].[BlogCategory] ([BlogsId], [CategoriesId]) VALUES (7, 6)
GO
SET IDENTITY_INSERT [dbo].[Category] ON
GO
INSERT [dbo].[Category] ([Id], [Name]) VALUES (1, N'Front End Development')
GO
INSERT [dbo].[Category] ([Id], [Name]) VALUES (2, N'Back End Development')
GO
INSERT [dbo].[Category] ([Id], [Name]) VALUES (3, N'Desktop Development')
GO
INSERT [dbo].[Category] ([Id], [Name]) VALUES (4, N'Databases')
GO
INSERT [dbo].[Category] ([Id], [Name]) VALUES (5, N'DevOps and Cloud')
GO
INSERT [dbo].[Category] ([Id], [Name]) VALUES (6, N'Infrastructure and Networking')
GO
SET IDENTITY_INSERT [dbo].[Category] OFF
GO运行查询后,从对象资源管理器刷新BlogsDb,然后您应该能够看到在BlogsDb数据库中创建的新表。
ASP.NET Core Web API项目
现在我们将转到我们的Web API部分来构建RESTful API并使用ASP.NET Core Web API技术连接到我们的数据库。
创建新的ASP.NET Core Web API项目
启动Visual Studio 2019,确保您使用的是最新的更新16.8.x,其中包括最新版本的.NET 5。
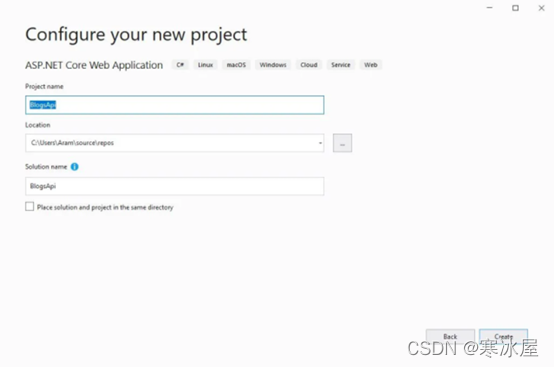
选择ASP.NET Core Web应用程序,然后为其命名为“BlogsApi”,然后选择“创建”。
然后选择API并按Create。
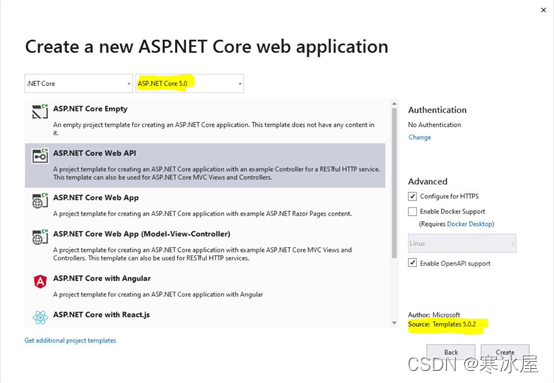
等待Visual Studio为您准备模板API项目,然后按F5或Run。您应该在默认浏览器上看到Swagger页面,表明您的Web API项目已在您的本地计算机(即IIS Express(localhost))上正常运行。
现在让我们开始准备我们的实体和dbcontext类,这些实体和类将用于使用Entity Framework Core库连接到您的数据库。
实体
让我们创建一个名为“Entities”的新文件夹,并在其中添加一个名为“Blog”的类。
using System;
using System.Collections.Generic;

namespace BlogsApi.Entities
{
    public class Blog
    {
        public int Id { get; set; }
        public string Name { get; set; }
        public string Description { get; set; }
        public string Url { get; set; }
        public string RssFeed { get; set; }
        public DateTime TS { get; set; }
        public bool Active { get; set; }
        public virtual ICollection<Category> Categories { get; set; }
    }
}接下来,让我们添加另一个名为“Category”的类:
using System.Collections.Generic;

namespace BlogsApi.Entities
{
    public class Category
    {
        public int Id { get; set; }
        public string Name { get; set; }
        public virtual ICollection<Blog> Blogs { get; set; }
    }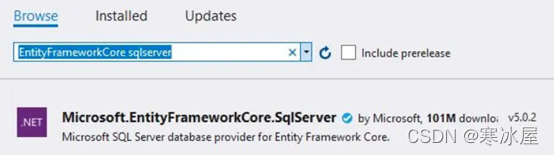
}导入EF Core
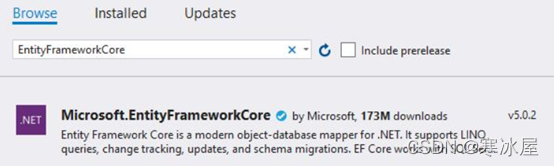
在添加DbContext之前,我们需要为EF Core和EF Core安装nuget包SqlServer:
实体框架核心和实体:
创建DbContext
现在,我们要添加我们DbContext继承的类,这将继承Entity Framework Core DbContext类,并将用于将实体和任何其他配置与我们的数据库连接起来。
下面是将从EF Core DbContext继承的BlogsDbContext类:
using Microsoft.EntityFrameworkCore;

namespace BlogsApi.Entities
{
    public class BlogsDbContext : DbContext
    {
        public DbSet<Blog> Blogs { get; set; }
        public DbSet<Category> Categories { get; set; }
        public BlogsDbContext(DbContextOptions<BlogsDbContext> options) : base(options)
        {
        }
        protected override void OnModelCreating(ModelBuilder modelBuilder)
        {
            modelBuilder.Entity<Blog>().ToTable("Blog");
            modelBuilder.Entity<Category>().ToTable("Category");
            modelBuilder.Entity<Blog>().HasMany(s => s.Categories).WithMany(c => c.Blogs);
        }
    }
}现在让我们在服务集合中插入数据库。您需要在ConfigureServices方法的startup类中添加以下代码:
services.AddDbContext<BlogsDbContext>(options =>
options.UseSqlServer(Configuration.GetConnectionString("BlogsDbConnectionString")));将连接字符串添加到appsettings.json
打开appsettings.json文件,让我们为新的连接字符串添加一个部分,它应该如下所示:
{
  "ConnectionStrings": {
    "BlogsDbConnectionString": "Server=Home\\SQLEXPRESS;Database=BlogsDb;
     Trusted_Connection=True;MultipleActiveResultSets=true"
  },
  "Logging": {
    "LogLevel": {
      "Default": "Information",
      "Microsoft": "Warning",
      "Microsoft.Hosting.Lifetime": "Information"
    }
  },
  "AllowedHosts": "*"
}
创建服务和接口
为了在功能上进行一些分离并提高我们的Web API项目的可追溯性和可测试性,我们将引入将充当业务层并在能够访问DbContext对象的同时保存业务逻辑的服务。该DbContext对象将被注入到要使用的服务构造函数中。
服务将实现接口,以便我们可以依赖抽象而不是具体的实现。这是一个非常重要的原则,可以提高代码的可测试性和可追溯性。
接口
创建一个名为“Interfaces”的新文件夹,然后添加一个新项目,您需要选择interface并将其命名为“IBlogService”:
using BlogsApi.Entities;
using System.Collections.Generic;
using System.Threading.Tasks;

namespace BlogsApi.Interfaces
{
    public interface IBlogService
    {
        Task<List<Blog>> GetAllBlogs();
        Task<List<Blog>> GetBlogsUnderCategory(int id);

    }
}然后添加另一个接口并将其命名为“ICategoryService”:
using BlogsApi.Entities;
using System.Collections.Generic;
using System.Threading.Tasks;

namespace BlogsApi.Interfaces
{
    public interface IBlogService
    {
        Task<List<Blog>> GetAllBlogs();
        Task<List<Blog>> GetBlogsUnderCategory(int id);

    }
服务
创建一个名为“Services”的新文件夹,然后添加一个名为“BlogService”的类:
using BlogsApi.Entities;
using BlogsApi.Interfaces;
using Microsoft.EntityFrameworkCore;
using System.Collections.Generic;
using System.Linq;
using System.Threading.Tasks;

namespace BlogsApi.Services
{
    public class BlogService : IBlogService
    {
        private readonly BlogsDbContext blogsDbContext;
        public BlogService(BlogsDbContext blogsDbContext)
        {
            this.blogsDbContext = blogsDbContext;
        }
        public async Task<List<Blog>> GetAllBlogs()
        {
            var blogs = blogsDbContext.Blogs.Include
            (o => o.Categories).Where(o => o.Active).OrderByDescending(o => o.TS);
            return await blogs.ToListAsync();
        }
        public async Task<List<Blog>> GetBlogsUnderCategory(int id)
        {
            var blogs = blogsDbContext.Blogs.Include(o => o.Categories).Where
            (o => o.Active && o.Categories.Any(category => category.Id == id));
            return await blogs.ToListAsync();
        }
    }
}并添加另一个名为“CategoryService”的类:
using BlogsApi.Entities;
using BlogsApi.Interfaces;
using Microsoft.EntityFrameworkCore;
using System.Collections.Generic;
using System.Threading.Tasks;

namespace BlogsApi.Services
{
    public class CategoryService : ICategoryService
    {
        private BlogsDbContext blogsDbContext;

        public CategoryService(BlogsDbContext blogsDbContext)
        {
            this.blogsDbContext = blogsDbContext;
        }
        public async Task<List<Category>> GetCategories()
        {
            var categories = blogsDbContext.Categories;

             return await categories.ToListAsync();
        }
    }
}现在为了确保在通过接口将服务注入构造函数时我们在服务和接口之间有正确的绑定,我们需要在startup的ConfigureServices方法中进行配置:
services.AddScoped<IBlogService, BlogService>();
services.AddScoped<ICategoryService, CategoryService>();创建模型(DTO)
重要的是要知道不建议您将实体对象按原样返回给您的客户,因为由于实体代表您数据库的确切结构,您不希望您的客户或(前端世界)了解这个结构。它可能不会造成严重的威胁或问题,但可能会导致您的内部系统设计出现一些泄漏,并可能落入您的竞争对手之手。
不返回实体对象的另一个原因是为了防止与后端结构紧密耦合,如果您要修改任何表,那么您的客户可能会受到影响并可能导致他们出现问题。
因此,为了避免此类问题并保持灵活和松散耦合,您应该引入DTO(数据传输对象)或模型,它们将是将绑定到您的实体类的新类,这些类可能包括您的实体属性的全部或部分具有相同的或不同的名称或数据类型。
因此,让我们继续创建一个名为“Models”的新文件夹。
然后向其添加一个名为BlogModel的新类。
using System;
using System.Collections.Generic;

namespace BlogsApi.Models
{
    public class BlogModel
    {
        public int Id { get; set; }
        public string Name { get; set; }
        public string Description { get; set; }
        public string Url { get; set; }
        public string RssFeed { get; set; }
        public DateTime SubmittedDate { get; set; }
        public List<CategoryModel> Categories { get; set; }
    }
}现在我们需要另一个类CategoryModel:
namespace BlogsApi.Models
{
    public class CategoryModel
    {
        public int Id { get; set; }
        public string Name { get; set; }
    }
}
完美的!那么现在会发生什么,我们将实体类转换为模型类,并将它们返回给我们的客户端。
通常,最好有一个辅助类来保存转换逻辑,并且只能从控制器中调用它。
所以,在编写我们的控制器之前,让我们创建我们的助手。创建一个名为“Helpers”的新文件夹,然后在其中创建一个名为“BlogHelper”的新类:
using BlogsApi.Entities;
using BlogsApi.Models;
using System.Collections.Generic;
using System.Linq;

namespace BlogsApi
{
    public class BlogHelper
    {
        public static List<BlogModel> ConvertBlogs(List<Blog> blogs)
        {
            var blogModels = blogs.ConvertAll(blog => new BlogModel
            {
                Id = blog.Id,
                Name = blog.Name,
                Description = blog.Description,
                Url = blog.Url,
                RssFeed = blog.RssFeed,
                SubmittedDate = blog.TS,
                Categories = blog.Categories.ToList().ConvertAll
                (category => new CategoryModel { Id = category.Id, Name = category.Name })
            });

            return blogModels;
        }
    }
}然后创建另一个名为CategoryHelper的类,它将包含将类别实体转换为模型的方法:
using BlogsApi.Entities;
using BlogsApi.Models;
using System.Collections.Generic;

namespace BlogsApi.Helpers
{
    public class CategoryHelper
    {
        public static List<CategoryModel> ConvertCategories(List<Category> categories)
        {
            var categoryModels = categories.ConvertAll(category => new CategoryModel
            {
                Id = category.Id,
                Name = category.Name,
            });

            return categoryModels;
        }
    }
}
现在我们准备添加我们的控制器并将所有组件粘合在一起。
控制器
让我们创建我们的端点,这些端点将用作我们的数据库的入口点或网关以访问表。
在控制器文件夹中,添加一个名为“BlogsController”的新控制器。这个控制器将有一个端点来返回所有的博客,正如你在Get()方法中看到的,我们调用该GetAllBlogs方法,然后将结果传递给我们的converter方法以将entities类型转换为models类型,然后在响应体中返回结果http 200 ok。
using BlogsApi.Interfaces;
using Microsoft.AspNetCore.Mvc;
using System.Threading.Tasks;

namespace BlogsApi.Controllers
{
    [ApiController]
    [Route("[controller]")]
    public class BlogsController : ControllerBase
    {
        private readonly IBlogService blogService;
        public BlogsController(IBlogService blogService)
        {
            this.blogService = blogService;
        }
        [HttpGet]
        [Route("")]
        public async Task<IActionResult> Get()
        {
            var blogs = await blogService.GetAllBlogs();

            var blogModels = BlogHelper.ConvertBlogs(blogs);

            return Ok(blogModels);
        }
    }
}您还可以注意到,我们使用BlogsController的构造函数注入来通过abstract interface IBlogService提供BlogService的实例。
接下来,让我们添加另一个名为“CategoriesController”的控制器,这将包括两个端点:一个获取所有的categories内容,另一个获取给定类别(id)中的博客:
using BlogsApi.Helpers;
using BlogsApi.Interfaces;
using Microsoft.AspNetCore.Mvc;
using System.Threading.Tasks;

namespace BlogsApi.Controllers
{
    [ApiController]
    [Route("[controller]")]
    public class CategoriesController : ControllerBase
    {
        private readonly ICategoryService categoryService;
        private readonly IBlogService blogService;

        public CategoriesController
               (ICategoryService categoryService, IBlogService blogService)
        {
            this.categoryService = categoryService;
            this.blogService = blogService;
        }

        [HttpGet]
        [Route("")]
        public async Task<IActionResult> Get()
        {
            var categories = await categoryService.GetCategories();

            var categoryModels = CategoryHelper.ConvertCategories(categories);

            return Ok(categoryModels);
        }

        [HttpGet]
        [Route("{categoryId}/blogs")]
        public async Task<IActionResult> GetCategoryBlogs(int categoryId)
        {
            var blogs = await blogService.GetBlogsUnderCategory(categoryId);

            var blogModels = BlogHelper.ConvertBlogs(blogs);

            return Ok(blogModels);
        }
    }
}现在,为了确保一切正常,我们需要运行Web API项目,看看我们会得到什么结果。
这里的一个重要说明是我们不会在IIS Express上运行我们的API,我们将在ASP.NET Core Web API的默认托管上运行它,为什么?因为我们将在模拟器上运行我们的Android应用程序,并且模拟器必须连接到IP地址10.0.2.2,这是127.0.0.1的另一个别名,但不是localhost,因此,模拟器将无法连接到IIS Express,但它会连接到ASP.NET Core Web API 的默认托管。
我将在本教程后面向您展示这将如何工作。
因此,在您的Visual Studio中,单击运行下拉按钮并选择BlogsApi而不是IIS Express:
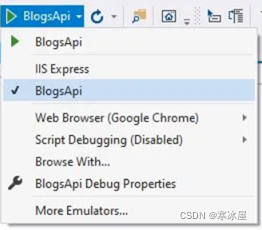
然后按下BlogsApi按钮本身。这将触发一个终端窗口,ASP.NET Core Web API的托管提供程序引导您的Web API项目:
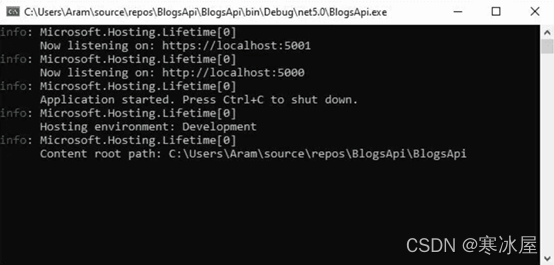
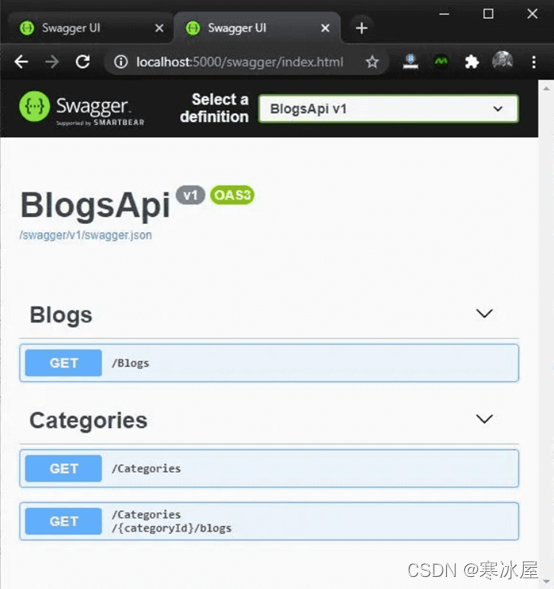
然后您应该看到您的默认浏览器,其中显示了BlogsApi的Swagger文档。
您的API项目现在托管在localhost下的2个端口:5001 https和5000 http。
对于本教程,我们将连接到http://localhost:5000,因为Android需要自签名证书才能连接到https,因此这超出了本教程的范围。
请记住,在生产中,您应该始终将您的Web或移动应用程序连接到https并构建您的RESTful API以在基于https的域上工作。
当然,我们可以通过简单提供的UI在Swagger上测试我们的API来导航和测试端点,但是我更喜欢使用Postman。
在Postman上测试API
如果您没有安装Postman,请继续从这里下载。
然后打开Postman并创建一个名为“BlogsApi”的新集合。
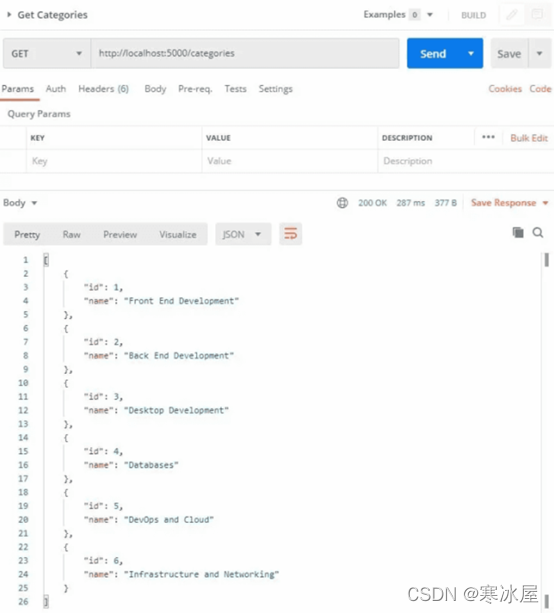
使用Get Categories创建一个新请求。这将指向返回所有类别的端点:
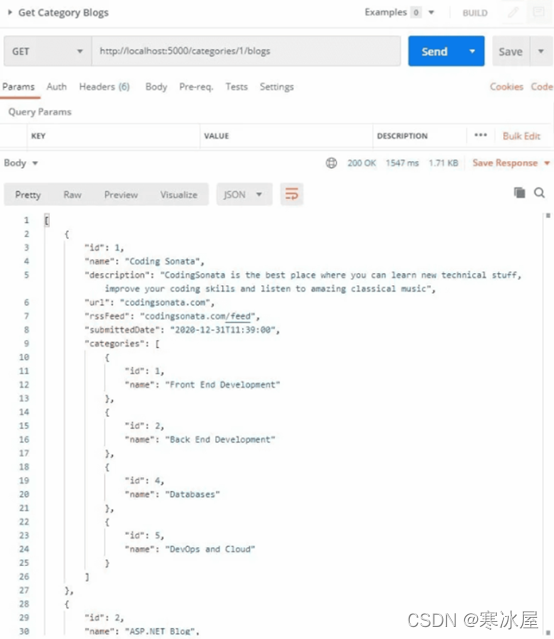
现在让我们创建另一个请求来检索所提供CategoryId的所有博客:
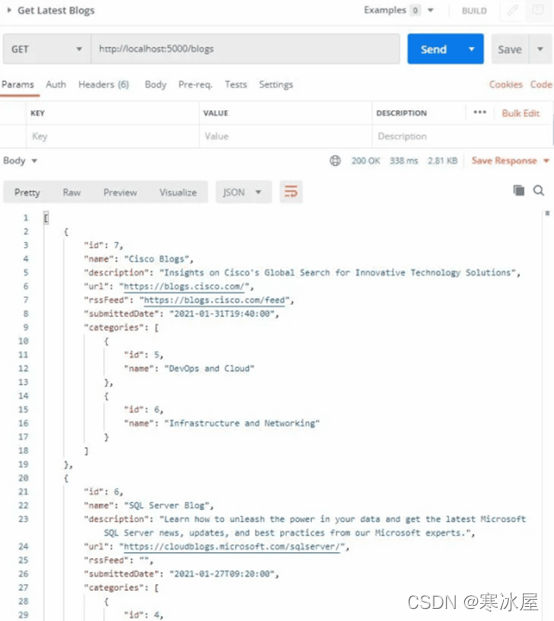
现在我们要测试的最后一个请求是从最新的博客中检索按时间顺序排列的所有博客。
你去吧!我们已经使用ASP.NET Core Web API构建和测试了我们的RESTful API。
当然,这些只是您可以使用这种强大技术做些什么的小样本。您仍然可以添加POST,PUT,DELETE甚至其他GET要求的项目,使之更大,更全面。
现在让我们跳到教程的前端部分,准备我们的Android应用程序以连接到我们刚刚使用ASP.NET Core Web API技术构建的RESTful API。
构建Android应用程序
我们的Android应用程序将在启动屏幕中通过格式良好的卡片显示所有博客Categories,该启动屏幕将具有带有三个按钮的底部导航:类别、最新博客和通知。
每当用户点击卡片时,它会打开一个新屏幕,显示该特定category博客下的可滚动列表,然后如果用户点击任何给定的博客,该应用程序将在新屏幕中显示所有博客详细信息,并带有可点击的链接在移动浏览器上打开博客。在任何时候,用户都可以使用默认的设备返回按钮返回到之前的屏幕。
正如本教程前面提到的,我们将使用Retrofit 2将Android与ASP.NET Core Web API连接起来。
所以让我们开始创建我们的Android应用程序,我将使用Android Studio 4.1.2,如果您没有Android Studio,您可以继续,从官方Android开发人员页面下载并安装它,如果您有旧版本,我建议你更新你的版本。
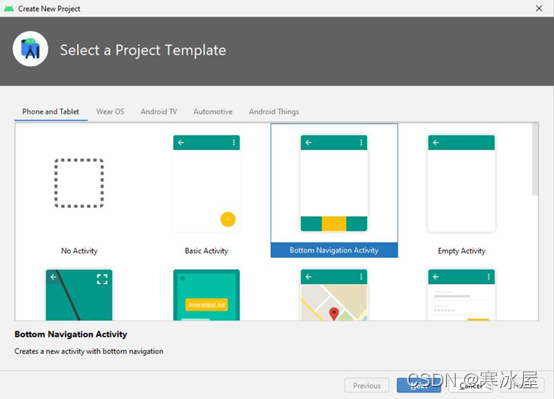
现在打开Android Studio,然后单击Create New Project。

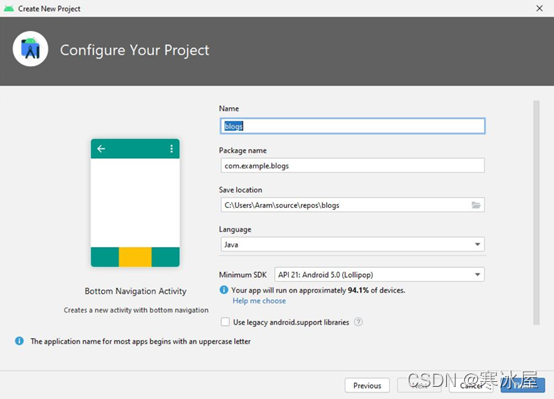
然后从项目模板屏幕中选择底部导航活动:
之后,在项目配置屏幕中,将名称更改为blogs。您还可以将包名称更改为您喜欢的任何名称,通常命名基于您拥有的产品,因此如果您有一个网站,那么它可以像com.codingsonata.blogs。现在让我们像com.demo.blogs一样保留它。
对Minimum SDK,我们会选择API 21: Android 5.0 (Lollipop),当然这通常是根据业务需求决定的,支持哪些设备,使用Android SDK的哪些API。
按Finish让Android Studio开始准备您的项目:
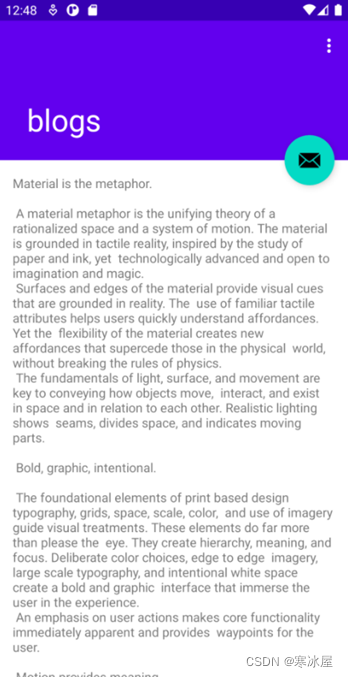
让我们运行这个示例应用程序来检查模拟器是否可以正常启动和运行,以及模板应用程序是否可以正常加载。
因此,一旦您在模拟器上看到以下屏幕,就意味着您已准备好开始构建博客应用程序,该应用程序将连接到我们使用ASP.NET Core Web API构建的RESTful API。
现在关闭模拟器,然后返回Android Studio。
设置Retrofit 2
正如本文前面提到的,我们将使用Retrofit 2连接到我们的ASP.NET Core Web API。
所以打开你的build.gradle (:app)文件并导航到依赖项部分,添加以下引用以获得Retrofit 2:
implementation 'com.squareup.retrofit2:retrofit:2.9.0'
implementation 'com.squareup.retrofit2:converter-gson:2.9.0'添加后,同步您的项目,让gradle下载并使用新库构建项目。
让我们准备我们的应用程序以连接到我们的RESTful API。
创建一个名为“data”的新包并将其直接放在com.example.blogs下。
模型
在名为“model”的数据下添加一个新包,这将包括POJO类,这些类将保存和绑定来自RESTful端点的数据。
创建Blog类:
package com.example.blogs.data.model;

public class Blog {
    private final int Id;
    private final String name;
    private final String description;
    private final String url;
    private final String rssFeed;
    private final String submittedDate;

    public Blog(int id, String name, String description, String url,
                String rssFeed, String submittedDate) {
        Id = id;
        this.name = name;
        this.description = description;
        this.url = url;
        this.rssFeed = rssFeed;
        this.submittedDate = submittedDate;
    }

    public int getId() {
        return Id;
    }

    public String getName() {
        return name;
    }

    public String getDescription() {
        return description;
    }

    public String getUrl() {
        return url;
    }

    public String getRssFeed() {
        return rssFeed;
    }

    public String getSubmittedDate() {
        return submittedDate;
    }
}然后创建另一个名为“Category”的类:
package com.example.blogs.data.model;

public class Category {
    private final int id;
    private final String name;

    public Category(int id, String name) {
        this.id = id;
        this.name = name;
    }

    public int getId() {
        return id;
    }

    public String getName() {
        return name;
    }
}现在在名为“remote”的数据下添加一个新包,这将包括将启动并连接到Retrofit的类。
Retrofit 2服务和接口
我们需要创建一个接口,该接口将使用Retrofit库中的注释来匹配和识别端点。接口名称是IBlogsApi,您可以使用任何您喜欢的名称,只需确保它以符合约定的I开头即可:
package com.example.blogs.data.remote;

import com.example.blogs.data.model.Blog;
import com.example.blogs.data.model.Category;

import java.util.List;

import retrofit2.Call;
import retrofit2.http.GET;
import retrofit2.http.Path;

public interface IBlogsApi {
    @GET("categories")
    Call<List<Category>> getCategories();

    @GET("categories/{id}/blogs")
    Call<List<Blog>> getBlogsByCategory(@Path("id") int id);

    @GET("blogs")
    Call<List<Blog>> getBlogs();
}然后,让我们添加RetrofitService类,我们将定义一个static方法来创建retrofit实例:
package com.example.blogs.data.remote;

import retrofit2.Retrofit;
import retrofit2.converter.gson.GsonConverterFactory;

public class RetrofitService {
    public static IBlogsApi Create(){
        Retrofit retrofit = new Retrofit.Builder()
                .baseUrl("http://10.0.2.2:5000/")
                .addConverterFactory(GsonConverterFactory.create())
                .build();
         return retrofit.create(IBlogsApi.class);
    }
}如果您注意到上面的baseUrl string,我们正在连接到10.0.2.2。正如前面提到的,这是它的别名托管loopback接口会被重定向到127.0.0.1或本地托管,但我们并没有在本地托管的指定baseUrl,因为Android模拟器只能与指定的端口连接到这个IP地址10.0.2.2,端口指定为5000,是托管ASP.NET Core Web API的地方。
现在,在转到调用RetrofitService的create方法的下一部分之前,我们将在一个新MainApplication类中扩展该Application类,并在其中保留对BlogsApiManager的static引用,并覆盖应用程序的onCreate方法以获取BlogsApiManager的单例实例。
所以让我们直接在根包corp.example.blogs下添加一个新类。
package com.example.blogs;

import android.app.Application;
import com.example.blogs.data.remote.BlogsApiManager;

public class MainApplication extends Application {

    public static BlogsApiManager blogsApiManager;

    @Override
    public void onCreate() {
        super.onCreate();
        blogsApiManager = BlogsApiManager.getInstance();
    }
}BlogsApi管理
接下来,我们将定义一个manager类,该类将保存一个RetrofitService的单例实例,并将包含将通过Retrofit Callback事件绑定到RESTful API的方法:
package com.example.blogs.data.remote;

import com.example.blogs.data.model.Blog;
import com.example.blogs.data.model.Category;

import java.util.List;

import retrofit2.Call;
import retrofit2.Callback;

public class BlogsApiManager {

    private static IBlogsApi service;
    private static BlogsApiManager apiManager;

    private BlogsApiManager() {
        service = RetrofitService.Create();
    }

    public static BlogsApiManager getInstance() {
        if (apiManager == null) {
            apiManager = new BlogsApiManager();
        }
        return apiManager;
    }
    public void getCategories(Callback<List<Category>> callback){
        Call<List<Category>> categoriesCall = service.getCategories();
        categoriesCall.enqueue(callback);
    }
    public void getBlogsByCategory(int id, Callback<List<Blog>> callback){
        Call<List<Blog>> blogsByCategoryCall = service.getBlogsByCategory(id);
        blogsByCategoryCall.enqueue(callback);
    }
    public void getBlogs(Callback<List<Blog>> callback){
        Call<List<Blog>> blogsCall = service.getBlogs();
        blogsCall.enqueue(callback);
    }
}
存储库
在本教程中,我们的数据源仅来自我们使用ASP.NET Core Web API构建的RESTful API的远程服务,我们没有要连接的本地数据源,因此存储库层将仅包含对BlogsApiManager的调用,并将在LiveData对象内保存数据,这些数据稍后将传播到UI层视图,即特定UI组件的ModelView。
这种分层服务的结构属于MVVM架构设计模式,使用Android X的LiveData和ModelView组件。
因此,让我们在名为“repository”的数据下添加一个新包,这将包括我们的博客应用程序的存储库:
package com.example.blogs.data.repository;

import androidx.lifecycle.MutableLiveData;

import com.example.blogs.data.model.Blog;
import com.example.blogs.data.remote.BlogsApiManager;
import com.example.blogs.data.model.Category;

import java.util.List;

import retrofit2.Call;
import retrofit2.Callback;
import retrofit2.Response;

public class BlogsRepository {

    private static volatile BlogsRepository instance;

    private final BlogsApiManager blogsApiManager;

    private final MutableLiveData<List<Category>> categories = new MutableLiveData<>();
    private final MutableLiveData<List<Blog>> blogsByCategory = new MutableLiveData<>();
    private final MutableLiveData<List<Blog>> blogs = new MutableLiveData<>();

    private BlogsRepository(BlogsApiManager blogsApiManager) {
        this.blogsApiManager = blogsApiManager;
    }

    public static BlogsRepository getInstance(BlogsApiManager blogsApiManager) {
        if (instance == null) {
            instance = new BlogsRepository(blogsApiManager);
        }
        return instance;
    }

    public MutableLiveData<List<Category>> getCategories(){
        blogsApiManager.getCategories(new Callback<List<Category>>() {
            @Override
            public void onResponse(Call<List<Category>> call,
                        Response<List<Category>> response) {
                if (response.isSuccessful()){
                    List<Category> body = response.body();
                    categories.setValue(body);
                } else{
                    categories.postValue(null);
                }
            }
            @Override
            public void onFailure(Call<List<Category>> call, Throwable t) {
                categories.postValue(null);
            }
        });

        return categories;
    }

    public MutableLiveData<List<Blog>> getBlogsByCategory(int id){
        blogsApiManager.getBlogsByCategory(id, new Callback<List<Blog>>() {
            @Override
            public void onResponse(Call<List<Blog>> call, Response<List<Blog>> response) {
                if (response.isSuccessful()){
                    List<Blog> body = response.body();
                    blogsByCategory.setValue(body);
                } else{
                    blogsByCategory.postValue(null);
                }
            }
            @Override
            public void onFailure(Call<List<Blog>> call, Throwable t) {
                blogsByCategory.postValue(null);
            }
        });

        return blogsByCategory;
    }

    public MutableLiveData<List<Blog>> getBlogs(){
        blogsApiManager.getBlogs(new Callback<List<Blog>>() {
            @Override
            public void onResponse(Call<List<Blog>> call, Response<List<Blog>> response) {
                if (response.isSuccessful()){
                    List<Blog> body = response.body();
                    blogs.setValue(body);
                } else{
                    blogs.postValue(null);
                }
            }
            @Override
            public void onFailure(Call<List<Blog>> call, Throwable t) {
                blogs.postValue(null);
            }
        });

        return blogs;
}现在让我们准备应用程序的UI部分。
用户界面
在您的项目资源管理器中展开ui包,您会注意到我们之前选择的模板为您创建的三个包。
您还会注意到为您创建的MainActivity,这是导航主机片段的托管活动,它将使用BottomNavigationView来在不同的片段之间切换。
这是MainActivity的代码,您无需对其进行任何特定操作:
package com.example.blogs.ui;

import android.os.Bundle;

import androidx.appcompat.app.AppCompatActivity;
import androidx.navigation.NavController;
import androidx.navigation.Navigation;
import androidx.navigation.ui.AppBarConfiguration;
import androidx.navigation.ui.NavigationUI;

import com.example.blogs.R;
import com.google.android.material.bottomnavigation.BottomNavigationView;

public class MainActivity extends AppCompatActivity {

    @Override
    protected void onCreate(Bundle savedInstanceState) {
        super.onCreate(savedInstanceState);
        setContentView(R.layout.activity_main);
        BottomNavigationView navView = findViewById(R.id.nav_view);
        // Passing each menu ID as a set of Ids because each
        // menu should be considered as top level destinations.
        AppBarConfiguration appBarConfiguration = new AppBarConfiguration.Builder(
        R.id.navigation_home, R.id.navigation_dashboard, R.id.navigation_notifications)
        .build();
        NavController navController =
           Navigation.findNavController(this, R.id.nav_host_fragment);
        NavigationUI.setupActionBarWithNavController
           (this, navController, appBarConfiguration);
        NavigationUI.setupWithNavController(navView, navController);
    }
}我们需要将home包重命名为categories,因此右键单击home包并重构 -> 重命名(或仅使用键盘中的Shift + F6),并使用名称“categories”。
Categories 包
在我们跳转到该categories部分的片段部分之前,我们将为它创建一个作为UI和模型之间的ViewModel中间层。
所以添加一个新类CategoriesViewModel:
package com.example.blogs.ui.categories;

import androidx.lifecycle.MutableLiveData;
import androidx.lifecycle.ViewModel;

import com.example.blogs.data.model.Category;
import com.example.blogs.data.repository.BlogsRepository;

import java.util.List;

public class CategoriesViewModel extends ViewModel {

    private final BlogsRepository categoryRepository;

    public CategoriesViewModel(BlogsRepository categoryRepository) {
        this.categoryRepository = categoryRepository;
    }

    public MutableLiveData<List<Category>> getCategories() {

        return categoryRepository.getCategories();
    }
}现在让我们添加一个factory类,CategoriesViewModelFactory,将在片段中实例化ViewModel实例:
package com.example.blogs.ui.categories;

import androidx.annotation.NonNull;
import androidx.lifecycle.ViewModel;
import androidx.lifecycle.ViewModelProvider;

import com.example.blogs.MainApplication;
import com.example.blogs.data.repository.BlogsRepository;

public class CategoriesViewModelFactory implements ViewModelProvider.Factory {

    @NonNull
    @Override
    @SuppressWarnings("unchecked")
    public <T extends ViewModel> T create(@NonNull Class<T> modelClass) {
        if (modelClass.isAssignableFrom(CategoriesViewModel.class)) {
            return (T) new CategoriesViewModel
            (BlogsRepository.getInstance(MainApplication.blogsApiManager));
        } else {
            throw new IllegalArgumentException("Unknown ViewModel class");
        }
    }
}我们希望通过recyclerview显示categories,GridLayoutManager每行有两个categories,每个category将一个卡视图中显示。
因此,让我们从准备用于显示category卡片的category项布局开始。
类别项布局
导航到res/layout文件夹并添加一个名为category_item.xml的新布局资源文件:
<?xml version="1.0" encoding="utf-8"?>
<androidx.cardview.widget.CardView
    xmlns:android="http://schemas.android.com/apk/res/android"
    xmlns:cardView="http://schemas.android.com/apk/res-auto"
    android:id="@+id/carView"
    android:layout_width="match_parent"
    android:layout_height="100dp"
    cardView:cardCornerRadius="5dp"
    cardView:cardElevation="5dp"
    android:layout_margin="5dp">

    <TextView
        android:id="@+id/category_name"
        android:layout_width="match_parent"
        android:layout_height="wrap_content"
        android:padding="14dp"
        android:text="Sample"
        android:textAppearance="@style/Base.TextAppearance.AppCompat.Large" />
</androidx.cardview.widget.CardView>
类别适配器
现在,让我们创建adapter,其使用card_item布局将数据绑定到recyclerview。
在categories包内,创建一个名为“CategoriesAdapter”的新类:
package com.example.blogs.ui.categories;

import android.content.Context;
import android.view.LayoutInflater;
import android.view.View;
import android.view.ViewGroup;
import android.widget.TextView;

import androidx.annotation.NonNull;
import androidx.recyclerview.widget.RecyclerView;

import com.example.blogs.R;
import com.example.blogs.data.model.Category;
import com.example.blogs.ui.common.OnItemClickListener;

import java.util.ArrayList;
import java.util.List;

public class CategoriesAdapter extends
    RecyclerView.Adapter<CategoriesAdapter.CategoryViewHolder> {

    @NonNull
    private final Context context;
    private List<Category> categories = new ArrayList<>();
    private final OnItemClickListener<Category> onCategoryClickListener;

    public CategoriesAdapter(@NonNull Context context,
           OnItemClickListener<Category> onCategoryClickListener) {
        this.context = context;
        this.onCategoryClickListener = onCategoryClickListener;
    }

    @Override
    public CategoryViewHolder onCreateViewHolder(ViewGroup parent, int viewType) {
        return new CategoryViewHolder
        (LayoutInflater.from(context).inflate(R.layout.category_item, parent, false));
    }

    @Override
    public void onBindViewHolder(CategoryViewHolder holder, int position) {
        holder.setCategoryItem(categories.get(position));
    }

    @Override
    public int getItemCount() {
        return categories == null ? 0 : categories.size();
    }

    public void setCategories(List<Category> categories) {
        this.categories = categories;
        this.notifyDataSetChanged();
    }

    class CategoryViewHolder extends RecyclerView.ViewHolder {

        private final TextView categoryName;
        private final View categoryItem;

        CategoryViewHolder(View categoryItem) {
            super(categoryItem);
            categoryName = categoryItem.findViewById(R.id.category_name);
            this.categoryItem = categoryItem;
        }

        private void setCategoryItem(Category category){
            categoryName.setText(category.getName());
            categoryItem.setOnClickListener
            (view -> onCategoryClickListener.onItemClicked(view, category));
        }
    }
}
OnItemClickListener
在上面的代码中,你会注意到:
import com.example.blogs.ui.common.OnItemClickListener;我们为我们的categories卡片项添加了一个点击监听器,这样每当用户点击category时,我们就可以知道哪个category被选中,从而转换到一个新屏幕,其中的博客列在选中的category下。
因此,打开ui包并创建一个名为'common'的新包,并在其中添加一个名为 'OnItemClickListener'的interface:
package com.example.blogs.ui.common;

import android.view.View;

public interface OnItemClickListener<T> {
    void onItemClicked(View view, T data);
}
类别片段
现在导航到HomeFragment并将其重命名为CategoriesFragment。这将保存所有UI相关代码以更新视图,它将观察CategoriesViewModel任何更改,然后相应地更新recyclerview及其适配器,我们还将在API调用发生时显示进度,并在收到结果后隐藏它。
package com.example.blogs.ui.categories;

import android.content.Intent;
import android.os.Bundle;
import android.view.LayoutInflater;
import android.view.View;
import android.view.ViewGroup;

import androidx.annotation.NonNull;
import androidx.core.widget.ContentLoadingProgressBar;
import androidx.fragment.app.Fragment;
import androidx.lifecycle.ViewModelProvider;
import androidx.recyclerview.widget.GridLayoutManager;
import androidx.recyclerview.widget.RecyclerView;

import com.example.blogs.R;
import com.example.blogs.data.model.Category;
import com.example.blogs.ui.blogs.BlogsActivity;
import com.example.blogs.ui.common.OnItemClickListener;
import com.google.gson.Gson;

public class CategoriesFragment extends Fragment {

    private CategoriesAdapter categoryAdapter;

    public View onCreateView(@NonNull LayoutInflater inflater,
                             ViewGroup container, Bundle savedInstanceState) {
        CategoriesViewModel homeViewModel = new ViewModelProvider
        (this, new CategoriesViewModelFactory()).get(CategoriesViewModel.class);
        View root = inflater.inflate(R.layout.fragment_categories, container, false);

        ContentLoadingProgressBar progress = root.findViewById(R.id.progress);

        RecyclerView categoriesRecyclerView =
                     root.findViewById(R.id.categories_recycler_view);
        OnItemClickListener<Category> onCategoryClickListener = (view, category) -> {
            Intent intent = new Intent(getActivity(), BlogsActivity.class);
            String categoryJson = new Gson().toJson(category);
            intent.putExtra("Category", categoryJson);
            intent.putExtra("CallerActivity", getActivity().getClass().getSimpleName());
            startActivity(intent);
        };

        categoryAdapter = new CategoriesAdapter(root.getContext(), onCategoryClickListener);
        categoriesRecyclerView.setAdapter(categoryAdapter);
        categoriesRecyclerView.setLayoutManager(new GridLayoutManager(root.getContext(), 2));

        progress.show();
        homeViewModel.getCategories().observe(getViewLifecycleOwner(), categories -> {
            categoryAdapter.setCategories(categories);
            progress.hide();
        });

        return root;
    }
}现在让我们创建fragment_categories.xml布局:
<?xml version="1.0" encoding="utf-8"?>
<androidx.constraintlayout.widget.ConstraintLayout
    xmlns:android="http://schemas.android.com/apk/res/android"
    xmlns:app="http://schemas.android.com/apk/res-auto"
    xmlns:tools="http://schemas.android.com/tools"
    android:layout_width="match_parent"
    android:layout_height="match_parent"
    tools:context=".ui.categories.CategoriesFragment">

    <androidx.core.widget.ContentLoadingProgressBar
        android:id="@+id/progress"
        android:layout_width="wrap_content"
        android:layout_height="wrap_content"
        style="?android:attr/progressBarStyleLarge"
        android:visibility="visible"
        android:indeterminateTint="@color/purple_700"
        app:layout_constraintBottom_toBottomOf="parent"
        app:layout_constraintEnd_toEndOf="parent"
        app:layout_constraintStart_toStartOf="parent" />
    <androidx.recyclerview.widget.RecyclerView
        android:layout_width="match_parent"
        android:layout_height="match_parent"
        android:id="@+id/categories_recycler_view"
        app:layout_constraintBottom_toBottomOf="parent"
        app:layout_constraintEnd_toEndOf="parent"
        app:layout_constraintStart_toStartOf="parent"
        app:layout_constraintTop_toTopOf="parent"
        />
</androidx.constraintlayout.widget.ConstraintLayout>
BlogsActivity
现在我们完成了Categories Fragment部分的工作,是时候创建一个新活动来显示所选category下的所有博客。
BlogsActivity将会从CategoriesFragment中调用,并且会收到一个带有category对象解析为JSON和CallerActivity的intent,这样BlogsActivity将显示所有的博客在一个片段将被共享和用于第二底部导航的布局的”最新博客”。
所以在ui包下,创建一个名为 'blogs'的新包,在里面创建一个新的Activity,选择 空白的Activity:
package com.example.blogs.ui.blogs;

import android.content.Intent;
import android.os.Bundle;

import androidx.appcompat.app.AppCompatActivity;
import androidx.appcompat.widget.Toolbar;
import androidx.fragment.app.FragmentTransaction;

import com.example.blogs.R;
import com.example.blogs.data.model.Category;
import com.google.gson.Gson;

public class BlogsActivity extends AppCompatActivity {

    @Override
    protected void onCreate(Bundle savedInstanceState) {
        super.onCreate(savedInstanceState);
        setContentView(R.layout.activity_blogs);
        Toolbar toolbar = findViewById(R.id.toolbar);
        setSupportActionBar(toolbar);

        Intent intent = getIntent();
        String categoryJson = intent.getStringExtra("Category");
        Category category = new Gson().fromJson(categoryJson, Category.class);

        setTitle(category.getName());
        String callerActivity = intent.getStringExtra("CallerActivity");

        BlogsFragment fragment = new BlogsFragment();
        Bundle args = new Bundle();
        args.putInt("CategoryId", category.getId());
        args.putString("CallerActivity", callerActivity);

        if (savedInstanceState == null){
            FragmentTransaction ft = getSupportFragmentManager().beginTransaction();
            fragment.setArguments(args);
            ft.replace(R.id.blogs_fragment_container, fragment);
            ft.commit();
        }
    }
}让我们为activity_blogs添加一个XML布局,它将包含一个FragmentContainerView托管片段和一个AppBarLayout显示带有category名称的顶部栏,正如您在前面的代码中看到的那样,在读取intent后,我们将活动的标题设置为选定的category名称并将其从JSON字符串格式转换为Category对象。
所以下面是activity_blogs.xml:
<?xml version="1.0" encoding="utf-8"?>
<androidx.coordinatorlayout.widget.CoordinatorLayout
    xmlns:android="http://schemas.android.com/apk/res/android"
    xmlns:app="http://schemas.android.com/apk/res-auto"
    xmlns:tools="http://schemas.android.com/tools"
    android:layout_width="match_parent"
    android:layout_height="match_parent"
    tools:context=".ui.blogs.BlogsActivity">

    <com.google.android.material.appbar.AppBarLayout
        android:layout_width="match_parent"
        android:layout_height="wrap_content"
        android:id="@+id/app_bar"
        android:theme="@style/Theme.Blogs.AppBarOverlay">

        <androidx.appcompat.widget.Toolbar
            android:id="@+id/toolbar"
            android:layout_width="match_parent"
            android:layout_height="?attr/actionBarSize"
            android:background="?attr/colorPrimary"
            app:popupTheme="@style/Theme.Blogs.PopupOverlay" />

    </com.google.android.material.appbar.AppBarLayout>

    <androidx.fragment.app.FragmentContainerView
        android:id="@+id/blogs_fragment_container"
        app:layout_behavior=
        "com.google.android.material.appbar.AppBarLayout$ScrollingViewBehavior"
        android:name="androidx.navigation.fragment.NavHostFragment"
        android:layout_width="match_parent"
        android:layout_height="match_parent"
        app:defaultNavHost="true"
        app:navGraph="@navigation/mobile_navigation" />

</androidx.coordinatorlayout.widget.CoordinatorLayout>
BlogsFragment
现在让我们创建BlogsFragment。如前所述,这个片段将在两个不同的地方使用,所以它会派生它的参数来检查CallerActivity,如果它来自MainActivity,那么这意味着这个片段将显示所选category的博客,因为我们直接从MainActivity最新博客下面托管的CategoriesFragment传递CallerActivity,所以它会调用getBlogs方法,否则它会显示最新的博客:
package com.example.blogs.ui.blogs;

import android.content.Intent;
import android.os.Bundle;
import android.view.LayoutInflater;
import android.view.View;
import android.view.ViewGroup;
import android.widget.LinearLayout;

import androidx.annotation.NonNull;
import androidx.core.widget.ContentLoadingProgressBar;
import androidx.fragment.app.Fragment;
import androidx.lifecycle.Observer;
import androidx.lifecycle.ViewModelProvider;
import androidx.recyclerview.widget.DividerItemDecoration;
import androidx.recyclerview.widget.LinearLayoutManager;
import androidx.recyclerview.widget.RecyclerView;

import com.example.blogs.R;
import com.example.blogs.data.model.Blog;
import com.example.blogs.ui.MainActivity;
import com.example.blogs.ui.blog.info.BlogInfoActivity;
import com.example.blogs.ui.common.OnItemClickListener;
import com.google.android.material.snackbar.BaseTransientBottomBar;
import com.google.android.material.snackbar.Snackbar;
import com.google.gson.Gson;

import java.util.ArrayList;
import java.util.List;

public class BlogsFragment extends Fragment {

    private BlogsAdapter blogsAdapter;

    public View onCreateView(@NonNull LayoutInflater inflater,
                             ViewGroup container, Bundle savedInstanceState) {
        BlogsViewModel blogViewModel = new ViewModelProvider
                (this, new BlogsViewModelFactory()).get(BlogsViewModel.class);
        View root = inflater.inflate(R.layout.fragment_blogs, container, false);

        ContentLoadingProgressBar progress = root.findViewById(R.id.progress);
        Bundle arguments = this.getArguments();

        String callerActivity = "";
        int categoryId = 0;
        if (arguments != null){
            callerActivity = arguments.getString("CallerActivity");
            categoryId = arguments.getInt("CategoryId");
        }

        RecyclerView blogsRecyclerView = root.findViewById(R.id.blogs_recycler_view);

        OnItemClickListener<Blog> onBlogClickListener = (view, blog) -> {
            Gson gson = new Gson();
            String blogJson = gson.toJson(blog);
            Intent intent = new Intent(getActivity(), BlogInfoActivity.class);
            intent.putExtra("Blog", blogJson);
            intent.putExtra("CallerActivity", getActivity().getClass().getSimpleName());
            startActivity(intent);
        };

        blogsAdapter = new BlogsAdapter(root.getContext(), onBlogClickListener);
        blogsRecyclerView.addItemDecoration
           (new DividerItemDecoration(root.getContext(), LinearLayout.VERTICAL));
        blogsRecyclerView.setAdapter(blogsAdapter);
        blogsRecyclerView.setLayoutManager(new LinearLayoutManager(root.getContext()));


        Snackbar make = Snackbar.make(getActivity().findViewById(android.R.id.content),
        "No blogs found for this category", BaseTransientBottomBar.LENGTH_INDEFINITE);

        Observer<List<Blog>> blogsObserver = blogs -> {
            if (blogs == null || blogs.size() == 0) {
                make.show();
                blogsAdapter.setBlogs(new ArrayList<>());
            } else {
                make.dismiss();
                blogsAdapter.setBlogs(blogs);
            }
            progress.hide();
        };
        progress.show();
        if (callerActivity.equals(MainActivity.class.getSimpleName())){
            blogViewModel.getBlogsByCategory(categoryId).observe
                              (getViewLifecycleOwner(), blogsObserver);
        } else {
            blogViewModel.getBlogs().observe(getViewLifecycleOwner(), blogsObserver);
        }
        return root;
    }
}在res/layout文件夹中创建后,让我们探索fragment_blogs xml布局:
<?xml version="1.0" encoding="utf-8"?>
<androidx.constraintlayout.widget.ConstraintLayout
    xmlns:android="http://schemas.android.com/apk/res/android"
    xmlns:app="http://schemas.android.com/apk/res-auto"
    android:layout_width="match_parent"
    android:layout_height="match_parent"
    app:layout_behavior="@string/appbar_scrolling_view_behavior">
    <androidx.core.widget.ContentLoadingProgressBar
        android:id="@+id/progress"
        android:layout_width="wrap_content"
        android:layout_height="wrap_content"
        style="?android:attr/progressBarStyleLarge"
        android:visibility="visible"
        android:indeterminateTint="@color/purple_700"
        app:layout_constraintBottom_toBottomOf="parent"
        app:layout_constraintEnd_toEndOf="parent"
        app:layout_constraintStart_toStartOf="parent" />
    <androidx.recyclerview.widget.RecyclerView
        android:id="@+id/blogs_recycler_view"

        android:layout_width="match_parent"
        android:layout_height="match_parent" />
</androidx.constraintlayout.widget.ConstraintLayout>blogs片段包括一个recyclerview用于显示博客列表的 ,并有ContentLoadingProgressBar显示一个漂亮的旋转器加载用户时,应用程序正在执行请求。
BlogsViewModel
BlogsViewModel将包括来自BlogsRepository的两个方法,一个是在选定的类别下获得博客,另一个是根据日期获得最新的类别:
package com.example.blogs.ui.blogs;

import androidx.lifecycle.MutableLiveData;
import androidx.lifecycle.ViewModel;

import com.example.blogs.data.model.Blog;
import com.example.blogs.data.model.Category;
import com.example.blogs.data.repository.BlogsRepository;

import java.util.List;

public class BlogsViewModel extends ViewModel {

    private MutableLiveData<List<Blog>> blogs;
    private BlogsRepository blogsRepository;

    public BlogsViewModel(BlogsRepository blogsRepository) {
        this.blogsRepository = blogsRepository;
    }

    public MutableLiveData<List<Blog>> getBlogsByCategory(int id) {
        blogs = blogsRepository.getBlogsByCategory(id);

        return blogs;
    }
    public MutableLiveData<List<Blog>> getBlogs() {
        blogs = blogsRepository.getBlogs();

        return blogs;
    }
}
BlogsViewModelFactory
这里是BlogsViewModelFactory,在使用BlogsRepository获取BlogsApiManager单例实例方面类似于CategoriesViewModelFactory:
package com.example.blogs.ui.blogs;

import androidx.annotation.NonNull;
import androidx.lifecycle.ViewModel;
import androidx.lifecycle.ViewModelProvider;

import com.example.blogs.MainApplication;
import com.example.blogs.data.repository.BlogsRepository;

public class BlogsViewModelFactory implements ViewModelProvider.Factory {

    @NonNull
    @Override
    @SuppressWarnings("unchecked")
    public <T extends ViewModel> T create(@NonNull Class<T> modelClass) {
        if (modelClass.isAssignableFrom(BlogsViewModel.class)) {
            return (T) new BlogsViewModel(BlogsRepository.getInstance
                       (MainApplication.blogsApiManager));
        } else {
            throw new IllegalArgumentException("Unknown ViewModel class");
        }
    }
}
BlogsAdapter
现在,我们将创建BlogsAdapter,它将用于绑定blog_item到从片段传递的blogs数据源:
package com.example.blogs.ui.blogs;

import android.content.Context;
import android.view.LayoutInflater;
import android.view.View;
import android.view.ViewGroup;
import android.widget.TextView;

import androidx.annotation.NonNull;
import androidx.recyclerview.widget.RecyclerView;

import com.example.blogs.R;
import com.example.blogs.data.helper.DateHelper;
import com.example.blogs.data.model.Blog;
import com.example.blogs.ui.common.OnItemClickListener;

import java.text.ParseException;
import java.util.ArrayList;
import java.util.List;

public class BlogsAdapter extends RecyclerView.Adapter<BlogsAdapter.BlogViewHolder> {

    @NonNull
    private final Context context;
    private List<Blog> blogs = new ArrayList<>();
    private final OnItemClickListener<Blog> onBlogItemClickListener;

    public BlogsAdapter(@NonNull Context context,
                        OnItemClickListener<Blog> onBlogItemClickListener) {
        this.context = context;
        this.onBlogItemClickListener = onBlogItemClickListener;
    }

    @Override
    public BlogViewHolder onCreateViewHolder(ViewGroup parent, int viewType) {
        return new BlogViewHolder(LayoutInflater.from(context).inflate
                                 (R.layout.blog_item, parent, false));
    }

    @Override
    public void onBindViewHolder(BlogViewHolder holder, int position) {
        try {
            holder.setBlogItem(blogs.get(position));
        } catch (ParseException e) {
            e.printStackTrace();
        }
    }

    @Override
    public int getItemCount() {
        return blogs == null ? 0 : blogs.size();
    }

    public void setBlogs(List<Blog> blogs) {
        this.blogs = blogs;
        this.notifyDataSetChanged();
    }

    class BlogViewHolder extends RecyclerView.ViewHolder {

        private final TextView blogName;
        private final TextView blogDescription;
        private final TextView blogDate;
        private final View regionItem;

        BlogViewHolder(View regionItem) {
            super(regionItem);
            this.regionItem = regionItem;
            blogName = regionItem.findViewById(R.id.blog_name);
            blogDescription = regionItem.findViewById(R.id.blog_description);
            blogDate = regionItem.findViewById(R.id.blog_date);
        }

        private void setBlogItem(Blog blog) throws ParseException {
            regionItem.setOnClickListener(view ->
                       onBlogItemClickListener.onItemClicked(view, blog));
            blogName.setText(blog.getName());
            blogDescription.setText(blog.getDescription());

            String formattedDate = DateHelper.getFormattedDate(blog.getSubmittedDate());
            blogDate.setText(formattedDate);
        }
    }
}让我们看看blog_item.xml布局的样子:
<?xml version="1.0" encoding="utf-8"?>
<LinearLayout xmlns:android="http://schemas.android.com/apk/res/android"
    android:orientation="vertical"
    android:padding="10dp"
    android:layout_width="match_parent"
    android:layout_height="wrap_content">

    <TextView
        android:id="@+id/blog_name"
        android:layout_width="match_parent"
        android:layout_height="wrap_content"
        android:padding="10dp"
        android:textStyle="bold"
        android:text="Blog Name"
        android:textAppearance="@style/TextAppearance.AppCompat.Medium" />

    <TextView
        android:id="@+id/blog_description"
        android:layout_width="match_parent"
        android:layout_height="wrap_content"
        android:padding="8dp"
        android:text="This is a Sample Blog description with one line only displayed"
        android:ellipsize="end"
        android:maxLines="2"
        android:textAppearance="@style/Base.TextAppearance.AppCompat.Large" />

    <TextView
        android:id="@+id/blog_date"
        android:layout_width="match_parent"
        android:layout_height="wrap_content"
        android:padding="8dp"
        android:textAlignment="textEnd"
        android:text="-"
        android:ellipsize="end"
        android:maxLines="2"
        android:textSize="12sp"
        android:textAppearance="@style/Base.TextAppearance.AppCompat.Large" />
</LinearLayout>到目前为止,我们已经实现了Categories和博客界面。现在,让我们实现接收博客详细信息并将其显示给用户的界面。
BlogsInfoActivity
在ui包下,添加一个带有名称blog.info的新包,并在其中创建一个新的Blank Activity并将其命名为BlogInfoActivity。在此活动中,我们将显示所有博客信息,无需为此创建片段,因为在本教程中,我们将不会有不同的界面或部分来显示博客信息。
BlogsInfoActivity应该有这样的代码:
package com.example.blogs.ui.blog.info;

import android.content.Intent;
import android.os.Bundle;

import com.example.blogs.data.helper.DateHelper;
import com.example.blogs.data.model.Blog;

import androidx.appcompat.app.AppCompatActivity;
import androidx.appcompat.widget.Toolbar;

import android.widget.TextView;
import android.widget.Toast;

import com.example.blogs.R;
import com.google.gson.Gson;

public class BlogInfoActivity extends AppCompatActivity {

    @Override
    protected void onCreate(Bundle savedInstanceState) {
        super.onCreate(savedInstanceState);
        setContentView(R.layout.activity_blog_info);
        Toolbar toolbar = findViewById(R.id.toolbar);
        setSupportActionBar(toolbar);

        Intent intent = getIntent();

        String blogJson = intent.getStringExtra("Blog");

        Blog blog = new Gson().fromJson(blogJson, Blog.class);

        if (blog == null){
            Toast.makeText(this, "Invalid blog", Toast.LENGTH_LONG).show();
            return;
        }

        TextView blogName = findViewById(R.id.blog_name);
        TextView blogDescription = findViewById(R.id.blog_description);
        TextView blogUrl = findViewById(R.id.blog_url);
        TextView blogRss = findViewById(R.id.blog_rss);
        TextView blogDate = findViewById(R.id.blog_date);

        blogName.setText(blog.getName());
        blogDescription.setText(blog.getDescription());
        blogUrl.setText(blog.getUrl());
        blogRss.setText(blog.getRssFeed());
        blogDate.setText(DateHelper.getFormattedDate(blog.getSubmittedDate()));

    }
}
如果你注意到上面源代码的最后一行,我们添加了一个格式化日期的方法:
blogDate.setText(DateHelper.getFormattedDate(blog.getSubmittedDate()));getFormattedDate接受string (其中包含UTC格式的博客日期),并对其进行格式化,以更直观的日期时间格式显示它。
让我们前往数据包并创建一个带有名称助手的新包,并在其中添加一个名称为“DateHelper”的新类。
package com.example.blogs.data.helper;

import java.text.DateFormat;
import java.text.ParseException;
import java.text.SimpleDateFormat;
import java.util.Date;
import java.util.Locale;

public class DateHelper {
    public static String getFormattedDate(String date)  {

        SimpleDateFormat displayDateFormat =
              new SimpleDateFormat("MMM dd, yyy h:mm a", Locale.US);
        DateFormat inputDateFormat =
            new SimpleDateFormat("yyyy-MM-dd'T'HH:mm:ss", Locale.US);
        Date formattedDate = null;
        try {
            formattedDate = inputDateFormat.parse(date);
        } catch (ParseException e) {
            e.printStackTrace();
        }
        if (formattedDate == null){
            return "-";
        }
        return displayDateFormat.format(formattedDate);
    }
}所以让我们回到res/layout文件夹并创建一个名为“activity_blog_info.xml”的新布局资源。
这是activity_blog_info.xml的来源,您可以随意以您喜欢的方式设计它:
<?xml version="1.0" encoding="utf-8"?>
<LinearLayout xmlns:android="http://schemas.android.com/apk/res/android"
    android:orientation="vertical"
    android:padding="10dp"
    android:layout_width="match_parent"
    android:layout_height="wrap_content">

    <TextView
        android:id="@+id/blog_name"
        android:layout_width="match_parent"
        android:layout_height="wrap_content"
        android:padding="10dp"
        android:textStyle="bold"
        android:text="Blog Name"
        android:textAppearance="@style/TextAppearance.AppCompat.Medium" />

    <TextView
        android:id="@+id/blog_description"
        android:layout_width="match_parent"
        android:layout_height="wrap_content"
        android:padding="8dp"
        android:text="This is a Sample Blog description with one line only displayed"
        android:ellipsize="end"
        android:maxLines="2"
        android:textAppearance="@style/Base.TextAppearance.AppCompat.Large" />

    <TextView
        android:id="@+id/blog_date"
        android:layout_width="match_parent"
        android:layout_height="wrap_content"
        android:padding="8dp"
        android:textAlignment="textEnd"
        android:text="-"
        android:ellipsize="end"
        android:maxLines="2"
        android:textSize="12sp"
        android:textAppearance="@style/Base.TextAppearance.AppCompat.Large" />
</LinearLayout>
添加网络配置
在模拟器上测试我们的工作之前,我们只需要做最后一步,我们将在res文件夹下添加一个名为XML的新包,并在其中添加一个名为network_security_config的XML文件。
<?xml version="1.0" encoding="utf-8"?>
<!-- IMPORTANT NOTE:
the configuration setting cleartextTrafficPermitted=\"true\"
only be used for testing purposes,
when connecting to APIs on production you should always connect to
https based endpoints instead of http
-->
<network-security-config>
    <base-config cleartextTrafficPermitted="true">
        <trust-anchors>
            <certificates src="system" />
        </trust-anchors>
    </base-config>
</network-security-config>我在这里面添加了一个重要的注释。你永远记住,你不应该在生产环境中使用cleartextTrafficPermitted=”true”,这意味着你在处理商业产品时应该始终连接到https API。添加这只是因为我们正在通过特殊IP地址(10.0.2.2)连接到localhost的模拟器上测试我们的应用程序,因此我们通过http调用连接到我们的API。
让我们将上面network_security_config的内容包含在我们的应用程序清单中,将下面的行添加到应用程序标记中。
android:networkSecurityConfig="@xml/network_security_config"由于我们仍在清单中,请确保将指定MainActivity为主要和启动器活动。
最终,您的清单应如下所示:
<?xml version="1.0" encoding="utf-8"?>
<manifest xmlns:android="http://schemas.android.com/apk/res/android"
    package="com.example.blogs">

    <uses-permission android:name="android.permission.INTERNET" />

    <application
        android:name=".MainApplication"
        android:allowBackup="true"
        android:icon="@mipmap/ic_launcher"
        android:label="@string/app_name"
        android:networkSecurityConfig="@xml/network_security_config"
        android:roundIcon="@mipmap/ic_launcher_round"
        android:supportsRtl="true"
        android:theme="@style/Theme.Blogs">
        <activity
            android:name=".ui.blog.info.BlogInfoActivity"
            android:label="@string/title_activity_blog_info"
            android:theme="@style/Theme.Blogs.NoActionBar" />
        <activity
            android:name=".ui.blogs.BlogsActivity"
            android:label="@string/title_activity_blog"
            android:theme="@style/Theme.Blogs.NoActionBar" />
        <activity
            android:name=".ui.MainActivity"
            android:label="@string/title_activity_main">
            <intent-filter>
                <action android:name="android.intent.action.MAIN" />
                <category android:name="android.intent.category.LAUNCHER" />
            </intent-filter>
        </activity>
    </application>
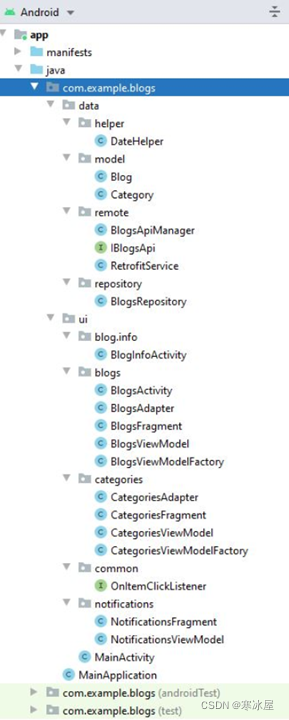
</manifest>您的Android文件夹结构应如下所示:
在模拟器上测试Android应用
现在让我们运行我们的应用程序,看看它会如何出现在模拟器上。
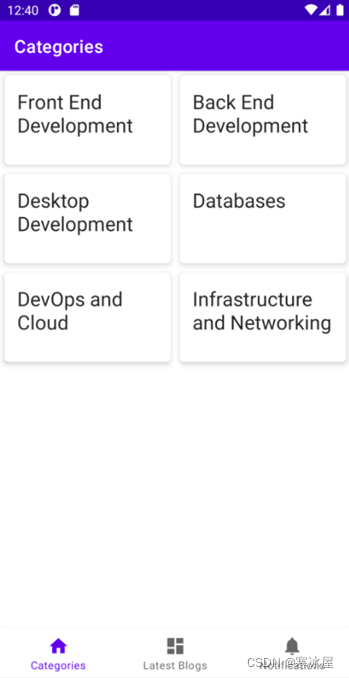
第一个屏幕(启动屏幕)是MainActivity,第一个显示的片段是categories片段,因此我们将通过网格布局看到填充categories的卡片:
现在,如果我们点击前端开发,我们将看到一个新屏幕,其中博客垂直填充在屏幕上,标题将是前端开发。
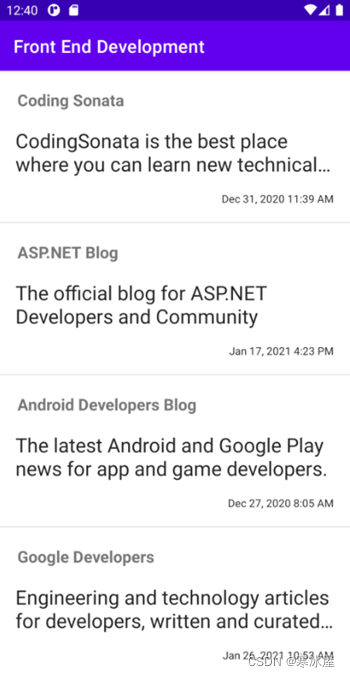
然后,如果我们点击Coding Sonata,我们将看到另一个屏幕,其中包含与所选博客相关的所有博客详细信息:

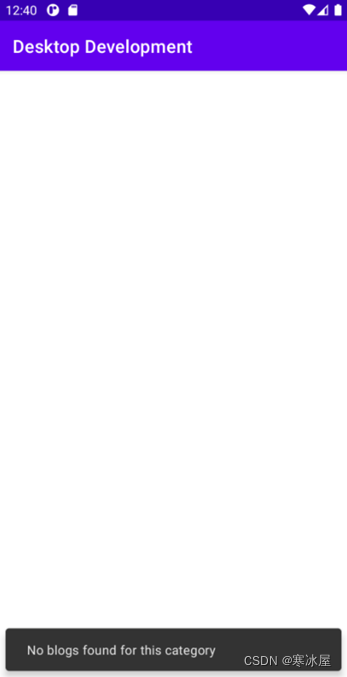
现在,让我们两次返回显示categories并选择桌面开发的主屏幕,我们没有在此category下添加任何博客,因此在下一个屏幕上,我们将看到一个告诉我们在此category下没有博客的信息的Snackbar。
现在让我们回到主屏幕并点击最新博客按钮,您应该会看到按日期排序的最新博客。

这就是加载进度微调器在调用API以获取categories.

总结
就是这样,我们已经设法在.NET 5中构建和连接Android到ASP.NET Core Web API。我们使用Entity Framework Core 5连接到SQL Server Express数据库。以Android SDK 30和min sdk 21为目标的Android应用程序使用Retrofit 2连接到RESTful API。
我希望你已经学会了如何将Android与ASP.NET Core Web API连接起来。
https://www.codeproject.com/Articles/5308542/A-Complete-Tutorial-to-Connect-Android-with-ASP-NE


 6280
6280

 被折叠的 条评论
为什么被折叠?
被折叠的 条评论
为什么被折叠?
 到【灌水乐园】发言


