


目录
获得报酬是任何业务中最关键的功能之一,数字发票正在成为标准做法。考虑到这一点,Web应用程序开发人员通常负责以编程方式生成和发送PDF发票。
无论您是自动化发票生成和通知流程,还是构建允许您的团队主动提醒客户未结发票的GUI,您将面临的第一个技术障碍是生成PDF发票。虽然您可以编写自定义PDF生成脚本,但这是一项艰巨的任务。基于Web的服务很方便,但如果您与客户签订了保密协议,则通过Internet将数据发送到第三方服务可能会有问题。
幸运的是,福昕的PDF工具可以让您快速安全地生成PDF文件。使用他们的HTML到PDF转换器,您可以将任何HTML文档(包括发票)转换为PDF文件,您可以将其附加到电子邮件或允许客户从您的Web应用程序下载。
在本教程中,您将了解如何创建一个NodeJS应用程序,该应用程序使用Foxit PDF SDK从Web应用程序中的HTML发票生成PDF发票。创建后,您将使用Nodemailer通过SMTP将发票发送到客户的电子邮件地址。您可以按照以下每个步骤操作或[在GitHub上下载完成的代码库)。
访问Foxit PDF SDK Web Demo并通过探索配置和功能亲身体验。
构建Web应用程序以创建和发送PDF发票
在本教程中,您将创建一个内部工具来帮助您的计费部门跟进未付发票。您将创建一个列出所有未结发票的页面和一个用于预览每个发票的页面。用户将能够单击链接向每个客户发送电子邮件提醒,并附上发票。
您将使用Express Web框架、Pure CSS进行样式设置和Nodemailer发送电子邮件。
先决条件
- NodeJS版本8+和NPM版本5+
- Foxit SDK(可在此处免费试用下载)
- Foxit HTML到PDF转换插件
- Mailtrap(如果您想测试SMTP电子邮件传输)
创建新的Express应用程序
要创建一个新的样板Express Web应用程序,请使用应用程序生成器:
npx express-generator --git --view=hbs这将创建一个带有.gitignore文件和Handlebars模板文件的Web应用程序。
接下来,添加Nodemailer npm包并安装Express的依赖项:
npm i nodemailer && npm iExpress生成的默认应用程序带有两个路由文件:/routes/index.js和/routes/users.js。删除users.js路由并创建一个名为invoices.js的新路由文件。将此新路由添加到您的app.js文件并删除usersRoute:
...
var indexRouter = require('./routes/index');
var invoicesRouter = require('./routes/invoices');

var app = express();
...
app.use('/', indexRouter);
app.use('/invoices', invoicesRouter);
...
发票路由器是您在此应用程序中完成大部分工作的地方。
在创建路由之前,您需要一些数据。在实际应用程序中,您可能会连接到数据库,但出于演示目的,您会将发票数据添加到JSON文件中。
在/data/invoices.json创建一个新文件并添加以下内容:
[
  {
    "id": "47427759-9362-4f8e-bfe4-2d3733534e83",
    "customer": "Bins and Sons",
    "contact_name": "Verne McKim",
    "contact_email": "vmckim0@example.com",
    "address": "3 Burning Wood Street",
    "city_state": "Memphis, TN 38118",
    "plan_id": "41595-5514",
    "plan_name": "Starter",
    "subtotal": 499.99,
    "fee": 50.00,
    "total": 549.99
  },
  {
    "id": "1afdd2fa-6353-437c-a923-e43baac506f4",
    "customer": "Koepp Group",
    "contact_name": "Junia Pretious",
    "contact_email": "jpretious1@example.com",
    "address": "7170 Fairfield Hill",
    "city_state": "Los Angeles, CA 90026",
    "plan_id": "43419-355",
    "plan_name": "Professional",
    "amount": 999.99,
    "fee": 50.00,
    "total": 1049.99
  },
  {
    "id": "59c216f8-7471-4ec2-a527-ab3641dc49aa",
    "customer": "Lynch-Bednar",
    "contact_name": "Evelin Stollenberg",
    "contact_email": "estollenberg2@example.com",
    "address": "9951 Erie Place",
    "city_state": "Chicago, IL 60605",
    "plan_id": "63323-714",
    "plan_name": "Starter",
    "amount": 499.99,
    "fee": 50.00,
    "total": 549.99
  }
]
这三张发票包含客户、计划和计费数据,可帮助您在下一部分生成发票。
创建发票路由
routes/invoices.js文件将在您的应用程序中创建三个新路由:
- /invoices——来自上述平面数据文件的所有发票的列表。
- /invoices/:id ——发票预览,因此用户可以在将发票发送给客户之前查看发票的外观。
- /invoices/:id/email ——生成PDF发票并将其发送到存档的联系人电子邮件的端点。
最后一条路由将在稍后解决,但您可以从添加前两条路由开始。打开invoices.js文件并添加以下内容:
const express = require('express');
const router = express.Router();
const invoices = require('../data/invoices.json');
// Import exec to run the Foxit HTML to PDF executable
const { exec } = require('child_process');
// Import nodemailer to send emails
const nodemailer = require('nodemailer');

router.get('/', function(req, res) {
  res.render('invoice-list', {
    invoices: invoices,
    // Accepts errors and successes as query string arguments
    success: req.query['success'],
    error: req.query['error'],
  });
});

router.get('/:id', function(req, res) {
  const invoice = invoices.find(invoice => invoice.id === req.params['id']);
  // If the invoice doesn't exist, redirect the user back to the list page
  if (!invoice) {
    res.redirect('/invoices');
  }
  // Make the date format pretty
  const date = new Date().toLocaleDateString("en", {
    year:"numeric",
    day:"2-digit",
    month:"2-digit",
  });
  res.render('invoice-single', { invoice, date });
});

router.get('/:id/email', function(req, res) {
  // Coming soon.
});

module.exports = router;
您的应用程序几乎可以测试了,但首先,您需要创建两个视图文件。
添加视图和样式
Express将逻辑和表示分离为routes/和views/。在views/目录中添加两个新文件: invoice-list.js和invoice-single.js。
将以下内容添加到您的invoice-list.js文件中:
<h1><a href="/invoices">Unpaid Invoices</a></h1>
{{#if success}}
<p class="success"><strong>Success!</strong> The invoice has been sent to the client.</p>
{{/if}}
{{#if error}}
<p class="error"><strong>Whoops!</strong> Something went wrong and your invoice could not be sent.</p>
{{/if}}
{{#each invoices}}
<h3>{{this.customer}}</h3>
<p>ID: {{this.id}} <br/>
  <a href="/invoices/{{this.id}}">View</a> | <a href="/invoices/{{this.id}}/email">Email Reminder</a>
</p>
{{/each}}打开invoice-single.js文件并添加:
<div class="pure-g">
  <div class="pure-u-1-2">
    <h1>Invoice</h1>
  </div>
  <div class="pure-u-1-2" style="text-align: right;">
    <p class="muted">Issued on {{ date }}</p>
  </div>
</div>
<div class="pure-g">
  <div class="pure-u-1-2">
    <h3>Provider</h3>
    <p>
      <strong>Tiller, Inc.</strong><br/>
      1255 S. Clark<br/>
      Chicago, IL 60608
    </p>
  </div>
  <div class="pure-u-1-2" style="text-align: right;">
    <h3>Billed to</h3>
    <p>
      <strong>{{invoice.customer}}</strong><br/>
      {{invoice.contact_name}}<br/>
      {{invoice.address}}<br/>
      {{invoice.city_state}}
    </p>
  </div>
</div>
<table class="pure-table pure-table-horizontal">
  <thead>
  <tr>
    <th>ID</th>
    <th>Plan Name</th>
    <th class="text-right">Amount</th>
  </tr>
  </thead>
  <tbody>
  <tr>
    <td>{{invoice.plan_id}}</td>
    <td>{{invoice.plan_name}}</td>
    <td class="text-right">${{invoice.subtotal}}</td>
  </tr>
  <tr>
    <td></td>
    <td class="text-right">Subtotal:</td>
    <td class="text-right">${{invoice.subtotal}}</td>
  </tr>
  <tr>
    <td></td>
    <td class="text-right">Taxes and Fees:</td>
    <td class="text-right">${{invoice.fee}}</td>
  </tr>
  <tr class="bold">
    <td></td>
    <td class="text-right">Total:</td>
    <td class="text-right">${{invoice.total}}</td>
  </tr>
  </tbody>
</table>
<div class="footer">
  <p>Please make checks payable to <strong>Tiller, Inc</strong>. Invoices are due 30 days after date issued.</p>
  <p>Thank you for your business!</p>
</div>接下来,您需要将样式添加到应用程序的样式表并加载Pure CSS 模块以使其看起来不错。打开views/layout.hbs文件并将其替换为以下内容以导入Pure并创建单列网格布局:
<!DOCTYPE html>
<html>
  <head>
    <title>{{title}}</title>
    <meta name="viewport" content="width=device-width, initial-scale=1">
    <link rel="stylesheet" href="https://unpkg.com/purecss@2.0.3/build/pure-min.css" integrity="sha384-cg6SkqEOCV1NbJoCu11+bm0NvBRc8IYLRGXkmNrqUBfTjmMYwNKPWBTIKyw9mHNJ" crossorigin="anonymous">
    <link rel='stylesheet' href='/stylesheets/style.css' />
  </head>
  <body>
    <div class="container">
      <div class="pure-g">
        <div class="pure-u-1">
          {{{body}}}
        </div>
      </div>
    </div>
  </body>
</html>打开应用程序的public/style.css文件并添加以下内容:
body {
  background-color: #f7f7f7;
  color: #333333;
}
a {
  color: #156d6a;
}
h1 a,
h2 a,
h3 a {
  text-decoration: none;
}
table {
  width: 100%;
}
.container {
  background-color: #ffffff;
  max-width: 700px;
  margin: 0 auto;
  padding: 30px;
}
.muted {
  color: #999999;
}
.bold {
  font-weight: bold;
}
.text-right {
  text-align: right;
}
.footer p {
  margin-top: 30px;
}
.success {
  background-color: #c0f5f3;
  color: #0d928d;
  padding: 10px;
}
.error {
  background-color: #f5c0c0;
  color: #792525;
  padding: 10px;
}虽然您不必添加样式,但它会让您的发票看起来更专业,因为Foxit在生成PDF时会捕获HTML文档中的所有样式。
在您的浏览器中试用我们的SDK for Web Demo,无需下载或登录。
此时,您已准备好测试您的应用程序。从命令行,运行npm start并打开您的网络浏览器到localhost:3000/invoices。您应该会看到这样的发票列表:
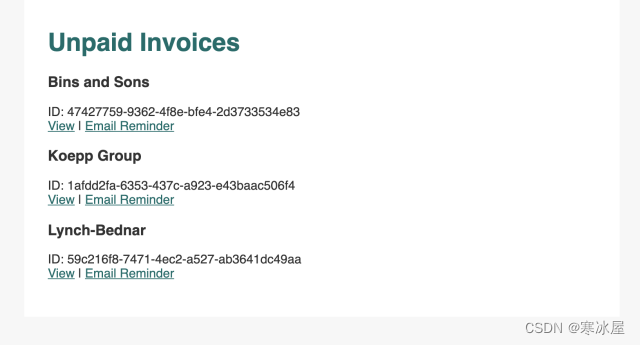
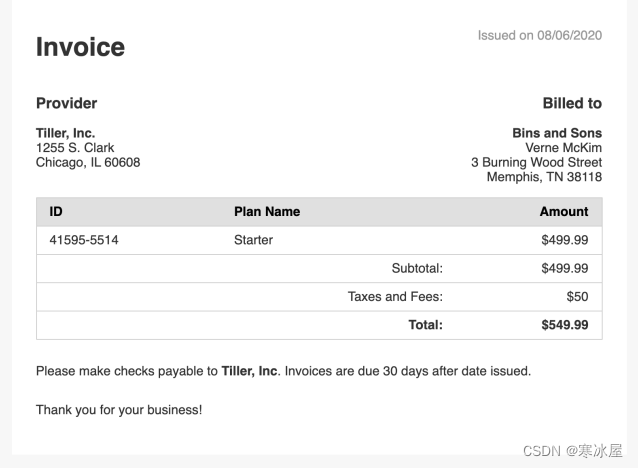
点击“查看”预览每张发票:
在最后两个步骤中,您将使用Foxit HTML to PDF工具生成PDF发票,然后再使用Nodemailer将它们附加到电子邮件中。
使用Foxit生成PDF
您可以使用Foxit的SDK进行各种PDF创建和操作操作,但一个常见的用例是从HTML文档或URL生成PDF文件。下载和编译HTML到PDF可执行文件的过程记录在此处。从命令行成功运行演示后,您可以继续。
Node的child_process库包含一个名为exec()的函数,允许您执行命令行函数。这是运行用C++编写的Foxit可执行文件的便捷方法。要运行HTML到PDF可执行文件,请通过将其替换为以下内容来更新您的/:id/email路由:
...

router.get('/:id/email', function(req, res) {
  // Set the executable path and output folder
  const htmlToPdfPath = '/path/to/foxit/html2pdf';
  const outputFolder = __dirname + '/../invoices/';

  // Get the invoice
  const invoice = invoices.find(invoice => invoice.id === req.params['id']);
  if (!invoice) {
    res.redirect('/invoices?error=1');
  }

  // Convert the HTML to PDF
  exec(
    ${htmlToPdfPath} -h localhost:3000/invoices/${req.params['id']} -o ${outputFolder}${req.params['id']}.pdf,
    (err, stdout, stderr) => {
      if (err || stderr) {
        console.error(err, stderr);
        res.redirect('/invoices?error=1');
      } else {
        // For now: log the output file path
        console.log(PDF generated and saved to ${outputFolder}${req.params['id']}.pdf);
        res.redirect('/invoices?success=1');
      }
  });
});在运行此代码之前,请确保更新htmlToPdfPath为指向您的htmltopdf可执行文件。
返回您的发票列表并单击任何发票上的“电子邮件提醒”,Node应用程序将调用htmltopdf可执行文件。反过来,可执行文件会将您的发票从Express提供的HTML文档转换为PDF文件。您可以在Web应用程序的invoices/目录中找到PDF文件。
现在您可以生成PDF发票,最后一步是将这些发票发送给您的客户。
使用Nodemailer发送电子邮件
Nodemailer提供了一个方便的接口来访问许多电子邮件传输层。SMTP是最流行的一种,但您也可以使用Amazon SES或服务器的sendmail命令。
要测试Nodemailer,您可以使用[stream transport's JSON option,它可以让您将消息记录到控制台。要设置您的消息并使用Nodemailer发送,请在您的/invoices/:id/email路由中的“PDF生成并保存到...”console.log语句下方添加以下内容:
...
// Construct the message
const message = {
  from: 'accounting@example.com',
  to: invoice.contact_email,
  subject: 'Reminder: Your Invoice from Tiller, Inc. is Due',
  html: <p>Hey ${invoice.contact_name},</p><p>I just wanted to remind you that your invoice for last month's services is now due. I've attached it here for your convenience.</p><p>Thanks for your business!</p>,
  attachments: [
    {
      filename: 'invoice.pdf',
      path: ${outputFolder}${req.params['id']}.pdf,
    }
  ]
};
// Use mailer to send invoice
nodemailer
  .createTransport({jsonTransport: true})
  .sendMail(message, function (err, info) {
    if (err) {
      res.redirect('/invoices?error=1');
    } else {
      console.log(info.message);
      res.redirect('/invoices?success=1');
    }
  });
...刷新您的节点应用程序并单击任何发票上的“电子邮件提醒”。这一次,您将在控制台中看到整个电子邮件数据对象为JSON:
{
  "from": {
    "address": "accounting@example.com",
    "name": ""
  },
  "to": [
    {
      "address": "jpretious1@example.com",
      "name": ""
    }
  ],
  "subject": "Reminder: Your Invoice from Tiller, Inc. is Due",
  "html": "<p>Hey Junia Pretious,</p><p>I just wanted to remind you that your invoice for last month's services is now due. I've attached it here for your convenience.</p><p>Thanks for your business!</p>",
  "attachments": [
    {
      "content": "JVBERi0xLjMKJcTl8uXrp...",
      "filename": "invoice.pdf",
      "contentType": "application/pdf",
      "encoding": "base64"
    }
  ],
  "headers": {},
  "messageId": "<65ea9109-8d5a-295e-9295-8e98e1b2c667@example.com>"
}该attachments.content字符串是您编码的PDF文件,因此为简洁起见,我在上面截断了它。
要使用真正的SMTP服务器测试电子邮件),您可以使用Mailtrap。假设您有一个帐户,请将createTransport({jsonTransport: true})调用替换为以下内容:
createTransport({
  host: "smtp.mailtrap.io",
  port: 2525,
  auth: {
    user: "<YOUR_MAILTRAP_USERID>",
    pass: "<YOUR_MAILTRAP_PASS>"
  }
})现在,当您通过电子邮件发送发票时,Mailtrap将捕获输出并让您下载PDF附件。在您的Mailtrap帐户中,您应该会看到如下所示的电子邮件:
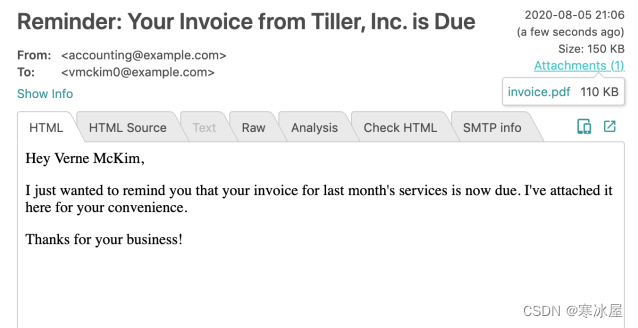
准备好将应用部署到生产环境后,请将Mailtrap SMTP凭据替换为生产邮件服务器。您的Web应用程序现在可以在您的计费团队想要跟进时生成PDF发票并将其发送给客户。
结论
如果您需要在线出示发票并以PDF格式发送,上述应用程序应该为您提供一个有用的起点。Foxit的HTML转PDF工具是一种方便且高效的PDF生成方式,但它并不是他们提供的唯一解决方案。
在您选择的平台上试用Foxit PDF SDK的先进技术:Web、Windows、Android、iOS、Linux、UWP或Mac。立即注册免费试用30天。
当您需要在 Web、移动或桌面应用程序中构建PDF支持时,Foxit是明确的选择。
https://www.codeproject.com/Articles/5317208/How-to-Create-a-PDF-Invoicing-Web-Application


 730
730

 被折叠的 条评论
为什么被折叠?
被折叠的 条评论
为什么被折叠?
 到【灌水乐园】发言


