


目录
免責聲明
这些测试项目是使用Visual Studio 4为.NET Framework 5.2019编写的。可能也可以使用早期版本,但需要一些调整。
我不在项目中使用可为空的引用类型。我不反对他们,它刚刚发生。
项目中的所有来源都属于公共领域。虽然我鼓励你使用它们,但我并不声称它们没有错误。
介绍
很久以前,我读了一篇关于史蒂夫乔布斯创建的新公司的第一篇期刊文章,NeXT,它是革命性的计算机NeXT Cube及其不寻常的操作系统NeXT OS。当时让我着迷的一件事是这个新系统的文件浏览器的图片——一长串可滚动的带有文件名的列列表。
许多年后,我拿到了苹果的新Macintosh电脑,它的新操作系统Mac OS X基于NeXT OS。 默认的文件浏览器视图是空间视图,但我很快就找到了切换到列视图并对其进行测试的方法。这真的很不寻常,但对我来说非常合乎逻辑和方便。
去年,我参与了一个处理分层数据集的项目。它是一个Windows应用程序,现在使用WPF作为其UI引擎。我的第一个解决方案是使用标准TreeView来表示屏幕上的数据,起初效果很好,直到我得到了一个巨大的数据集进行测试。
不要误会我的意思,应用程序本身可以很好地处理数百万个数据项,问题是树变得太大而无法理解。然后我想起了NeXT / Mac文件浏览器。它通过缩小屏幕上的项目数量并帮助找到它们之间的关系来处理文件和文件夹的层次结构。遗憾的是,WPF不提供实现这些级联列或Miller列(如其调用)的控件。我决定实现这样的控件。
我承认,当我开始我的小项目时,我太乐观了。我认为WPF自定义控件很容易创建。一般来说,它们是,但这种特殊的控制似乎是一个难以破解的难题。在创建可用的东西之前,我认为,有四个项目从头开始。每次我偶然遇到一些微不足道的小事,最终都会让我重新开始。
帮助我完成任务的词是MVVM。我的控件包含其自己的子控件内部视图模型,并将列管理委托给绑定子系统。
让我们通过几个简单的步骤来查看此控件创建。
步骤 1
测试解决方案
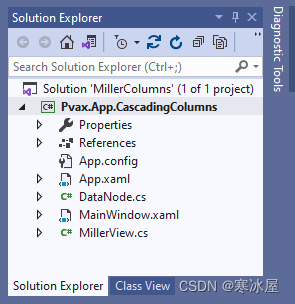
创建WPF应用程序项目。
添加一个支持层次结构并且可以绑定到TreeView:
using System.Collections.Generic;
using System.Collections.ObjectModel;
using System.Diagnostics;

namespace Pvax.App.CascadingColumns
{
    public class DataNode
    {
        [DebuggerStepThrough]
        public DataNode()
        {
            SubNodes = new ObservableCollection<DataNode>();
        }

        public DataNode(string title) :
            this()
        {
            Title = title;
        }

        public DataNode(string title, IEnumerable<DataNode> subNodes) :
            this(title)
        {
            foreach(DataNode subNode in subNodes)
            {
                SubNodes.Add(subNode);
            }
        }

        public string Title
        {
            get;
            set;
        }

        public ObservableCollection<DataNode> SubNodes
        {
            get;
        }
    }
}请注意,我特意将子节点集合命名为SubNode,而不是Children。添加预填充ObservableCollection<DataNode>实例作为主窗口的DataContext:
public MainWindow()
{
    InitializeComponent();

    DataContext = new ObservableCollection<DataNode>
    {
        new DataNode("First root", new[]
        {
            new DataNode("Folder 1", new[]
            {
                . . . . .
            },
        }),
        new DataNode("Third root", new[]
        {
            new DataNode("Folder 1"),
            new DataNode("Folder 2"),
            new DataNode("Folder 3"),
            new DataNode("Folder 4"),
        }),
    };
}
将主窗口拆分为两个水平空间:
<Grid>
    <Grid.RowDefinitions>
        <RowDefinition />
        <RowDefinition />
    </Grid.RowDefinitions>
    <Grid.ColumnDefinitions>
        <ColumnDefinition />
    </Grid.ColumnDefinitions>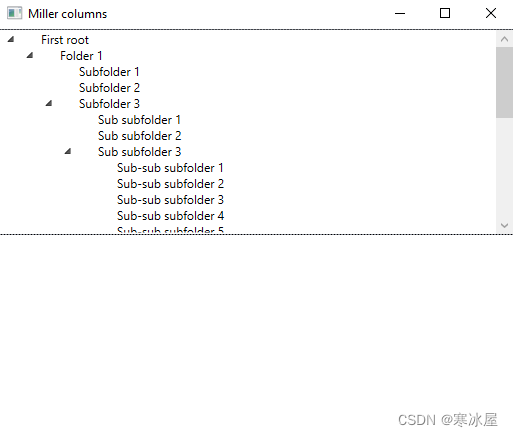
</Grid>将TreeView放在顶行并将其绑定到我们的DataContext:
<TreeView ItemsSource="{Binding}">
    <TreeView.ItemTemplate>
        <HierarchicalDataTemplate ItemsSource="{Binding SubNodes}">
            <TreeViewItem Header="{Binding Title}" />
        </HierarchicalDataTemplate>
    </TreeView.ItemTemplate>
</TreeView>这个treeview用作数据层次结构引用,并将标准控件与米勒列视图进行比较。
创建一个新的public classMillerView,将其祖先声明为Control,添加静态和默认构造函数:
public class MillerView : Control
{
    static MillerView()
    {
    }

    public MillerView()
    {
    }
}
将此控件的实例放在主窗口的第二行:
<local:MillerView Grid.Row="1">
</local:MillerView>
从这一点开始,您可以编译并运行测试项目。
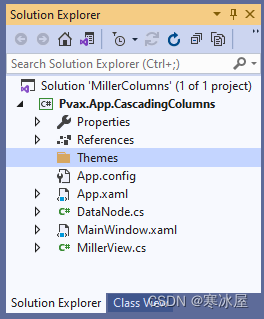
添加新的项目文件夹,主题:
将新的XAML资源文件 Generic.xaml 添加到新文件夹中:
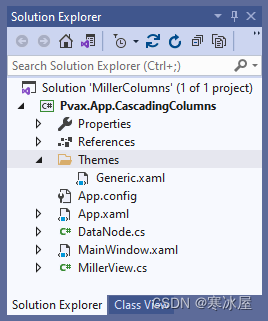
在Generic.xaml 中添加一个空的MillerView控件样式:
<ResourceDictionary xmlns="http://schemas.microsoft.com/winfx/2006/xaml/presentation"
                    xmlns:x="http://schemas.microsoft.com/winfx/2006/xaml"
                    xmlns:local="clr-namespace:Pvax.App.CascadingColumns">
     <Style TargetType="{x:Type local:MillerView}">
     </Style>
</ResourceDictionary>然后通过修改static构造函数将MillerView控件与此样式关联:
static MillerView()
{
DefaultStyleKeyProperty.OverrideMetadata(typeof(MillerView),
new FrameworkPropertyMetadata(typeof(MillerView)));
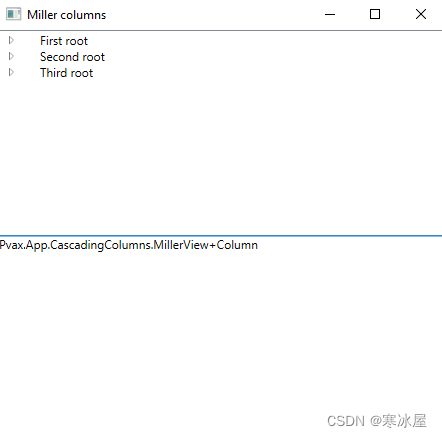
}编译并运行程序。你会得到这样的东西:
MillerView在那里,但看不见。
步骤 2
最少的级联列实现
让我们设计控件的模板:
<Style TargetType="{x:Type local:MillerView}">
    <Setter Property="Template">
        <Setter.Value>
            <ControlTemplate TargetType="{x:Type local:MillerView}">
            </ControlTemplate>
        </Setter.Value>
    </Setter>
</Style>MillerView需要一个用于列的容器。这些列将是列表框或列表视图,容器应该是可水平滚动的。我尝试使用ListBox作为容器,但偶然遇到了许多小问题。缓解这些问题需要花费太多精力,并使项目难以管理和支持。所以我使用ItemsControl作为容器。此容器将成为控件的命名部分:
<Style TargetType="{x:Type local:MillerView}">
    <Setter Property="Template">
        <Setter.Value>
            <ControlTemplate TargetType="{x:Type local:MillerView}">
                <ItemsControl x:Name="PART_Columns">
                </ItemsControl>
            </ControlTemplate>
        </Setter.Value>
    </Setter>
</Style>现在将部件的名称添加到MillerView类中:
[TemplatePart(Name = "PART_Columns", Type = typeof(ItemsControl))]
public class MillerView : Control
{
    . . . . .
}现在,我引入一个字段visualColumns,并通过重写OnApplyTemplate()方法将此字段附加到命名部分:
private ItemsControl visualColumns;

public override void OnApplyTemplate()
{
    if(null != visualColumns)
    {
    }
    visualColumns = (ItemsControl)GetTemplateChild("PART_Columns");
    if(null != visualColumns)
    {
    }
}关于null检查。他们很快就会被填满。第一个是清理所必需的——在控件的生存期内,可以多次调用该OnApplyTemplate()方法。
现在,重要的部分。我们的列将是Selector类的后代。这包括ListBox和ListView类。此类继承将集合映射到列表的ItemsSource依赖属性。ListBox和ListView利用DataTemplate类来定义其项属性,但DataTemplate不知道我们的全局视图模型具有的子集合。TreeView使用HierarchicalDataTemplate替代。我认为在米勒列的情况下这是不可能的。
所以我创建了自己的列模型类,作为以下的MillerView嵌套类:
private sealed class Column
{
    public IEnumerable ColumnItems
    {
        get;
        set;
    }
}
并添加这些视图模型的列表:
private readonly ObservableCollection<Column> dataColumns;

public MillerView()
{
    dataColumns = new ObservableCollection<Column>();
}现在,此dataColumns模型应成为列容器的项源。修改我们的OnApplyTemplate()方法:
public override void OnApplyTemplate()
{
    if(null != visualColumns)
    {
        visualColumns.ItemsSource = null;
    }
    visualColumns = (ItemsControl)GetTemplateChild("PART_Columns");
    if(null != visualColumns)
    {
        visualColumns.ItemsSource = dataColumns;
    }
}现在我们需要在dataColumns集合中添加和删除Column项,绑定系统将为我们创建和销毁列。
但是,我们需要以某种方式访问模型数据。我在MillerView中创建了一个ItemsSource依赖属性,但有一点小问题——我没有提供完整的实现,而是从ItemsControl类中使用ItemsSourceProperty。如果下一版本的WPF更改此属性,这些更改将自动传播到MillerView:
public IEnumerable ItemsSource
{
    get => (IEnumerable)GetValue(ItemsSourceProperty);
    set => SetValue(ItemsSourceProperty, value);
}

public static readonly DependencyProperty ItemsSourceProperty =
                       ItemsControl.ItemsSourceProperty.AddOwner(
    typeof(MillerView),
    new FrameworkPropertyMetadata
    (null, (d, e) => ((MillerView)d).OnItemsSourceChanged(e.OldValue, e.NewValue)));

private void OnItemsSourceChanged(object oldValue, object newValue)
{
    dataColumns.Clear();
    PopulateItemsSource(newValue);
}哦,我忘记了两个细节。我专门为MillerView替换属性元数据,并且需要实现一种PopulateItemsSource()方法。方法如下:
private void PopulateItemsSource(object newItems)
{
    if(null != newItems)
    {
        var newList = newItems as IEnumerable;
        if(!IsEmpty(newList))
        {
            dataColumns.Add(new Column { ColumnItems = newList });
        }
    }
}此IsEmpty()方法检查IEnumerable是否为空。我可以使用LINQ进行此类测试,但这是实现:
private static bool IsEmpty(IEnumerable list)
{
    if(null != list)
    {
        IEnumerator enumerator = list.GetEnumerator();
        bool result = !enumerator.MoveNext();
        if(enumerator is IDisposable disposable)
        {
            disposable.Dispose();
        }
        return result;
    }
    else
    {
        return false;
    }
}控件类为其继承者声明一些属性,包括Background、BorderBush和BorderThickness。TreeView,如您在运行我们的测试程序时所看到的,使用这些属性在其工作区周围绘制边框。让我们通过修改控件的模板来为MillerView执行相同的操作。还要为ItemSource属性提供绑定:
<Style TargetType="{x:Type local:MillerView}">
    <Setter Property="Template">
        <Setter.Value>
            <ControlTemplate TargetType="{x:Type local:MillerView}">
                <Border Background="{TemplateBinding Background}"
                 BorderBrush="{TemplateBinding BorderBrush}"
                 BorderThickness="{TemplateBinding BorderThickness}">
                    <ItemsControl x:Name="PART_Columns" ItemsSource="{Binding}">
                    </ItemsControl>
                </Border>
            </ControlTemplate>
        </Setter.Value>
    </Setter>
</Style>现在,我们可以绑定MillerView到与我们的TreeView。我还画了一下视图:
<local:MillerView Grid.Row="1" ItemsSource="{Binding}"
BorderThickness="1" BorderBrush="{DynamicResource
{x:Static SystemColors.MenuHighlightBrushKey}}">
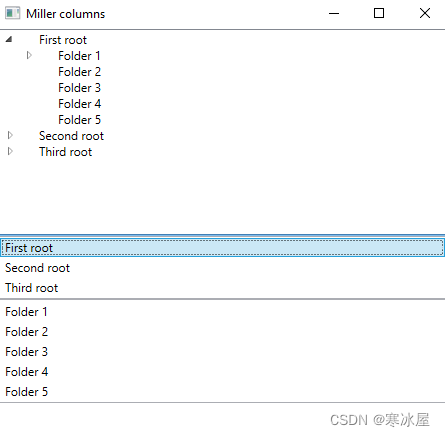
</local:MillerView>以下是我们的应用程序现在的样子:
WPF不知道如何在屏幕上显示MillerView。让我们通过项模板提供此信息。
该属性首先:
public static DataTemplate GetItemTemplate(DependencyObject obj)
{
              return (DataTemplate)obj.GetValue(ItemTemplateProperty);
}

public static void SetItemTemplate(DependencyObject obj, DataTemplate value)
{
              obj.SetValue(ItemTemplateProperty, value);
}

public static readonly DependencyProperty ItemTemplateProperty =
              ItemsControl.ItemTemplateProperty.AddOwner(
typeof(MillerView));我再次使用该DependencyProperty.AddOwner()方法。
现在将此属性添加到模板:
<ItemsControl x:Name="PART_Columns" ItemsSource="{Binding}"
 ItemTemplate="{TemplateBinding ItemTemplate}">
</ItemsControl>
并为此属性提供默认值:
<Setter Property="ItemTemplate" >
    <Setter.Value>
        <DataTemplate>
            <ListBox MinWidth="120" ItemsSource="{Binding ColumnItems}"
             local:MillerView.ColumnItemChildren="{Binding SelectedItem.Children,
             RelativeSource={RelativeSource Self}}" />
        </DataTemplate>
    </Setter.Value>
</Setter>哎呀!这不会编译,系统不知道MillerView.ColumnItemChildren附加属性。让我们添加它:
public static IEnumerable GetColumnItemChildren(DependencyObject obj)
{
    return (IEnumerable)obj.GetValue(ColumnItemChildrenProperty);
}

public static void SetColumnItemChildren(DependencyObject obj, IEnumerable value)
{
    obj.SetValue(ColumnItemChildrenProperty, value);
}

public static readonly DependencyProperty ColumnItemChildrenProperty =
                                          DependencyProperty.RegisterAttached(
    "ColumnItemChildren",
    typeof(IEnumerable),
    typeof(MillerView),
    new PropertyMetadata(null, OnColumnItemChildrenChanged));

private static void OnColumnItemChildrenChanged
               (DependencyObject d, DependencyPropertyChangedEventArgs e)
{
    var selector = (Selector)d;
    MillerView millerView = GetMillerView(selector);
    if(null != millerView)
    {
        millerView.OnColumnItemChildrenChanged(selector, e.OldValue, e.NewValue);
    }
}

private void OnColumnItemChildrenChanged
        (Selector selector, object oldValue, object newValue)
{
    RemoveColumns(selector);
    PopulateItemsSource(newValue);
}此属性是一个完全附加属性,允许我通过XAML为每列提供数据属性名称,并避免约定或硬编码名称。
仍然无法编译,我需要实现两个实用程序方法:GetMillerView()和RemoveColumns()。两者都非常简单——查找我们控件的可视化树,然后分别从dataColumns集合中删除«extra»项:
private static MillerView GetMillerView(Selector selector)
{
    DependencyObject current = selector;
    while(null != current)
    {
        if(current is MillerView millerView)
        {
            return millerView;
        }
        current = VisualTreeHelper.GetParent(current);
    }
    return null;
}

private void RemoveColumns(Selector selector)
{
    int count = dataColumns.Count;
    for(int i = count - 1; i > 0; i--)
    {
        if(dataColumns[i].ColumnItems == selector.ItemsSource)
        {
            break;
        }
        dataColumns.RemoveAt(i);
    }
}
哦,还有一件事——向控件添加一个新字段:
private Selector selectedSelector;在默认模板中,绑定到的MillerView.ColumnItemChildren属性的名称是Children,但我们DataNode类的实际名称是SubNodes。XAML为了救援,我在 MainWindow.xaml 文件中修改了我们控件的项模板:
<local:MillerView Grid.Row="1" ItemsSource="{Binding}"
 BorderThickness="1" BorderBrush="{DynamicResource
 {x:Static SystemColors.MenuHighlightBrushKey}}">
    <local:MillerView.ItemTemplate>
        <DataTemplate>
            <ListBox MinWidth="120" ItemsSource="{Binding ColumnItems}"
             local:MillerView.ColumnItemChildren="{Binding SelectedItem.SubNodes,
             RelativeSource={RelativeSource Self}}" >
                <ListBox.ItemTemplate>
                    <DataTemplate>
                        <TextBlock Text="{Binding Title}" />
                    </DataTemplate>
                </ListBox.ItemTemplate>
            </ListBox>
        </DataTemplate>
    </local:MillerView.ItemTemplate>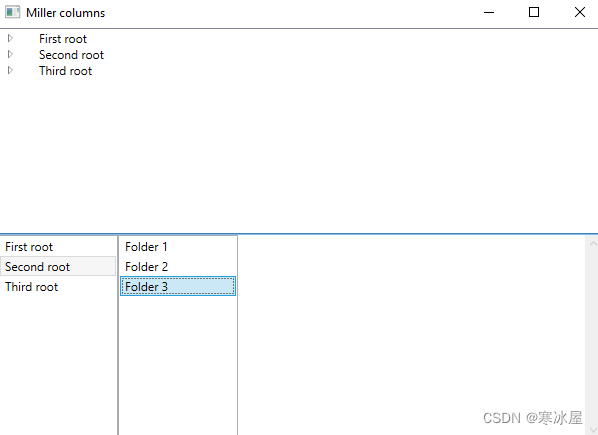
</local:MillerView>同时,我将ListBox项绑定到我们DataNode类的Title属性中。让我们来看看结果:
关闭。我需要使主要项目控制水平并使所有子列表框的高度相同。让我们修改控件的样式:
<Style TargetType="{x:Type local:MillerView}">
    <Setter Property="ItemTemplate" >
        <Setter.Value>
            <DataTemplate>
                <ListBox MinWidth="120" ItemsSource="{Binding ColumnItems}"
                 local:MillerView.ColumnItemChildren="{Binding SelectedItem.Children,
                 RelativeSource={RelativeSource Self}}" />
            </DataTemplate>
        </Setter.Value>
    </Setter>
    <Setter Property="ItemsPanel">
        <Setter.Value>
            <ItemsPanelTemplate>
                <StackPanel IsItemsHost="True" Orientation="Horizontal" />
            </ItemsPanelTemplate>
        </Setter.Value>
    </Setter>
    <Setter Property="Template">
        <Setter.Value>
            <ControlTemplate TargetType="{x:Type local:MillerView}">
                <Border Background="{TemplateBinding Background}"
                 BorderBrush="{TemplateBinding BorderBrush}"
                 BorderThickness="{TemplateBinding BorderThickness}">
                    <ItemsControl x:Name="PART_Columns" ItemsSource="{Binding}"
                     ItemTemplate="{TemplateBinding ItemTemplate}"
                     ItemsPanel="{TemplateBinding ItemsPanel}" >
                        <ItemsControl.Template>
                            <ControlTemplate>
                                <ScrollViewer HorizontalScrollBarVisibility="Auto">
                                    <ItemsPresenter />
                                </ScrollViewer>
                            </ControlTemplate>
                        </ItemsControl.Template>
                    </ItemsControl>
                </Border>
            </ControlTemplate>
        </Setter.Value>
    </Setter>
</Style>我需要从ItemsControl另一个ItemsPanel属性“借用”:
public static ItemsPanelTemplate GetItemsPanel(DependencyObject obj)
{
return (ItemsPanelTemplate)obj.GetValue(ItemsPanelProperty);
}
public static void SetItemsPanel(DependencyObject obj, ItemsPanelTemplate value)
{
obj.SetValue(ItemsPanelProperty, value);
}
public static readonly DependencyProperty ItemsPanelProperty =
ItemsControl.ItemsPanelProperty.AddOwner(
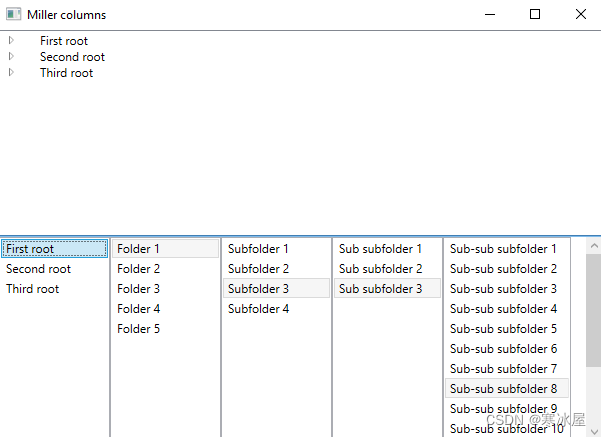
typeof(MillerView));这就是控件现在的样子:
您可以单击列的项,控件将显示子节点集合(如果存在)。如果您沿着层次结构向下,然后返回,列将消失...但是等等:
如果从第一列的第一项开始,深入,然后单击第一列的第一项,则没有任何反应。为什么?因为从绑定系统的角度来看,什么都没有改变。我需要修复它。
步骤 3
修复最后一个讨厌的问题。
首先,我们需要拦截列上的鼠标点击。我决定使用“鼠标向上”事件,因为它出现在其他鼠标按钮事件之后:
public override void OnApplyTemplate()
{
    if(null != visualColumns)
    {
        visualColumns.MouseUp -= VisualColumns_MouseUp;
        visualColumns.ItemsSource = null;
    }

    selectedSelector = null;
    visualColumns = (ItemsControl)GetTemplateChild("PART_Columns");
    if(null != visualColumns)
    {
        visualColumns.ItemsSource = dataColumns;
        visualColumns.MouseUp += VisualColumns_MouseUp;
    }
}

private void VisualColumns_MouseUp(object sender, MouseButtonEventArgs e)
{
}
现在我需要找到单击鼠标的列:
- 占据鼠标位置。
- 将其转换为本地坐标。
- 以鼠标光标下方的元素为例。
- 沿着可视化树向上走,直到找到父选择器。
让我们实现这一点:
private static Selector FindParentSelector(DependencyObject currentElement)
{
    while(null != currentElement)
    {
        if(currentElement is Selector selector)
        {
            return selector;
        }
        currentElement = VisualTreeHelper.GetParent(currentElement);
    }
    return null;
}现在找到选择器的VisualColumns_MouseUp方法:
Point relativeToColumnsSet = e.GetPosition(visualColumns);
Selector currentSelector = FindParentSelector
         (visualColumns.InputHitTest(relativeToColumnsSet) as DependencyObject);
然后我需要检查数据:
if(null == currentSelector)
{
    return;
}
如果用户在任何列之外单击,则不执行任何操作。
if(null == selectedSelector)
{
    selectedSelector = currentSelector;
    return;
}如果selectedSelector字段为null,则表示首次收到单击。然后我将其设置为当前选择器,再次,我们的工作完成了。
现在是有趣的部分。这些选择器包含对类型为Column的内部视图模型对象的引用。如果两个选择器引用相同的视图模型,我认为它们相等:
if(ReferenceEquals(selectedSelector.DataContext, currentSelector.DataContext))
{
    return;
}最后一项检查是比较dataColumns集合中的视图模型索引。为此,我首先需要找到它们:
var selectedColumn = selectedSelector.DataContext
    as Column; // NB: DataContext may contain something other than a Column here
var currentColumn = (Column)currentSelector.DataContext;
int selectedColumnIndex = dataColumns.IndexOf(selectedColumn);
int currentColumnIndex = dataColumns.IndexOf(currentColumn);同样,有一个问题——我使用IndexOf()方法,他们反过来使用集合项的Equals()方法。默认情况下,Equals()通过引用比较对象,但我需要比较ColumnItems属性,即使也通过引用。为了解决这个问题,让我们为我们的Column类重写Equals()和GetHashCode()方法:
public override bool Equals(object obj)
{
    return obj is Column column &&
        EqualityComparer<IEnumerable>.Default.Equals(ColumnItems, column.ColumnItems);
}

public override int GetHashCode()
{
    return 939713329 + EqualityComparer<IEnumerable>.Default.GetHashCode(ColumnItems);
}在这里,我使用了VS的标准代码生成器。
然后检查,如果currentColumnIndex小于selectedColumnIndex,则从集合中删除过时的列:
C#
if(currentColumnIndex < selectedColumnIndex)
{
    for(int i = dataColumns.Count - 1; i > currentColumnIndex + 1; i--)
    {
        dataColumns.RemoveAt(i);
    }
    Selector nextSelector = FindChildSelector
    (visualColumns.ItemContainerGenerator.ContainerFromItem
    (dataColumns[currentColumnIndex + 1]));
    if(null != nextSelector)
    {
        nextSelector.SelectedIndex = -1;
    }
}
请注意突出显示的行。如果当前列的右侧有一列,则其项目选择应消失。
在完成实现之前,我需要实现FindChildSelector()方法:
private static Selector FindChildSelector(DependencyObject rootElement)
{
    if(rootElement is Selector selector1)
    {
        return selector1;
    }
    // Breadth first search
    for(int i = 0; i < VisualTreeHelper.GetChildrenCount(rootElement); i++)
    {
        DependencyObject currentElement = VisualTreeHelper.GetChild(rootElement, i);
        if(currentElement is Selector selector2)
        {
            return selector2;
        }
    }
    for(int i = 0; i < VisualTreeHelper.GetChildrenCount(rootElement); i++)
    {
        DependencyObject currentElement = VisualTreeHelper.GetChild(rootElement, i);
        Selector selector3 = FindChildSelector(currentElement);
        if(null != selector3)
        {
            return selector3;
        }
    }
    return null;
}out事件处理程序实现的最后一步是selectedSelector赋值:
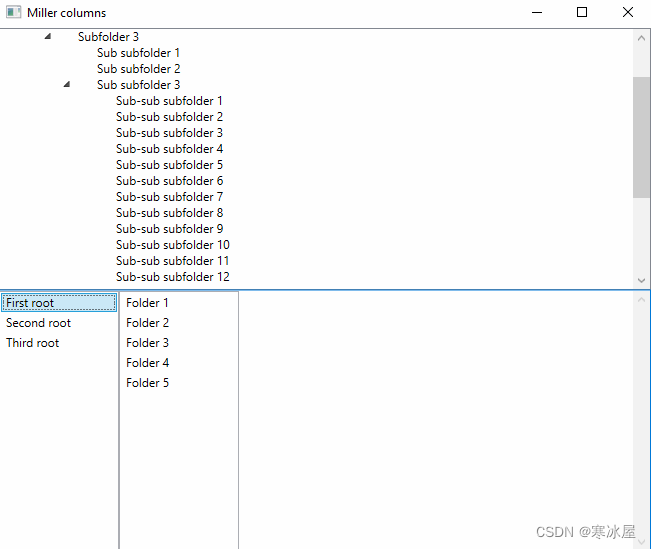
selectedSelector = currentSelector;现在编译并运行应用程序,看看它是如何工作的。
结论
本文介绍的Miller列实现只是一个基本示例。有很多容易完成的任务,例如:
- 通过修改控件的默认模板来改进控件的设计——将垂直滚动条添加到单个列而不是ItemsContol。
- 添加显示所选列及其选定项的属性。
- 添加通知用户交互的事件。
- 更多改进。
但是,我想介绍一个有用的UI元素,您可以在该元素上创建自己的高级解决方案。
https://www.codeproject.com/Articles/5351231/Miller-Columns-for-WPF


 被折叠的 条评论
为什么被折叠?
被折叠的 条评论
为什么被折叠?
 到【灌水乐园】发言


