目录
从Visual Studio 2017创建Asp.Net核心Web项目
![]()
介绍
在本文中,您将使用.net core 2.2构建一个Angular 7应用程序。
这个基本的应用程序具有许多您希望在API驱动应用程序中找到的功能。它允许用户选择他们的位置并显示当前的天气位置。
设置Angular CLI环境
在开始之前,让我们转到anguilar教程,获取有关设置Angular CLI环境的说明。
先决条件
在开始之前,请确保您的开发环境包括Node.js和npm包管理器。
Angular需要Node.js版本8.x或10.x.
要检查您的版本,请在终端/控制台窗口中运行node -v。
要获取Node.js,请转到Nodes。
npm包管理器
Angular、Angular CLI和Angular应用程序依赖于可用作npm包的库提供的特性和功能。要下载并安装npm软件包,您必须拥有一个npm软件包管理器。
要使用npm安装CLI,请打开终端/控制台窗口并输入以下命令:
npm install -g @angular/cli从Visual Studio 2017创建Asp.Net核心Web项目
确保您安装了最新的Visaul Studio 2017(版本15.9.5)和.NetCore 2.2 SDK。从这里下载.Net Core 2.2 。
打开Visual Studio 2017 ->创建新项目 ->选择Core Web应用程序。将解决方案命名为Global Weather。

单击“确定”,然后在下一个窗口中选择一个API,如下所示:

再次单击“确定”以创建GlobalWeather解决方案。
使用Angular CLI创建天气客户端
创建API项目后,打开Powershell并导航到GlobalWeather项目文件夹,运行以下命令:
ng new WeatherClient
这将在API项目中创建一个Angular 7应用程序。现在解决方案结构应该是这样的。

现在需要在默认的Startup.cs类中进行一些更改。
在ConfigureService方法中添加以下行:
services.AddSpaStaticFiles(configuration =>
{
    configuration.RootPath = "WeatherClient/dist";
});在Configure方法中添加以下行:
app.UseHttpsRedirection();
app.UseStaticFiles();
app.UseSpaStaticFiles();
app.UseHttpsRedirection();
app.UseMvc();
app.UseSpa(spa =>
{
    spa.Options.SourcePath = "WeatherClient";
    if (env.IsDevelopment())
    {
        spa.UseAngularCliServer(npmScript: "start");
    }
});从Properties / launchSettings.json中删除"launchUrl": "api/values"
好。现在只需单击“IISExpress”即可运行它。

它不起作用。基本上异常情况是无法启动npm。但我可以告诉你,它肯定在NetCore 2.1中运行。那么NetCore 2.2正在发生什么?经过研究,坏消息是它是Netcore 2.2的一个错误,好消息是有一个解决方法。
现在我们做一个解决方法来解决它。首先创建一个类CurrentDirectoryHelper.cs
using System;

namespace GlobalWeather
{
    internal class CurrentDirectoryHelpers
    {
        internal const string AspNetCoreModuleDll = "aspnetcorev2_inprocess.dll";

        [System.Runtime.InteropServices.DllImport("kernel32.dll")]
        private static extern IntPtr GetModuleHandle(string lpModuleName);

        [System.Runtime.InteropServices.DllImport(AspNetCoreModuleDll)]
        private static extern int http_get_application_properties(ref IISConfigurationData iiConfigData);

        [System.Runtime.InteropServices.StructLayout(System.Runtime.InteropServices.LayoutKind.Sequential)]
        private struct IISConfigurationData
        {
            public IntPtr pNativeApplication;
            [System.Runtime.InteropServices.MarshalAs(System.Runtime.InteropServices.UnmanagedType.BStr)]
            public string pwzFullApplicationPath;
            [System.Runtime.InteropServices.MarshalAs(System.Runtime.InteropServices.UnmanagedType.BStr)]
            public string pwzVirtualApplicationPath;
            public bool fWindowsAuthEnabled;
            public bool fBasicAuthEnabled;
            public bool fAnonymousAuthEnable;
        }

        public static void SetCurrentDirectory()
        {
            try
            {
                // Check if physical path was provided by ANCM
                var sitePhysicalPath = Environment.GetEnvironmentVariable("ASPNETCORE_IIS_PHYSICAL_PATH");
                if (string.IsNullOrEmpty(sitePhysicalPath))
                {
                    // Skip if not running ANCM InProcess
                    if (GetModuleHandle(AspNetCoreModuleDll) == IntPtr.Zero)
                    {
                        return;
                    }

                    IISConfigurationData configurationData = default(IISConfigurationData);
                    if (http_get_application_properties(ref configurationData) != 0)
                    {
                        return;
                    }

                    sitePhysicalPath = configurationData.pwzFullApplicationPath;
                }

                Environment.CurrentDirectory = sitePhysicalPath;
            }
            catch
            {
                // ignore
            }
        }
    }
}然后在Startup.cs类的Satrtup方法中添加以下行,
CurrentDirectoryHelpers.SetCurrentDirectory();现在再次运行。

就是这样。我们完美地使用.NetCore制作Angular CLI应用程序。
现在框架已经完成。我们需要考虑应用程序需要做什么。
天气信息REST API
我们正在开发一个显示天气信息的网站。用户可以选择任何位置并显示当前的天气信息。
我决定使用accuweather REST API来获取应用程序的数据。我们需要创建一个帐户来获取用于API的API密钥。用户应该能够按国家/地区缩小其位置搜索范围。
天气组件
从app.component.ts删除所有内容,但<router-outlet> </ router-outlet>除外。
在powershell中,转到WeatherClient文件夹。运行以下命令以生成新组件。
ng generate component weatherAngular 路由
路由告诉路由器当用户单击链接或将URL粘贴到浏览器地址栏时显示哪个视图。
典型的Angular路由有两个属性:
path:与浏览器地址栏中的URL匹配的字符串。
component:导航到此路由时路由器应创建的组件。
我们打算从根URL导航到WeatherComponent。
导入WeatherComponent,以便您可以在路径中引用它。然后使用到该组件的单个路由定义路由数组。
import { NgModule } from '@angular/core';
import { Routes, RouterModule } from '@angular/router';
import { WeatherComponent } from './weather/weather.component';

const routes: Routes = [
  { path: '', redirectTo: 'weather', pathMatch: 'full' },
  { path: 'weather', component: WeatherComponent },
];

@NgModule({
  imports: [RouterModule.forRoot(routes)],
  exports: [RouterModule]
})
export class AppRoutingModule { }好。现在刷新浏览器,它导航到WeatherComponent。

反应表单(Reactive Form)
反应表单提供了一种模型驱动的方法来处理其值随时间变化的表单输入。反应表单与模板驱动表单的区别在于不同的方式。反应表单通过对数据模型的同步访问,与可观察操作符的不变性以及通过可观察流的变更跟踪提供更高的可预测性。如果您更喜欢直接访问以修改模板中的数据,则模板驱动的表单不太明确,因为它们依赖于嵌入在模板中的指令以及可变数据来异步跟踪更改。
让我们为Weather Component构建反应表单。
首先在app.module.ts中注册ReactiveFormsModule。
import { BrowserModule } from '@angular/platform-browser';
import { NgModule } from '@angular/core';
import { FormsModule, ReactiveFormsModule } from '@angular/forms';
import { AppRoutingModule } from './app-routing.module';
import { AppComponent } from './app.component';
import { WeatherComponent } from './weather/weather.component';

@NgModule({
  declarations: [
    AppComponent,
    WeatherComponent
  ],
  imports: [
    FormsModule,
    ReactiveFormsModule,
    BrowserModule,
    AppRoutingModule
  ],
  providers: [],
  bootstrap: [AppComponent]
})
export class AppModule { }在weather.component.ts的ngOnInit()中构建反应表单。
import { Component, OnInit } from '@angular/core';
import { FormGroup, FormControl, FormBuilder, Validators } from '@angular/forms';

@Component({
  selector: 'app-weather',
  templateUrl: './weather.component.html',
  styleUrls: ['./weather.component.css']
})
export class WeatherComponent implements OnInit {

  private weatherForm: FormGroup;

  constructor(
    private fb: FormBuilder) {
  }

  ngOnInit() {
    this.weatherForm = this.buildForm();
  }

  buildForm(): FormGroup {
    return this.fb.group({
      searchGroup: this.fb.group({
        country: [
          null
        ],
        city: [
          null,
          [Validators.required]
        ],
      })
    });
  }
}表单是每个angular应用程序的基本部分。表单的一个最大特性是,您可以在将用户输入发送到服务器之前验证该输入。在这里,我们使用内置的angular验证器验证“city”。只需将所需的验证器添加到验证器数组中。因为我们将所需的验证器添加到“city”,所以“city”输入空值将使表单处于无效状态。
在html模板weather.componenet.html中使用[formGroup]和[formControl]。
<div class="container content" style="padding-left: 0px; padding-top: 10px">
    <form [formGroup]="weatherForm">
        <div formgroupname="searchGroup">
            <div class="row">
                <div class="col-md-3 form-group"><input class="form-control" formcontrolname="country" id="country" placeholder="Country" type="text" /></div>
            </div>

            <div class="row">
                <div class="col-md-3 form-group"><input class="form-control" formcontrolname="city" id="city" placeholder="Location" type="text" /></div>
            </div>

            <div class="row">
                <div class="col-md-3"><input class="btn btn-primary" type="button" /></div>
            </div>
        </div>
    </form>
</div>
再次运行它。

在Angular App中使用Bootstrap 4样式
首先安装bootstrap 4。在powershell中,转到WeatherClient文件夹,然后运行以下命令。
npm install bootstrap --save
在src/styles.css中,添加以下行。
@import '../node_modules/bootstrap/dist/css/bootstrap.css';现在再次运行。

Angular 服务
组件不应直接获取或保存数据,并且它们当然不应故意呈现假数据。他们应该专注于呈现数据并委托对服务的数据访问。
让我们添加位置服务来调用accuweather REST API以获取国家/地区列表。
在“app”文件夹下创建“shared”文件夹。然后在“shared”文件夹下创建“services”和“models”文件夹。
从https://developer.accuweather.com/apis中,您可以获得所有API参考。现在我们需要做的是获得所有国家。API网址为http://dataservice.accuweather.com/locations/v1/countries。
在src/app/shared/models/文件夹下创建一个名为country.ts的文件。定义国家/地区接口并将其导出。该文件应如下所示。
export interface Country {

  ID: string;

  LocalizedName: string;

  EnglishName: string;

}在src/app/文件夹中创建一个名为app.constants.ts的文件。定义locationAPIUrl和apiKey常量。该文件应如下所示。
export class Constants {

  static locationAPIUrl = 'http://dataservice.accuweather.com/locations/v1';

  static apiKey = 'NmKsVaQH0chGQGIZodHin88XOpwhuoda';

}我们将创建一个LocationService,所有应用程序类都可以使用它来获取国家/地区。我们将依赖Angular依赖注入将其注入到WeatherComponent构造函数中,而不是使用new创建该服务。
使用Angular CLI,在src/app/shared/services/文件夹中创建一个名为location的服务。
ng generate service location该命令在src/app/location.service.ts中生成框架LocationService类。LocationService类应如下所示。
import { Injectable } from '@angular/core';


@Injectable({

  providedIn: 'root'

})

export class LocationService {


  constructor() { }
}在Angular将其注入WeatherComponent之前,我们必须使LocationService可用于依赖注入系统。通过注册提供者来完成此操作。提供者可以创建或提供服务; 在这种情况下,它实例化LocationService类以提供服务。
查看LocationService类定义之前的@Injectable()语句,可以看到元数据值中提供的是'root'。当您在根级别提供服务时,Angular会创建一个单一的,共享的LocationService实例,并注入任何要求它的类。在@Injectable元数据中注册提供程序还允许Angular通过删除服务来优化应用程序,如果它最终不被使用的话。
打开WeatherComponent类文件。导入LcationService。
import { LocationService } from '../shared/services/location.service';并注入LocationService。
constructor(

    private fb: FormBuilder,

    private locationService: LocationService) {

}
Angular HttpClient
LocationService通过HTTP请求获取国家/地区数据。HttpClient是Angular通过HTTP与远程服务器通信的机制。
打开根AppModule,从@angular/common/http导入HttpClientModule符号。
import { HttpClientModule } from '@angular/common/http';将其添加到@NgModule.imports数组。
imports: [

    FormsModule,

    ReactiveFormsModule,

    BrowserModule,

    AppRoutingModule,

    HttpClientModule

]使用HttpClient获取国家/地区
getCountries(): Observable<Country[]> {

    const uri = decodeURIComponent(

      `${Constants.locationAPIUrl}/countries?apikey=${Constants.apiKey}`

    );

    return this.http.get<Country[]>(uri)

      .pipe(

        tap(_ => console.log('fetched countries')),

        catchError(this.errorHandleService.handleError('getCountries', []))

      );

}默认情况下,HttpClient.get将响应的主体作为无类型的JSON对象返回。应用可选的类型说明符<Country []>,可以为您提供类型化的结果对象。
JSON数据的形状由服务器的数据API确定。Accuweather API将国家/地区数据作为数组返回。
getCountries方法将利用可观察值的流程。它将使用RxJS tap操作符执行此操作,该操作符查看可观察值,对这些值执行某些操作,并将它们传递给它们。点击回拨不会触及值本身。
当出现问题时,特别是当您从远程服务器获取数据时,LocationService.getCountries()方法应捕获错误并执行适当的操作。
要捕获错误,可以通过RxJS catchError()运算符“管道”http.get()的可观察结果。我们将它转换为error-handle.service.ts类。
import { Injectable } from '@angular/core';

import { Observable, of } from 'rxjs';

@Injectable({

  providedIn: 'root'

})

export class ErrorHandleService {

  constructor() {}

  handleError<T>(operation = 'operation', result?: T) {

    return (error: any): Observable<T> => {

      console.error(error); // log to console instead

      // Let the app keep running by returning an empty result.

      return of(result as T);

    }

  }

}所以LocationService类现在如下所示。
import { Injectable } from '@angular/core';

import { HttpClient } from '@angular/common/http';

import { Observable, of } from 'rxjs';

import { Constants } from '../../../app/app.constants';

import { Country } from '../../shared/models/country';

import { catchError, map, tap } from 'rxjs/operators';

import { ErrorHandleService } from '../../shared/services/error-handle.service';


@Injectable({

  providedIn: 'root'

})

export class LocationService {


  constructor(

    private http: HttpClient,

    private errorHandleService: ErrorHandleService) { }


  getCountries(): Observable<Country[]> {

    const uri = decodeURIComponent(

      `${Constants.locationAPIUrl}/countries?apikey=${Constants.apiKey}`

    );

    return this.http.get<Country[]>(uri)

      .pipe(

        tap(_ => console.log('fetched countries')),

        catchError(this.errorHandleService.handleError('getCountries', []))

      );

  }

}在WeatherComponent文件中添加getCountries()以从服务中检索国家/地区。
getCountries(): void {

    this.locationService.getCountries()

      .subscribe(countries => this.countries = countries);

}在ngOnInit生命周期钩子中调用getCountries(),并在构造WeatherComponent实例后让Angular在适当的时候调用ngOnInit。
ngOnInit() {

    this.weatherForm = this.buildForm();

    this.getCountries();

  }
Promise
Promise是一种特殊类型的对象,我们可以使用它来处理异步任务,也可以自己构造它来处理异步任务。在Promise之前,回调是我们用于异步功能的,就像上面订阅http服务结果一样。直到代码变得复杂之前回调很好用。但是当你有多层调用和许多错误要处理时会发生什么?你遇到了回调地狱!Promise使用异步操作,它们或者返回一个值(即promise解析)或错误消息(即promise拒绝)。
现在我们承诺重写WeatherComponent.getCountries()。
async getCountries() {

  const promise = new Promise((resolve, reject) => {

    this.locationService.getCountries()

      .toPromise()

      .then(

        res => { // Success

          this.countries = res;

          resolve();

        },

        err => {

          console.error(err);

          this.errorMessage = err;

          reject(err);

        }

      );

  });

  await promise;

}因为getCountries()现在是异步函数,所以我们需要在ngOnInit()中等待这个函数。
async ngOnInit() {

    this.weatherForm = this.buildForm();

    await this.getCountries();

}国家/地区输入的自动完成
Ng-bootstrap是Angular小部件,从一开始就使用Bootstrap 4 CSS和Angular生态系统设计的API构建。我们使用“Typeahead”其中的一个小部件来实现国家/地区自动完成。
NgbTypeahead指令提供了一种从任何文本输入创建强大的预先输入(typeahead)的简单方法。使用以下命令install ng-bootstrap。
npm install --save @ng-bootstrap/ng-bootstrap安装完成后,您需要导入我们的主模块。
import { NgbModule } from '@ng-bootstrap/ng-bootstrap';

@NgModule({

  declarations: [

    AppComponent,

    WeatherComponent

  ],

  imports: [

    NgbModule,

    FormsModule,

    ReactiveFormsModule,

    BrowserModule,

    AppRoutingModule,

    HttpClientModule

  ],

  providers: [],

  bootstrap: [AppComponent]

})

export class AppModule { }
聚焦行为
可以使用当前输入值获得焦点事件,以便以极大的灵活性在焦点上发出结果。在空输入时,将采用所有选项,否则将根据搜索项过滤选项。
打开weather.component.html,更改“country”输入以使用NgbTypeahead。
<input type="text" id="country" class="form-control" formControlName="country"
                 placeholder="Country"
                 [ngbTypeahead]="searchCountry" [resultFormatter]="countryFormatter"
                 [inputFormatter]="countryFormatter"
                 (focus)="focus$.next($event.target.value)"
                 (click)="click$.next($event.target.value)"
                 #instanceCountry="ngbTypeahead"
autocomplete="off" editable="false" [focusFirst]="false" />打开wather.component.ts,首先导入NgbTypeahead。
import { NgbTypeahead } from '@ng-bootstrap/ng-bootstrap';然后添加以下代码。
countryFormatter = (country: Country) => country.EnglishName;


  searchCountry = (text$: Observable<string>) => {

    const debouncedText$ = text$.pipe(debounceTime(200), distinctUntilChanged());

    const clicksWithClosedPopup$ = this.click$.pipe(filter(() => !this.instanceCountry.isPopupOpen()));

    const inputFocus$ = this.focus$;


    return merge(debouncedText$, inputFocus$, clicksWithClosedPopup$).pipe(

      map(term => (term === ''

        ? this.countries

        : this.countries.filter(v => v.EnglishName.toLowerCase().indexOf(term.toLowerCase()) > -1)).slice(0, 10))

    );

}现在通过IISExpress运行GlobalWeather项目。您可以按预期看到确切的行为。输入为空时加载所有国家/地区。

选项值由非空值过滤。

搜索位置
在我们调用API获取当前天气状况之前,需要传递位置键。因此,我们首先需要调用City Search API,http://dataservice.accuweather.com/locations/v1/cities/{countryCode}/{adminCode}/search 。
在src/app/shared/models/文件夹下创建一个名为city.ts的文件。定义城市界面并将其导出。该文件应如下所示。
import { Country } from './country';


export interface City {

  Key: string;

  EnglishName: string;

  Type: string;

  Country:Country;

}在src/app/shared/services/文件夹下打开location.service.ts,添加getCities方法。
getCities(searchText: string, countryCode: string): Observable<City[]> {

  const uri = countryCode

    ? decodeURIComponent(

      `${Constants.locationAPIUrl}/cities/${countryCode}/search?apikey=${Constants.apiKey}&q=${searchText}`)

    : decodeURIComponent(

      `${Constants.locationAPIUrl}/cities/search?apikey=${Constants.apiKey}&q=${searchText}`);

  return this.http.get<City[]>(uri)

    .pipe(

      map(res => (res as City[]).map(o => {

        return {

          Key: o.Key,

          EnglishName: o.EnglishName,

          Type: o.Type,

          Country: {

            ID: o.Country.ID,

            EnglishName: o.Country.EnglishName

          }

        }


      })),

      tap(_ => console.log('fetched cities')),

      catchError(this.errorHandleService.handleError('getCities', []))

    );

}如何将http json响应映射到对象数组
HttpClient是Angular HTTP API的演变,JSON是假定的默认值,不再需要显式解析。将JSON结果映射到数组,尤其是复杂数组总是有点棘手。我们来看看如何将地图搜索位置API结果映射到City Array。
从API参考中,我们定义了城市接口,它只包含我们需要的字段。对于json结果中的每个项,我们创建一个新对象并从JSON初始化字段。
map(res => (res as City[]).map(o => {

          return {

            Key: o.Key,

            EnglishName: o.EnglishName,

            Type: o.Type,

            Country: {

              ID: o.Country.ID,

              EnglishName: o.Country.EnglishName

            }

          }

        }))
获取当前的天气状况
http://dataservice.accuweather.com/currentconditions/v1/{locationKey}是我们需要调用以获取当前条件的API。
在src/app/shared/models/ 文件夹下创建一个名为current-conditions.ts的文件。定义CurrentConditions接口并将其导出。该文件应如下所示。
export interface CurrentConditions {

  LocalObservationDateTime: string;

  WeatherText: string;

  WeatherIcon: number;

  IsDayTime: boolean;

  Temperature: Temperature;

}


export interface Metric {

  Unit: string;

  UnitType: number;

  Value:number;

}


export interface Imperial {

  Unit: string;

  UnitType: number;

  Value: number;

}


export interface Temperature {

  Imperial: Imperial;

  Metric: Metric;

}在src/app/app.constants.ts下打开app.constants.ts。添加一个新常量。
static currentConditionsAPIUrl = 'http://dataservice.accuweather.com/currentconditions/v1';
在src/app/shared/services/文件夹中创建一个名为current-conditions的服务。
ng generate service currentConditions该命令在src/app/current-conditions.service.ts中生成框架CurrentConditionsService类
然后在CurrentConditionsService类中添加getCurrentConditions方法。
import { Injectable } from '@angular/core';

import { HttpClient } from '@angular/common/http';

import { Observable, of } from 'rxjs';

import { Constants } from '../../../app/app.constants';

import { CurrentConditions } from '../models/current-conditions';

import { catchError, map, tap } from 'rxjs/operators';

import { ErrorHandleService } from '../../shared/services/error-handle.service';


@Injectable()

export class CurrentConditionsService {


  constructor(

    private http: HttpClient,

    private errorHandleService: ErrorHandleService) { }


  getCurrentConditions(locationKey: string): Observable<CurrentConditions []> {

    const uri = decodeURIComponent(

      `${Constants.currentConditionsAPIUrl}/${locationKey}?apikey=${Constants.apiKey}`

    );

    return this.http.get<CurrentConditions []>(uri)

      .pipe(

        tap(_ => console.log('fetched current conditions')),

        catchError(this.errorHandleService.handleError('getCurrentConditions', []))

      );

  }

}获取WeatherComponent中的位置键
在src/app/weather文件夹下打开weatherComponent.ts。添加getCity()方法。
async getCity() {

  const country = this.countryControl.value as Country;

  const searchText = this.cityControl.value as string;

  const countryCode = country ? country.ID : null;

  const promise = new Promise((resolve, reject) => {

    this.locationService.getCities(searchText, countryCode)

      .toPromise()

      .then(

        res => { // Success

          var data = res as City[];

          const cities = data;

          if (cities.length === 0) {

            this.errorMessage = 'Cannot find the specified location.';

            reject(this.errorMessage);

          } else {

            this.city = cities[0];

            resolve();

          }


        },

        err => {

          console.error(err);

          this.errorMessage = err;

          reject(err);

        }

      );

  });

  await promise;

  if (this.city) {

    const country = this.countries.filter(x => x.ID === this.city.Country.ID)[0];

    this.weatherForm.patchValue({

      searchGroup: {

        country: country,

        city: this.city.EnglishName

      }

    });

  }

}
修补表单控件的值
对于反应表单,使用表单API非常容易设置模型值。更新FormGroup与FormControl时,实际上发生了两件事。
从组件中轻松获得表单控件。例如,我们可以获得城市和国家表单控件,如下所示。
get cityControl(): FormControl {
    return <FormControl>this.weatherForm.get('searchGroup.city');
  }


get countryControl(): FormControl {
    return <FormControl>this.weatherForm.get('searchGroup.country');
}PatchValue允许您设置存在的值,它将忽略当前迭代控件中不存在的值。
在getCity()函数中,我们在获得响应时修补天气表单值。
if (this.city) {

  const country = this.countries.filter(x => x.ID === this.city.Country.ID)[0];

  this.weatherForm.patchValue({

    searchGroup: {

      country: country,

      city: this.city.EnglishName

    }

  });

}获取WeatherComponent中的当前条件
在src/app/shared/models/文件夹下创建一个名为weather.ts的文件。定义Weather类并将其导出。该文件应如下所示。
import { CurrentConditions } from './current-conditions';

import { City } from './city';


export class Weather {

  public location: string;

  public weatherIconUrl: string;

  public weatherText: string;

  public temperatureValue: number;

  public temperatureUnit: string;

  public isDaytime: boolean;


  public constructor(currentConditions: CurrentConditions, city: City) {

    this.location = city.EnglishName;

    this.weatherText = currentConditions.WeatherText;

    this.isDaytime = currentConditions.IsDayTime;

    if (currentConditions.WeatherIcon)

      this.weatherIconUrl = `../assets/images/${currentConditions.WeatherIcon}.png`;

    this.temperatureValue = currentConditions.Temperature.Metric.Value;

    this.temperatureUnit = currentConditions.Temperature.Metric.Unit;

  }

}打开weather.component.ts,添加getCurrentConditions()方法。当我们从CurrentConditionService获得结果时,将其映射到天气类。
async getCurrentConditions() {

    if (!this.city)

      return;

    const promise = new Promise((resolve, reject) => {

      this.currentConditionService.getCurrentConditions(this.city.Key)

        .toPromise()

        .then(

          res => { // Success

            if (res.length > 0) {

              const data = res[0] as CurrentConditions;

              this.weather = new Weather(data, this.city);

              resolve();

            } else {

              this.errorMessage = "Weather is not available.";

              reject(this.errorMessage);

            }

          },

          err => {

            console.error(err);

            reject(err);

          }

        );

    });

    await promise;

}使用有效的表单组绑定HTML元素
<input type="button" class="btn btn-primary" [disabled]="!weatherForm.valid" value="Go" (click)="search()" />只有在天气表单组有效时才启用“Go”按钮。构建表单时,需要城市字段。
buildForm(): FormGroup {

    return this.fb.group({

      searchGroup: this.fb.group({

        country: [

          null

        ],

        city: [

          null,

          [Validators.required]

        ],

      })

    });

}这意味着如果City字段为空,则Weather表单组无效。只有在City字段具有值时,才会启用“Go”按钮。并且“单击”此按钮将触发搜索功能。
在天气HTML模板中显示天气面板
在Search()之后,我们获取当前条件并存储在WeatherComponent类的weather成员中。
现在我们需要在Weather模板中显示搜索结果。
在src/app/weather文件夹下打开wather.component.html,在<form>之前添加以下更改。这是一个简单的Angular模板绑定。在这里,我使用ng-template指令来显示“Daytime”或“Night”。
与名称一样,ng-template指令表示Angular模板:这意味着此标记的内容将包含模板的一部分,然后可以与其他模板一起组合以形成最终的组件模板。
在我们一直使用的许多结构指令中,Angular 已经在引擎盖下使用NG-模板:ngIf, ngFor 和ngSwitch。
<div class="city">
<div *ngIf="weather">
<h1>{{weather.location | uppercase }}</h1>
<div class="row">
<table>
<tr>
<td>
<img src="{{weather.weatherIconUrl}}" class="img-thumbnail">
</td>
<td>
<span>{{weather.weatherText}}</span>
</td>
</tr>
<tr>
<td>
<div *ngIf="weather.isDaytime; then thenBlock else elseBlock"></div>
<ng-template #thenBlock><span>Daytime</span></ng-template>
<ng-template #elseBlock><span>Night</span></ng-template>
</td>
<td>
<span>{{weather.temperatureValue}}°{{weather.temperatureUnit}}</span>
</td>
</tr>
</table>
</div>
</div>
<div *ngIf="!weather">
<div class="content-spacer-invisible"></div>
<div> {{errorMessage}}</div>
</div>
</div>现在再次运行应用程序。

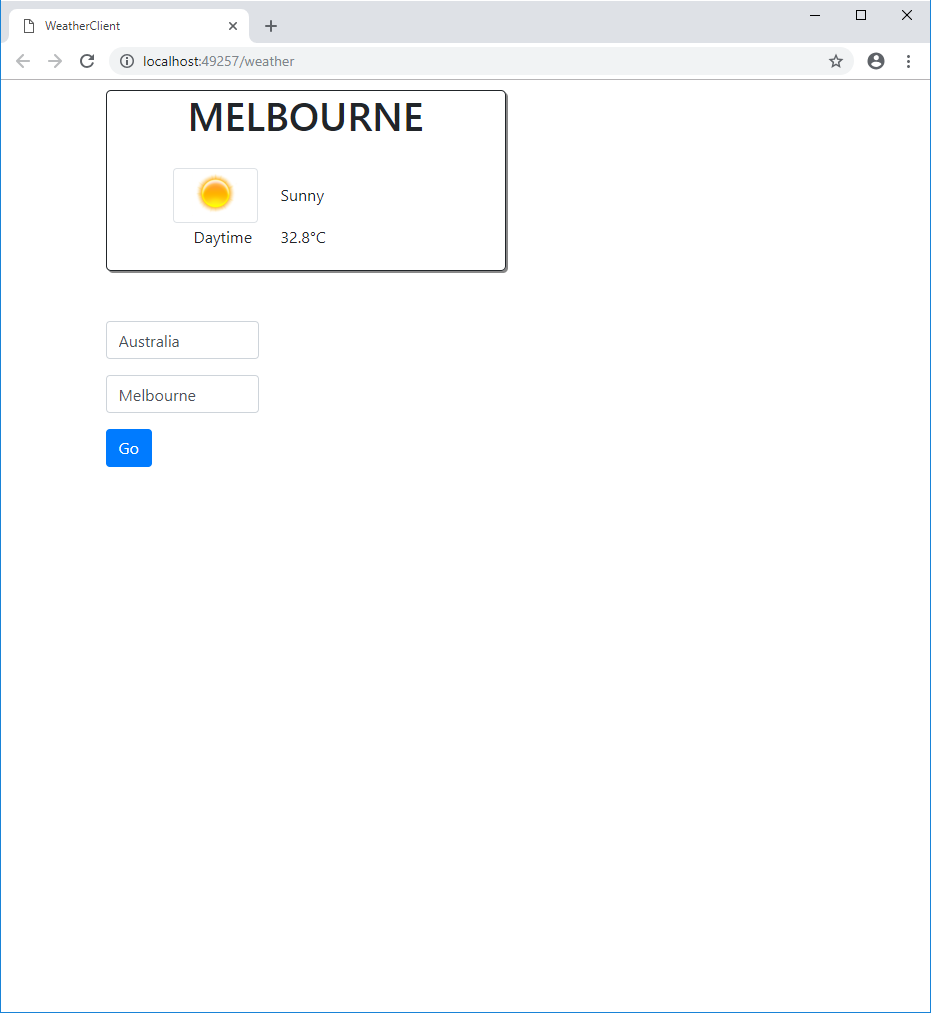
哇哦!我们得到了墨尔本的现状。
还有一点东西不见了。
组件样式
在src/app/weather文件夹下的weather.component.css中添加组件样式。
.city {

  display: flex;

  flex-direction: column;

  align-items: center;

  max-width: 400px;

  padding: 0px 20px 20px 20px;

  margin: 0px 0px 50px 0px;

  border: 1px solid;

  border-radius: 5px;

  box-shadow: 2px 2px #888888;

}


.city h1 {

  line-height: 1.2

}


.city span {

  padding-left: 20px

}


.city .row {

  padding-top: 20px

}
天气图标
在src/assets下创建“images”文件夹。从http://developer.accuweather.com下载所有天气图标,并将它们添加到“images”文件夹。
再次运行应用程序

从Chrome调试Angular App
每个开发人员都知道调试对开发非常重要。我们来看看如何从Chrome调试Angular应用程序。
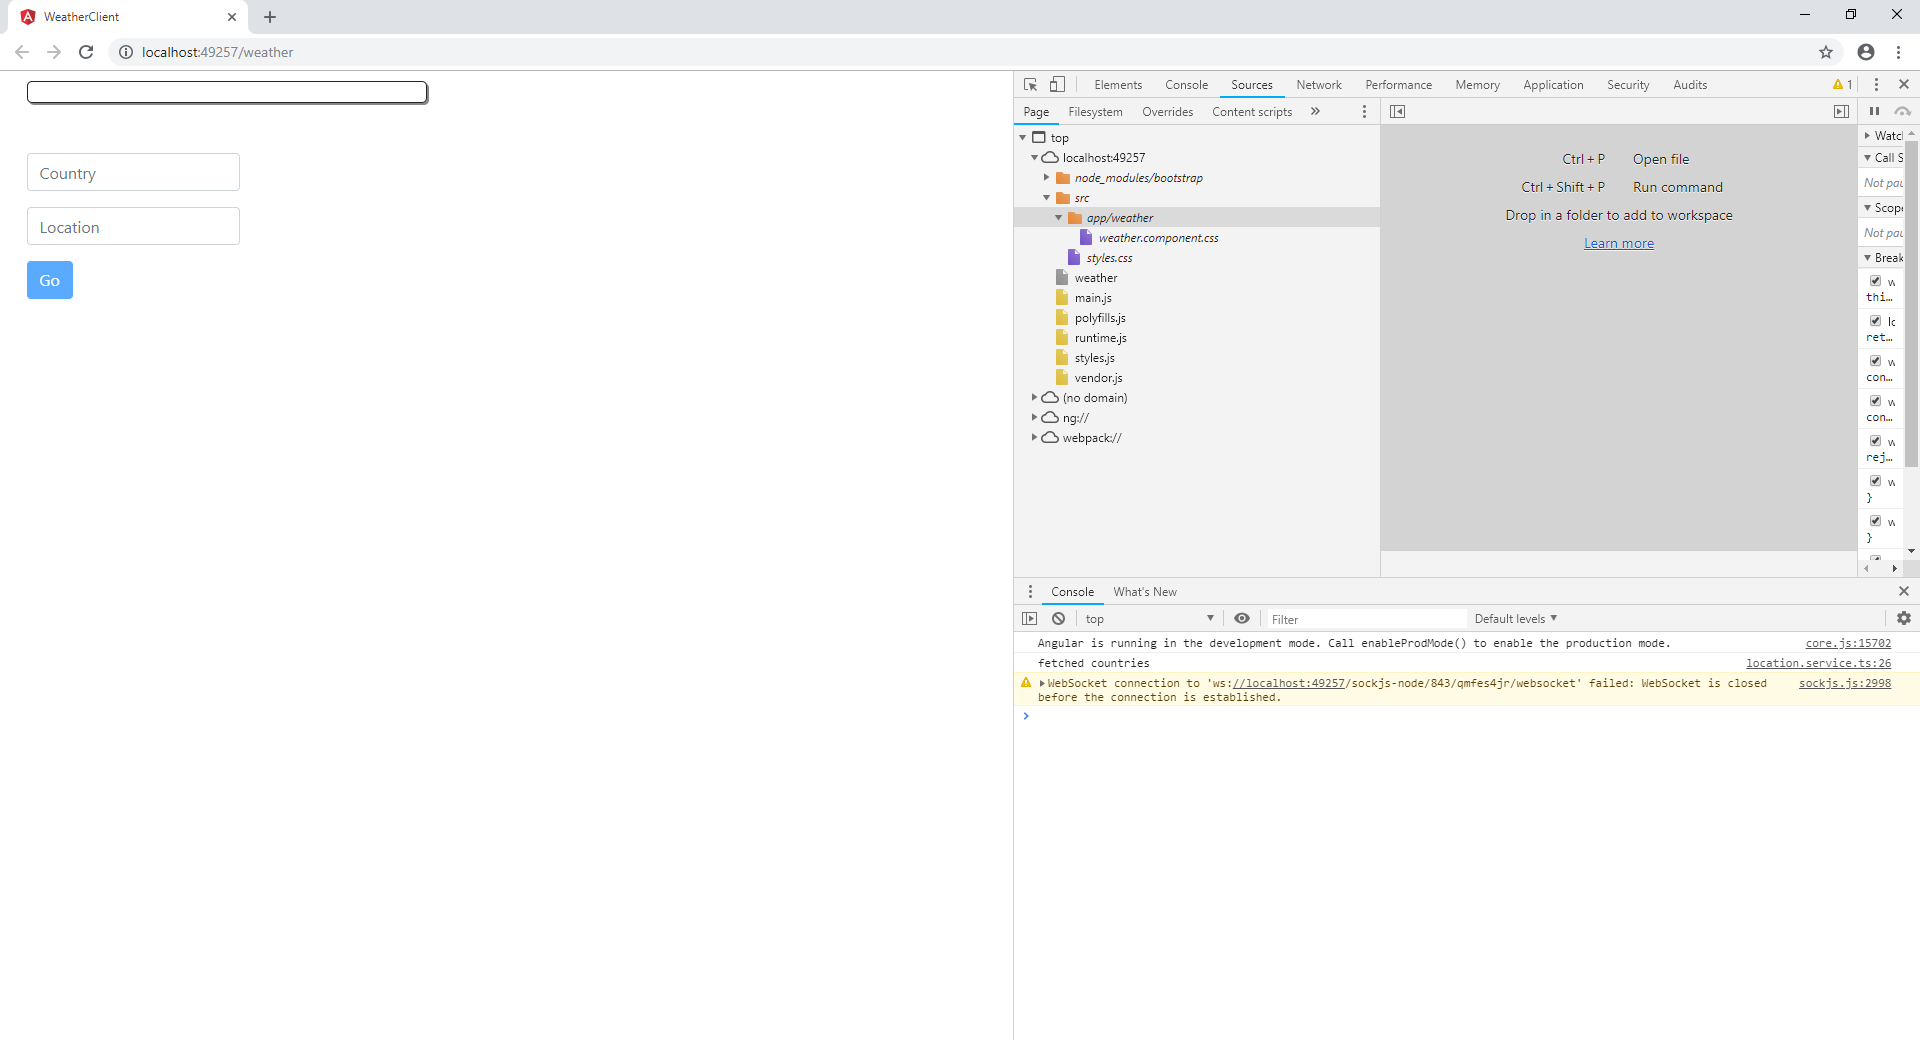
使用IIS Express运行“GlobalWeather”项目。按“F12”显示开发人员工具。然后单击“Source”选项卡。

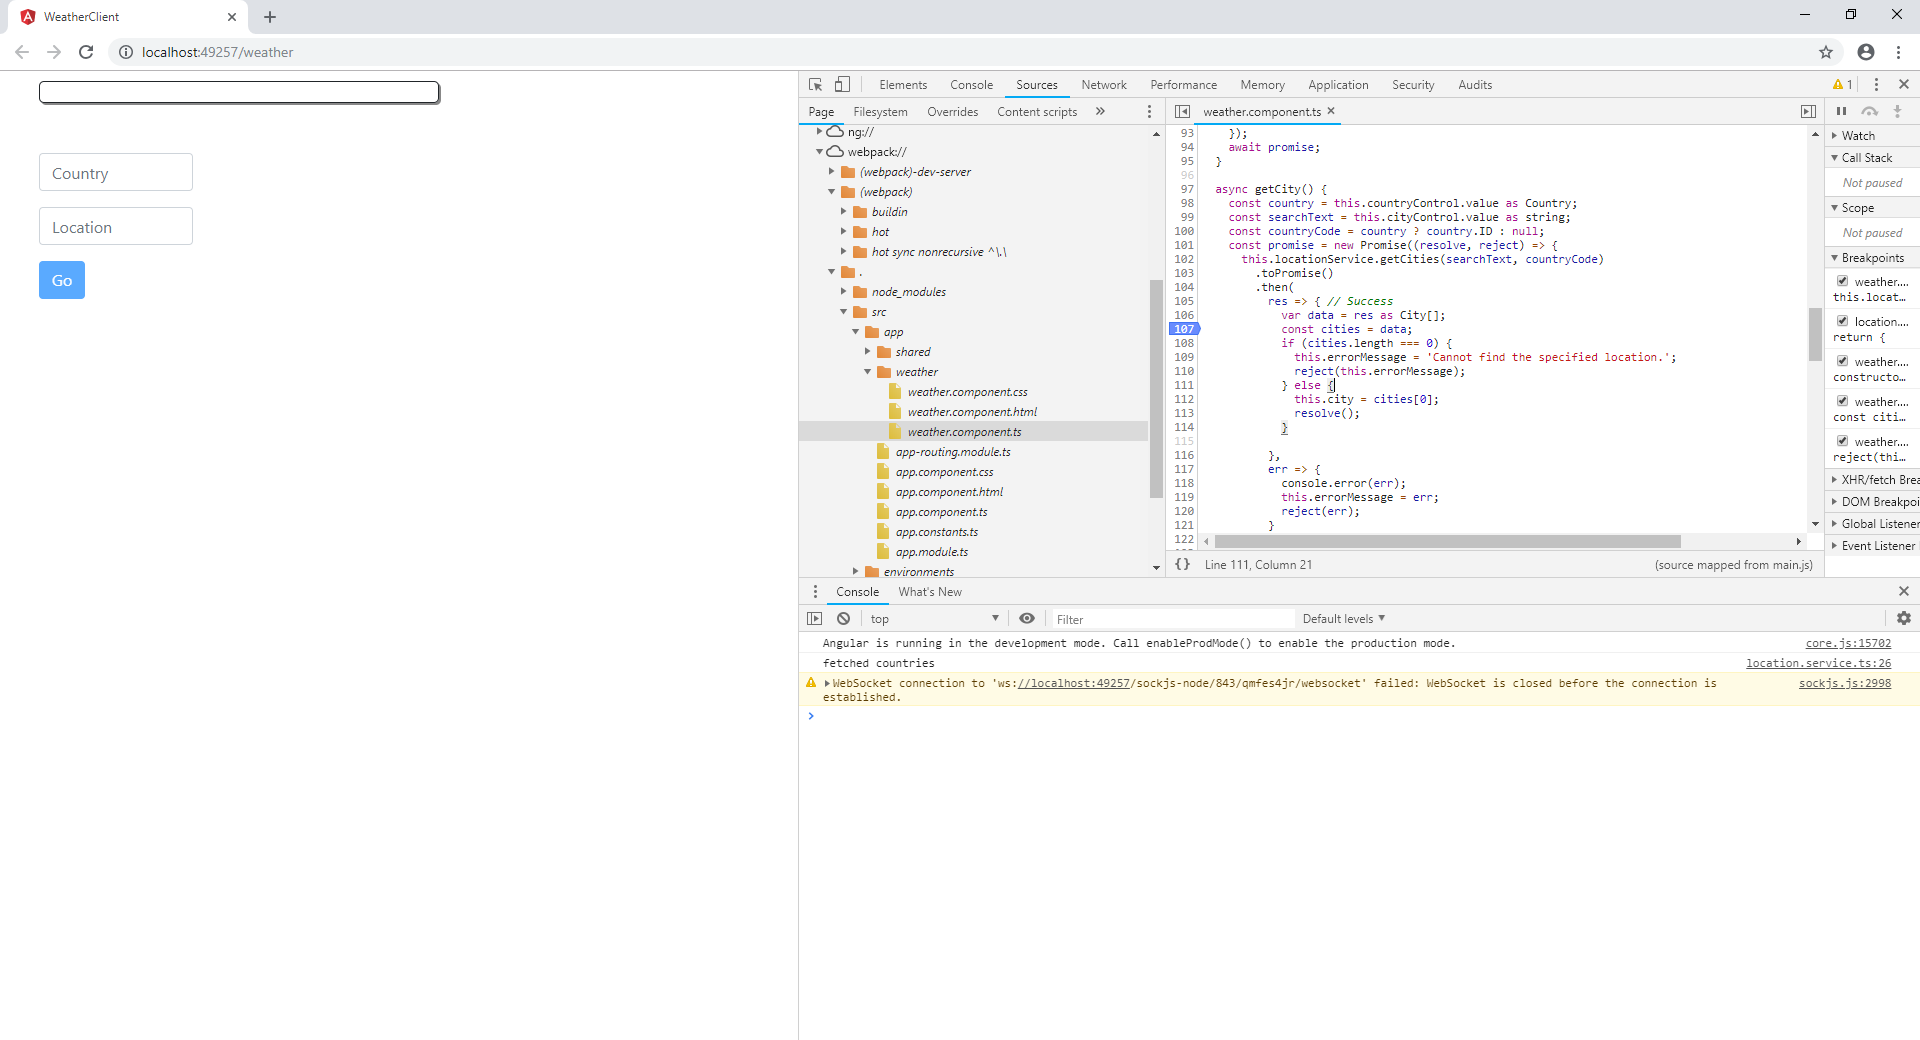
在左侧面板中的webpack://中找到源typescript文件。这里我们以weather.componet.ts为例。
选择源文件后,源代码将显示在中间面板中。单击行号将切换断点。将断点放在要调试的位置。

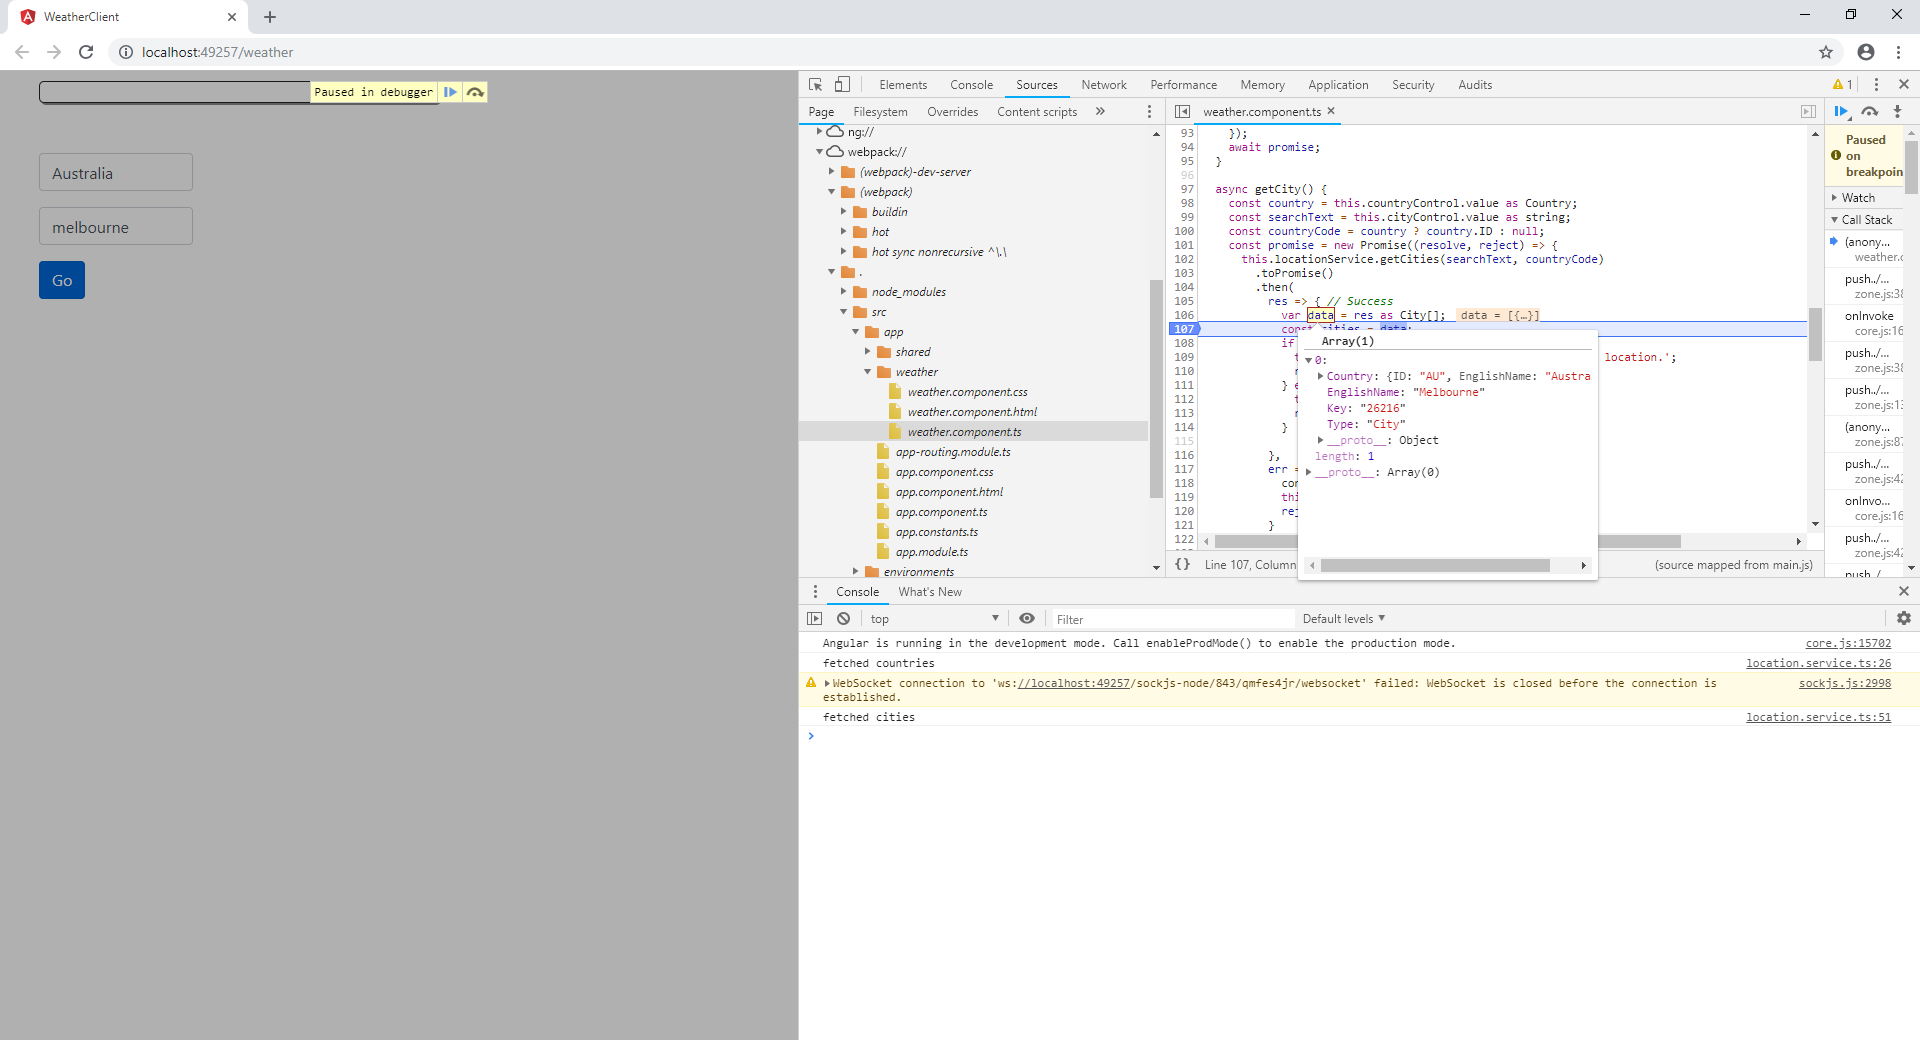
从UI中,选择“Australia”并输入“Melbourne”,然后单击“Go”按钮,将触发断点。

如何使用源代码
npm安装
源代码不包含任何外部包。因此,在从Visual Stduido运行它之前,需要运行安装所有依赖项。打开powershell,然后转到GlobalWeather\GlobalWeather\WeatherClient文件夹。运行npm install。
npm install然后从Visual Stuido构建并运行。
Accuweather API密钥
目前,源代码包含我的API密钥。这是免费密钥。但每天只能调用50次。所以我告诉你登录 http://developer.accuweather.com 获取自己的免费密钥。
结论
在本文中,我们使用.Net Core 2.2构建了一个Angular 7应用程序,并介绍了Angular基础知识,如Bootstrapping,NgModules,Reactive Form,Http Client,Observation,Promise和Routing。
下一篇:Angular 7和 .NET Core 2.2——全球天气(第2部分)
原文地址:https://www.codeproject.com/Articles/1274513/Angular-7-with-Net-Core-2-2-Global-Weather-Part-1


 295
295

 被折叠的 条评论
为什么被折叠?


