


阅读文章:
1、Android LayoutInflater原理分析,带你一步步深入了解View(一)
1. 如果root为null,attachToRoot将失去作用,设置任何值都没有意义。

2. 如果root不为null,attachToRoot设为true,则会给加载的布局文件的指定一个父布局,即root。

3. 如果root不为null,attachToRoot设为false,则会将布局文件最外层的所有layout属性进行设置,即会为
布局生成的实例根据root生成该实例的LayoutParams(因为LayoutParams会包含实例设置的各种layout_xxx
属性),当该view被添加到父view(准确的说应该是父ViewGroup)当中时,这些layout属性会自动生效。

4. 在不设置attachToRoot参数的情况下,如果root不为null,attachToRoot参数默认为true。2、三个案例带你看懂LayoutInflater中inflate方法两个参数和三个参数的区别
3、Android角落 - LayoutInflater第三个参数
补充笔记:
一
往一个 Layout 中添加子布局的实现方法(假设情景为往一个 FrameLayout 中添加一个布局文件为sub_layout 的子布局,而该布局中只包含一个 Button):
sub_layout.xml
<Button xmlns:android="http://schemas.android.com/apk/res/android"
    android:layout_width="300dp"
    android:layout_height="100dp"
    android:text="BUTTON"
    android:gravity="center">
</Button>(1)当 inflate() 方法的参数 root 为 null 时,就需要利用 Layout 的 addView() 方法将实例化的子布局添加到布局中。示例代码如下:
LayoutInflater inflater = LayoutInflater.from(context);
View button=inflater.inflate(R.layout.sub_layout, null);
frameLayout.addView(button);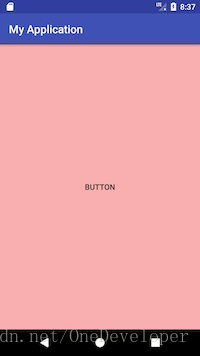
实现效果如上,但是此时设置的 layout_xxx 属性会失效,这是因为当 root 为空时,通过反射拿到的 View(即 Android LayoutInflater原理分析,带你一步步深入了解View(一)一文中的展示的源码 public View inflate(XmlPullParser parser, ViewGroup root, boolean attachToRoot) 方法中提到的 temp 变量)是没有设置 LayoutParams 的。
此时为了实现预期效果,如 :
android:layout_width="300dp"
android:layout_height="100dp"
就需要为 button 设置 LayoutParams,如下:
LayoutInflater inflater = LayoutInflater.from(this);
View button=inflater.inflate(R.layout.sub_layout, null);
FrameLayout.LayoutParams param = new FrameLayout.LayoutParams(dp2px(300),dp2px(100));
button.setLayoutParams(param);
frameLayout.addView(button);
因为是往 FrameLayout 中添加子布局,所以需要设置 FrameLayout.LayoutParams 类型的。
(2)当 inflate() 方法的参数 root 不为 null 时( 此时 inflate(resource,root) 方法中 attachToRoot 默认为 true ),可以直接使用
//attachToRoot 需要为true,
//否则不会将 R.layout.sub_layout 添加到 frameLayout 中,
//就需要手动 addView() 了
inflater.inflate(R.layout.sub_layout, frameLayout, true);
或者
View button=inflater.inflate(R.layout.sub_layout, frameLayout, false);
frameLayout.addView(button);
来实现。


 419
419


 被折叠的 条评论
为什么被折叠?
被折叠的 条评论
为什么被折叠?
 到【灌水乐园】发言


