


Ubuntu安装Onedrive
OnedriveBusiness https://github.com/xybu/onedrived-dev/issues/1
Ubuntu安装微软Onedrive教程
2018年05月09日 12:10:38 skylark0924 阅读数:6680
Ubuntu安装Onedrive教程
系统信息:
-
操作系统:
Ubuntu 16.04本教程通过安装开源社区的
onedrive-d,实现在linux操作系统中将本地文件同步到微软OneDrive云存储。onedrive-d不仅支持Ubuntu/ Debian,同时也支持CentOS/ Fedora/ RHEL。
第1步:废话不多说,直接从github下载安装
1.$ git clone https://github.com/xybu92/onedrive-d.git
2.$ cd onedrive-d
3.$ ./install.sh- 1
- 2
- 3
安装过程中,会自动安装必要的软件,例如pip3 等但是安装需要python-3,不过ubuntu都会自带的,所以无须担心。
第2步:安装后,你会看到这样的消息:
onedrive-d installed successfully.
Please run command `onedrive-pref` to set up the program.- 1
- 2
根据提示,在终端输入onedrive-pref 进行初始化配置 ,如图 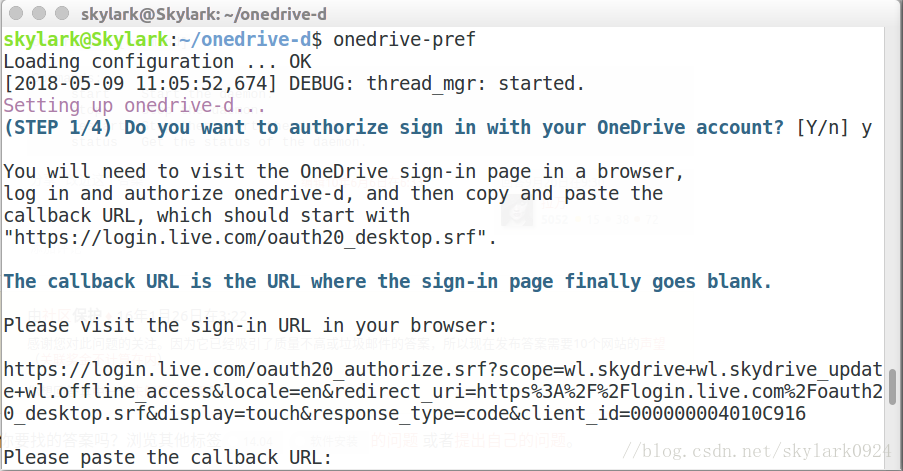
在浏览器中打开终端中的链接,登录你的微软账号
然后会看到:

点击 是。然后将跳转到的网址复制到终端。
onedrive-d has been successfully authorized.- 1
接着配置: 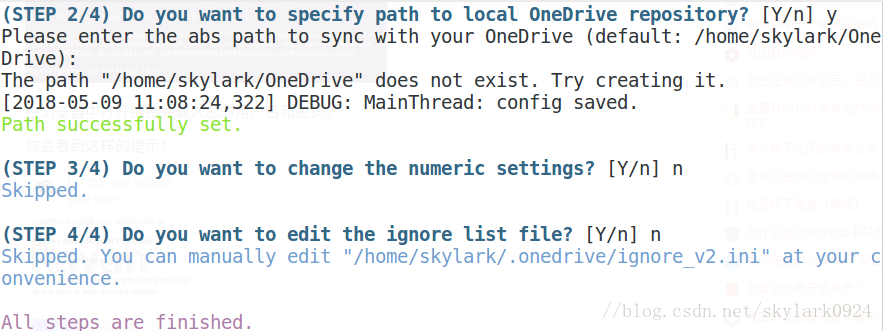
至此,onedrive-d 配置完成。
第3步:帮助
$ onedrive-d --help- 1
Commands:
     start    Start the daemon.
     stop     Stop the daemon.
     restart  Stop then start the daemon.
status Get the status of the daemon.- 1
- 2
- 3
- 4
- 5
终端输入
$ onedrived start- 1
至此,你会在home文件夹下找到onedrive文件夹,里面已经同步了你的onedrive 文件。
OneDrive Sync for Linux (Ubuntu)

Garrett MillsFollow
Feb 23, 2018
So, a while back I decided to make the switch back to the Dark Side and moved all of my computers back to Windows 10 Pro from Ubuntu. My primary motivation for this was because I needed to use the Adobe Creative suite for project. After the project was completed, I just sort of stuck with Windows, largely out of complacency, but also because the Anniversary Update introduced a few really awesome features. The most useful of these was replacing the default Desktop/Documents/Pictures folders with OneDrive folders.
So, when I switched back to Ubuntu recently (mostly so I could use KDE Connect), I tried to find a OneDrive client that would do the same things. Unsurprisingly, no first-party client exists from our Microsoft overlords, and there is a stunning lack of third-party clients. However, thanks to a project called onedrive-d, I got it working. Here’s how.
(For the lazy among you, here’s an automatic script.)
Step 1: Install onedrived
onedrived is a third-party, CLI-based OneDrive client created by Xiangyu Bu. It provides basic OneDrive sync. Clean and simple.
Install git if you don’t have it:
sudo apt install git -y
Clone the onedrive-d files to a hidden folder:
git clone https://github.com/xybu/onedrived-dev.git ~/.odd
cd ~/.odd
Run the Installer:
sudo python3 ./setup.py install
Step 2: Install ngrok
ngrok is a 3rd-party platform for relaying webhook integration. onedrived uses ngrok to allow webhook requests from the OneDrive API to the onedrived client without requiring port-forwarding or similar.
Download ngrok from here and extract the ngrok file. Then, copy it to a path directory using the following command:
sudo mv ~/path/to/extracted/ngrok /usr/bin/ngrok
Step 3: Configure onedrived
After installing onedrived, you need to authorize it to access your Microsoft account. To do this, run the following command to configure onedrived interactively:
onedrived-pref account add
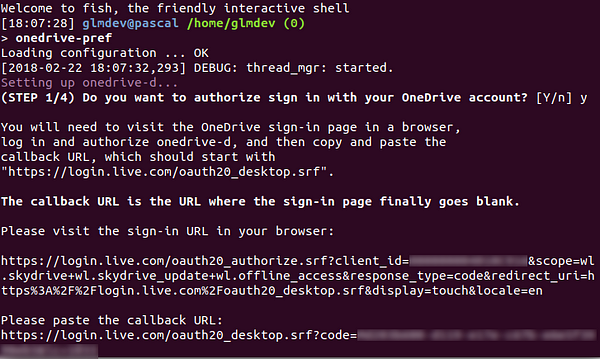
This command will launch an interactive wizard to help you configure onedrived. First, copy the given URL into your browser of choice and complete the Microsoft login and permissions. After you allow onedrived access, it will land you on a blank white page. Copy the URL of this page, paste it back into the interactive prompt.
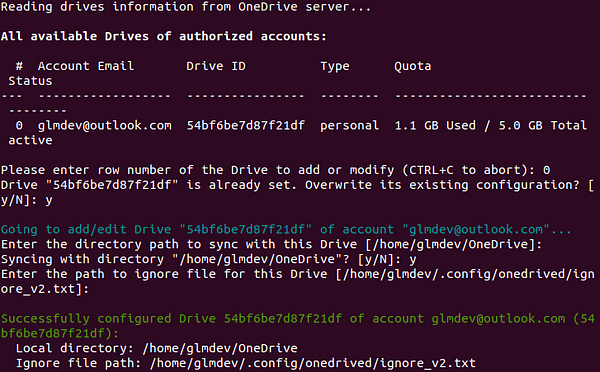
Now, you need to select which virtual drive to use with onedrived. Set the virtual drive by running the following command:
onedrived-pref drive set
It will run you through some interactive setup questions. Leave the default directory path the same, tell it y to sync that directory, and leave the default ignore file.
Lastly, you can start the OneDrive daemon by running:
onedrived start
At this point, onedrived will begin syncing your OneDrive files with the local computer. This may take some time if you have a particularly large OneDrive. You can access the files by navigating to Home > OneDrive.
This, however, isn’t as seamless as Microsoft’s implementation. For that, we need to change the default folders that Nautilus uses. To do this, open the user’s directory configuration file using the following command:
gedit ~/.config/user-dirs.dirs
The user-dirs.dirs file tells GNOME/Nautilus which folders to use for the default Desktop/Documents/Pictures/etc. folders. Change the default paths to their respective OneDrive folders (make sure you’ve created the folders on your OneDrive) like so:
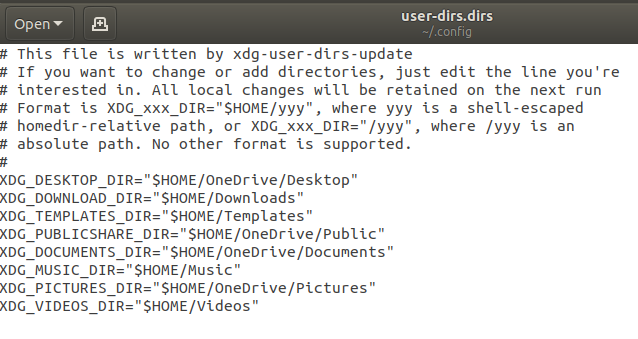
You can pick which folders you want to sync over OneDrive and which ones you want to use locally. In this case, I’ve chosen to sync my Desktop, Public, Documents, and Pictures folders.
Finally, run the following command to ensure your changes are preserved:
echo "enabled=false" > ~/.config/user-dirs.conf
Step 3: Enable the OneDrive Daemon on Login
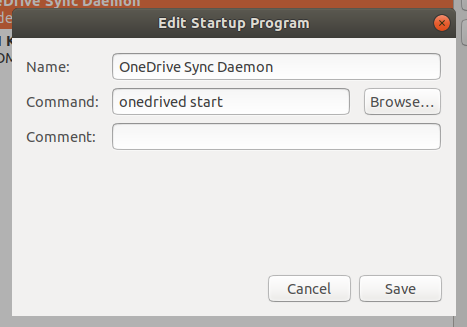
The onedrive-d daemon doesn’t automatically start by itself, so to ensure that OneDrive starts syncing automatically when you log in, we need to tell GNOME to start it on login. Run the gnome-session-properties command to open GNOME’s configuration. Then, add a startup program to run the onedrived startcommand.
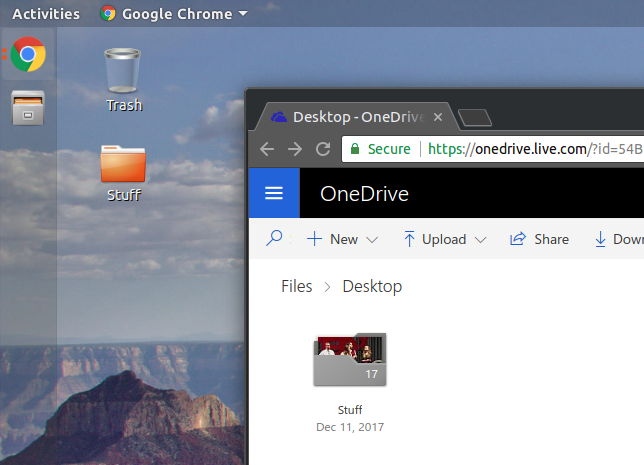
Finally, log out and log back in to restart Nautilus and from now on, GNOME and Nautilus should seamlessly sync with your OneDrive.
Keyrings troubles #30
https://github.com/xybu/onedrived-dev/issues/30
Hi, for those who bang their head on this, here is what worked for me (after 2 hours of Googling):
# install keyrings.alt from git
pip3 install --user git+https://github.com/jaraco/keyrings.alt
# set a default password for your account
# the first password to enter is the system password
# then this is the keyring password (the one that will be asked by onedrive-d)
.local/bin/keyring set system <your_account>
# create your onedrive-d account
.local/bin/onedrived-pref account add
# follow the instruction for pasting the URL
# then provide the second password you gave to keyring
# you're done, pffffffffffffff
Edit: well, you're done except for issue #27


 635
635


 被折叠的 条评论
为什么被折叠?
被折叠的 条评论
为什么被折叠?
 到【灌水乐园】发言


