记录fragment的博客和资料已经很多很多了,光csdn上我就看了郭lin和鸿洋大神的blog,都写的很好。我写这篇关于fragment博客的目的是想从一个初学者的角度去谈谈我学习fragment的过程和体会以及遇到的牵扯到的相关问题,另一方面也当成自己的电子笔记,希望对其他初学者能有所帮助。
一、fragment简介
简单谈一下我对fragment的理解,由于手机屏幕较小,一个Activity能放的东西是有限的,比如一个列表一般就占满了整个屏幕,再查看详情则只能通过跳转到新的Activity去实现。而平板电脑的出现解决了屏幕小的问题,那么需求也就暴露了出来,平板的宽屏幕可以展示的东西更多了,而且在一个Activity放置过多的组件也不易于管理,所以fragment出现了,它可以代表Activity的子模块,并且有自己独立的生命周期。
在web开发中有一种经典的页面模型,上左右分三块,一般上面占满屏幕宽度,放Logo之类的,左边是树状菜单,而右边是用于展示菜单的内容,点击菜单、刷新右边的页面,类似于这样:

在web中实现这种布局很简单,我们都知道使用框架,比如frameset或者iframe,分别写3个子html页面用于显示上面的3块内容,最后通过<iframe>或者<frameset>标签把它们放在一个容器html页面中即可,通过点击左侧菜单的超链接来改变右边的内容页面。
其实Android也是类似的,如果要在平板电脑上实现上面的效果,那就需要使用fragment来完成了,上面可能是一个titlebar或者是一个放TextView的fragment,左边可能是一个放ListView的fragment,而右边也就是放内容的fragment,没错,fragment相当于frameset或iframe,它只是一个容器。还有一点很重要,就是fragment必须被“嵌入”Activity中使用,并且它有自己的生命周期和响应事件,但fragment的生命周期直接被其所属的activity的生命周期控制。
二、创建fragment
与创建Activity类似,创建一个fragment首先要继承android.app.Fragment,并且要重写onCreatView方法,为什么要重写这个方法,因为上面说了fragment只是容器,那么只有装了东西这个容器才完整,这个所谓的“东西”也就是各种各样的组件了,onCreatView方法的返回值是View,这个View也就是fragment所要显示的View,可以参照官方文档:

这句话说的很清楚了,为fragment提供一个布局的话,你必须实现onCreatView()这个回调方法。
清楚了这两点,那么我们写一个简单的自定义Fragment类。
- package com.xw.fragment;
-
- import android.app.Fragment;
- import android.os.Bundle;
- import android.view.LayoutInflater;
- import android.view.View;
- import android.view.ViewGroup;
-
- public class MyFragment1 extends Fragment {
-
- @Override
- public View onCreateView(LayoutInflater inflater, ViewGroup container,
- Bundle savedInstanceState) {
- View view = inflater.inflate(
- com.example.fragmentdemo.R.layout.fragment1, container, false);
- return view;
- }
- }
可以看到是通过LayoutInflater的inflate方法去加载布局的,而这个布局也就是这个fragment所要显示的布局。关于inflate方法初学者可能不是很清楚,其实我本人也不是很清楚,以前实例化布局我都是用setContentView这个方法,那这个inflate方法和setContentView方法又有什么区别和联系呢?
从表面上看:
setContentView方法没有返回值,并且是Activity的一个实例方法。
那么既然没有返回值,并且在当前的Activity的中被调用,那么可想而知,那么这个方法应该就是为当前的Activity加载布局了,而fragment里面并没有setContentView方法,所以开发fragment的时候我们没有可选择性,目前我们只需要知道inflate方法就是用来实例化布局的就可以了,关于具体的细节和原理我们在后续的blog中再做记录。
对了,为了看到后面的简单效果再show一下fragment1.xml,很简单,只是一个红色的TextView:
- <?xml version="1.0" encoding="utf-8"?>
- <LinearLayout xmlns:android="http://schemas.android.com/apk/res/android"
- android:layout_width="match_parent"
- android:layout_height="match_parent"
- android:orientation="vertical"
- android:padding="10dp"
- >
-
- <TextView
- android:layout_width="100dp"
- android:layout_height="100dp"
- android:background="#FF0000"
- android:text="fragment one"
- android:gravity="center"
- />
-
- </LinearLayout>
三、在Activity中显示Fragment
上面我们已经知道了如何创建一个fragment,但是fragment终究还是要被“嵌入”到Activity中才能使用的,那么我们就具体看一下如何在Activity中引用fragment,其实就是如何在activity的布局文件中引入fragment:
- <LinearLayout xmlns:android="http://schemas.android.com/apk/res/android"
- xmlns:tools="http://schemas.android.com/tools"
- android:layout_width="match_parent"
- android:layout_height="match_parent"
- android:padding="10dp"
- tools:context="com.xw.activity.MainActivity" >
-
- <fragment
- android:id="@+id/fm_fragment1"
- android:name="com.xw.fragment.MyFragment1"
- android:layout_width="match_parent"
- android:layout_height="match_parent"
- />
-
- </LinearLayout>
显而易见的,是通过<fragment>的android:name属性来引入fragment。
Activity的代码不变,依然是setContentView(R.layout.activity_main.xml),最后运行一下看看效果:

这样就完成了在Activity中展示一个fragment,这样的效果也许看不出什么,稍候我会做一个典型的fragment的应用的例子,也就是我们经常会用到的Tab导航。
四、常用方法和API
在fragment中获取它所在的Activity:Activity activity=getActivity();
在Activity中获取fragment:getFragmentManager().findFragmentById()或findFragmentByTag();
在上面可以看到getFragmentManager()方法,它返回的是一个FragmentManager对象:
FragmentManager fragmentManager=getFragmentManager();
如果要添加、删除或替换fragment,那么就需要FragmentTransaction对象的一系列方法来处理了:
FragmentTransaction ftx=fragmentManager.beginTransaction();
向Activity中添加一个fragment:
ftx.add(Fragment fragment,String tag);
从Activity中移除一个fragment:
ftx.remove(Fragment fragment);
使用一个fragment替换当前的fragment:
ftx.replace(int containerViewId,Fragment fragment);
隐藏当前的fragment:
ftx.hide(Fragment fragment);
显示之前隐藏的fragment:
ftx.show(Fragment fragment);
FragmentTransaction与DatabaseTransaction类似,后者一般代表对底层数据库的多个更新操作,而前者表示Activity对Fragment执行的多个改变操作,相同的是,最后都要调用commit()方法进行提交操作。
五、Tab导航的例子
其实文字的东西也没啥写的,无非就是那点东西,下面通过一个实例来练习一下fragment的具体用法,这个例子就是经常会用到的Tab导航。
Layout代码(activity_main.xml):
- <LinearLayout xmlns:android="http://schemas.android.com/apk/res/android"
- xmlns:tools="http://schemas.android.com/tools"
- android:layout_width="match_parent"
- android:layout_height="match_parent"
- android:background="@drawable/bg_main_day"
- android:orientation="vertical"
- tools:context=".MainActivity" >
-
- <RadioGroup
- android:id="@+id/rg_select_main"
- android:layout_width="match_parent"
- android:layout_height="45dp"
- android:gravity="center_vertical"
- android:orientation="horizontal" >
-
- <RadioButton
- android:id="@+id/rb1"
- style="@style/SelectTextView"
- android:layout_width="match_parent"
- android:layout_height="wrap_content"
- android:layout_weight="1.0"
- android:background="@drawable/iv_selectbar_selector"
- android:button="@null"
- android:gravity="center"
- android:text="当前推荐" />
-
- <RadioButton
- android:id="@+id/rb2"
- style="@style/SelectTextView"
- android:layout_width="match_parent"
- android:layout_height="wrap_content"
- android:layout_weight="1.0"
- android:background="@drawable/iv_selectbar_selector"
- android:button="@null"
- android:gravity="center"
- android:text="景点" />
-
- <RadioButton
- android:id="@+id/rb3"
- style="@style/SelectTextView"
- android:layout_width="match_parent"
- android:layout_height="wrap_content"
- android:layout_weight="1.0"
- android:background="@drawable/iv_selectbar_selector"
- android:button="@null"
- android:gravity="center"
- android:text="美食" />
-
- <RadioButton
- android:id="@+id/rb4"
- style="@style/SelectTextView"
- android:layout_width="match_parent"
- android:layout_height="wrap_content"
- android:layout_weight="1.0"
- android:background="@drawable/iv_selectbar_selector"
- android:button="@null"
- android:gravity="center"
- android:text="文化" />
-
- <RadioButton
- android:id="@+id/rb5"
- style="@style/SelectTextView"
- android:layout_width="match_parent"
- android:layout_height="wrap_content"
- android:layout_weight="1.0"
- android:background="@drawable/iv_selectbar_selector"
- android:button="@null"
- android:gravity="center"
- android:text="娱乐" />
- </RadioGroup>
-
- <FrameLayout
- android:id="@+id/main_frame"
- android:layout_width="match_parent"
- android:layout_height="match_parent" >
- </FrameLayout>
-
- </LinearLayout>
Activity代码:
- package com.xw.activity;
-
- import android.app.Activity;
- import android.app.FragmentTransaction;
- import android.os.Bundle;
- import android.widget.RadioButton;
- import android.widget.RadioGroup;
- import android.widget.RadioGroup.OnCheckedChangeListener;
-
- import com.example.fragmenttabdemo.R;
- import com.xw.fragment.FragmentFive;
- import com.xw.fragment.FragmentFour;
- import com.xw.fragment.FragmentOne;
- import com.xw.fragment.FragmentThree;
- import com.xw.fragment.FragmentTwo;
-
- public class MainActivity extends Activity implements OnCheckedChangeListener {
-
- private RadioGroup rg;
- private RadioButton rb;
-
- private FragmentOne fone;
- private FragmentTwo ftwo;
- private FragmentThree fthree;
- private FragmentFour ffour;
- private FragmentFive ffive;
-
- @Override
- protected void onCreate(Bundle savedInstanceState) {
- super.onCreate(savedInstanceState);
- setContentView(R.layout.activity_main);
-
- setupView();
- addListener();
- }
-
- private void setupView() {
- rg = (RadioGroup) findViewById(R.id.rg_select_main);
- rb = (RadioButton) findViewById(R.id.rb1);
-
-
- fone = new FragmentOne();
- ftwo = new FragmentTwo();
- fthree = new FragmentThree();
- ffour = new FragmentFour();
- ffive = new FragmentFive();
-
-
- FragmentTransaction ftx = getFragmentManager().beginTransaction();
- ftx.add(R.id.main_frame, fone);
- ftx.commit();
-
- rb.setChecked(true);
- }
-
- private void addListener() {
- rg.setOnCheckedChangeListener(this);
- }
-
- @Override
- public void onCheckedChanged(RadioGroup group, int checkedId) {
- FragmentTransaction ftx = getFragmentManager().beginTransaction();
- switch (checkedId) {
- case R.id.rb1:
- ftx.replace(R.id.main_frame, fone);
- break;
- case R.id.rb2:
- ftx.replace(R.id.main_frame, ftwo);
- break;
- case R.id.rb3:
- ftx.replace(R.id.main_frame, fthree);
- break;
- case R.id.rb4:
- ftx.replace(R.id.main_frame, ffour);
- break;
- case R.id.rb5:
- ftx.replace(R.id.main_frame, ffive);
- break;
- default:
- break;
- }
- ftx.commit();
- }
-
- }
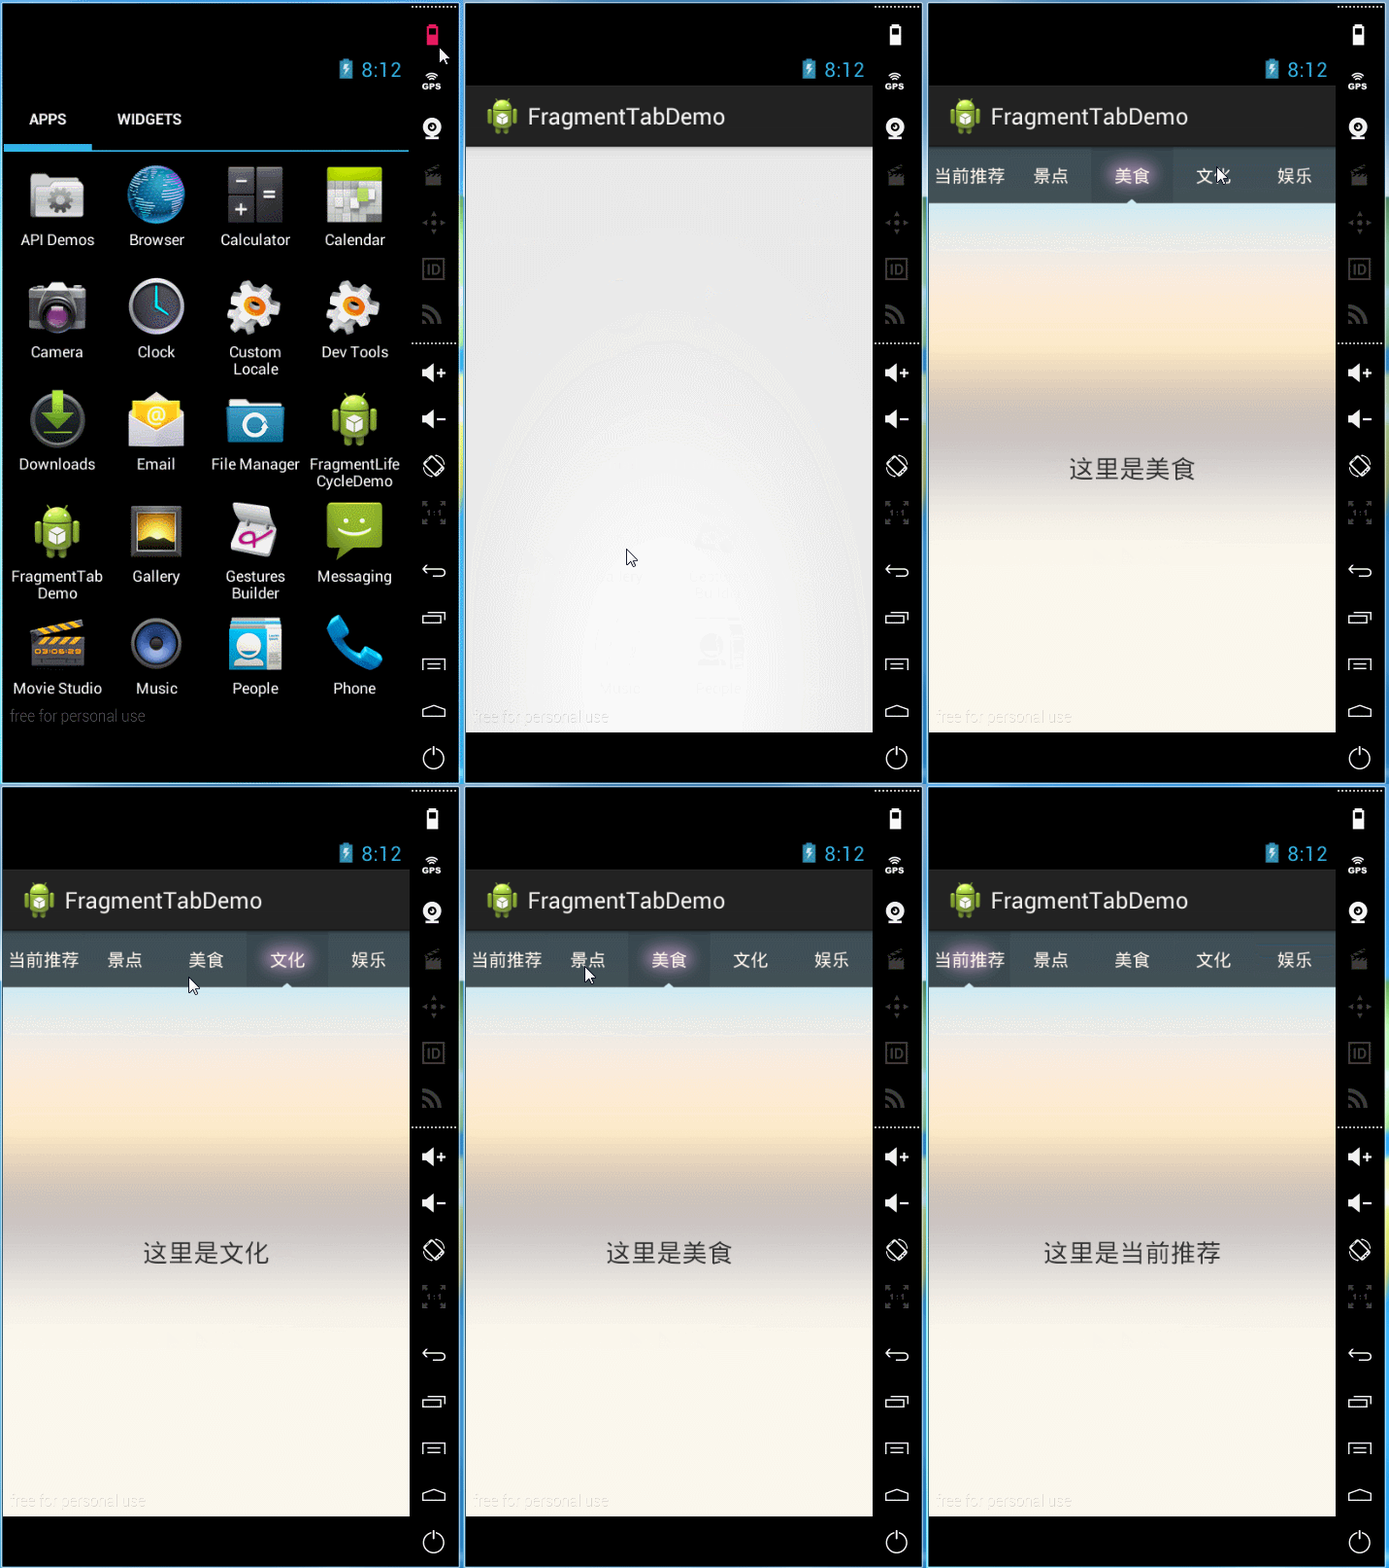
Fragment的代码就不贴了,都很简单,和上面基本一样,下面看看运行效果:

很简单吧!通过点击不同的radiobutton,根据id去判断并替换containerView中的组件,这应该是fragment最简单的一种应用,也许还有潜在的bug和不合理的地方,欢迎各位批评指正。
六、总结
本篇记录了我认识fragment的过程,也许只是一个最简单的demo,但对于我来说也算是一点一滴的进步,关于fragment的生命周期、back stack、与activity之间的通信、fragment管理与fragment事务等等暂且还没有去详细了解,只是尽快熟悉了API和用法,然后立刻上手敲一个小demo,不知道这种学习方法对不对,但是我更倾向于这样,先会用,再研究原理,因为做出东西就会有成就感,为继续学习提供了动力。一般菜鸟废话都比较多,呵呵。我还是会继续努力的,要抓紧了,在Android上不能耽误太多时间,要学的东西还有很多很多,加油。


 1939
1939

 被折叠的 条评论
为什么被折叠?


