


本篇博客是继linux上Nginx+Tomcat搭建高性能负载均衡的后续,我们已经实现了nginx的负载均衡,现在我们结合redis实现session的共享。
Spring Session 的使用
Spring中的关于session的配置文件application-dao.xml的内容:
<?xml version="1.0" encoding="UTF-8"?>
<beans xmlns="http://www.springframework.org/schema/beans"
    xmlns:xsi="http://www.w3.org/2001/XMLSchema-instance"
    xmlns:context="http://www.springframework.org/schema/context"
    xmlns:mongo="http://www.springframework.org/schema/data/mongo"
    xmlns:aop="http://www.springframework.org/schema/aop"
    xsi:schemaLocation="http://www.springframework.org/schema/beans
            http://www.springframework.org/schema/beans/spring-beans-3.0.xsd
            http://www.springframework.org/schema/data/mongo
            http://www.springframework.org/schema/data/mongo/spring-mongo.xsd
            http://www.springframework.org/schema/context
     	http://www.springframework.org/schema/context/spring-context-3.0.xsd
     	http://www.springframework.org/schema/aop
        http://www.springframework.org/schema/aop/spring-aop-3.0.xsd">

		<context:property-placeholder location="classpath:database.properties" />

		<context:annotation-config/>

		<bean id="poolConfig" class="redis.clients.jedis.JedisPoolConfig">
	        <property name="maxIdle" value="${redis.maxIdle}" />
	        <property name="maxTotal" value="${redis.maxActive}" />
	        <property name="maxWaitMillis" value="${redis.maxWait}" />
	        <property name="testOnBorrow" value="${redis.testOnBorrow}" />
    	</bean>

		 <bean id="connectionFactory" class="org.springframework.data.redis.connection.jedis.JedisConnectionFactory">
		 	 <property name="hostName" value="${redis.host}"/>
		 	 <property name="port" value="${redis.port}"/>
		 	 <property name="password" value="${redis.pass}"/>
		 	 <property name="poolConfig" ref="poolConfig"/>
		 </bean>

    	<bean id="stringSerializer" class="org.springframework.data.redis.serializer.StringRedisSerializer"/>

    	<bean id="hashSerializer" class="org.springframework.data.redis.serializer.JdkSerializationRedisSerializer"/>

	    <bean id="redisTemplate" class="org.springframework.data.redis.core.RedisTemplate">
	        <property name="connectionFactory" ref="connectionFactory" />
	        <property name="keySerializer" ref="stringSerializer"/>
	        <property name="valueSerializer" ref="stringSerializer"/>
	        <property name="hashKeySerializer" ref="stringSerializer" />
	        <property name="hashValueSerializer" ref="hashSerializer"/>
	    </bean>

	    <bean id="redisHttpSessionConfiguration"
	    	class="org.springframework.session.data.redis.config.annotation.web.http.RedisHttpSessionConfiguration">
    		<property name="maxInactiveIntervalInSeconds" value="180000" />
		</bean>

</beans>
pom.xml文件内容:
<project xmlns="http://maven.apache.org/POM/4.0.0" xmlns:xsi="http://www.w3.org/2001/XMLSchema-instance"
  xsi:schemaLocation="http://maven.apache.org/POM/4.0.0 http://maven.apache.org/maven-v4_0_0.xsd">
  <modelVersion>4.0.0</modelVersion>
  <groupId>com.npf</groupId>
  <artifactId>springsessionshare</artifactId>
  <packaging>war</packaging>
  <version>0.0.1-SNAPSHOT</version>
  <name>springsessionshare Maven Webapp</name>
  <url>http://maven.apache.org</url>

  <properties>
		<spring.version>4.1.6.RELEASE</spring.version>
		<project.build.sourceEncoding>UTF-8</project.build.sourceEncoding>
   </properties>

  <dependencies>

    <dependency>
      <groupId>junit</groupId>
      <artifactId>junit</artifactId>
      <version>4.10</version>
      <scope>test</scope>
    </dependency>

    <dependency>
	      <groupId>junit</groupId>
	      <artifactId>junit</artifactId>
	      <version>4.10</version>
	      <scope>test</scope>
    </dependency>

  	<dependency>
           <groupId>org.springframework.session</groupId>
           <artifactId>spring-session-data-redis</artifactId>
           <version>1.0.2.RELEASE</version>
    </dependency>

	<dependency>
		<groupId>org.springframework</groupId>
		<artifactId>spring-webmvc</artifactId>
		<version>${spring.version}</version>
	</dependency>

	<dependency>
	    <groupId>commons-logging</groupId>
	    <artifactId>commons-logging</artifactId>
	    <version>1.2</version>
	</dependency>

	<dependency>
	    <groupId>jstl</groupId>
	    <artifactId>jstl</artifactId>
	    <version>1.2</version>
	</dependency>

  </dependencies>


  <profiles>
	  <profile>
	    <id>jdk-1.7</id>
	    <activation>
	        <activeByDefault>true</activeByDefault>
	        <jdk>1.7</jdk>
	    </activation>
	    <properties>
	        <maven.compiler.source>1.7</maven.compiler.source>
	        <maven.compiler.target>1.7</maven.compiler.target>
	        <maven.compiler.compilerVersion>1.7</maven.compiler.compilerVersion>
	    </properties>
	</profile>
  </profiles>

  <build>
    <finalName>springsessionshare</finalName>
  </build>
</project>
Spring Session 原理
首先是applicationContact-dao.xml文件:
<bean id="redisHttpSessionConfiguration"
	    	 class="org.springframework.session.data.redis.config.annotation.web.http.RedisHttpSessionConfiguration">
    		<property name="maxInactiveIntervalInSeconds" value="180000" />
</bean>
这段代码,就实现了Spring Session中使用redis作为存储session的配置文件。进入源码,可以发现,它使用了RedisTemplate以及import org.springframework.session.web.http.SessionRepositoryFilter。
SpringSession实现了HttpSession的接口来处理Session相关的业务操作,它提供了两种解决方案,一种是默认的使用Map来保存Session,还有一种,是为了在集群中解决Session共享的方案的使用Redis来处理Session数据。
它们分别是接口org.springframework.session.SessionRepository(即处理Session的接口)的两个实现:
org.springframework.session.MapSessionRepository 和 org.springframework.session.RedisOperationsSessionRepository。
然后,它们在SessionRepositoryFilter,被注入进来处理对应的Session实现的策略方式。注意,这个是Filter,为了在Spring中生效,所以在web.xml中添加了:
<filter>
	    <filter-name>springSessionRepositoryFilter</filter-name>
	    <filter-class>org.springframework.web.filter.DelegatingFilterProxy</filter-class>
	</filter>
	<filter-mapping>
	    <filter-name>springSessionRepositoryFilter</filter-name>
	    <url-pattern>/*</url-pattern>
</filter-mapping>doFilter方法来进代理。因为SessionRepositoryFilter需要一些Spring Context的处理。所以才要在web.xml里配置这段过滤器的代理过滤器。整个流程就是这样子了。再详细的, 可以根据此思想,深入每一个相关的类的源码。或者直接进行单步调试。
测试
将项目部署到npf2和npf3机器上的tomcat机器上面,然后访问npf1上面的nginx。http://npf1/springsessionshare/student/find/all
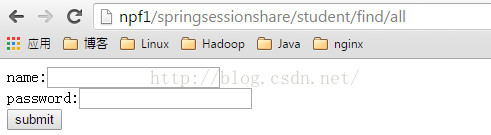
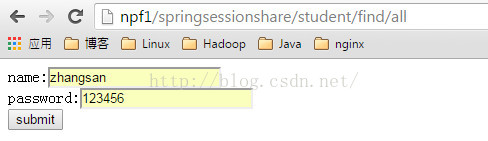
然后输入用户名和密码登录:
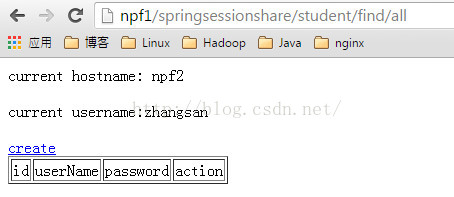
登录后,然后显示主页,当前给我们提供服务的主机是npf2。
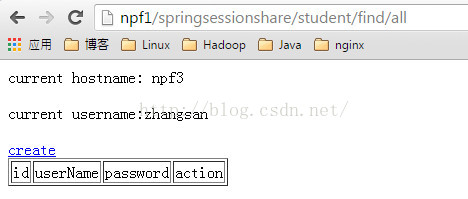
反复刷新当前页,可以看到如果当前给我们提供服务的机器是npf3,我们也可以不必要再次登录了。
本文的源代码已经托管到GitHub上面:springsessionshare
参考文献:
1.Nginx + Tomcat + Session 共享解决方案


 9465
9465


 被折叠的 条评论
为什么被折叠?
被折叠的 条评论
为什么被折叠?
 到【灌水乐园】发言


