


1.安装所需的库
这里看我的博客配置
2.前期数据库准备
这里博主的数据库格式
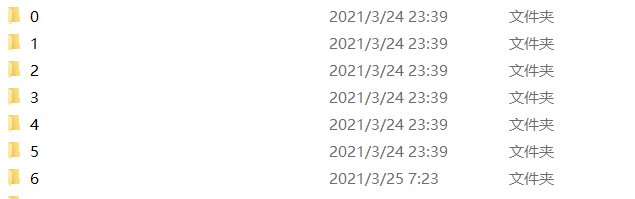
每个文件夹里面包含同一个人的10张图片
这里创建一个人名对照表
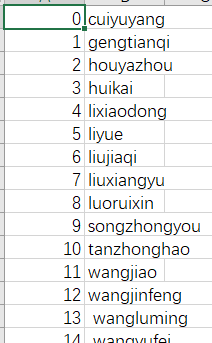
对应的是每个人的名字和文件夹
3. 数据分辨率调节和数据增强(可以跳过)
这里因为博主的数据库照片是手机拍的,一张照片的分辨率非常大, 不便于处理,这里首先把每个人脸降低分辨率
import os
from PIL import Image
import glob
import cv2

for people in range(0,29):#编号从0到28,,所以到29
    # 图片文件夹路径
    file_dir = f"E:\\face\\test\\train\\{str(people)}\\"
    for img_name in os.listdir(file_dir):
        img_path = file_dir + img_name
        img = Image.open(img_path)
        img.thumbnail((500,500))
        print(img.format, img.size, img.mode)
        img.save(img_path,'JPEG')
运行文件之前记得把路径修改成自己的路径
运行完后有的图片可能有翻转,可以自己翻转回来
图片因为就只有10张,博主这里进行数据增强一下,代码
# -*- coding: utf-8 -*-

import cv2
import numpy as np
import os.path
import copy

# 昏暗 n
def darker(image,percetage=0.9):
    image_copy = image.copy()
    w = image.shape[1]
    h = image.shape[0]
    #get darker
    for xi in range(0,w):
        for xj in range(0,h):
            image_copy[xj,xi,0] = int(image[xj,xi,0]*percetage)
            image_copy[xj,xi,1] = int(image[xj,xi,1]*percetage)
            image_copy[xj,xi,2] = int(image[xj,xi,2]*percetage)
    return image_copy

# 亮度 n
def brighter(image, percetage=1.5):
    image_copy = image.copy()
    w = image.shape[1]
    h = image.shape[0]
    #get brighter
    for xi in range(0,w):
        for xj in range(0,h):
            image_copy[xj,xi,0] = np.clip(int(image[xj,xi,0]*percetage),a_max=255,a_min=0)
            image_copy[xj,xi,1] = np.clip(int(image[xj,xi,1]*percetage),a_max=255,a_min=0)
            image_copy[xj,xi,2] = np.clip(int(image[xj,xi,2]*percetage),a_max=255,a_min=0)
    return image_copy


for people in range(0,29):
    # 图片文件夹路径
    file_dir = f"E:\\face\\test\\train\\{str(people)}\\"
    for img_name in os.listdir(file_dir):
        img_path = file_dir + img_name
        img = cv2.imread(img_path)

    for img_name in os.listdir(file_dir):
        img_path = file_dir + img_name
        img = cv2.imread(img_path)


        #变暗
        img_darker = darker(img)
        cv2.imwrite(file_dir + img_name[0:-4] + 'darker.jpg', img_darker)

        #变亮、
        img_brighter = brighter(img)
        cv2.imwrite(file_dir + img_name[0:-4] + 'brighter.jpg', img_brighter)

        #高斯模糊
        blur = cv2.GaussianBlur(img, (7, 7), 1.5)
        #      cv2.GaussianBlur(图像,卷积核,标准差)
        cv2.imwrite(file_dir + img_name[0:-4] + 'blur.jpg',blur)
通过变暗,变亮,加上高斯模糊操作把数据增多
4.使用face_recognition获取每个人的特征向量
face_recognition可以对每张人脸进行编码,博主把每个人的特征向量存储下来,当做比对数据库
代码
import face_recognition
import cv2
import os
import pickle
import pandas as pd
face_names = []
face_codings = []


bok = pd.read_csv('./人脸对照.csv')
person_list = os.listdir("face/")
# print(os.listdir("face/" + str(0)))
face_codes = []
person_codes = []
single_codes = []
for i in range(len(person_list)):
    image_num = os.listdir("face/" + str(i))
    person_codes = []
    for j in image_num:
        image_path = "face/" + str(i) + "/" + str(j)
        face_img = face_recognition.load_image_file(image_path)
        single_codes = face_recognition.face_encodings(face_img)
        if len(single_codes) != 0:
            person_codes.append(single_codes[0])
    face_codes.append(person_codes)

output = open('facedata.pkl', 'wb')
pickle.dump(face_codes, output)
output.close()
这样得到一个文件存储的每个人的特征向量
5.调用摄像头进行人脸识别
得到了人脸向量数据库之后就可以进行人脸识别了。
这里博主说一下原理
数据库存储的是每个人每张图片的128维向量,使用摄像头捕捉到人脸之后,使用捕捉的人脸也得到一个128的向量,把这向量和数据库中的向量进行比对,找出距离的均值最短的就是这个人的标签,如果比对完所有的数据发现距离距离最短的人的也很大,那说明这个摄像头捕捉到的人没有在数据库中。
代码
import face_recognition
import cv2
import numpy as np
import pandas as pd
import pickle
from PIL import Image, ImageFont, ImageDraw

# cv2.namedWindow('face_recognition',cv2.CAP_DSHOW)
video_capture = cv2.VideoCapture(0)


pkl_file = open('facedata.pkl', 'rb')
all_known_face_encodings = pickle.load(pkl_file)
pkl_file.close()

know_name = pd.read_csv('./person_name.csv')
known_face_names= list(know_name.iloc[:,1])

# Initialize some variables
face_locations = []
face_encodings = []
face_names = []
process_this_frame = True

while True:
    # Grab a single frame of video
    ret, frame = video_capture.read()

    # Resize frame of video to 1/4 size for faster face recognition processing
    small_frame = cv2.resize(frame, (0, 0), fx=0.25, fy=0.25)

    # Convert the image from BGR color (which OpenCV uses) to RGB color (which face_recognition uses)
    rgb_small_frame = small_frame[:, :, ::-1]

    # Only process every other frame of video to save time
    if process_this_frame:
        # Find all the faces and face encodings in the current frame of video
        face_locations = face_recognition.face_locations(rgb_small_frame)
        face_encodings = face_recognition.face_encodings(rgb_small_frame, face_locations)

        face_names = []
        for face_encoding in face_encodings:
            min_dis = 10000.0#初始化为最大值
            name = known_face_names[0]
            # See if the face is a match for the known face(s)
            name = "Unknown"
            for i in range(len(all_known_face_encodings)):
                # name = "Unknown"
                face_dis = face_recognition.face_distance(all_known_face_encodings[i], face_encoding)
                # If a match was found in known_face_encodings, just use the first one.
                # min_dis = min(np.mean(face_dis),min_dis)
                if face_dis.shape[0] != 0:
                    face_mean = np.mean(face_dis)
                    if face_mean != 0 and face_mean < min_dis:
                        min_dis = face_mean
                        name = known_face_names[i - 1]


            if min_dis > 0.63:#阈值可调
                name = "unknow"
            face_names.append(name)

    process_this_frame = not process_this_frame


    # Display the results
    for (top, right, bottom, left), name in zip(face_locations, face_names):
        # Scale back up face locations since the frame we detected in was scaled to 1/4 size
        top *= 4
        right *= 4
        bottom *= 4
        left *= 4

        # Draw a box around the face
        cv2.rectangle(frame, (left, top), (right, bottom), (0, 0, 255), 2)
        # font = ImageFont.truetype(r'C:\Windows\Fonts\simfang.ttf',40)
        # Draw a label with a name below the face
        cv2.rectangle(frame, (left, bottom - 35), (right, bottom), (0, 0, 255), cv2.FILLED)

        # print(name)
        font = cv2.FONT_HERSHEY_DUPLEX
        cv2.putText(frame, name, (left + 6, bottom - 6), font, 1.0, (255, 255, 255), 1)

    # Display the resulting image
    cv2.imshow('Video', frame)

    # Hit 'q' on the keyboard to quit!
    if cv2.waitKey(1) & 0xFF == ord('q'):
        break

# Release handle to the webcam
video_capture.release()
cv2.destroyAllWindows()
附上结果
博主害羞就不露脸了

水平有限,如有错误,多加指正!


 1122
1122


 被折叠的 条评论
为什么被折叠?
被折叠的 条评论
为什么被折叠?
 到【灌水乐园】发言


