


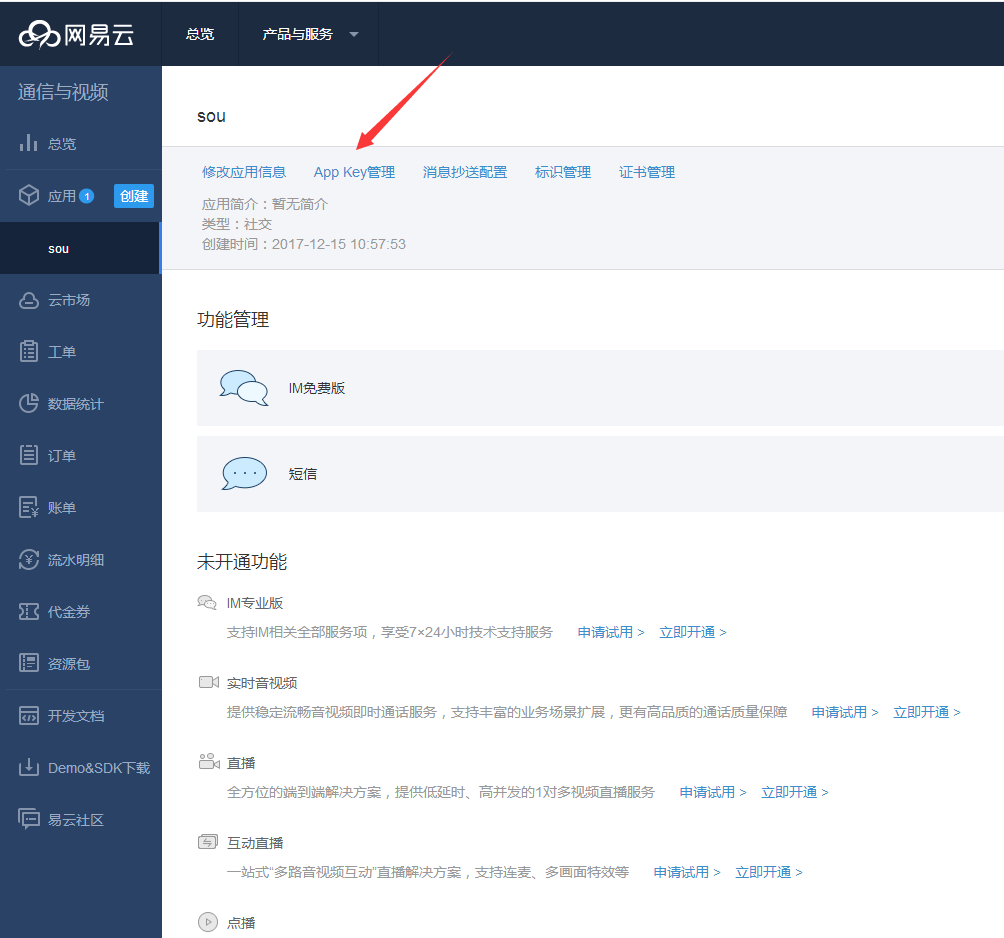
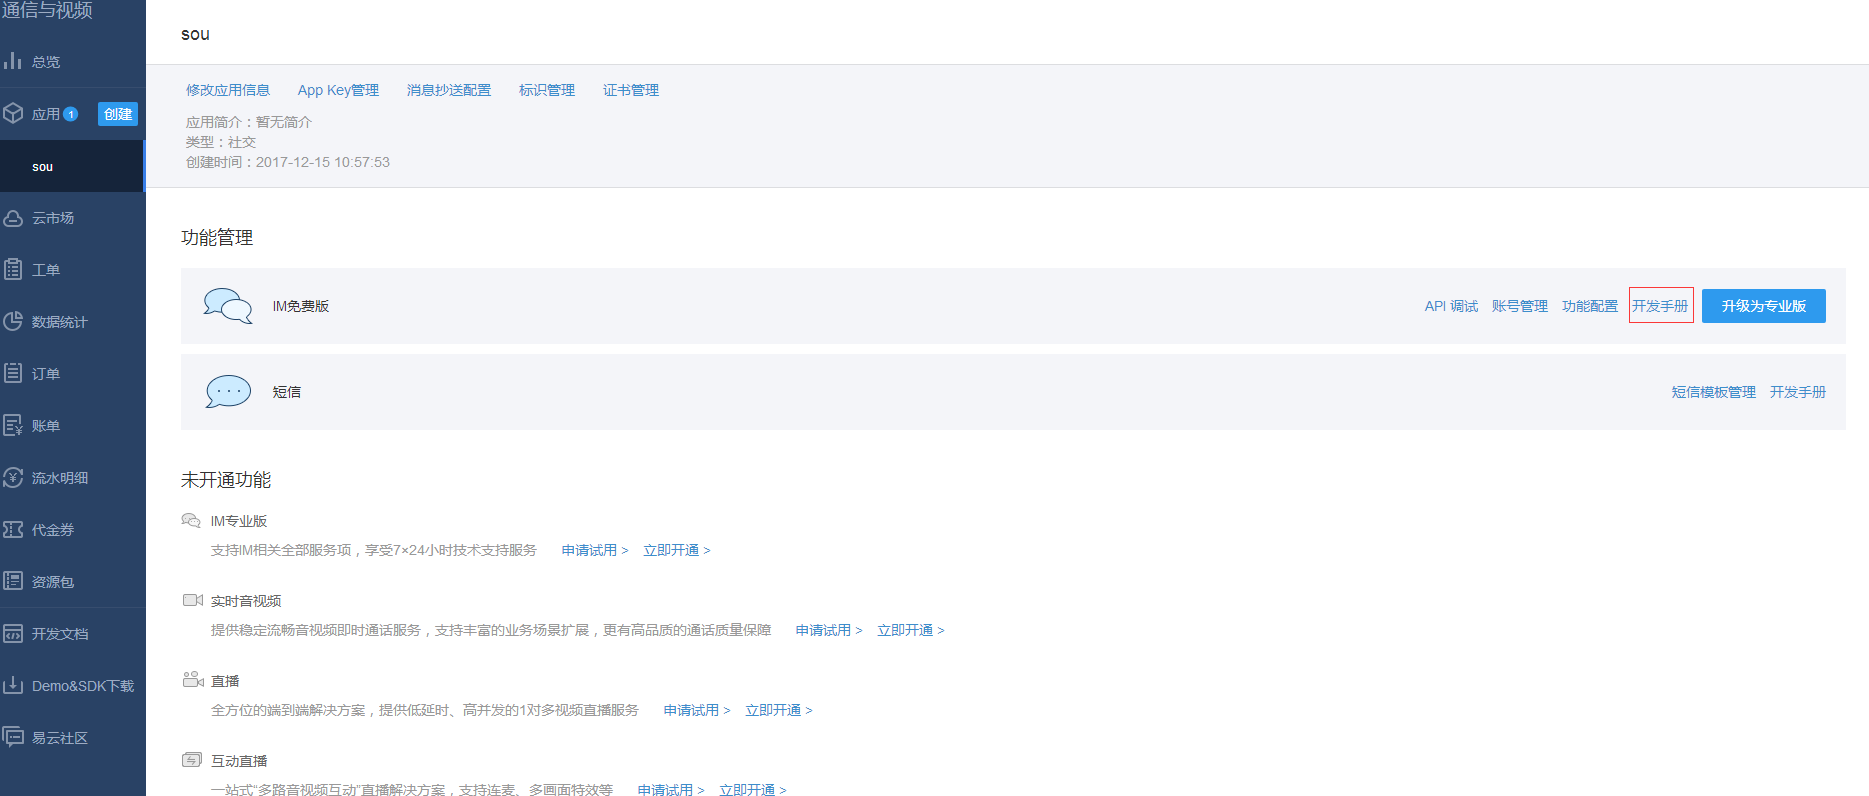
1.登录云信的官网 https://netease.im/?from=bdjjnim0034
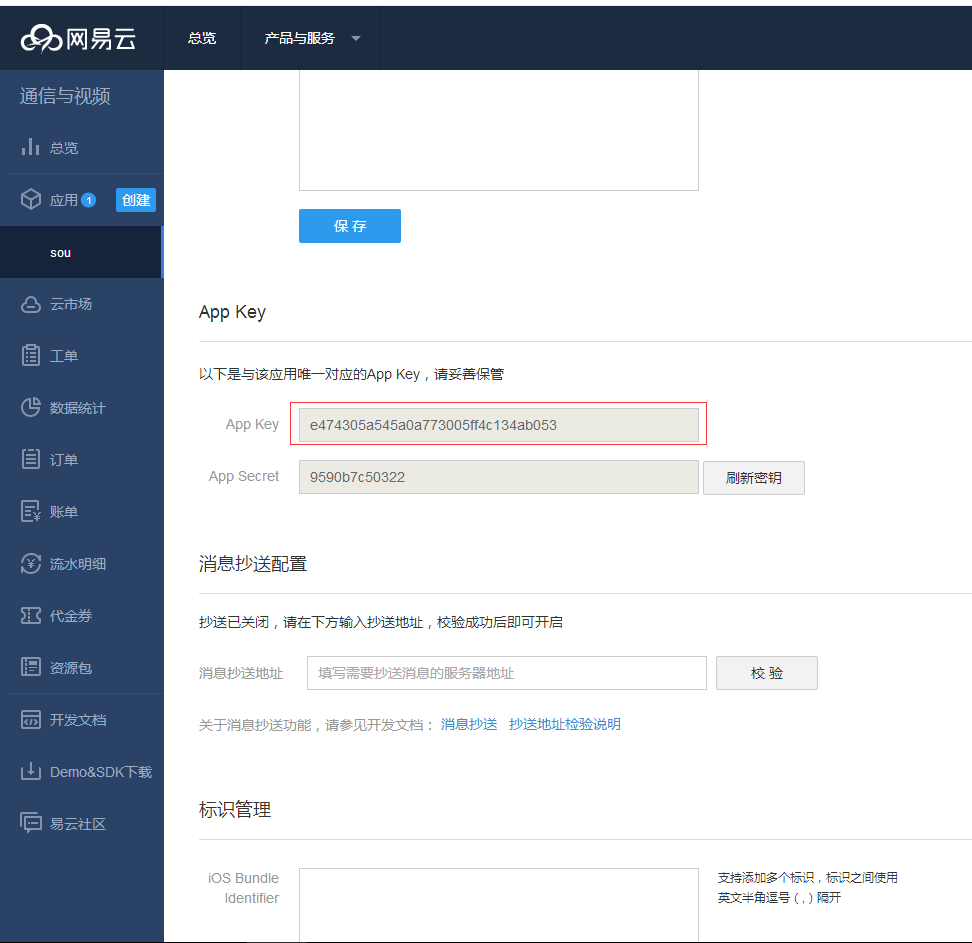
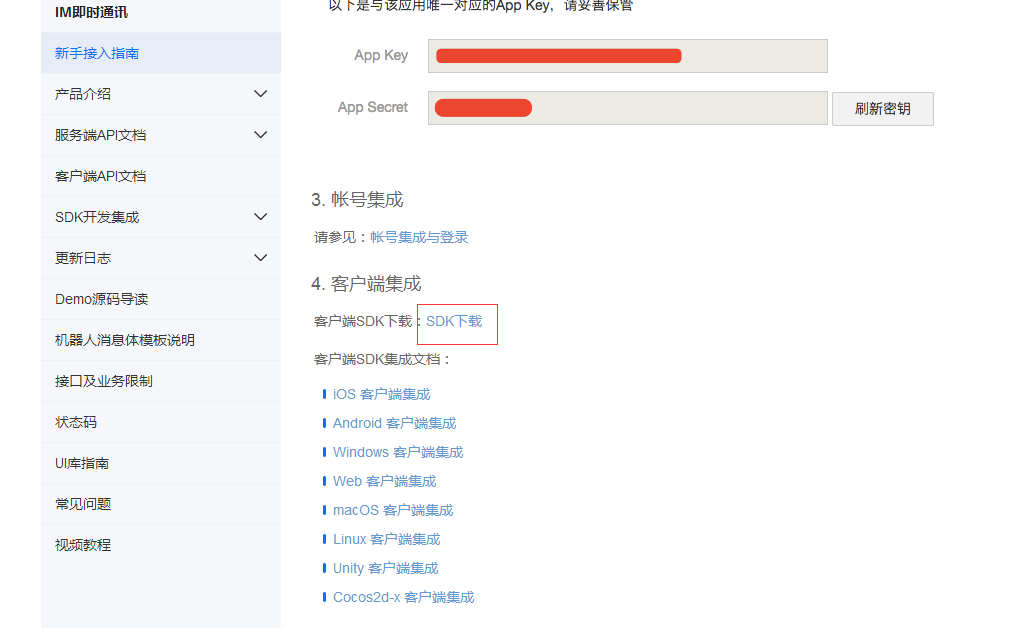
注册一个账号并登录 然后点击AppKey管理 就可以得到AppKey了
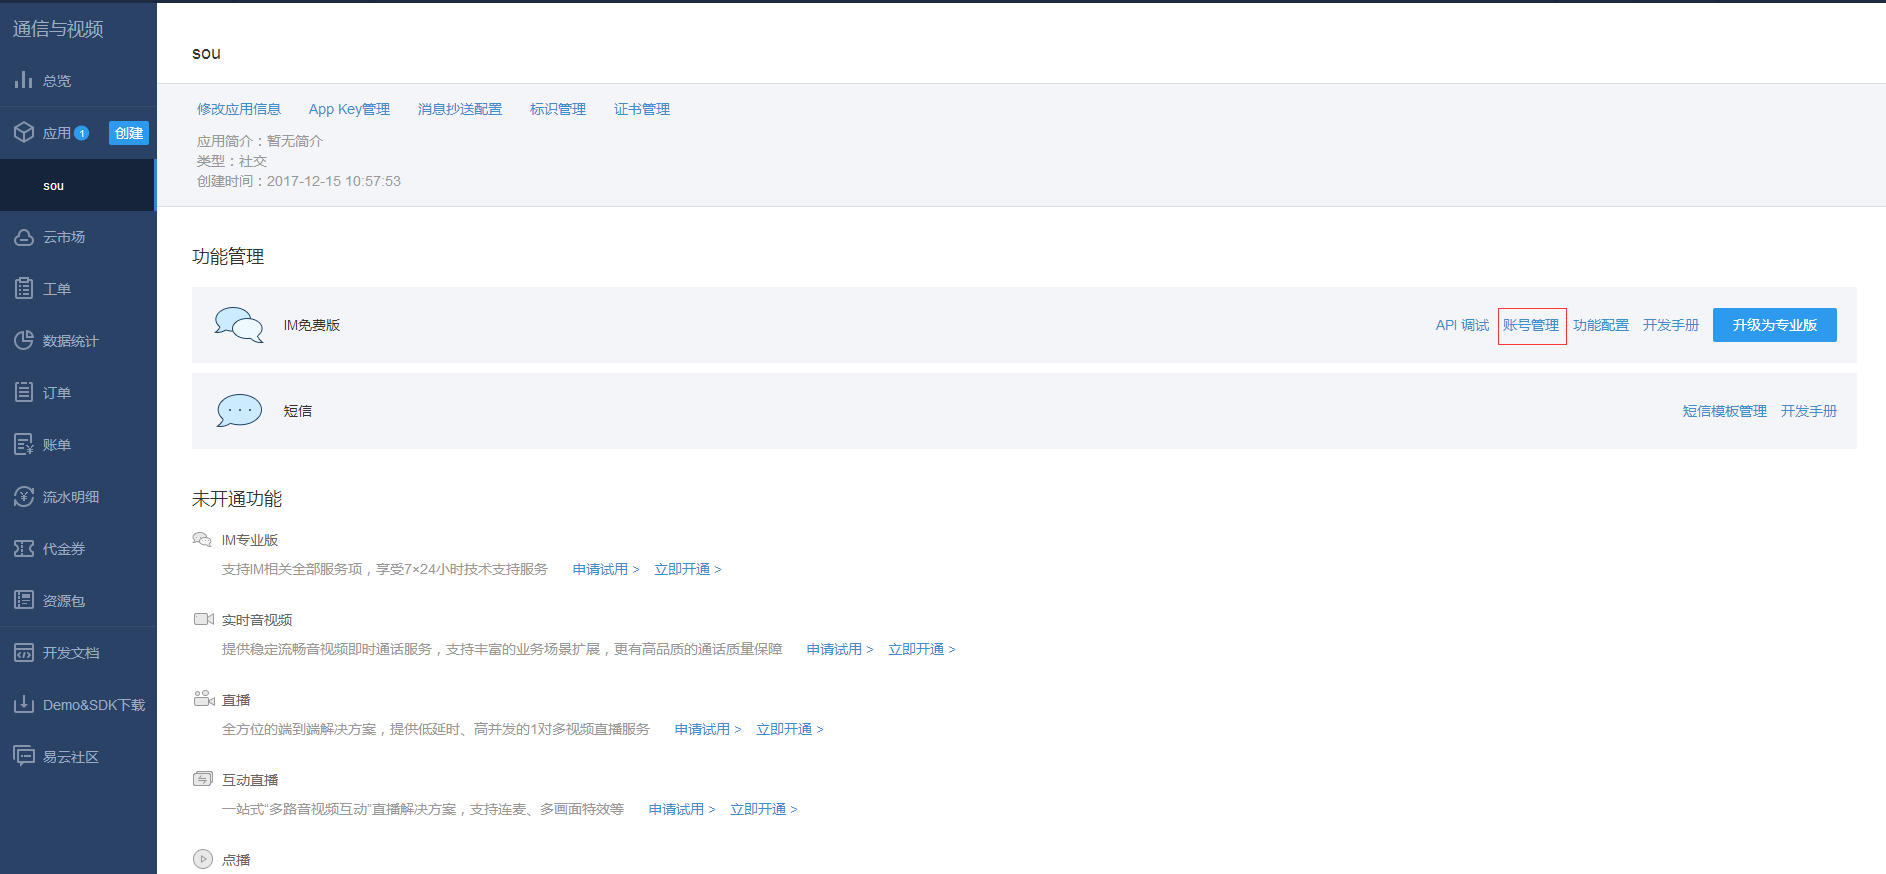
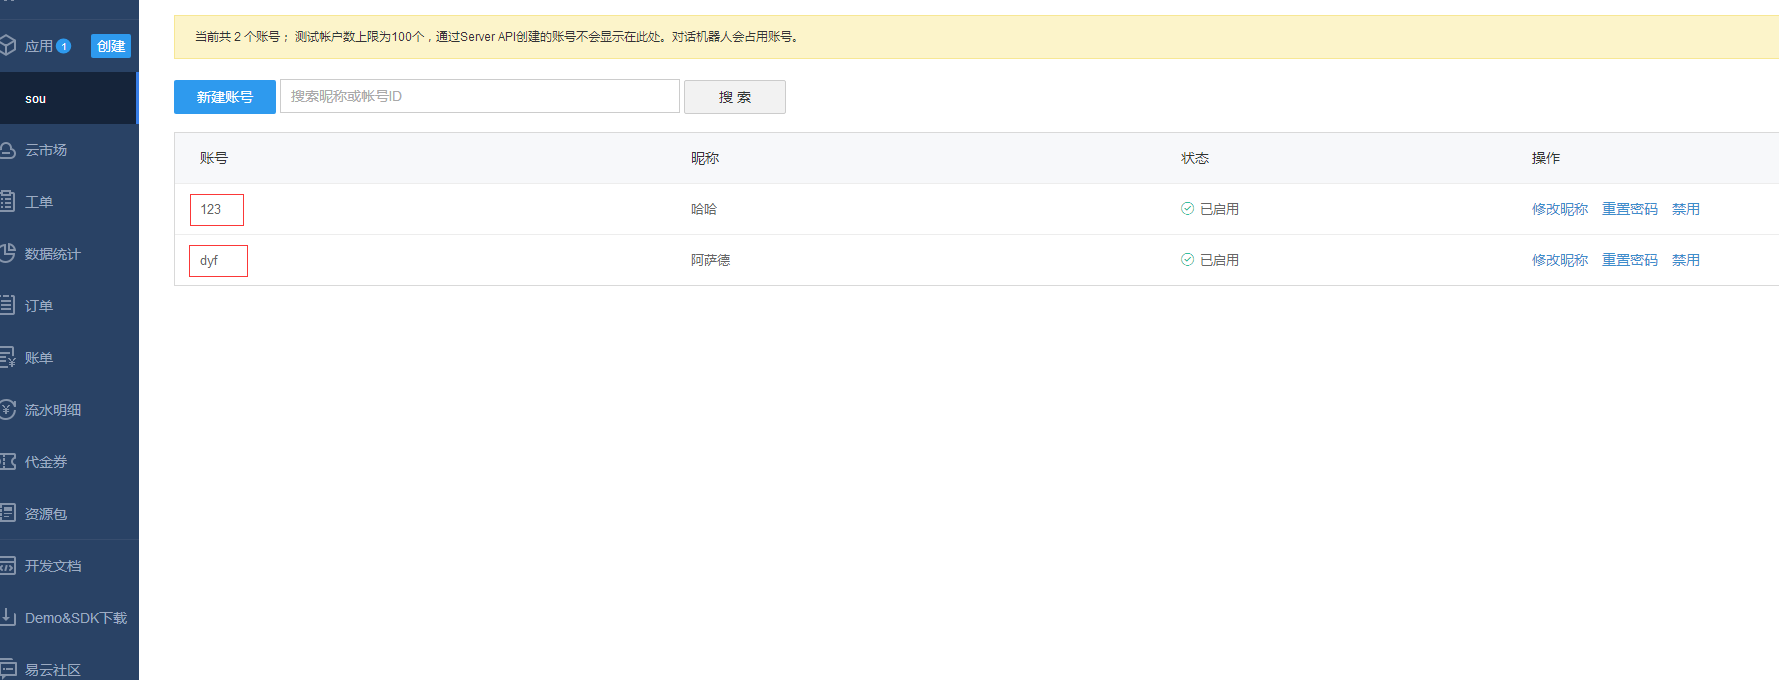
2.点击账号管理 然后进去创建账号 作为测试用的 到时候运行的时候就可以用创建的账号登录
3.我在这里只创建了2个
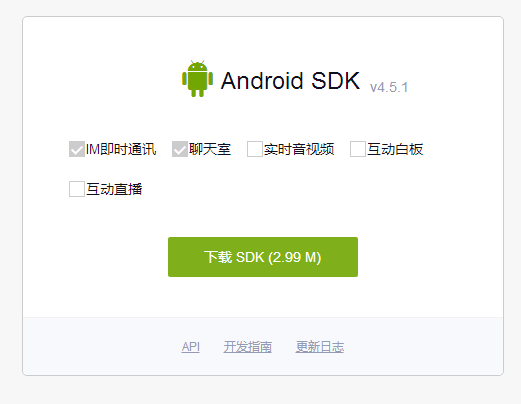
4.然后点击开发手册 点击新手开发指南 滑到下面点击SDK下载 然后选择下载
5.下载完之后把libs里面的文件和包都复制到你的项目中 导包
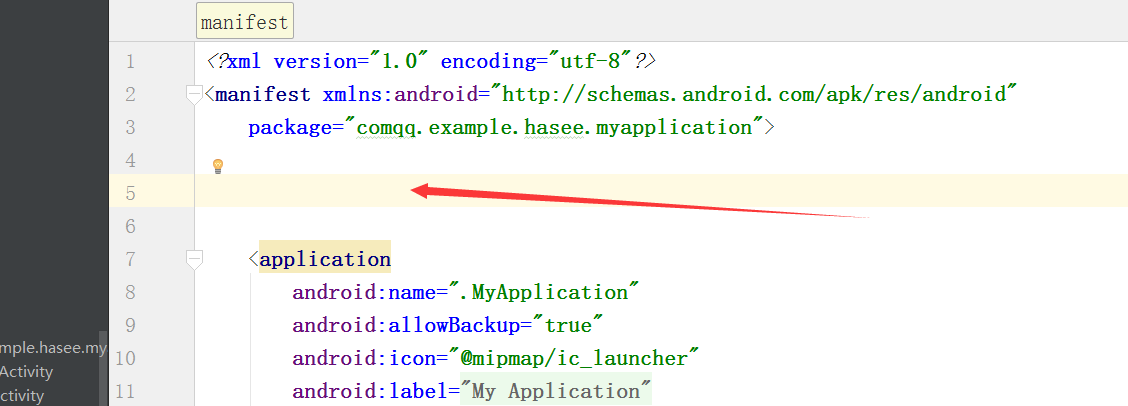
6.在清单文件中添加权限 将下面的权限 复制到下图所示
<!-- 权限声明 -->
    <!-- 访问网络状态-->
    <uses-permission android:name="android.permission.INTERNET" />
    <uses-permission android:name="android.permission.ACCESS_NETWORK_STATE" />
    <uses-permission android:name="android.permission.ACCESS_WIFI_STATE" />
    <!-- 控制呼吸灯,振动器等,用于新消息提醒 -->
    <uses-permission android:name="android.permission.FLASHLIGHT" />
    <uses-permission android:name="android.permission.VIBRATE" />
    <!-- 外置存储存取权限 -->
    <uses-permission android:name="android.permission.READ_EXTERNAL_STORAGE"/>
    <uses-permission android:name="android.permission.WRITE_EXTERNAL_STORAGE"/>

    <!-- 多媒体相关 -->
    <uses-permission android:name="android.permission.CAMERA"/>
    <uses-permission android:name="android.permission.RECORD_AUDIO"/>
    <uses-permission android:name="android.permission.READ_PHONE_STATE"/>

    <!-- 如果需要实时音视频通话模块,下面的权限也是必须的。否则,可以不加 -->
    <uses-permission android:name="android.permission.BLUETOOTH" />
    <uses-permission android:name="android.permission.BLUETOOTH_ADMIN" />
    <uses-permission android:name="android.permission.MODIFY_AUDIO_SETTINGS"/>
    <uses-permission android:name="android.permission.BROADCAST_STICKY"/>
    <uses-feature android:name="android.hardware.camera" />
    <uses-feature android:name="android.hardware.camera.autofocus" />
    <uses-feature android:glEsVersion="0x00020000" android:required="true" />

    <!-- SDK 权限申明, 第三方 APP 接入时,请将 com.netease.nim.demo 替换为自己的包名 -->
    <!-- 和下面的 uses-permission 一起加入到你的 AndroidManifest 文件中。 -->
    <permission
        android:name="com.netease.nim.demo.permission.RECEIVE_MSG"
        android:protectionLevel="signature"/>
    <!-- 接收 SDK 消息广播权限, 第三方 APP 接入时,请将 com.netease.nim.demo 替换为自己的包名 -->
     <uses-permission android:name="com.netease.nim.demo.permission.RECEIVE_MSG"/>
7.同上 android:value="e474305a545a0a773005ff4c134ab053" 这里面填的参数是之前获得的AppKey
<!--
             APP key, 可以在这里设置,也可以在 SDKOptions 中提供。
            如果 SDKOptions 中提供了,取 SDKOptions 中的值。
        -->
        <meta-data
            android:name="com.netease.nim.appKey"
            android:value="e474305a545a0a773005ff4c134ab053" />

        <!-- 云信后台服务,请使用独立进程。 -->
        <service
            android:name="com.netease.nimlib.service.NimService"
            android:process=":core" />

        <!-- 云信后台辅助服务 -->
        <service
            android:name="com.netease.nimlib.service.NimService$Aux"
            android:process=":core" />

        <!-- 云信后台辅助服务 -->
        <service
            android:name="com.netease.nimlib.job.NIMJobService"
            android:exported="true"
            android:permission="android.permission.BIND_JOB_SERVICE"
            android:process=":core" />

        <!-- 云信监视系统启动和网络变化的广播接收器,保持和 NimService 同一进程 -->
        <receiver
            android:name="com.netease.nimlib.service.NimReceiver"
            android:exported="false"
            android:process=":core">
            <intent-filter>
                <action android:name="android.intent.action.BOOT_COMPLETED" />
                <action android:name="android.net.conn.CONNECTIVITY_CHANGE" />
            </intent-filter>
        </receiver>

        <!-- 云信进程间通信 Receiver -->
        <receiver android:name="com.netease.nimlib.service.ResponseReceiver" />

        <!-- 云信进程间通信service -->
        <service android:name="com.netease.nimlib.service.ResponseService" />

        <!-- 云信进程间通信provider -->
        <!-- android:authorities="{包名}.ipc.provider", 请将com.netease.nim.demo替换为自己的包名 -->
        <provider
            android:name="com.netease.nimlib.ipc.NIMContentProvider"
            android:authorities="comqq.example.hasee.myapplication.ipc.provider"
            android:exported="false"
            android:process=":core" />

        <activity android:name=".Main2Activity"></activity>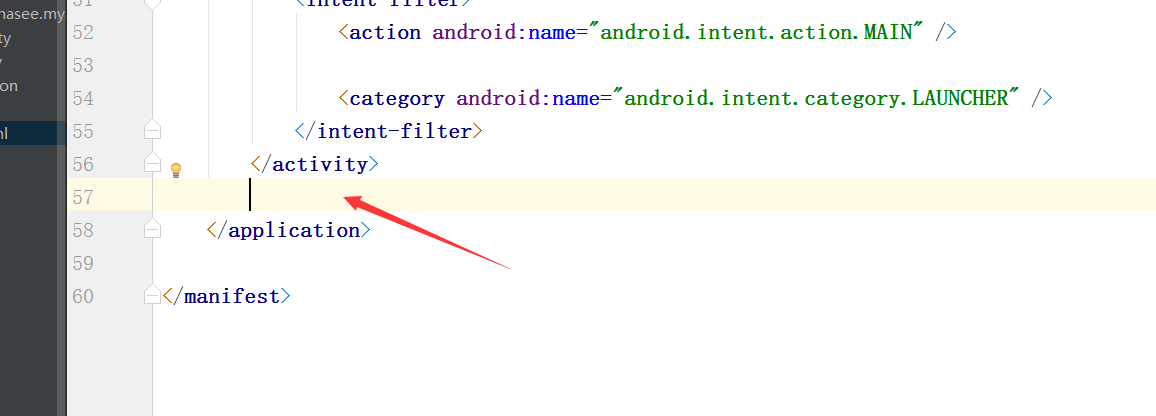
8.创建一个类MyApplication继承Application 下面是代码
 @Override
    public void onCreate() {
        super.onCreate();

        // SDK初始化(启动后台服务,若已经存在用户登录信息, SDK 将完成自动登录)
        NIMClient.init(this, loginInfo(), options());
    }

    // 如果返回值为 null,则全部使用默认参数。
    private SDKOptions options() {
        SDKOptions options = new SDKOptions();

        // 如果将新消息通知提醒托管给 SDK 完成,需要添加以下配置。否则无需设置。
        StatusBarNotificationConfig config = new StatusBarNotificationConfig();
        config.notificationEntrance = Main2Activity.class; // 点击通知栏跳转到该Activity
        config.notificationSmallIconId = R.mipmap.ic_launcher_round;
        // 呼吸灯配置
        config.ledARGB = Color.GREEN;
        config.ledOnMs = 1000;
        config.ledOffMs = 1500;
        // 通知铃声的uri字符串
        config.notificationSound = "android.resource://com.netease.nim.demo/raw/msg";
        options.statusBarNotificationConfig = config;

        // 配置保存图片,文件,log 等数据的目录
        // 如果 options 中没有设置这个值,SDK 会使用下面代码示例中的位置作为 SDK 的数据目录。
        // 该目录目前包含 log, file, image, audio, video, thumb 这6个目录。
        // 如果第三方 APP 需要缓存清理功能, 清理这个目录下面个子目录的内容即可。
        String sdkPath = Environment.getExternalStorageDirectory() + "/" + getPackageName() + "/nim";
        options.sdkStorageRootPath = sdkPath;

        // 配置是否需要预下载附件缩略图,默认为 true
        options.preloadAttach = true;

        // 配置附件缩略图的尺寸大小。表示向服务器请求缩略图文件的大小
        // 该值一般应根据屏幕尺寸来确定, 默认值为 Screen.width / 2
        options.thumbnailSize = 480/2;

        // 用户资料提供者, 目前主要用于提供用户资料,用于新消息通知栏中显示消息来源的头像和昵称
        options.userInfoProvider = new UserInfoProvider() {
            @Override
            public UserInfo getUserInfo(String account) {
                return null;
            }

            @Override
            public String getDisplayNameForMessageNotifier(String account, String sessionId,
                                                           SessionTypeEnum sessionType) {
                return null;
            }

            @Override
            public Bitmap getAvatarForMessageNotifier(SessionTypeEnum sessionType, String sessionId) {
                return null;
            }
        };
        return options;
    }

    // 如果已经存在用户登录信息,返回LoginInfo,否则返回null即可
    private LoginInfo loginInfo() {
        return null;
    }
9.主布局
<LinearLayout xmlns:android="http://schemas.android.com/apk/res/android"
    xmlns:app="http://schemas.android.com/apk/res-auto"
    xmlns:tools="http://schemas.android.com/tools"
    android:layout_width="match_parent"
    android:layout_height="match_parent"
    tools:context="comqq.example.hasee.myapplication.MainActivity"
    android:orientation="vertical">

    <EditText
        android:id="@+id/et1"
        android:layout_width="match_parent"
        android:layout_height="50dp"
       android:hint="请输入账号"
        />
    <EditText
        android:id="@+id/et2"
        android:layout_width="match_parent"
        android:layout_height="50dp"
        android:hint="请输入密码"
        />
    <Button
        android:id="@+id/but1"
        android:layout_width="wrap_content"
        android:layout_height="wrap_content"
        android:onClick="cc"
        android:text="登录"/>

</LinearLayout>
10.主函数
public class MainActivity extends AppCompatActivity {

    private EditText et1,et2;
    @Override
    protected void onCreate(Bundle savedInstanceState) {
        super.onCreate(savedInstanceState);
        setContentView(R.layout.activity_main);
        et1=findViewById(R.id.et1);
        et2=findViewById(R.id.et2);
    }
    public void cc(View view){
        switch (view.getId()) {
            case R.id.but1:
                //封装登录信息.
                LoginInfo info
                        = new LoginInfo(et1.getText().toString(),et2.getText().toString());
                //请求服务器的回调
                RequestCallback<LoginInfo> callback =
                        new RequestCallback<LoginInfo>() {
                            @Override
                            public void onSuccess(LoginInfo param) {
                                Toast.makeText(MainActivity.this, "登录成功", Toast.LENGTH_SHORT).show();

                                // 可以在此保存LoginInfo到本地,下次启动APP做自动登录用

                                //跳转到消息页面
                                startActivity(new Intent(MainActivity.this,Main2Activity.class));
                                finish();
                            }

                            @Override
                            public void onFailed(int code) {
                                Toast.makeText(MainActivity.this, "登录失败", Toast.LENGTH_SHORT).show();

                            }

                            @Override
                            public void onException(Throwable exception) {
                                Toast.makeText(MainActivity.this, exception.toString(), Toast.LENGTH_SHORT).show();
                            }

                        };
                //发送请求.
                NIMClient.getService(AuthService.class).login(info)
                        .setCallback(callback);

                break;
        }

    }
}
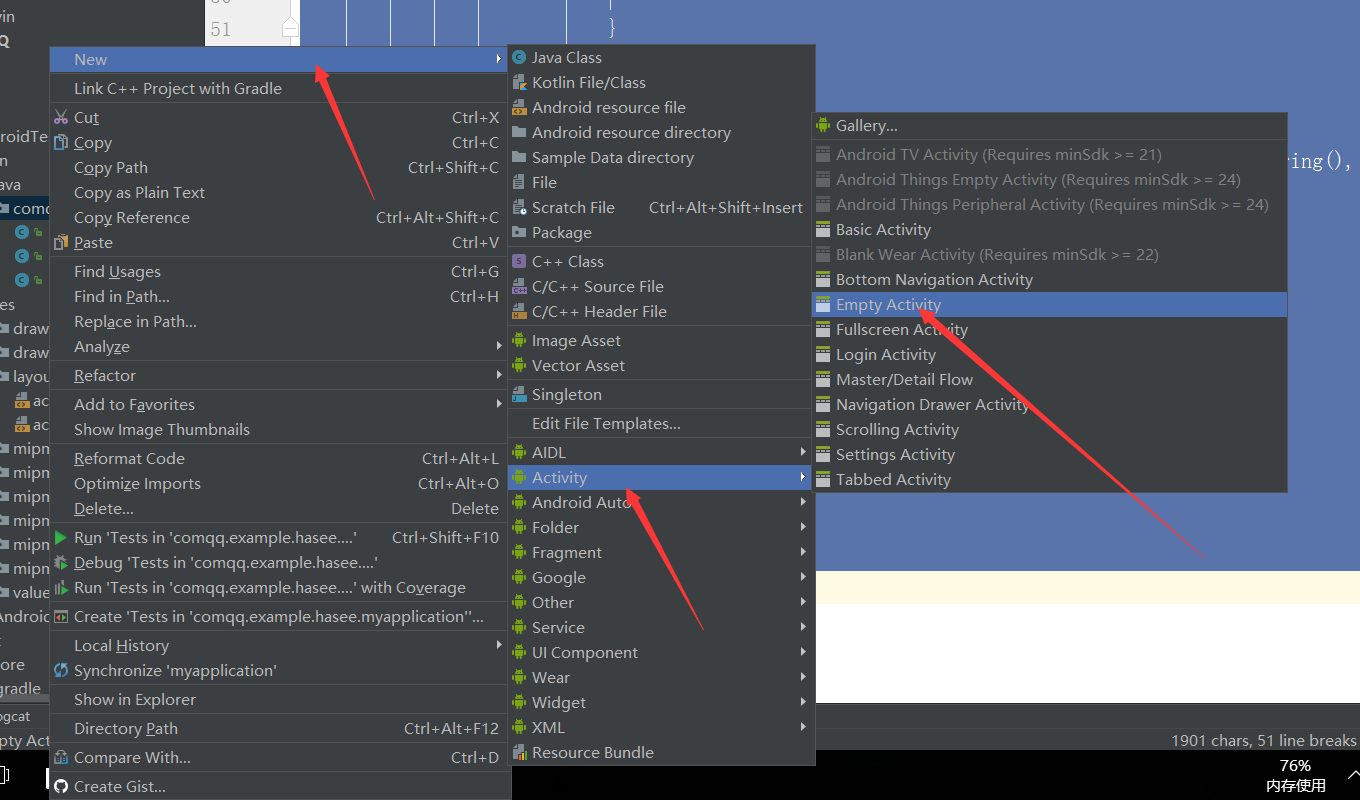
11.创建一个新的Activity
12.副布局
<LinearLayout xmlns:android="http://schemas.android.com/apk/res/android"
    android:layout_width="match_parent"
    android:layout_height="match_parent"
    android:orientation="vertical">

    <TextView
        android:layout_width="match_parent"
        android:layout_height="wrap_content"
        android:layout_gravity="center_horizontal"
        android:background="@android:color/holo_green_light"
        android:gravity="center"
        android:paddingBottom="10dp"
        android:paddingTop="10dp"
        android:text="单聊"
        android:textColor="@android:color/white"
        android:textSize="20sp" />

    <LinearLayout
        android:layout_width="match_parent"
        android:layout_height="0dp"
        android:layout_weight="1"
        android:orientation="vertical"
        android:paddingLeft="20dp"
        android:paddingRight="20dp">

        <TextView
            android:layout_width="wrap_content"
            android:layout_height="wrap_content"
            android:text="收到的消息:" />

        <TextView
            android:id="@+id/tv1"
            android:layout_width="wrap_content"
            android:layout_height="0dp"
            android:layout_weight="1"
            android:text="1111"
            android:textColor="@android:color/holo_red_light" />

        <TextView
            android:layout_width="wrap_content"
            android:layout_height="wrap_content"
            android:text="发出的消息:" />

        <TextView
            android:id="@+id/tv2"
            android:layout_width="wrap_content"
            android:layout_height="0dp"
            android:layout_weight="1"
            android:text="2222"
            android:textColor="@android:color/holo_blue_light" />
    </LinearLayout>

    <EditText
        android:id="@+id/et3"
        android:layout_width="match_parent"
        android:layout_height="wrap_content"
        android:layout_marginLeft="20dp"
        android:layout_marginRight="20dp"
        android:layout_marginTop="5dp"
        android:hint="输入消息..." />

    <LinearLayout
        android:layout_width="match_parent"
        android:layout_height="wrap_content"
        android:orientation="horizontal"
        android:paddingLeft="10dp"
        android:paddingRight="10dp">

        <Button
            android:id="@+id/but2"
            android:layout_width="0dp"
            android:layout_height="wrap_content"
            android:layout_weight="1"
            android:text="选择联系人"
            android:onClick="aa"/>

        <Button
            android:id="@+id/but3"
            android:layout_width="0dp"
            android:layout_height="wrap_content"
            android:layout_weight="1"
            android:text="发送"
            android:onClick="aa"/>

        <Button
            android:id="@+id/but4"
            android:layout_width="0dp"
            android:layout_height="wrap_content"
            android:layout_weight="1"
            android:text="退出"
            android:onClick="aa"/>
    </LinearLayout>

</LinearLayout>
13.副函数
public class Main2Activity extends AppCompatActivity {
    private TextView tv1,tv2;
    private EditText et3;
    private String account;
    private Observer<List<IMMessage>> incomingMessageObserver;


    @Override
    protected void onCreate(Bundle savedInstanceState) {
        super.onCreate(savedInstanceState);
        setContentView(R.layout.activity_main2);
        tv1=findViewById(R.id.tv1);
        tv2=findViewById(R.id.tv2);
        et3=findViewById(R.id.et3);

        // 处理新收到的消息,为了上传处理方便,SDK 保证参数 messages 全部来自同一个聊天对象。
        //消息接收观察者
        incomingMessageObserver = new Observer<List<IMMessage>>() {
            @Override
            public void onEvent(List<IMMessage> messages) {
                // 处理新收到的消息,为了上传处理方便,SDK 保证参数 messages 全部来自同一个聊天对象。
                IMMessage imMessage = messages.get(0);
                tv1.setText(imMessage.getFromNick() + "-->:" + imMessage.getContent());
                account = imMessage.getFromAccount();
            }
        };
        //注册消息接收观察者,
        //true,代表注册.false,代表注销
        NIMClient.getService(MsgServiceObserve.class)
                .observeReceiveMessage(incomingMessageObserver, true);

    }
    public void aa(View view){
        switch (view.getId()) {
            case R.id.but2:
                //选择联系人.
                //这个数组里面填的是你的账号   也就是之前创建的测试号
                final String[] accounts = {"123", "dyf"};
                final String[] items = {
                        "哈哈",
                        "阿萨德",

                };
                new AlertDialog.Builder(this)
                        .setTitle("请选择联系人!")
                        .setItems(items, new DialogInterface.OnClickListener() {
                            @Override
                            public void onClick(DialogInterface dialog, int which) {
                                account = accounts[which];
                                Toast.makeText(Main2Activity.this, items[which], Toast.LENGTH_SHORT).show();
                            }
                        })
                        .create()
                        .show();
                break;
            case R.id.but3:
                //发送消息
                // 以单聊类型为例
                SessionTypeEnum sessionType = SessionTypeEnum.P2P;
                String text = et3.getText().toString();
                // 创建一个文本消息
                IMMessage textMessage = MessageBuilder.createTextMessage(account, sessionType, text);
                // 发送给对方
                NIMClient.getService(MsgService.class).sendMessage(textMessage, false);
                tv2.setText(text);

                break;
            case R.id.but4:
                //退出登录
                NIMClient.getService(AuthService.class).logout();
                finish();
                startActivity(new Intent(this, MainActivity.class));
                break;
        }

    }

    @Override
    protected void onDestroy() {
        super.onDestroy();
        //注销消息接收观察者.
        NIMClient.getService(MsgServiceObserve.class)
                .observeReceiveMessage(incomingMessageObserver, false);
    }
}


 4080
4080


 被折叠的 条评论
为什么被折叠?
被折叠的 条评论
为什么被折叠?
 到【灌水乐园】发言


