


关于SpringMVC+MyBatis+C3P0连接池结合的框架做了一个配置:
首先导入相关的架包:
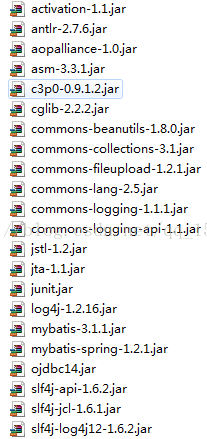
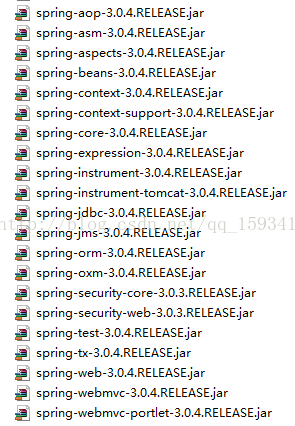
其中有些可以删除,像commons-fileupload-1.2.1.jar是做上传用的,我们可以扔掉,还有一些看自己所需吧。
配置web.xml:
<!--字符编码过滤器-->
 <filter>
		<filter-name>CharacterEncodingFilter</filter-name>
		<filter-class>org.springframework.web.filter.CharacterEncodingFilter</filter-class>
		<init-param>
			<param-name>encoding</param-name>
			<param-value>utf-8</param-value>
		</init-param>
		<init-param><pre name="code" class="java"><!--配置spring监听器-->
	<listener>
		<listener-class>org.springframework.web.context.ContextLoaderListener</listener-class>
	</listener>
    <context-param>
		<param-name>contextConfigLocation</param-name>
		<param-value>classpath:applicationContext.xml</param-value>
	</context-param>
                <param-name>forceEncoding</param-name>
                <param-value>true</param-value>
                </init-param></filter>
  <filter-mapping><filter-name>CharacterEncodingFilter</filter-name>
  <url-pattern>/*</url-pattern></filter-mapping>
<!--核心控制器,负责将请求分配给控制对象-->
	<servlet>
		<servlet-name>springMVC</servlet-name>
		<servlet-class>org.springframework.web.servlet.DispatcherServlet</servlet-class>
		<init-param>
        <param-name>contextConfigLocation</param-name>
        <param-value>classpath:springMVC-servlet.xml</param-value>
        </init-param>
		<load-on-startup>1</load-on-startup>
	</servlet>
	<servlet-mapping>
		<servlet-name>springMVC</servlet-name>
		<url-pattern>*.do</url-pattern>
	</servlet-mapping>
在配置Spring文件之前,我们要先配置一下属性文件:jdbc.properties(这里用的oracle数据库)
datasource.driverClassName=oracle.jdbc.driver.OracleDriver
datasource.url=jdbc\:oracle\:thin\:@localhost\:1521\:orcl
datasource.username=dglt
datasource.password=12345


c3p0.acquireIncrement=3
c3p0.initialPoolSize=3
c3p0.idleConnectionTestPeriod=60
c3p0.minPoolSize=5
c3p0.maxPoolSize=100
c3p0.maxStatements=100
c3p0.numHelperThreads=10
c3p0.maxIdleTime=60
Spring相关文件配置(applicationContext.xml):
1)配置c3p0连接池:
<bean id="placeholderConfig"
          class="org.springframework.beans.factory.config.PropertyPlaceholderConfigurer">
        <property name="locations">
	        <list>
	            <value>classpath:jdbc.properties</value>
	        </list>
        </property>
</bean>

    <!-- data source -->
    <bean id="dataSource"
          class="com.mchange.v2.c3p0.ComboPooledDataSource"
          destroy-method="close">
        <property name="driverClass">
            <value>${datasource.driverClassName}</value>
        </property>
        <property name="jdbcUrl">
            <value>${datasource.url}</value>
        </property>
        <property name="user">
            <value>${datasource.username}</value>
        </property>
        <property name="password">
            <value>${datasource.password}</value>
        </property>
        <!--当连接池中的连接耗尽的时候c3p0一次同时获取的连接数。Default: 3 -->
        <property name="acquireIncrement">
            <value>${c3p0.acquireIncrement}</value>
        </property>
        <!--初始化时获取三个连接,取值应在minPoolSize与maxPoolSize之间。Default: 3 -->
        <property name="initialPoolSize">
            <value>${c3p0.initialPoolSize}</value>
        </property>
        <property name="minPoolSize">
            <value>${c3p0.minPoolSize}</value>
        </property>
        <property name="maxPoolSize">
            <value>${c3p0.maxPoolSize}</value>
        </property>
        <!--最大空闲时间,60秒内未使用则连接被丢弃。若为0则永不丢弃。Default: 0 -->
        <property name="maxIdleTime">
            <value>${c3p0.maxIdleTime}</value>
        </property>
        <!--每60秒检查所有连接池中的空闲连接。Default: 0 -->
        <property name="idleConnectionTestPeriod">
            <value>${c3p0.idleConnectionTestPeriod}</value>
        </property>
        <!-- JDBC的标准参数,用以控制数据源内加载的PreparedStatements数量。但由于预缓存的statements
	                        属于单个connection而不是整个连接池。所以设置这个参数需要考虑到多方面的因素。
	                        如果maxStatements与maxStatementsPerConnection均为0,则缓存被关闭。Default: 0-->
        <property name="maxStatements">
            <value>${c3p0.maxStatements}</value>
        </property>
        <!-- c3p0是异步操作的,缓慢的JDBC操作通过帮助进程完成。扩展这些操作可以有效的提升性能 通过
                                  多线程实现多个操作同时被执行。Default: 3-->
        <property name="numHelperThreads">
            <value>${c3p0.numHelperThreads}</value>
        </property>
</bean><bean id="sqlSessionFactory" class="org.mybatis.spring.SqlSessionFactoryBean">
<property name="dataSource" ref="dataSource" />
<property name="configLocation" value="classpath:SqlMapConfig.xml"></property>
</bean> <bean id="sqlSessionTemplate" class="org.mybatis.spring.SqlSessionTemplate">
<constructor-arg ref="sqlSessionFactory"></constructor-arg>
</bean><bean name="txManager" class="org.springframework.jdbc.datasource.DataSourceTransactionManager">
<property name="dataSource" ref="dataSource"></property>
</bean>
<tx:annotation-driven transaction-manager="txManager"/><context:component-scan base-package="包路径" />
配置和前台相关的xml(springMVC-servlet.xml):
<?xml version="1.0" encoding="UTF-8"?>
<beans xmlns="http://www.springframework.org/schema/beans"
    xmlns:xsi="http://www.w3.org/2001/XMLSchema-instance"
    xmlns:aop="http://www.springframework.org/schema/aop"
    xmlns:context="http://www.springframework.org/schema/context"
    xsi:schemaLocation="
        http://www.springframework.org/schema/beans http://www.springframework.org/schema/beans/spring-beans-3.0.xsd
        http://www.springframework.org/schema/context http://www.springframework.org/schema/context/spring-context-3.0.xsd
        http://www.springframework.org/schema/aop http://www.springframework.org/schema/aop/spring-aop-3.0.xsd">


  <!-- 启用spring mvc 注解 -->
    <context:annotation-config />


    <!-- 使用annotation 自动注册bean,并保证@Required,@Autowired,@Controller的属性被注入, 包路径自己修改-->
    <context:component-scan base-package="ck.cn.contractmanage.web.spring" />
    <context:component-scan base-package="ck.cn.systemmanage.web.spring" />

    <!-- 对模型视图名称的解析,即在模型视图名称添加前后缀 -->
    <bean class="org.springframework.web.servlet.view.InternalResourceViewResolver">
        <property name="viewClass" value="org.springframework.web.servlet.view.JstlView" />
        <property name="prefix" value="/WEB-INF/jsp/" />  <!--默认会查找该目录下面的jsp页面  -->
        <property name="suffix" value=".jsp" />
    </bean>
    <!-- ②:启动Spring MVC的注解功能,完成请求和注解POJO(java简单对象)的映射 -->
    <bean class="org.springframework.web.servlet.mvc.annotation.AnnotationMethodHandlerAdapter"/>


</beans><?xml version="1.0" encoding="UTF-8"?>
<!DOCTYPE configuration
PUBLIC "-//ibatis.apache.org//DTD Config 3.0//EN"
"http://ibatis.apache.org/dtd/ibatis-3-config.dtd">
<configuration>
<settings >
<!-- 不启用延迟加载 -->
<setting name="lazyLoadingEnabled" value="false"/>
</settings>
<!-- 为bean 起别名:使用它们你可以不用输入类的全路径,type为相关bean的路径,alias为bean起别名 -->
<typeAliases>
<typeAlias type="ck.cn.contractmanage.model.ContractVo" alias="Contractbean"/>
<typeAlias type="ck.cn.systemmanage.model.ParameterVo" alias="Parameterbean"/>
</typeAliases>
<!-- 配置orm映射 -->
<mappers>
<mapper resource="ck/cn/contractmanage/model/ContractVo.xml"/>
<mapper resource="ck/cn/systemmanage/model/ParameterVo.xml"/>
</mappers>
</configuration>
<?xml version="1.0" encoding="UTF-8"?>
<!DOCTYPE mapper
PUBLIC "-//ibatis.apache.org//DTD Mapper 3.0//EN"
"http://ibatis.apache.org/dtd/ibatis-3-mapper.dtd">

<!--Mapper配置文件主要是实现POJO类和sql之间的映射 其中#{id}是需要传入的参数,parameterType是参数的类型,resultMap是查询返回的结果类-->
<!-- 配置orm映射  确保数据库中的列能和bean中的列相对应  -->
<!--如果返回类型为resultType时,java对象的属性应和数据库表里的各字段保持一致,这样在查出结果后mybatis会将Map里面的键值对取出赋给resultType所指定的对象对应的属性。
如果不一致要写成下面的:用restutMap -->


<mapper	namespace="ck.cn.contractmanage.dao" > <!--配置到接口即可-->

<!--当实体类属性跟数据库字段不一致时映射结果集: 返回用restutMap-->
<resultMap type="Contractbean"  id="ContractVoMap">
<id  property="id"      column="id"/>
<id  property="jzmc"    column="jzmc"/>
<id  property="hetong"  column="hetong"/>
<id  property="qibie_id"   column="qibie_id"/>
<id  property="quyu_id"    column="quyu_id"/>
<id  property="zhenqu_id" column="zhenqu_id"/>
<id  property="mianji"  column="mianji"/>
<id  property="dizhi"   column="dizhi"/>
<id  property="yzmc"    column="yzmc"/>
<id  property="yzdh"    column="yzdh"/>
</resultMap>


<!-- 指定主键增加 -->
<insert id="insert_SQL" parameterType="Contractbean">
insert into hetong(id,jzmc,hetong)values(#{id},#{jzmc},#{hetong})
</insert>

<insert id="insertHetong" parameterType="Contractbean">
<selectKey resultType="java.lang.Long" order="BEFORE"   keyProperty="id">
        SELECT HETONG_SEQ.Nextval  FROM DUAL
 </selectKey>
	insert into
	hetong(
	id,
	jzmc,
	hetong,
	qibie_id,
	quyu_id,
	zhenqu_id,
	mianji,
	dizhi,
	yzmc,
	yzdh)
	values
	(
	#{id,jdbcType=VARCHAR},
	#{jzmc,jdbcType=VARCHAR},
	#{hetong,jdbcType=VARCHAR},
	#{qibie_id,jdbcType=VARCHAR},
	#{quyu_id,jdbcType=VARCHAR},
	#{zhenqu_id,jdbcType=VARCHAR},
	#{mianji,jdbcType=VARCHAR},
	#{dizhi,jdbcType=VARCHAR},
	#{yzmc,jdbcType=VARCHAR},
	#{yzdh,jdbcType=VARCHAR}
	)
</insert>


<!-- 根据id查 -->
<select id="queryHetongByid" parameterType="Contractbean" resultMap="ContractVoMap">
select  id, jzmc,hetong,qibie_id,quyu_id,zhenqu_id,mianji,dizhi,yzmc,yzdh from  hetong  where id=#{id}
</select>
<!-- 查询所有 -->
<select id="queryCount" resultType="int">
select  count(*) as count from  hetong
</select>

<!-- 动态查询  -->
<select id="queryDynamic_SQL" parameterType="Contractbean" resultMap="ContractVoMap">
select hetong.id as id,
       hetong.jzmc,
       hetong.hetong,
       a.name as qibiename,
       b.name as quyuname,
       c.name as zhenquname,
       hetong.mianji,
       hetong.dizhi,
       hetong.yzmc,
       hetong.yzdh
  from hetong hetong, paramtertable a, paramtertable b, paramtertable c
 where hetong.qibie_id = a.id
   and hetong.quyu_id = b.id
   and hetong.zhenqu_id = c.id
<if test="jzmc!=null and jzmc!=''">
and jzmc like #{jzmc}
</if>
<if test="quyu_id!=null and quyu_id!=''">
and quyu_id=#{quyu_id}
</if>
<if test="yzdh!=null and yzdh!=''">
and yzdh=#{yzdh}
</if>
order by id desc
</select>
 <pre name="code" class="java"><!-- 删除  -->
<delete id="deleteHetong" parameterType="java.lang.Integer">
delete from hetong where id=#{id111}
</delete>

<pre name="code" class="java"><!-- 批量删除,array传来的必须是一个数组,list传来的必须是一个list集合  -->
<delete id="deletebatch_Hetong" parameterType="java.util.List">
delete from hetong where id in
<foreach item="item" index="index" collection="array" open="(" separator="," close=")">
#{item}
</foreach>
</delete>

<update id="updateHetong" parameterType="Contractbean">
	update hetong
	<set>
		<if test="jzmc!=null">jzmc=#{jzmc},</if>
		<if test="hetong!=null">hetong=#{hetong},</if>
		<if test="qibie_id!=null">qibie_id=#{qibie_id},</if>
		<if test="quyu_id!=null">quyu_id=#{quyu_id},</if>
		<if test="zhenqu_id!=null">zhenqu_id=#{zhenqu_id},</if>
		<if test="mianji!=null">mianji=#{mianji},</if>
		<if test="dizhi!=null">dizhi=#{dizhi},</if>
		<if test="yzmc!=null">yzmc=#{yzmc},</if>
		<if test="yzdh!=null">yzdh=#{yzdh},</if>
	</set>
	where id=#{id}
</update>


</mapper>


 966
966


 被折叠的 条评论
为什么被折叠?
被折叠的 条评论
为什么被折叠?
 到【灌水乐园】发言


