如何使用visualFormat语言纯代码写约束呢?经过本人的学习,写出来与大家分享一下:
使用storyboard可以完成我们的大部分的布局需求,然而storyboard不是万能的,在对于后续的可维护性较高的工程中最好使用手写代码,这就需要我们掌握纯手写约束这项基本能力;
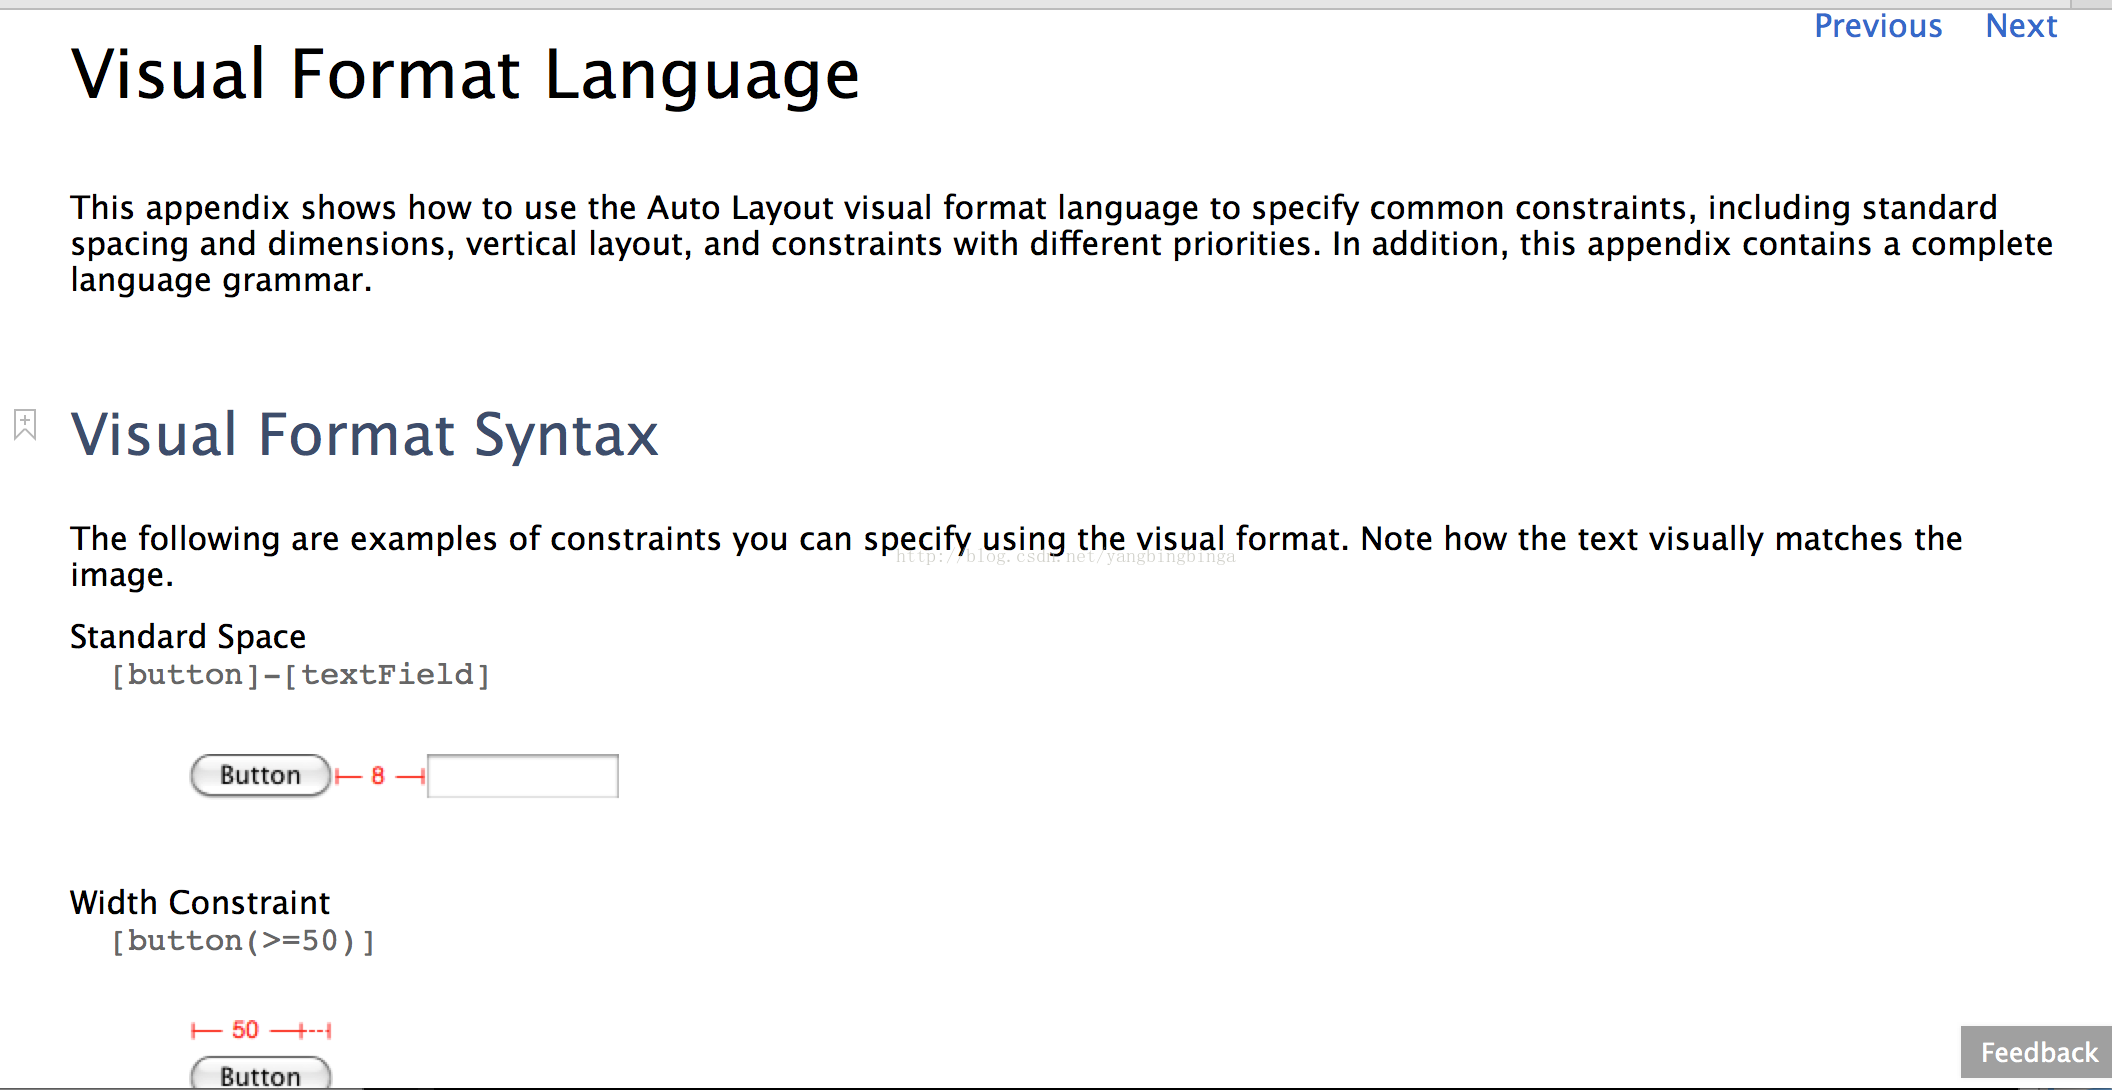
我们在苹果的doc文档里面可以看到一些关于VisualFormat的介绍,但这仅仅是个介绍,我们在实际的应用过程中需要更多的知识:
首先看一下,手写约束的效果图:
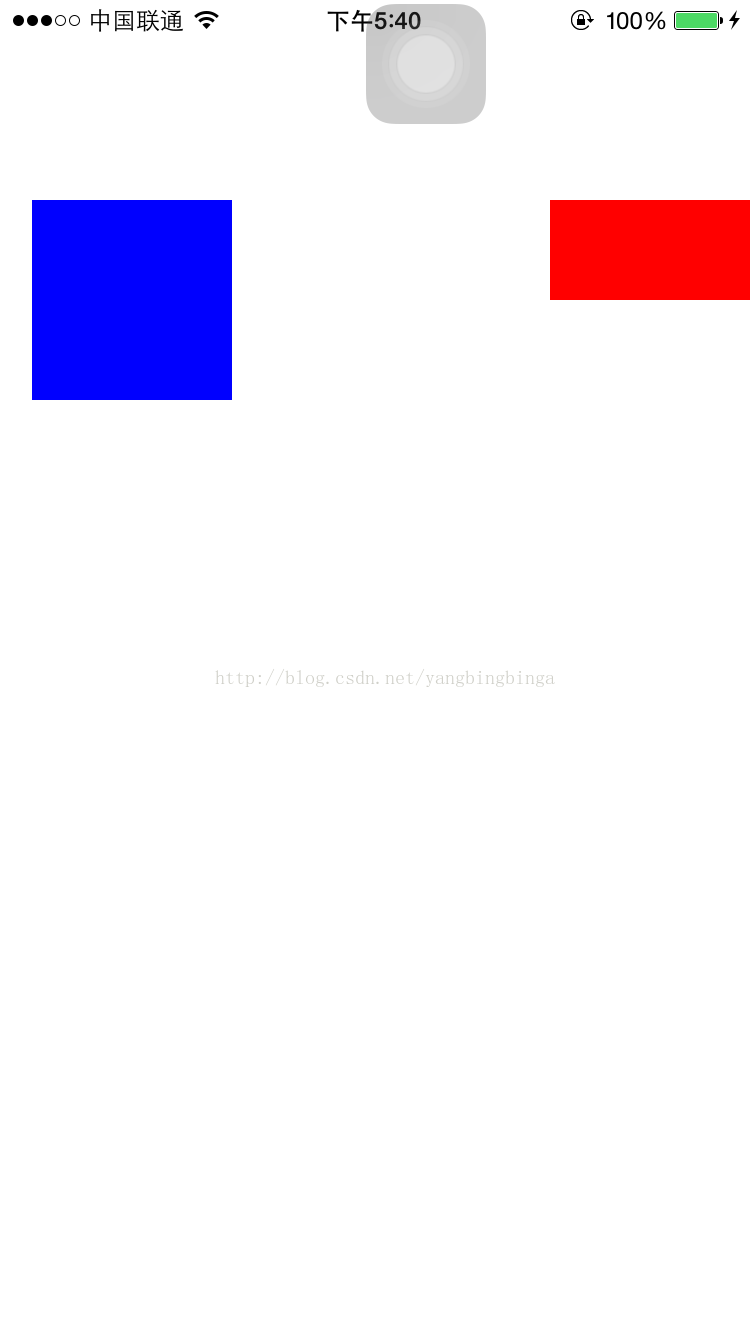
图中的两个按钮要求:
1.两个Button的宽度相等=100
2.两个Button的顶部对齐
3._button1的左边距离父视图为默认的间隔(20)
4.button2左边距离_button1为20,这个20约束的优先级是 750;button2右边距离父视图距离为0
首先,看一下使用VisualFormat实现该效果的代码:
注意:为了更全面的介绍VisualFormat,写法格式可能会有多种!!!
.h
-
-
-
-
-
-
-
-
- #import <UIKit/UIKit.h>
-
- @interface ViewController : UIViewController
-
-
- @end
.m
-
-
-
-
-
-
-
-
- #import "ViewController.h"
-
- @interface ViewController ()
- {
- UIButton *button2;
- }
- @property(nonatomic,strong)UIButton *button1;
- @end
-
- @implementation ViewController
-
- - (void)viewDidLoad
- {
- [super viewDidLoad];
- _button1=[UIButton buttonWithType:UIButtonTypeCustom];
- _button1.backgroundColor=[UIColor blueColor];
- _button1.translatesAutoresizingMaskIntoConstraints=NO;
- button2=[UIButton buttonWithType:UIButtonTypeCustom];
- button2.backgroundColor=[UIColor redColor];
- button2.translatesAutoresizingMaskIntoConstraints=NO;
- [self.view addSubview:_button1];
- [self.view addSubview:button2];
- NSArray *hCons=[NSLayoutConstraint constraintsWithVisualFormat:@"H:|-[_button1(100)]-50@750-[button2(==_button1)]|" options:NSLayoutFormatAlignAllTop metrics:0 views:NSDictionaryOfVariableBindings(_button1,button2) ];
-
- [self.view addConstraints:hCons];
-
- NSArray *vCons=[NSLayoutConstraint constraintsWithVisualFormat:@"V:|-(100)-[_button1(100)]" options:0 metrics:0 views:@{@"_button1":_button1,@"button2":button2}];
- [self.view addConstraints:vCons];
-
- NSArray *vCons1=[NSLayoutConstraint constraintsWithVisualFormat:@"V:[button2(==50)]" options:0 metrics:0 views:@{@"_button1":_button1,@"button2":button2}];
- [self.view addConstraints:vCons1];
-
- }
- @end
说明:
1.
- _button1=[UIButton buttonWithType:UIButtonTypeCustom];
要使用VisualFormat一定要提前分配好内存,否则会在使用
constraintsWithVisualFormat的_view参数,会导致崩溃
2.
_button1.translatesAutoresizingMaskIntoConstraints=NO;
使用AutoLayout和默认的autoSizing有冲突,默认 是YES,使用代码 写约束,一定要设置为NO,关闭自动调整,AutoResizing
3.
- NSArray *hCons=[NSLayoutConstraint constraintsWithVisualFormat:@"H:|-[_button1(100)]-50@750-[button2(==_button1)]|" options:NSLayoutFormatAlignAllTop metrics:0 views:NSDictionaryOfVariableBindings(_button1,button2) ];
- 使用constraintsWithVisualFormat方法创建一个约束数组,默认只有一个元素
- 参数说明:(1)@"H:|-[_button1(100)]-50@750-[button2(==_button1)]|"
- H代表水平方向上,_button1距离 父视图 为 - (子视图与父视图之间默认间隔为20),[_button(100)] 代表,宽度为为100也可以写成[_button(>=100)];
- 50@750,代表 _button1和button2之间的间隔是 50优先级为 750(默认的约束的优先级是1000,所以该约束可能不会使用);[button2(==_button1)]代表 button2的宽度等于_button1的宽度,也可以写成[button2(_button1)]
(2)options:NSLayoutFormatAlignAllTop
对齐约束,比如上面的约束是对齐约束 ,顶部对齐!
其他对齐方式:
- NSLayoutFormatAlignAllLeft
- NSLayoutFormatAlignAllRight
- NSLayoutFormatAlignAllTop
- NSLayoutFormatAlignAllBottom
- NSLayoutFormatAlignAllLeading
- NSLayoutFormatAlignAllTrailing
- NSLayoutFormatAlignAllCenterX
- NSLayoutFormatAlignAllCenterY
- NSLayoutFormatAlignAllBaseline
- NSLayoutFormatAlignAllLastBaseline
这是一个便利的方式,在添加水平约束的时候,可以添加 垂直方向的;垂直方向上 同理
(3)
- NSDictionary *metrics=@{@"space":@100}也就是,例如在如下的VisualFormat字符串中使用 @"H:[_button1]-space-[button2]"
- 这样,space这个间隔就可以替换成我们想要的约束了!
- views:NSDictionaryOfVariableBindings(_button1,button2)] 效果等价于:
- NSDictionary *dict=@{@"_button1":_button1,@"button2":button};
- 注意对应的 _button对象和 button不能为空!
- 我们也可以使用NSString *visualString=[NSString stringWithFormat:@"H:|[_button1(%g),100.0];来添加 变化的宽度或者其他约束,效果和 metrics类似;对于类似于:@"H:|-[_button1(100)]-50@750-[button2(==_button1)]|"的可视化格式字符串,我将在下一篇文章中详细介绍


 511
511

 被折叠的 条评论
为什么被折叠?
被折叠的 条评论
为什么被折叠?
 到【灌水乐园】发言


