


最近一直在自己的个人项目中集成进shiro这个权限控制框架,踩了不少的坑,sb(允许我这么叫他把,方便简洁)集成shiro的教程不少,但是使用ajax方式的还真的不是很多,下面把我自己的经验分享给大家。
1、在pom中加入shiro的包
 <!-- shiro权限控制 -->
<dependency>
    <groupId>org.apache.shiro</groupId>
    <artifactId>shiro-spring</artifactId>
    <version>1.4.0</version>
</dependency>
2、首先创建实体
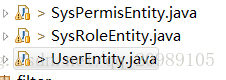
一共是这三个实体
这里是UserEntity
package com.cy.example.entity;

import java.util.List;

import org.springframework.stereotype.Repository;

@Repository
public class UserEntity extends SuperEntity {

    private String c_username;

    private String c_pwd;

    private String c_phone;

    private String n_age;

    private String n_sex;

    private int n_status;

    private List<SysRoleEntity> roleList;// 一个用户具有多个角色


    //getter setter 省略,以下2个实体也是

    public byte[] getCredentialsSalt() {
        // TODO Auto-generated method stub
        return this.c_username.getBytes();
    }
}
SysRoleEntity
package com.cy.example.entity;

import java.util.ArrayList;
import java.util.List;

public class SysRoleEntity extends SuperEntity {

    private String c_roleName;

    private List<SysPermisEntity> permisList;// 一个角色对应多个权限

    private List<UserEntity> userList;// 一个角色对应多个用户


    public List<String> getPermissionsName() {
        List<String> list = new ArrayList<String>();
        List<SysPermisEntity> perlist = getPermisList();
        for (SysPermisEntity per : perlist) {
            list.add(per.getC_permisName());
        }
        return list;
    }

    @Override
    public String toString() {
        return "SysRoleEntity [c_roleName=" + c_roleName + ", permisList="
                + permisList + ", userList=" + userList + "]";
    }

}
SysPermisEntity
package com.cy.example.entity;

import java.util.List;

public class SysPermisEntity extends SuperEntity {

    private String c_permisName;

    private List<SysRoleEntity> roles;// 一个权限对应一个角色


}
3、数据库准备
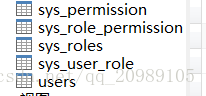
这里多了2个表,一个用户关联角色表,一个是角色关联权限表
表结构和数据直接看sql吧,
DROP TABLE IF EXISTS `sys_permission`;
CREATE TABLE `sys_permission` (
  `id` int(11) NOT NULL AUTO_INCREMENT,
  `c_permisName` varchar(255) NOT NULL,
  PRIMARY KEY (`id`)
) ENGINE=InnoDB AUTO_INCREMENT=7 DEFAULT CHARSET=utf8;

-- ----------------------------
-- Records of sys_permission
-- ----------------------------
INSERT INTO `sys_permission` VALUES ('1', 'add');
INSERT INTO `sys_permission` VALUES ('2', 'del');
INSERT INTO `sys_permission` VALUES ('3', 'update');
INSERT INTO `sys_permission` VALUES ('4', 'list');
INSERT INTO `sys_permission` VALUES ('5', 'user:list');
INSERT INTO `sys_permission` VALUES ('6', 'user:update');

-- ----------------------------
-- Table structure for sys_roles
-- ----------------------------
DROP TABLE IF EXISTS `sys_roles`;
CREATE TABLE `sys_roles` (
  `id` int(11) NOT NULL AUTO_INCREMENT,
  `c_roleName` varchar(255) NOT NULL,
  PRIMARY KEY (`id`)
) ENGINE=InnoDB AUTO_INCREMENT=4 DEFAULT CHARSET=utf8;

-- ----------------------------
-- Records of sys_roles
-- ----------------------------
INSERT INTO `sys_roles` VALUES ('1', 'admin');
INSERT INTO `sys_roles` VALUES ('2', 'manege');
INSERT INTO `sys_roles` VALUES ('3', 'normal');

-- ----------------------------
-- Table structure for sys_role_permission
-- ----------------------------
DROP TABLE IF EXISTS `sys_role_permission`;
CREATE TABLE `sys_role_permission` (
  `id` bigint(20) NOT NULL AUTO_INCREMENT,
  `n_permission_id` bigint(20) NOT NULL,
  `n_role_id` bigint(20) NOT NULL,
  PRIMARY KEY (`id`)
) ENGINE=InnoDB AUTO_INCREMENT=11 DEFAULT CHARSET=utf8;

-- ----------------------------
-- Records of sys_role_permission
-- ----------------------------
INSERT INTO `sys_role_permission` VALUES ('3', '3', '1');
INSERT INTO `sys_role_permission` VALUES ('4', '4', '1');
INSERT INTO `sys_role_permission` VALUES ('5', '1', '2');
INSERT INTO `sys_role_permission` VALUES ('6', '2', '2');
INSERT INTO `sys_role_permission` VALUES ('7', '3', '2');
INSERT INTO `sys_role_permission` VALUES ('8', '4', '2');
INSERT INTO `sys_role_permission` VALUES ('9', '3', '3');
INSERT INTO `sys_role_permission` VALUES ('10', '1', '1');

-- ----------------------------
-- Table structure for sys_user_role
-- ----------------------------
DROP TABLE IF EXISTS `sys_user_role`;
CREATE TABLE `sys_user_role` (
  `id` int(11) NOT NULL AUTO_INCREMENT,
  `n_userId` int(11) NOT NULL,
  `n_roleId` int(11) NOT NULL,
  PRIMARY KEY (`id`)
) ENGINE=InnoDB AUTO_INCREMENT=6 DEFAULT CHARSET=utf8;

-- ----------------------------
-- Records of sys_user_role
-- ----------------------------
INSERT INTO `sys_user_role` VALUES ('1', '8', '1');

-- ----------------------------
-- Table structure for users
-- ----------------------------
DROP TABLE IF EXISTS `users`;
CREATE TABLE `users` (
  `id` bigint(11) NOT NULL AUTO_INCREMENT,
  `c_username` varchar(255) NOT NULL,
  `c_pwd` varchar(255) NOT NULL,
  `c_phone` varchar(255) DEFAULT NULL,
  `n_age` int(11) NOT NULL,
  `n_sex` int(11) NOT NULL,
  `c_createDate` varchar(255) DEFAULT NULL,
  `n_creater` bigint(20) DEFAULT NULL,
  `c_updateDate` varchar(255) DEFAULT NULL,
  `n_updater` bigint(20) DEFAULT NULL,
  `n_deleted` int(11) DEFAULT NULL,
  `n_status` int(11) DEFAULT NULL,
  PRIMARY KEY (`id`)
) ENGINE=InnoDB AUTO_INCREMENT=91 DEFAULT CHARSET=utf8;

-- ----------------------------
-- Records of users
-- ----------------------------
INSERT INTO `users` VALUES ('8', 'admin', 'c4ca4238a0b92382', '1', '12', '0', '2017-08-01 11:00:05', '8', '2017-09-23 10:47:57', '8', '0', '1');
4、编写ShiroConfig.java
package com.cy.example.config;

import java.util.LinkedHashMap;
import java.util.Map;

import javax.servlet.Filter;

import org.apache.shiro.mgt.SecurityManager;
import org.apache.shiro.spring.web.ShiroFilterFactoryBean;
import org.apache.shiro.web.mgt.DefaultWebSecurityManager;
import org.slf4j.Logger;
import org.slf4j.LoggerFactory;
import org.springframework.context.annotation.Bean;
import org.springframework.context.annotation.Configuration;

import com.cy.example.filter.ShiroPermissionsFilter;
import com.cy.example.utils.AuthRealm;

/*
 * Shiro 配置
 */
@Configuration
public class ShiroConfig {

    private static final Logger logger = LoggerFactory
            .getLogger(ShiroConfig.class);

    @Bean
    public ShiroFilterFactoryBean shiroFilter(SecurityManager securityManager) {
        ShiroFilterFactoryBean shiroFilterFactoryBean = new ShiroFilterFactoryBean();

        Map<String, Filter> filters = shiroFilterFactoryBean.getFilters();//获取filters
        //将自定义 的ShiroFilterFactoryBean注入shiroFilter
        filters.put("perms", new ShiroPermissionsFilter());

        // 必须设置SecuritManager
        shiroFilterFactoryBean.setSecurityManager(securityManager);
        // 拦截器.
        Map<String, String> filterChainDefinitionMap = new LinkedHashMap<String, String>();
        // 配置不会被拦截的链接 顺序判断
        filterChainDefinitionMap.put("/css/**", "anon");
        filterChainDefinitionMap.put("/js/**", "anon");
        filterChainDefinitionMap.put("/images/**", "anon");
        filterChainDefinitionMap.put("/js/**", "anon");
        filterChainDefinitionMap.put("/lib/**", "anon");

        filterChainDefinitionMap.put("/index", "anon");

    //这个是登录验证的后台地址,这里把它过滤掉,让自己的控制层来验证
    filterChainDefinitionMap.put("/system/user/validate", "anon");
        // 配置退出 过滤器,其中的具体的退出代码Shiro已经替我们实现了
        filterChainDefinitionMap.put("/logout", "logout");
        // 这里自定义的权限拦截规则
        filterChainDefinitionMap.put("/system/*/add", "perms[add]");
        filterChainDefinitionMap.put("/system/*/delete", "perms[del]");
        // filterChainDefinitionMap.put("/system/*/list", "perms[list]");
        // <!-- authc:所有url都必须认证通过才可以访问; anon:所有url都都可以匿名访问-->
        filterChainDefinitionMap.put("/**", "authc");
        // 如果不设置默认会自动寻找Web工程根目录下的"/login.jsp"页面,这个就是类似于登录界面
        shiroFilterFactoryBean.setLoginUrl("/index");
        // 登录成功后要跳转的链接
//      shiroFilterFactoryBean.setSuccessUrl("/main");

        // 未授权界面;
        // shiroFilterFactoryBean.setUnauthorizedUrl("/menu/403");
        shiroFilterFactoryBean
                .setFilterChainDefinitionMap(filterChainDefinitionMap);

        logger.info("--------------Shiro拦截器工厂类注入成功----------------");
        return shiroFilterFactoryBean;
    }

    /*
     * 配置自定义的权限登录器
     */
    @Bean
    public AuthRealm authRealm() {
        AuthRealm authRealm = new AuthRealm();
//      authRealm.setCredentialsMatcher(matcher);
        return authRealm;
    }

    /*
     * 配置核心安全事务管理器
     */
    @Bean
    public SecurityManager securityManager() {
        logger.info("--------------shiro安全事务管理器已经加载----------------");
        DefaultWebSecurityManager manager = new DefaultWebSecurityManager();
        manager.setRealm(authRealm());
        return manager;
    }
}
5、创建realm,这个就是类似于用来赋值的。。我是这么理解的,在这里用户和权限的赋值。
package com.cy.example.utils;

import org.apache.shiro.authc.AuthenticationException;
import org.apache.shiro.authc.AuthenticationInfo;
import org.apache.shiro.authc.AuthenticationToken;
import org.apache.shiro.authc.SimpleAuthenticationInfo;
import org.apache.shiro.authz.AuthorizationInfo;
import org.apache.shiro.authz.SimpleAuthorizationInfo;
import org.apache.shiro.realm.AuthorizingRealm;
import org.apache.shiro.subject.PrincipalCollection;
import org.apache.shiro.util.ByteSource;
import org.slf4j.Logger;
import org.slf4j.LoggerFactory;
import org.springframework.beans.factory.annotation.Autowired;

import com.baomidou.mybatisplus.mapper.EntityWrapper;
import com.cy.example.entity.SysPermisEntity;
import com.cy.example.entity.SysRoleEntity;
import com.cy.example.entity.UserEntity;
import com.cy.example.service.UserService;

public class AuthRealm extends AuthorizingRealm {

    @Autowired
    private UserService userService;

    private static final Logger logger = LoggerFactory
            .getLogger(AuthRealm.class);

    @Override
    protected AuthorizationInfo doGetAuthorizationInfo(
            PrincipalCollection principals) {
        // TODO Auto-generated method stub
        logger.info("--------------权限配置——授权----------------");
        SimpleAuthorizationInfo authorizationInfo = new SimpleAuthorizationInfo();
        UserEntity user = (UserEntity) principals.getPrimaryPrincipal();
        for (SysRoleEntity role : user.getRoleList()) {
            authorizationInfo.addRole(role.getC_roleName());
            for (SysPermisEntity p : role.getPermisList()) {
                authorizationInfo.addStringPermission(p.getC_permisName());
            }
        }
        logger.info(user.toString());
        return authorizationInfo;
    }

    /*
     * 认证信息.(身份验证) : Authentication 是用来验证用户身份 如果返回一个SimpleAccount
     * 对象则认证通过,如果返回值为空或者异常,则认证不通过。 1、检查提交的进行认证的令牌信息 2、根据令牌信息从数据源(通常为数据库)中获取用户信息
     * 3、对用户信息进行匹配验证 4、验证通过将返回一个封装了用户信息的AuthenticationInfo实例
     * 5、验证失败则抛出AuthenticationException异常信息
     */
    @Override
    protected AuthenticationInfo doGetAuthenticationInfo(
            AuthenticationToken token) throws AuthenticationException {
        // TODO Auto-generated method stub
        logger.info("***用户身份验证");
        // 获取用户的输入的账号.
        String username = (String) token.getPrincipal();
        if (StringUtil.IsNullOrEmptyT(username)) {
            return null;
        }
        logger.info("***" + token.getCredentials());
        // 实际项目中,这里可以根据实际情况做缓存,如果不做,Shiro自己也是有时间间隔机制,2分钟内不会重复执行该方法
        UserEntity user = userService.selectOne(new EntityWrapper<UserEntity>().eq("c_username", username));

        logger.info("***登录user:" + user);
        SimpleAuthenticationInfo authenticationInfo = new SimpleAuthenticationInfo(
                user, // 用户名
                user.getC_pwd(), // 密码
                ByteSource.Util.bytes(user.getCredentialsSalt()),// 这里的getCredentialsSalt()只是返回一个唯一值,我返回的是用户名,用来加密的
                salt=username+salt
                getName() // realm name
        );
        return authenticationInfo;
    }

}
这里的两个方法就是用来给用户和权限赋值的。
6、给大家看一下我的数据库查询的sql
<select id="findOneByUsername" parameterType="java.lang.String" resultMap="BaseResultMap" >
       SELECT
            u.id,
            c_username,
            u.c_pwd,
            u.c_phone,
            u.n_age,
            u.n_status,
            u.c_createDate,
            u.n_creater,
            u.c_updateDate,
            u.n_updater,
            CASE
        WHEN n_sex = 1 THEN
            '男'
        WHEN n_sex = 0 THEN
            '女'
        END AS n_sex,
        r.c_roleName,
        r.id as r_id,
        p.id as p_id,
        p.c_permisName
        FROM
            users u
        LEFT JOIN sys_user_role ur ON u.id = ur.n_userId
        LEFT JOIN sys_roles r ON ur.n_roleId = r.id
        LEFT JOIN sys_role_permission rp ON rp.n_role_id = ur.n_roleId
        LEFT JOIN sys_permission p ON p.id = rp.n_permission_id
       WHERE u.c_username = #{c_username} and n_deleted=0
    </select>
通过左连接把角色和权限查询出来
7、看一下验证登录的控制层
@SuppressWarnings("finally")
    @RequestMapping("/validate")
    @ResponseBody
    public Map<String, Object> validate(String username, String password) {
        Map<String, Object> map = new HashMap<String, Object>();
        password = MD5Util.GetMD5Code(password);
        UsernamePasswordToken usernamePasswordToken = new UsernamePasswordToken(
                username, password);
        boolean flag = true;
        String msg = "";
        Subject subject = SecurityUtils.getSubject();
        try {
            subject.login(usernamePasswordToken); // 完成登录
            UserEntity user = (UserEntity) subject.getPrincipal();
            subject.getSession().setAttribute(WebConfig.LOGIN_USER, user);
            LoginRecordEntity loginRecord = new LoginRecordEntity();
            loginRecord.setC_createDate(DateUtil.getNow());
            loginRecord.setC_loginIp(super.getIP(getRequest()));
            loginRecord.setC_username(user.getC_username());
            loginRecordService.add(loginRecord);
            msg = "登陆成功!";
            map.put("flag", flag);
        } catch (Exception exception) {
            if (exception instanceof UnknownAccountException) {
                logger.info("账号不存在: -- > UnknownAccountException");
                msg = "登录失败,用户账号不存在!";
            } else if (exception instanceof IncorrectCredentialsException) {
                logger.info(" 密码不正确: -- >IncorrectCredentialsException");
                msg = "登录失败,用户密码不正确!";
            } else {
                logger.info("else -- >" + exception);
                msg = "登录失败,发生未知错误:" + exception;
            }
            map.put("flag", false);
        } finally {
            map.put("msg", msg);
            return map;
        }
    }
返回数据的格式看一下map就知道了。
8、最重要的一步,添加权限验证失败的过滤器,当时搞这个权限失败JSON返回数据我搞了很久,走了不少弯路,希望大家能够成功的集成shiro
package com.cy.example.filter;

import java.io.IOException;
import java.util.HashMap;
import java.util.Map;

import javax.servlet.ServletRequest;
import javax.servlet.ServletResponse;
import javax.servlet.http.HttpServletRequest;
import javax.servlet.http.HttpServletResponse;

import org.apache.shiro.web.filter.authz.PermissionsAuthorizationFilter;
import org.slf4j.Logger;
import org.slf4j.LoggerFactory;

import com.cy.example.utils.JsonUtil;
import com.cy.example.utils.StringUtil;

public class ShiroPermissionsFilter extends PermissionsAuthorizationFilter {

    private static final Logger logger = LoggerFactory
            .getLogger(ShiroPermissionsFilter.class);

    /**
     * shiro认证perms资源失败后回调方法
     * @param servletRequest
     * @param servletResponse
     * @return
     * @throws IOException
     */
    @Override
    protected boolean onAccessDenied(ServletRequest servletRequest, ServletResponse servletResponse) throws IOException {
        logger.info("----------权限控制-------------");
        HttpServletRequest httpServletRequest = (HttpServletRequest) servletRequest;
        HttpServletResponse httpServletResponse = (HttpServletResponse) servletResponse;
        String requestedWith = httpServletRequest.getHeader("X-Requested-With");
        if (!StringUtil.IsNullOrEmpty(requestedWith) &&
                StringUtil.IsEmpty(requestedWith, "XMLHttpRequest")) {//如果是ajax返回指定格式数据
            Map<String, Object> result = new HashMap<String, Object>();
            result.put("flag", false);
            result.put("msg", "权限不足!");
            httpServletResponse.setCharacterEncoding("UTF-8");
            httpServletResponse.setContentType("application/json");
            httpServletResponse.getWriter().write(JsonUtil.collectToString(result));
        } else {//如果是普通请求进行重定向
            httpServletResponse.sendRedirect("/403");
        }
        return false;
    }

}
下面附上我的项目地址,想看源码 的可以去下载,对你有帮助请star我的github地址


 888
888


 被折叠的 条评论
为什么被折叠?
被折叠的 条评论
为什么被折叠?
 到【灌水乐园】发言


