


配置Spring发送邮件
Spring Email抽象的核心是MailSender接口。顾名思义,MailSender的实现能够通过连接Email服务器实现邮件发送的功能。
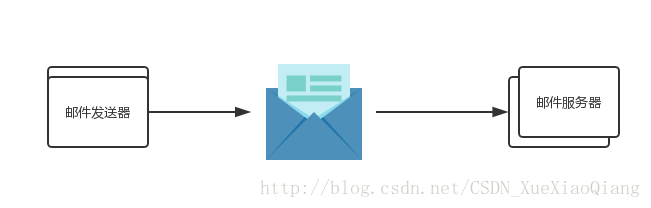
Spring自带的一个MailSender的实现——JavaMailSenderImpl。它会使用JavaMail API来发送Email。
配置邮件发送器
需要的核心maven:
     <dependency>
        <groupId>org.springframework</groupId>
        <artifactId>spring-context-support</artifactId>
        <version>4.3.8.RELEASE</version>
    </dependency>

    <dependency>
        <groupId>javax.mail</groupId>
        <artifactId>mail</artifactId>
        <version>1.4.7</version>
    </dependency>
- 1
- 2
- 3
- 4
- 5
- 6
- 7
- 8
- 9
- 10
- 11
配置bean:
public class RootConfig {

    /**
     * 配置邮件发送器
     * @return
     */
    @Bean
    public MailSender mailSender() {
        JavaMailSenderImpl mailSender = new JavaMailSenderImpl();
        mailSender.setHost("smtp.163.com");//指定用来发送Email的邮件服务器主机名
        mailSender.setPort(25);//默认端口,标准的SMTP端口
        mailSender.setUsername("test@163.com");//用户名
        mailSender.setPassword("test");//密码
        return mailSender;
    }

}
- 1
- 2
- 3
- 4
- 5
- 6
- 7
- 8
- 9
- 10
- 11
- 12
- 13
- 14
- 15
- 16
- 17
需要注意的是,如果你使用163等邮件服务器的话,一定要在设置中开启SMTP。
装配和使用邮件发送器
@RunWith(SpringJUnit4ClassRunner.class)
@ContextConfiguration(classes={RootConfig.class, WebConfig.class})
@WebAppConfiguration
public class EmailSenderTest {

    @Autowired
    private JavaMailSender mailSender;

    @Test
    public void sendSimpleEmail(){
        SimpleMailMessage message = new SimpleMailMessage();//消息构造器
        message.setFrom("test@163.com");//发件人
        message.setTo("shoujian@tom.com");//收件人
        message.setSubject("Spring Email Test");//主题
        message.setText("hello world!!");//正文
        mailSender.send(message);
        System.out.println("邮件发送完毕");
    }

}
- 1
- 2
- 3
- 4
- 5
- 6
- 7
- 8
- 9
- 10
- 11
- 12
- 13
- 14
- 15
- 16
- 17
- 18
- 19
- 20
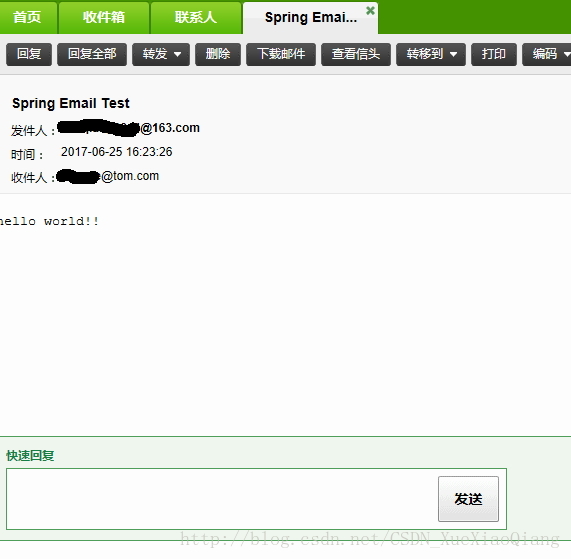
下面是收到的邮件:
构建丰富内容的Email消息
添加附件
发送带有附件的Email,关键技巧是创建multipart类型的消息——Email由多个部分组成,其中一部分是Email体,其他部分是附件。
为了发送multipart类型的Email,你需要创建一个MIME(Multipurpose Internet Mail Extensions)的消息。
/**
     * 发送带有附件的email
     * @throws MessagingException
     */
    @Test
    public void sendEmailWithAttachment() throws MessagingException{
        MimeMessage message = mailSender.createMimeMessage();
        MimeMessageHelper helper = new MimeMessageHelper(message, true);//构造消息helper,第二个参数表明这个消息是multipart类型的
        helper.setFrom("testFrom@163.com");
        helper.setTo("testTo@qq.com");
        helper.setSubject("Spring Email Test");
        helper.setText("这是一个带有附件的消息");
        //使用Spring的FileSystemResource来加载fox.png
        FileSystemResource image = new FileSystemResource("D:\\fox.png");
        System.out.println(image.exists());
        helper.addAttachment("fox.png", image);//添加附加,第一个参数为添加到Email中附件的名称,第二个人参数是图片资源
        mailSender.send(message);
        System.out.println("邮件发送完毕");
    }
- 1
- 2
- 3
- 4
- 5
- 6
- 7
- 8
- 9
- 10
- 11
- 12
- 13
- 14
- 15
- 16
- 17
- 18
- 19
javax.mail.internet.MimeMessage本身的API有些笨重。Spring为我们提供了MimeMessageHelper,来帮助我们,只需要将其实例化并将MimeMessage传给其构造器。
结果:

发送富文本内容的Email
这里我们使用嵌入式的图片:
/**
     * 发送富文本内容的Email
     * @throws MessagingException
     */
    @Test
    public void sendRichEmail() throws MessagingException{
        MimeMessage message = mailSender.createMimeMessage();
        MimeMessageHelper helper = new MimeMessageHelper(message, true);
        helper.setFrom("testFrom@163.com");
        helper.setTo("testTo@qq.com");
        helper.setSubject("Spring Email Test");
        helper.setText("<html><body><img src='cid:testLogo'>"
                + "<h4>Hello World!!!</h4>"
                + "</body></html>", true);//第二个参数表明这是一个HTML
        //src='cid:testLogo'表明在消息中会有一部分是图片并以testLogo来进行标识
        ClassPathResource image = new ClassPathResource("logo.jpg");
        System.out.println(image.exists());
        helper.addInline("testLogo", image);//添加内联图片,第一个参数表明内联图片的标识符,第二个参数是图片的资源引用
        mailSender.send(message);
    }
- 1
- 2
- 3
- 4
- 5
- 6
- 7
- 8
- 9
- 10
- 11
- 12
- 13
- 14
- 15
- 16
- 17
- 18
- 19
- 20
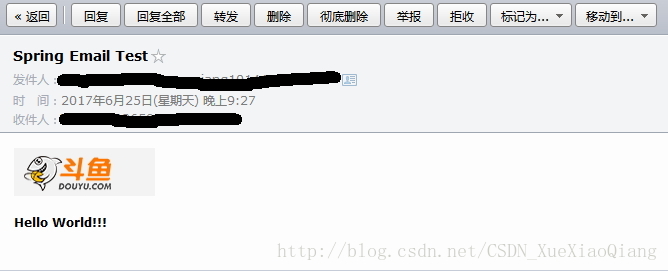
结果:
使用模板生成Email
使用Velocity构建Email消息
Apache Velocity是由Apache提供的通用的模板引擎。
配置VelocityEngine工厂bean,它能在Spring应用上下文中很便利的生成VelocityEngine:
/**
     * 配置VelocityEngine工厂Bean
     * @return
     */
    @Bean
    public VelocityEngineFactoryBean velocityEngine() {
        VelocityEngineFactoryBean velocityEngine = new VelocityEngineFactoryBean();
        Properties props = new Properties();
        props.setProperty("resource.loader", "class");
        props.setProperty("class.resource.loader.class", ClasspathResourceLoader.class.getName());
        velocityEngine.setVelocityProperties(props);
        return velocityEngine;
    }
- 1
- 2
- 3
- 4
- 5
- 6
- 7
- 8
- 9
- 10
- 11
- 12
- 13
这里我们将其配置为从类路径下加载Velocity模板
使用:
@Autowired
    VelocityEngine velocityEngine;

    @SuppressWarnings("deprecation")
    @Test
    public void sendEmailByVelocity() throws MessagingException{
        Map<String, Object> modal = new HashMap<String, Object>();
        modal.put("name", "薛小强");
        modal.put("text", "这是一个用Velocity生成的模板");
        //使用VelocityEngineUtils将Velocity模板与模型数据合并成String
        String emailText = VelocityEngineUtils
                .mergeTemplateIntoString(velocityEngine, "emailTemplate.vm", "UTF-8", modal);

        MimeMessage message = mailSender.createMimeMessage();
        //第三个参数设置编码,否则如果有汉字会出现乱码问题
        MimeMessageHelper helper = new MimeMessageHelper(message, true, "utf-8");
        helper.setFrom("testForm@163.com");
        helper.setTo("testTo@qq.com");
        helper.setSubject("Spring Email Test");
        helper.setText(emailText, true);
        ClassPathResource image = new ClassPathResource("logo.jpg");
        helper.addInline("logo", image);
        mailSender.send(message);
        System.out.println("邮件发送完毕");
    }
- 1
- 2
- 3
- 4
- 5
- 6
- 7
- 8
- 9
- 10
- 11
- 12
- 13
- 14
- 15
- 16
- 17
- 18
- 19
- 20
- 21
- 22
- 23
- 24
- 25
这里的模板emailTemplate.vm文件内容为:
<!DOCTYPE html>
<html>
<body>
<img src='cid:logo'>
<h4>Hello ${name}</h4>
<h3>${text}</h3>
</body>
</html>
- 1
- 2
- 3
- 4
- 5
- 6
- 7
- 8
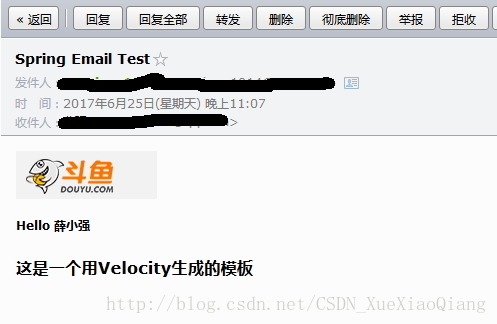
结果:
<link href="https://csdnimg.cn/release/phoenix/template/css/markdown_views-ea0013b516.css" rel="stylesheet"/>
转自https://blog.csdn.net/csdn_xuexiaoqiang/article/details/73730649


 5436
5436


 被折叠的 条评论
为什么被折叠?
被折叠的 条评论
为什么被折叠?
 到【灌水乐园】发言


