


传统方式
import cv2

url = "rtsp://**********************"

cap = cv2.VideoCapture(url)
while True:
    ret, frame = cap.read()
    cv2.imshow("frame", frame)
    if cv2.waitKey(1) & 0xFF == ord("q"):
        break
这种方式比较简单,但是拉取的视频流会有1s左右的延迟
GSTREAMER的方式进行拉流
安装依赖
# 安装gstreamer的依赖包
sudo apt-get install libgstreamer1.0-0 gstreamer1.0-plugins-base gstreamer1.0-plugins-good gstreamer1.0-plugins-bad gstreamer1.0-plugins-ugly gstreamer1.0-libav gstreamer1.0-doc gstreamer1.0-tools gstreamer1.0-x gstreamer1.0-alsa gstreamer1.0-gl gstreamer1.0-gtk3 gstreamer1.0-qt5 gstreamer1.0-pulseaudio -y
sudo apt install libgstreamer1.0-dev libgstreamer-plugins-base1.0-dev -y
# 更新python相关依赖
python3 -m pip install --upgrade pip
python3 -m pip install --upgrade setuptools
python3 -m pip install --upgrade wheel
# 这一步很重要,如果不安装,会导致opencv源码编译中出现问题
python3 -m pip install numpy
# 拉取opencv源码,github中的比较卡,可以使用下面的gitee的同步源
git clone https://gitee.com/luzhipeng0728/opencv.git
# 进入opencv库
cd opencv/
# 这里我们使用的是opencv 4.4.0的版本,如果有特殊需要可以使用其它版本
git checkout 4.4.0
# 开始进行编译,期间要确保python3的版本,默认Python3位3.6.9如果需要安装到python3.8中需要自行切换默认python
mkdir build
cd build/
cmake -D CMAKE_BUILD_TYPE=RELEASE \
-D INSTALL_PYTHON_EXAMPLES=ON \
-D INSTALL_C_EXAMPLES=OFF \
-D PYTHON_EXECUTABLE=$(which python3) \
-D BUILD_opencv_python2=OFF \
-D CMAKE_INSTALL_PREFIX=$(python3 -c "import sys; print(sys.prefix)") \
-D PYTHON3_EXECUTABLE=$(which python3) \
-D PYTHON3_INCLUDE_DIR=$(python3 -c "from distutils.sysconfig import get_python_inc; print(get_python_inc())") \
-D PYTHON3_PACKAGES_PATH=$(python3 -c "from distutils.sysconfig import get_python_lib; print(get_python_lib())") \
-D WITH_GSTREAMER=ON \
-D BUILD_opencv_python3=yes \
-D BUILD_EXAMPLES=ON \
..
cmake执行完成后需要注意下面

需要注意上面的两个划红线的地方,GStreamer需要为YES,编译时候,才能将gstreamer编译到opencv中去,python3下面的四行内容要完整才能保证opencv编译到python3的opencv中去
如果有问题,可以去看下上面的脚本中的依赖是否有安装失败的
如果之前已经安装过opencv的话需要将原来直接pip安装的opencv卸载掉
python3 -m pip uninstall opencv-python下面执行编译
# 编译
sudo make -j$(nproc)
# 执行安装
sudo make install
# 更新config
sudo ldconfig
# 使用下面的执行查看,看到的应该和上面截图中cmake显示的一样,如果GStreamer为YES,则说明编译成功了
python3 -c "import cv2; print(cv2.getBuildInformation())"
如果上面步骤都正常通过了,下面我们来执行测试代码,查看使用gstreamer的视频进行拉流,延迟为多少
import cv2
image_width = 1920
image_height = 1080
rtsp_latency = 10
uri = "rtsp://admin:123456@192.168.3.64:554/Streaming/Channels/1"
gst_str = ("rtspsrc location={} latency={} ! rtph264depay ! avdec_h264 ! videorate ! videoconvert ! appsink sync=false").format(uri, rtsp_latency)
print(f'use gstream {gst_str}')
cap = cv2.VideoCapture(gst_str, cv2.CAP_GSTREAMER)
while True:
    ret, frame = cap.read()
    cv2.imshow("frame", frame)
    if cv2.waitKey(1) & 0xFF == ord("q"):
        break
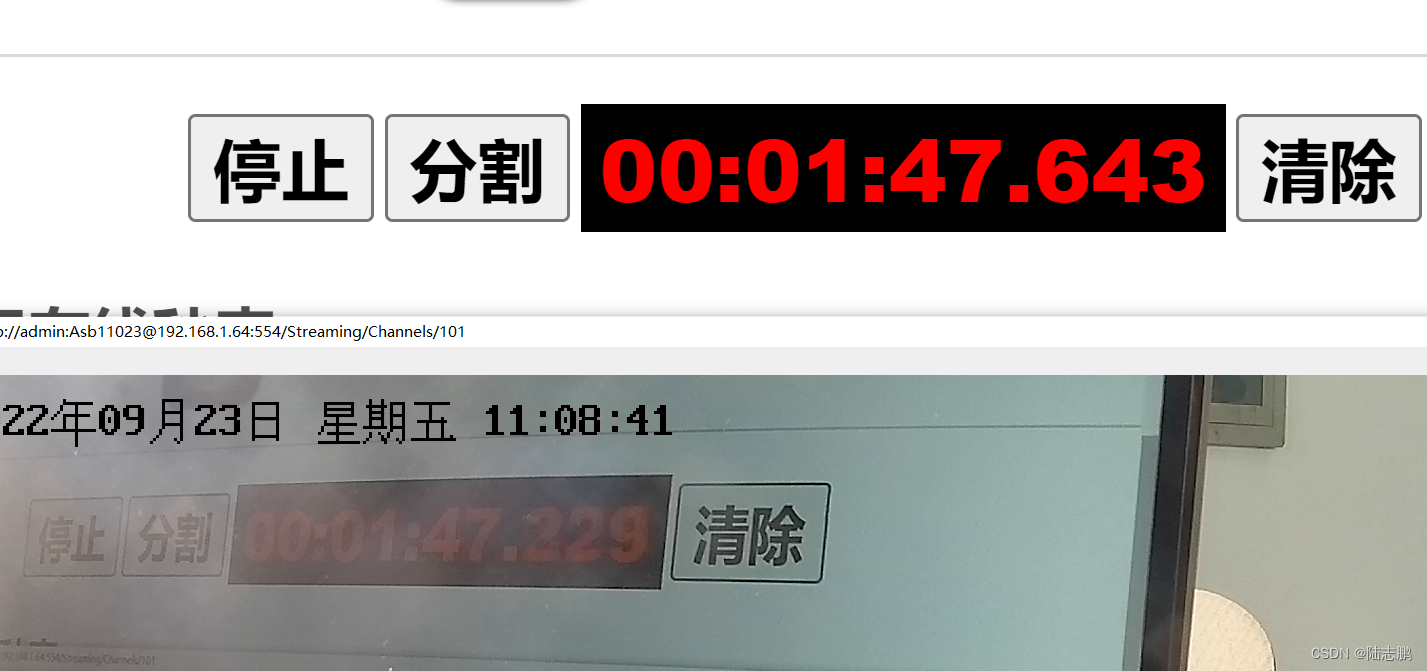
可以看到上面的延迟只有0.4s左右


 2515
2515


 被折叠的 条评论
为什么被折叠?
被折叠的 条评论
为什么被折叠?
 到【灌水乐园】发言


