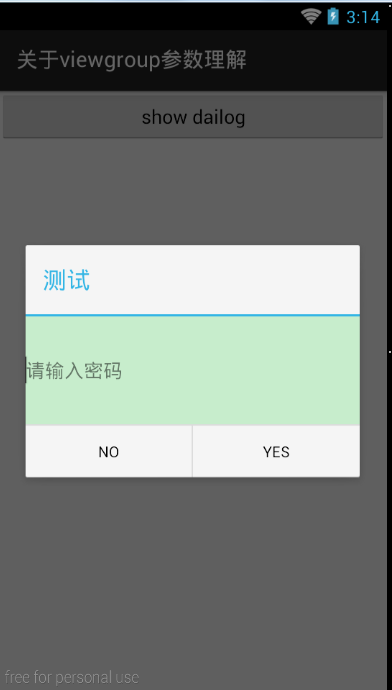
以前在写代码的时候,有一个很不好的习惯,当然这个习惯也是跟着视频教程学的,那就是我们在将xml文件转化成view的时候,会很顺手的将viewpgroup参数写为null。比如下面这个例子。我不想用难的api来实现,我们只用最简单的。在AlertDialog里填充一个edittext的视图
首先是dialog里面的edittext视图
- <?xml version="1.0" encoding="utf-8"?>
- <LinearLayout xmlns:android="http://schemas.android.com/apk/res/android"
- android:layout_width="match_parent"
- android:layout_height="match_parent"
- android:orientation="vertical" >
-
- <EditText
- android:background="#C7EDCC"
- android:layout_width="match_parent"
- android:layout_height="wrap_content"
- android:hint="请输入密码">
-
- </EditText></LinearLayout>
其次是我们的主布局视图
- <RelativeLayout xmlns:android="http://schemas.android.com/apk/res/android"
- xmlns:tools="http://schemas.android.com/tools"
- android:layout_width="match_parent"
- android:layout_height="match_parent"
- >
-
- <Button
- android:id="@+id/id_showdialog"
- android:layout_width="match_parent"
- android:layout_height="wrap_content"
- android:text="show dailog" />
-
- </RelativeLayout>
我们的mainactivity代码:
- package com.derek.demo;
-
- import android.app.AlertDialog;
- import android.os.Bundle;
- import android.support.v7.app.ActionBarActivity;
- import android.view.View;
- import android.view.View.OnClickListener;
- import android.widget.Button;
-
- public class MainActivity extends ActionBarActivity implements OnClickListener{
-
- private Button showdialog;
- private View dialog_item;
- @Override
- protected void onCreate(Bundle savedInstanceState) {
- super.onCreate(savedInstanceState);
- setContentView(R.layout.activity_main);
- showdialog = (Button) findViewById(R.id.id_showdialog);
- showdialog.setOnClickListener(this);
- }
- @Override
- public void onClick(View v) {
- switch (v.getId()) {
- case R.id.id_showdialog:
- showdialog();
- break;
-
- default:
- break;
- }
-
- }
- private void showdialog() {
- dialog_item = View.inflate(this, R.layout.dialog_item, null);
- AlertDialog.Builder builder = new AlertDialog.Builder(this)
- .setTitle("测试")
- .setView(dialog_item)
- .setNegativeButton("NO",null)
- .setPositiveButton("YES", null);
- AlertDialog dialog = builder.create();
- dialog.show();
- }
-
-
- }
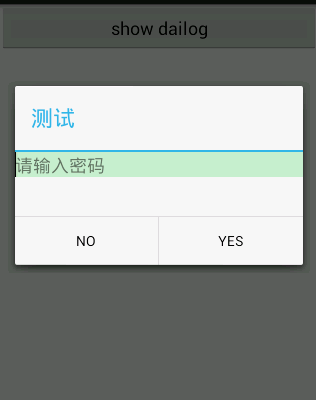
代码是不是很简单?我们来看一下效果图
我们把edittext的高度改为100dp,效果图如下
嗯,貌似实现了我们预想的结果,但事实上是这样吗?我们来看下一个例子,这个例子我参考了其他大神的研究。我们用listview来填充数据,同样,代码类似,我们只是把dialog_item填充到listview中
dialog_item布局如下
- <?xml version="1.0" encoding="utf-8"?>
- <LinearLayout xmlns:android="http://schemas.android.com/apk/res/android"
- android:id="@+id/linearLayout"
- android:layout_width="match_parent"
- android:layout_height="match_parent"
- android:background="#000000"
- android:orientation="vertical" >
-
- <EditText
- android:layout_width="match_parent"
- android:layout_height="wrap_content"
- android:background="#C7EDCC"
- android:hint="请输入密码" >
- </EditText>
-
- </LinearLayout>
主布局如下:
- <RelativeLayout xmlns:android="http://schemas.android.com/apk/res/android"
- xmlns:tools="http://schemas.android.com/tools"
- android:layout_width="match_parent"
- android:layout_height="match_parent"
- >
-
- <ListView
- android:id="@+id/id_listview"
- android:layout_width="match_parent"
- android:layout_height="match_parent"
- />
- </RelativeLayout>
mainactivty代码如下:
- package com.derek.demo;
-
- import android.os.Bundle;
- import android.support.v7.app.ActionBarActivity;
- import android.view.LayoutInflater;
- import android.view.View;
- import android.view.ViewGroup;
- import android.widget.BaseAdapter;
- import android.widget.ListView;
-
- public class MainActivity extends ActionBarActivity {
-
- private ListView listView;
-
- @Override
- protected void onCreate(Bundle savedInstanceState) {
- super.onCreate(savedInstanceState);
- setContentView(R.layout.activity_main);
- listView = (ListView) findViewById(R.id.id_listview);
- listView.setAdapter(new MyAdapter());
- }
-
- class MyAdapter extends BaseAdapter {
-
- @Override
- public int getCount() {
-
- return 10;
- }
-
- @Override
- public Object getItem(int position) {
-
- return null;
- }
-
- @Override
- public long getItemId(int position) {
-
- return 0;
- }
-
- @Override
- public View getView(int position, View convertView, ViewGroup parent) {
-
-
- if (convertView == null) {
- LayoutInflater inflater = LayoutInflater
- .from(MainActivity.this);
- convertView = inflater.inflate(R.layout.dialog_item, null);
- }
- return convertView;
- }
-
- }
-
- }
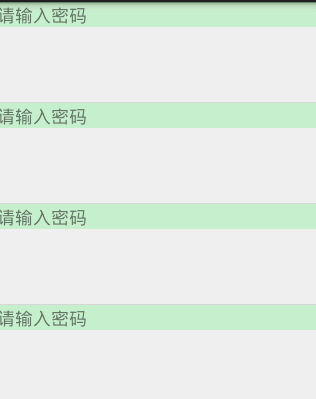
代码依然很简单;贴上效果图:
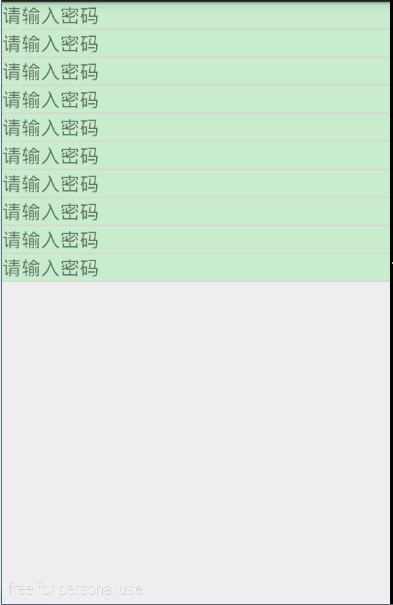
嗯,效果出来了,和预想的一样。下面我们改变edittext的高度为100dp,代码不贴了,效果图是这样的,是不是和你们预想的一样?
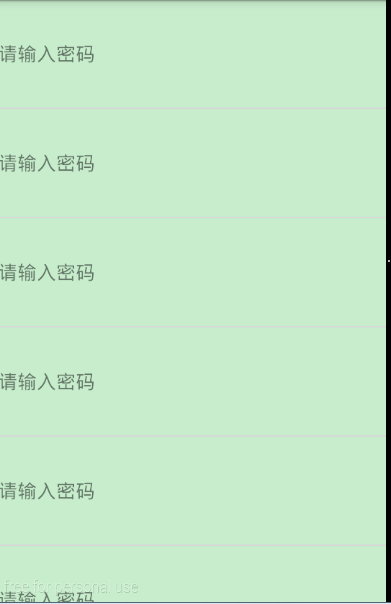
看到这里,你发现问题没有?有些人说没有。真没有吗?哈哈,确实没有,我刚开始写博客的时候也纳闷,怎么效果和出来的一样啦,(我预想的是edittext的高度是不变的)这让我怎么写?哈哈,不过灵光一现,我就发现问题了,回到代码我来总结一下一个很重要的问题,我们是讲viewgroup root这个参数的,root是什么意思?是根的意思,我们也可以把它理解为父视图,我们以上代码都是把他写为null的,那么问题来了,不是null的时候呢?我们来改代码:把linearlayout高度改为100dp
dialog_item布局:
- <?xml version="1.0" encoding="utf-8"?>
- <LinearLayout xmlns:android="http://schemas.android.com/apk/res/android"
- android:id="@+id/linearLayout"
- android:layout_width="match_parent"
- android:layout_height="100dp"
- android:orientation="vertical" >
-
- <EditText
- android:layout_width="match_parent"
- android:layout_height="wrap_content"
- android:background="#C7EDCC"
- android:hint="请输入密码" >
- </EditText>
-
- </LinearLayout>
其他不变,我们发现效果图是这样的:

哎呦我草,你们发现没有,高度没有变化啊,是不是和我有同样一个疑问,难道不是100dp吗?这时候,我们的root参数要起作用了,只需要改一步,代码贴一部分:
- @Override
- public View getView(int position, View convertView, ViewGroup parent) {
-
-
- if (convertView == null) {
- LayoutInflater inflater = LayoutInflater
- .from(MainActivity.this);
-
- convertView = inflater.inflate(R.layout.dialog_item,parent,false);
- }
- return convertView;
- }
-
- }
效果就出来了(注意一下颜色,我故意设置的两个不同颜色)
这个时候你发现高度是100dp了,而edittext的高度还是wrapcontent,这也就是为什么我们平时不注意这个参数写的代码也可以运行的原因,因为我们直接修改的是里面控件的高度。有时候写代码不注意这个很容易出错,比如上一篇博客里写的自定义button,你把继承自linearlayout改成继承view,后面参数写成null,一定会报错的,root参数的意义就是把你当前的布局绑定到一个根视图上,然后形成一个view。不知道你们明白没有,我也只是记录一下我的理解,我有理解错误的地方,恳请大神拍砖,我也不分析源码,因为初学者学起来很蛋疼,而且csdn有很多好的博客,我也借鉴了他们的,更重要的是我也是菜鸟,我也分析不了,只能从应用层面先理解一下了。
说到这里,我想到一个问题,怎么把alertdialog里的edittext也变成这种形式呢?你们想想。很简单的,我已经实现了,图贴上来当结束语吧
题外话:写一篇博客,我一开始觉得很简单,写下来发现很难。就是这么一个简单的知识点,讲的也是云里雾里,我写博客就当是一个学习的记录,我讲的这些一定有很多漏洞,甚至是完全错误的,我只是抛砖引玉,csdn博客上大神太多,你们可以参考他们的讲解,很详细,至于写博客,我特别建议大家抽出时间来写写,因为在写这篇博客的时候发现,inflate方法的第三个参数也很值得研究,不信?你把listview的填充布局第三个参数改为true试试?(亲测,在dialog里填充,第三个参数无所谓,都能实现预想效果),这是为什么呢?再次警告,我讲的不一定正确


 1215
1215

 被折叠的 条评论
为什么被折叠?
被折叠的 条评论
为什么被折叠?
 到【灌水乐园】发言


