


UnityEditor可以说是一个挺庞大的领域了,平时更注重上线开发,对于编辑这块儿知之甚少。这里暂不系统地去研究,简单去实现几个常用的功能。
1.让一个公共普通类型变量在编辑界面显示,但不允许修改。

这里为的是在编辑界面能更直观的查看值的变化,但不允许外部手动修改。和Unity自带的readonly区别就在于,如果给变量前面加上readonly,在编辑界面是看不到这个变量的。上代码:
首先创建一个DisplayOnlyAttribute类
[AttributeUsage(AttributeTargets.Field, Inherited = false)]
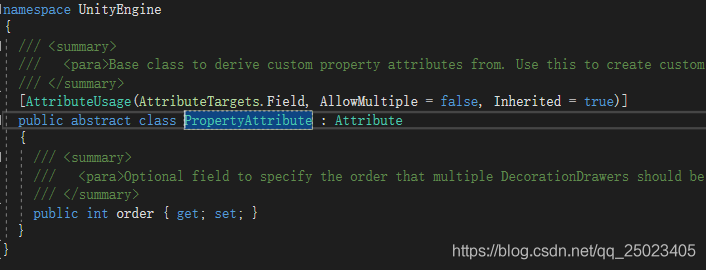
public class DisplayOnlyAttribute : PropertyAttribute
{
}它需要继承PropertyAttribute,之所以需要继承它,是下面要写的DisplayOnlyDrawer类做基础。引用其他博主的原图:
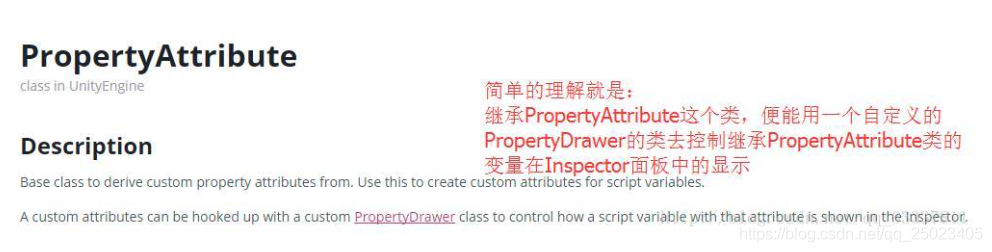
作用在于用户可以自定义Inspector面板中的内容。
接下来写DisplayOnlyDrawer类,因为它继承了UnityEditor,所以需要把它放在Editor目录下。
[CustomPropertyDrawer(typeof(DisplayOnlyAttribute))]
public class DisplayOnlyDrawer : PropertyDrawer
{
    public override void OnGUI(Rect position, SerializedProperty property, GUIContent label)
    {
        GUI.enabled = false;
        EditorGUI.PropertyField(position, property, label);

        GUI.enabled = true;
      // string value = "";
      //  switch (property.propertyType)
     //   {
       //     case SerializedPropertyType.Integer:
       //         value = property.intValue.ToString();
       //         break;
      //  }

    //   EditorGUI.LabelField(position, property.name + "\t:" + value);
    }

    public override float GetPropertyHeight(SerializedProperty property, GUIContent label)
    {
        return EditorGUI.GetPropertyHeight(property, label, true);
    }
}
这里使用了两种方法,都可以达到只读无法修改的效果。
第一种,先将 GUI.enabled置为false,让它不能编辑,然后通过EditorGUI.PropertyField编写该属性属性,再置为true.
第二种,获取到property的类型和值,通过EditorGUI.LabelField进行编写。第二种是看的别人的博客整的。下面为显示效果。
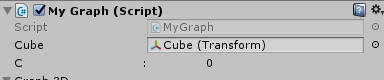
然后,随便创建个脚本,在变量前面添加 [DisplayOnly]就可以了,也可以写成[DisplayOnlyAttribute]
public class MyGraph : MonoBehaviour
{
    public Transform cube;
    [DisplayOnly]
    public int C;
}
附引用博主的地址:
https://blog.csdn.net/qq_33337811/article/details/66475651
2.让自定义类型变量在编辑界面显示并编辑界面。
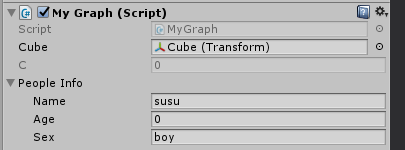
以上实现的是一个基本类型的变量的显示,但针对我们自定义的类型,比如一个struct结构体或类class变量,是无法显示出来的。比如这里我们自定义一个结构体People:
[Serializable]
public struct People
{
public string Name;
public int Age;
public string Sex;
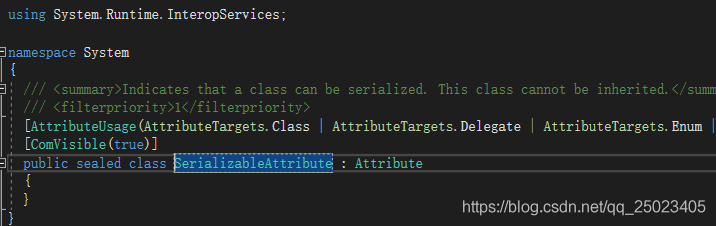
}这时就要用到[Serializable]。对于Serializable的解释,可以参考以下博文:
https://blog.csdn.net/qq_15020543/article/details/82761416
Serializable: 用于 自定义的,非 abstract 的类. 结构体等 , 使这类型也能序列化,这样我们就可以在Inspector面板看到它的各个属性。这里的作用,不仅仅是让这个类能够显示出来,关键在于可以序列化,也就是存储你自身编辑的信息。
达到这一步之后,我们可以根据上面的思路,再去自定义编辑People各属性的显示方式。因为,无论是我们自定义的DisplayOnlyAttribute,还是Serializable,他们都继承于Attribute
所以,按上面的套路继续往下写:
 [CustomPropertyDrawer(typeof(People))]
    public class PeopleDrawer : PropertyDrawer
    {
        public override void OnGUI(Rect position, SerializedProperty property, GUIContent label)
        {
            EditorGUI.BeginProperty(position, label, property);


            var start = 80;

                      var lRect = new Rect(position.x, position.y, start - 5, position.height);
            EditorGUI.LabelField(lRect, label.text);

            // Don't make child fields be indented
            var indent = EditorGUI.indentLevel;
            EditorGUI.indentLevel = 0;

            // Calculate rects
            var delta =90;
            var aRect = new Rect(position.x + start + delta * 0, position.y, delta , position.height);
            var bRect = new Rect(position.x + start + delta * 1, position.y, delta , position.height);
            var cRect = new Rect(position.x + start + delta * 2, position.y, delta , position.height);
            var a = property.FindPropertyRelative("Name");
            var b = property.FindPropertyRelative("Age");
            var c = property.FindPropertyRelative("Sex");
            Property(aRect, 40,40, a);
            Property(bRect, 40,30, b);
            Property(cRect, 40,30, c);
            EditorGUI.indentLevel = indent;

            EditorGUI.EndProperty();
        }
        private void Property(Rect rect, float labelWidth,float deltaWidth, SerializedProperty property)
        {
            var labelRect = rect;
            labelRect.width = labelWidth;

            var contentRect = rect;
            contentRect.x += deltaWidth;
            contentRect.width -= labelWidth;

            EditorGUI.LabelField(labelRect, property.displayName);
            EditorGUI.PropertyField(contentRect, property, GUIContent.none);
        }
    }
先看效果:

这里注意的几点:
1.OnGUI(Rect position, SerializedProperty property, GUIContent label)
position:该属性在Editor中被分配到的位置、大小。注意这里的x,y对应的是左上角,跟游戏中的左下角不同(因为Inspector是从上到下绘制)。大小的宽度由Inspector的宽度决定,而高度需要通过在类中override一个方法来自定义高度,否则默认为一行高
property:待绘制的属性本身。Unity在编辑器的API中大部分的实际的值都是用一个SerializedProperty表示的,实际上就是对值的一个包装。通过这个包装,当我们修改值的时候,Unity可以知道这次操作,类似刷新界面、Undo、prefab修改之类的信息都可以帮我们处理好。坏处在于我们得通过类似FindPropertyRelative的方法,用字符串去寻找内部的值(SerializedProperty是个嵌套结构,内部的数据也是SerializedProperty)。
label:这个值在MonoBehaviour里的字段名。这里要注意,如果我们申明了一个变量为
public People PeopleInfo;
那么label.text就是这个变量名:PeopleInfo
如果我们申明的是一个它这样的数组,那么。。。。
label.text是。。。。。额,数组下标:
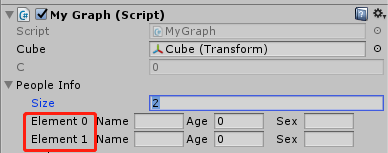
2.EditorGUI.LabelField()编辑的是属性名的显示。
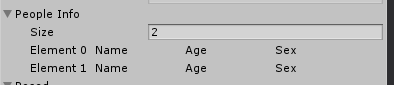
3.EditorGUI.PropertyField()编辑的是属性值的显示

第二部分完毕,附上相关博文链接:
https://www.cnblogs.com/yangrouchuan/p/6698844.html


 2万+
2万+


 被折叠的 条评论
为什么被折叠?
被折叠的 条评论
为什么被折叠?
 到【灌水乐园】发言


