


日常开发中常用的spring注解
1. @RestController
标明此Controller提供RestAPI,则Controller中的方法不返回jsp页面,配置的视图解析器InternalResourceViewResolver不起作用,返回的内容就是Return 里的内容。因为现在大多都是前后端分离项目,所以这个注解会经常使用。
@RestController("test")
public class Mytest{

    @RequestMapping("/hello")
    public String myHello(){
        return "hello";
    }
}
等同于:
@Controller("test")
public class Mytest{

    @RequestMapping("/hello")
    @ResponseBody
    public String myHello(){
        return "hello";
    }
}
2. @RequestMapping及其变体
映射http请求url到java方法,其变体有GetMapping, PostMapping,PutMapping, DeleteMapping,同上都是简化写法
@RestController("test")
public class Mytest{

    @RequestMapping(value = "mytest", method = RequestMethod.POST)
    public String myHello(){
        return "hello";
    }
}
等同于:
@RestController("test")
public class Mytest{

    @PostMapping(value = "mytest")
    public String myHello(){
        return "hello";
    }
}
3. @RequestParam
映射请求参数到java方法的参数,写到方法参数上的时候,就是必须要求前端传入参数时带上这个参数,如果不带则会报错,但是加上默认值default value就不会报错,或者required 可以设置非必需和必须。
value:请求中传入参数的名称,如果不设置后台接口的value值,则会默认为该变量名。比如上图中第一个参数如果不设置value="page",则前端传入的参数名必须为pageNum,否则在后台接口中pageNum将接收不到对应的数据
required:该参数是否为必传项。默认是true,表示请求中一定要传入对应的参数,否则会报404错误,如果设置为false时,当请求中没有此参数,将会默认为null,而对于基本数据类型的变量,则必须有值,这时会抛出空指针异常。如果允许空值,则接口中变量需要使用包装类来声明。
defaultValue:参数的默认值,如果请求中没有同名的参数时,该变量默认为此值。注意默认值可以使用SpEL表达式,如"#{systemProperties['java.vm.version']}"
@RequestMapping(value = "/testRequestParam")
    public String testRequestParam(@RequestParam(value="username")String un,@RequestParam(value = "age",required = false,defaultValue = "0") int age){
        System.out.println("testRequestParam,username:"+un+",age,"+age);
        return "success";
    }
4. @PageableDefault
指定分页参数默认值
配合Pageable pageable 对象 使用起来非常方便 前端只需要 写上分页相关信息 size:15 page :1 sort : age,desc 这样的形式即可
@GetMapping
public List<User> query(@RequestParam String username, @PageableDefault(size = 20, page = 0, sort = "username") Pageable pageable) {
    System.out.println(pageable.getPageNumber());
    System.out.println(pageable.getPageSize());
    System.out.println(pageable.getSort());
    List<User> users = Lists.newArrayList();
    users.add(new User("a", "132"));
    users.add(new User("b", "456"));
    users.add(new User("c", "789"));
    return users;
}
5. @PathVariable
完美配合Rest风格API,通过 @PathVariable 可以将 URL 中占位符参数绑定到控制器处理方法的入参中:URL 中的 {xxx} 占位符可以通过@PathVariable(“xxx“) 绑定到操作方法的入参中。其中参数name 和 参数value 的效果是同等的 ,都是指定url中片段的参数名
@GetMapping("/{id:\\d+}")// 正则表达式限定参数
@JsonView(User.UserDetailView.class)// 指定方法返回详细对象视图,有username和password
public User getInfo(@PathVariable String id) {
 return new User(id,"tom","123");
}
6.@JsonView
很好用的注解,用来控制Json输出内容
在某一些请求返回的JSON中,我们并不希望返回某些字段。而在另一些请求中需要返回某些字段。
可以自定义选择给前端传Json对象的不同属性,使用它就可以很好的避免创建多个重复的DTO对象给前端传值问题。非常方便。
使用步骤:
- 1.使用接口来声明多个视图
- 2.在值对象的get方法上指定视图
- 3.在Controller的方法上指定视图
步骤1.使用接口来声明多个视图(例如查询用户列表场景。就不传PASSWORD,查询用户详情的场景就是要带上PASSWORD)
package com.ls.dto;

/**
* @program: ls-web
* @description: 封装用户数据
* @author: Liang Shan
* @create: 2019-10-28 10:37
**/
public class User {
    /*用户简单视图*/
    public interface UserSimpleView {
    };
    /*用户详细视图*/
    public interface UserDetailView extends UserSimpleView {
    };
    private String username;
    private String password;


    public String getUsername() {
        return username;
    }


    public void setUsername(String username) {
        this.username = username;
    }


    public String getPassword() {
        return password;
    }


    public void setPassword(String password) {
        this.password = password;
    }
}
步骤2.在值对象的get方法上指定视图。
package com.ls.dto;
import com.fasterxml.jackson.annotation.JsonView;
/**
* @program: ls-web
* @description: 封装用户数据
* @author: Liang Shan
* @create: 2019-10-28 10:37
**/
public class User {
    /*用户简单视图*/
    public interface UserSimpleView {
    };
    /*用户详细视图*/
    public interface UserDetailView extends UserSimpleView{
    };
    private String username;
    private String password;


    @JsonView(UserSimpleView.class)
    public String getUsername() {
        return username;
    }


    public void setUsername(String username) {
        this.username = username;
    }
    // 因为有继承关系,所以使用了UserDetailView的查询接口也会有username这个字段
    @JsonView(UserDetailView.class)
    public String getPassword() {
        return password;
    }


    public void setPassword(String password) {
        this.password = password;
    }
}
步骤3.在Contrtoller方法上指定视图。
package com.ls.web.controller;


import com.fasterxml.jackson.annotation.JsonView;
import com.ls.dto.User;
import org.assertj.core.util.Lists;
import org.springframework.data.domain.Pageable;
import org.springframework.data.web.PageableDefault;
import org.springframework.web.bind.annotation.GetMapping;
import org.springframework.web.bind.annotation.PathVariable;
import org.springframework.web.bind.annotation.RequestParam;
import org.springframework.web.bind.annotation.RestController;


import java.util.List;


/**
* @program: ls-web
* @description: 用户Controller层
* @author: Liang Shan
* @create: 2019-10-28 10:15
**/
@RestController
public class UserController {
    @GetMapping("/user")
    @JsonView(User.UserSimpleView.class)// 指定方法返回简单对象视图,只有username
    public List<User> query(@RequestParam  String username, @PageableDefault(size = 20, page = 0, sort = "username") Pageable pageable) {
        System.out.println(pageable.getPageNumber());
        System.out.println(pageable.getPageSize());
        System.out.println(pageable.getSort());
        List<User> users = Lists.newArrayList();
        users.add(new User("a","132"));
        users.add(new User("b","456"));
        users.add(new User("c","789"));
        return users;
    }


    @GetMapping("/user/{id:\\d+}")// 正则表达式限定参数
    @JsonView(User.UserDetailView.class)// 指定方法返回详细对象视图,有username和password
    public User getInfo(@PathVariable String id) {
        User user = new User("a","132");
        user.setUsername("tom");
        return user;
    }
}
返回结果
简单视图:

详情视图:

7. @RequestBody
映射请求体到JAVA方法的参数
主要用来接收前端传递给后端的json字符串中的数据的(请求体中的数据的);GET方式无请求体,所以使用@RequestBody接收数据时,前端不能使用GET方式提交数据,而是用POST方式进行提交。在后端的同一个接收方法里,@RequestBody与@RequestParam()可以同时使用,@RequestBody最多只能有一个,而@RequestParam()可以有多个。
8. @JsonFormat
从数据库获取时间传到前端进行展示的时候,我们有时候可能无法得到一个满意的时间格式的时间日期,在数据库中显示的是正确的时间格式,获取出来却变成了很丑的时间戳,@JsonFormat注解很好的解决了这个问题,我们通过使用@JsonFormat可以很好的解决:后台到前台时间格式保持一致的问题
实体类中的属性上打上这个注解:
@JsonFormat(pattern = "yyyy-MM-dd HH:mm:ss",timezone="GMT+8")
private Date symstarttime;
9. @DateTimeFormat
我们在使用WEB服务的时,可能会需要用到,传入时间给后台,比如注册新用户需要填入出生日期等,这个时候前台传递给后台的时间格式同样是不一致的,而我们的与之对应的便有了另一个注解,@DataTimeFormat便很好的解决了这个问题,接下来记录一下具体的@JsonFormat与DateTimeFormat的使用过程。
同上可以一起使用, 也是实体类中的属性上打上这个注解:
@DateTimeFormat(pattern = "yyyy-MM-dd")
@JsonFormat(pattern = "yyyy-MM-dd HH:mm:ss",timezone="GMT+8")
private Date symendtime;
10. @Valid 注解和BindingResult
@Valid 注解和BindingResult验证请求参数的合法性并处理校验结果 。
校验参数是写API不可避免的事情,一定要验证用户传上来的数据是不是有效的,只有在用户传上来的数据满足自己的业务要求的时候,才应该再进行业务的处理,所以校验是一个非常常见的场景,传统的校验无非就是使用 if()手动来判断,但是如果API很多,就会有很多重复代码,如果好点的可以封装为方法,不好的话,万一修改,那将会是非常麻烦的一件事情。
所以使用@Valid注解来做参数的校验可以很好的解决这个问题,springboot利用切面集合进行所有controller的参数拦截和校验,避免了业务代码的臃肿,当出现业务逻辑的修改时也十分方便。
步骤1:
先在实体对象中填写需要校验参数的注解,例如@NotBlank @NotNull等等
public class User {

    private String id;

    private String username;

    @NotBlank(message = "密码不能为空")
    private String password;

    private LocalDate birthday;
步骤2:
然后在controller层的对象参数前加上@Valid注解就可以正常的判断了
@PostMapping
public User create(@Valid @RequestBody User user) {
    System.out.println(user.getId());
    System.out.println(user.getUsername());
    System.out.println(user.getPassword());
    System.out.println("hahaha"+user.getBirthday());
    user.setId("1");
    return user;
}
校验注解的规则:
| @AssertFalse | Boolean,boolean | 验证注解的元素值是false |
| @AssertTrue | Boolean,boolean | 验证注解的元素值是true |
| @NotNull | 任意类型 | 验证注解的元素值不是null |
| @Null | 任意类型 | 验证注解的元素值是null |
| @Min(value=值) | BigDecimal,BigInteger, byte,short, int, long,等任何Number或CharSequence(存储的是数字)子类型 | 验证注解的元素值大于等于@Min指定的value值 |
| @Max(value=值) | 和@Min要求一样 | 验证注解的元素值小于等于@Max指定的value值 |
| @DecimalMin(value=值) | 和@Min要求一样 | 验证注解的元素值大于等于@ DecimalMin指定的value值 |
| @DecimalMax(value=值) | 和@Min要求一样 | 验证注解的元素值小于等于@ DecimalMax指定的value值 |
| @Digits(integer=整数位数, fraction=小数位数) | 和@Min要求一样 | 验证注解的元素值的整数位数和小数位数上限 |
| @Size(min=下限, max=上限) | 字符串、Collection、Map、数组等 | 验证注解的元素值的在min和max(包含)指定区间之内,如字符长度、集合大小 |
| @Past | java.util.Date,java.util.Calendar;Joda Time类库的日期类型 | 验证注解的元素值(日期类型)比当前时间早 |
| @Future | 与@Past要求一样 | 验证注解的元素值(日期类型)比当前时间晚 |
| @NotBlank | CharSequence子类型 | 验证注解的元素值不为空(不为null、去除首位空格后长度为0),不同于@NotEmpty,@NotBlank只应用于字符串且在比较时会去除字符串的首位空格 |
| @Length(min=下限, max=上限) | CharSequence子类型 | 验证注解的元素值长度在min和max区间内 |
| @NotEmpty | CharSequence子类型、Collection、Map、数组 | 验证注解的元素值不为null且不为空(字符串长度不为0、集合大小不为0) |
| @Range(min=最小值, max=最大值) | BigDecimal,BigInteger,CharSequence, byte, short, int, long等原子类型和包装类型 | 验证注解的元素值在最小值和最大值之间 |
| @Email(regexp=正则表达式,flag=标志的模式) | CharSequence子类型(如String) | 验证注解的元素值是Email,也可以通过regexp和flag指定自定义的email格式 |
| @Pattern(regexp=正则表达式,flag=标志的模式) | String,任何CharSequence的子类型 | 验证注解的元素值与指定的正则表达式匹配 |
| @Valid | 任何非原子类型 | 指定递归验证关联的对象;如用户对象中有个地址对象属性,如果想在验证用户对象时一起验证地址对象的话,在地址对象上加@Valid注解即可级联验证 |
在Valid 判断后,如果发生了错误,是不会进入方法体的,直接返回给前端错误码,但是如果我想在发生错误后进入方法体内执行,比如记录错误日志等,就需要BindingResult类来处理了。
一个@Valid 对应一个 BindingResult,如果有多个,就要依次对应。
@PutMapping("/{id:\\d+}")
@JsonView(User.UserDetailView.class)
public User update(@Valid@RequestBody User user,BindingResult errors) {
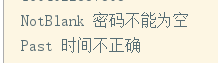
if (errors.hasErrors()) {
errors.getAllErrors().stream().forEach(e ->{
System.out.println(e.getCode()+" " +e.getDefaultMessage());} );
}
return user;
}控制台打印的输出结果:
然而使用javax提供的校验注解只能是满足基础的简单验证,再不过就是使用正则表达式对格式进行校验,但是实际开发环境中,可能需要更为复杂的业务数据的校验,比如说是查询数据库的数值后对比这种复杂的业务逻辑的校验,这时候基本的校验注解就不能满足我们的需求了,所以,我们也可以自定义校验注解,来达到符合自己的业务逻辑需求的注解
自定义校验注解:
步骤1:新建一个注解类 ,要打上@Target @Retention @Constraint 注解
然后需要实现代码中的三个属性(message可以不要,但是使用时必须强制要求填写message)
package com.ls.validator;

import javax.validation.Constraint;
import javax.validation.Payload;
import java.lang.annotation.*;
/**
* @Description: 自定义约束校验注解
* @Author: Liang Shan
* @Date: 2019/10/30 0030
*/
/**
*@Target:注解可以使用的地方
*@Retention(
*1、RetentionPolicy.SOURCE:注解只保留在源文件,当Java文件编译成class文件的时候,注解被遗弃;
*2、RetentionPolicy.CLASS:注解被保留到class文件,但jvm加载class文件时候被遗弃,这是默认的生命周期;
*3、RetentionPolicy.RUNTIME:注解不仅被保存到class文件中,jvm加载class文件之后,仍然存在;
*@Constraint:校验实现类
*/
@Target({ElementType.METHOD, ElementType.FIELD})// @Target是为了定义这个注解可以标注在哪里,这里因为是需要做参数的校验,所以定义,可以标注在方法上和字段上
@Retention(RetentionPolicy.RUNTIME)// 运行时的一个注解
@Constraint(validatedBy = MyConstraintValidator.class)// javax校验注解,声明这个注解用于校验的,并且可以指定当前注解的具体业务逻辑实现类是哪一个类
public @interface MyConstraint {
    // 如果要实现javax的校验注解,就需要实现三个参数 第一个message, 第二个groups 第三个payload
    String message() default "{自定义约束校验注解消息}";


    Class<?>[] groups() default {};


    Class<? extends Payload>[] payload() default {};
}
步骤2:实现校验实现类
需要实现ConstraintValidator这个泛型接口,泛型的第一个参数是实现哪个注解类,第二个参数是能够使用这个注解的数据类型是什么
package com.ls.validator;
import com.ls.service.HelloService;
import org.springframework.beans.factory.annotation.Autowired;
import javax.validation.ConstraintValidator;
import javax.validation.ConstraintValidatorContext;
/**
* @program: ls-security
* @description: 注解实现业务逻辑类
* 实现了 javax的 ConstraintValidator的接口 需要定义它的泛型, 有两个值, 第一个值是指定我需要去实现业务逻辑的注解类,第二个就是限定这个注解能够验证的数据类型
* @author: Liang Shan
* @create: 2019-10-30 11:34
**/
public class MyConstraintValidator implements ConstraintValidator<MyConstraint, Object> {
/*
* 这个类不需要去打@Compoment注解,实现了ConstraintValidator接口的类,Spring会自动把他注册到bean里,所以可以直接使用@Autowired注解
* */
@Autowired
private HelloService helloService;
/**
* @Description: 初始化方法,在这个方法中可以进行一些初始化的处理
* @Param: [constraintAnnotation]
* @return: void
* @Author: Liang Shan
* @Date: 2019/10/30 0030
*/
@Override
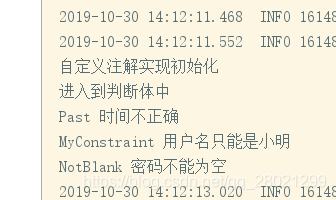
public void initialize(MyConstraint constraintAnnotation) {
System.out.println("自定义注解实现初始化");
}
/**
* @Description: 实现具体判断业务逻辑的方法
* @Param: [s, constraintValidatorContext]
* @return: boolean
* @Author: Liang Shan
* @Date: 2019/10/30 0030
*/
@Override
public boolean isValid(Object a, ConstraintValidatorContext constraintValidatorContext) {
System.out.println("进入到判断体中");
return false;
}
}步骤3:在你的实体类中打上注解
/**
* @program: ls-web
* @description: 封装用户数据
* @author: Liang Shan
* @create: 2019-10-28 10:37
**/
public class User {
    /*用户简单视图*/
    public interface UserSimpleView {
    };
    /*用户详细视图*/
    public interface UserDetailView extends UserSimpleView{
    };

    private String id;

    @MyConstraint(message = "用户名只能是小明")
    private String username;

    @NotBlank(message = "密码不能为空")
    private String password;

    @Past(message = "时间不正确")
    private Date birthday;
}
步骤4:使用@Valid 激活注解
@PutMapping("/{id:\\d+}")// 正则表达式限定参数
@JsonView(User.UserDetailView.class)// 指定方法返回详细对象视图,有username和password
public User update(@Valid @RequestBody User user,BindingResult errors) {
    if (errors.hasErrors()) {
        errors.getAllErrors().stream().forEach(e ->{
            System.out.println(e.getCode()+" " +e.getDefaultMessage());} );
    }
    return user;
}
最后,验证通过完成:


 被折叠的 条评论
为什么被折叠?
被折叠的 条评论
为什么被折叠?
 到【灌水乐园】发言


