


前言:
学习的地址:https://www.majiaxueyuan.com/front/showcoulist
SpringBoot的pom依赖(以2.0版本为例的)
本集记录的是security的权限框架 数据库结构和 shiro那节记录的数据库一样的 就不赘述了
目录
1.添加依赖
<parent>
        <groupId>org.springframework.boot</groupId>
        <artifactId>spring-boot-starter-parent</artifactId>
        <version>2.0.0.RELEASE</version>
    </parent>
    <dependencies>
        <dependency>
            <groupId>org.springframework.boot</groupId>
            <artifactId>spring-boot-starter</artifactId>
        </dependency>
        <dependency>
            <groupId>org.springframework.boot</groupId>
            <artifactId>spring-boot-starter-web</artifactId>
        </dependency>

        <!-- 引入freeMarker的依赖包. -->
        <dependency>
            <groupId>org.springframework.boot</groupId>
            <artifactId>spring-boot-starter-freemarker</artifactId>
        </dependency>

        <dependency>
            <groupId>org.apache.commons</groupId>
            <artifactId>commons-lang3</artifactId>
            <version>3.4</version>
        </dependency>

        <dependency>
            <groupId>org.springframework.boot</groupId>
            <artifactId>spring-boot-starter-security</artifactId>
        </dependency>


        <dependency>
            <groupId>mysql</groupId>
            <artifactId>mysql-connector-java</artifactId>
        </dependency>

        <dependency>
            <groupId>org.mybatis.spring.boot</groupId>
            <artifactId>mybatis-spring-boot-starter</artifactId>
            <version>1.1.1</version>
        </dependency>

        <dependency>
            <groupId>org.projectlombok</groupId>
            <artifactId>lombok</artifactId>
        </dependency>

    </dependencies>
    <build>
        <plugins>
            <plugin>
                <groupId>org.springframework.boot</groupId>
                <artifactId>spring-boot-maven-plugin</artifactId>
            </plugin>
        </plugins>
    </build>
2.编写application的配置文件
使用的是application.yml类型的
server:
    port: 8080
    tomcat:
        uri-encoding: UTF-8
spring:
    freemarker:
        allow-request-override: false
        cache: true
        charset: UTF-8
        check-template-location: true
        content-type: text/html
        expose-request-attributes: false
        expose-session-attributes: false
        expose-spring-macro-helpers: false
        suffix: .ftl
        template-loader-path: classpath:/templates/
    datasource:
        url: jdbc:mysql://localhost:3306/bootdb?useUnicode=true&characterEncoding=utf-8
        username: root
        password: xxxx
        driver-class-name: com.mysql.jdbc.Driver
前端页面配置:
index:
<!DOCTYPE html>
<html xmlns="http://www.w3.org/1999/html">
<head lang="en">
    <meta charset="UTF-8"/>
    <title></title>
</head>
<body>
你好啊:${username}
</br>
</br>
</body>
</html>
login页面
<!DOCTYPE html>
<html>
<head lang="en">
<meta charset="UTF-8"/>
<title></title>
</head>
<body>
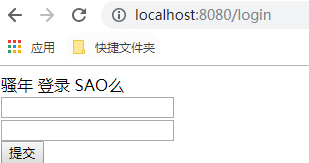
骚年 登录 SAO么
${msg}
<form action="/login" method="post">
<input type="text" name="username"/><br/>
<input type="password" name="password"/><br/>
<input type="submit" name="submit"/><br/>
</form>
</body>
</html>
3.编写security的配置类
主要是处理两个东西:
1.WebSecurityConfig
//注意配置文件 否则会去访问自带的模版
@Configuration
@EnableGlobalMethodSecurity(prePostEnabled = true)  //开启全局安全 就是pre之前 和 post结束之后的
public class WebSecurtiyConfig extends WebSecurityConfigurerAdapter {


    //需要自己创建的DetailUservice
    @Bean
    public MyUserDetailUservice myUserDetailUservice() {
        return new MyUserDetailUservice();
    }

    //配置 AuthenticationManagerBuilder

    @Override
    protected void configure(AuthenticationManagerBuilder auth) throws Exception {

        System.out.println("项目启动执行 第一个 开始走configure auth了!!!!");
        //通过userService去处理
        //后面需要建立一个UserDetailUserService 密码使用的BCryptPasswordEncodeer加盐了的
        auth.userDetailsService(myUserDetailUservice()).passwordEncoder(new BCryptPasswordEncoder());

    }

    //写死的
    @Bean
    @Override
    protected AuthenticationManager authenticationManager() throws Exception {
        return super.authenticationManager();
    }


    //这个是去处理网站请求的配置

    @Override
    protected void configure(HttpSecurity http) throws Exception {
        System.out.println("项目启动执行 第二个 开始走configure http了!!!!");
        http.csrf().disable();//关闭网站检测
        http.authorizeRequests().anyRequest().fullyAuthenticated();
        //login的方法和表单请求的方法一致

        http.formLogin().loginPage("/login")
        .failureUrl("/errorLogin").defaultSuccessUrl("/index").permitAll();
        http.logout().permitAll();
    }
}
这个配置类是处理http请求以及用户认证的
2.MyUserDetialUserService
这个是用来去数据库查询数据的
@Service
public class MyUserDetailUservice implements UserDetailsService {
@Autowired
private UserMapper userMapper;
@Autowired
private RoleUserMapper roleUserMapper;
@Override
public UserDetails loadUserByUsername(String username) throws UsernameNotFoundException {
//通过用户名获取用户
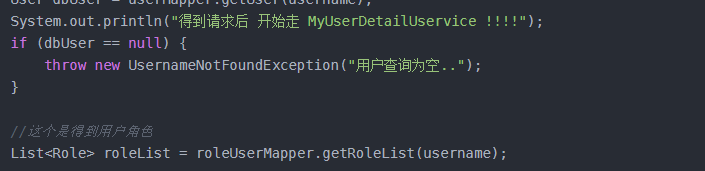
User dbUser = userMapper.getUser(username);
System.out.println("得到请求后 开始走 MyUserDetailUservice !!!!");
if (dbUser == null) {
throw new UsernameNotFoundException("用户查询为空..");
}
//这个是得到用户角色
List<Role> roleList = roleUserMapper.getRoleList(username);
//这里是得到角色 然后将放到一个认证的collection当中,然后使用userdetials的用户中
Collection<GrantedAuthority> grantedAuthorities = new ArrayList<>();
for (Role r : roleList) {
GrantedAuthority grantedAuthority = new SimpleGrantedAuthority("ROLE_"+r.getRname());
grantedAuthorities.add(grantedAuthority);
}
try {
org.springframework.security.core.userdetails.User detailUser = new org.springframework.security.core.userdetails.User(username, dbUser.getPassword(), grantedAuthorities);
return detailUser;
} catch (Exception e) {
throw new UsernameNotFoundException("用户密码错误..");
}
}
}可以看到上面需要通过mapper去查询数据过去。所以这里我需要连接数据库
4.连接数据库查询实现登录
首先是需要三个实体类 分别是 用户 角色 和 权限
用户:
@Data
public class User {

    private Integer uid;

    private String name;

    private String password;

    private Integer age;
}
角色:
@Data
public class Role {

    private Integer rid;

    private String rname;

    private String rdescription;

}
权限:
@Data
public class Permission {

    private Integer pid;

    private String pname;

}
接着是创建mapper接口
用户接口
@Mapper
@Repository
public interface UserMapper {

    @Select("SELECT * FROM users WHERE name LIKE #{username} limit 1;")
    User getUser(@Param("username") String username);

    @Insert("INSERT users INTO(name,password,age) VALUES(#{username},#{password},1);")
    void inserUser(@Param("username") String username, @Param("password") String password);

}
角色接口
@Mapper
@Repository
public interface RoleUserMapper {

    @Select("SELECT r.rid, r.rname,r.rdescription FROM users u,role r,role_user ru WHERE u.name =#{userName} and u.uid = ru.uid and ru.rid = r.rid;")
    List<Role> getRoleList(@Param("userName") String userName);

}
权限查询接口
@Mapper
@Repository
public interface RolePermissionMapper {


    @Select("SELECT p.pid,p.pname FROM permission p , permission_role pr ,role r WHERE r.rname = #{roleName} and r.rid =pr.rid and p.pid=pr.pid;")
    List<Permission> getPermissions(@Param("roleName") String roleName);
}
这样所需要的接口和上面的UserDetailService就对上了
然后将使用到的controller写上
登陆用的controller
@Controller
public class loginController{
@Autowired
private UserMapper userMapper;
@GetMapping("/login")
public String login(Map<String, String> maps) {
maps.put("msg", "");
return "login";
}
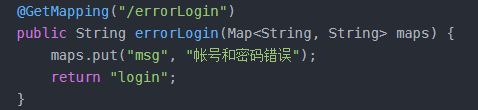
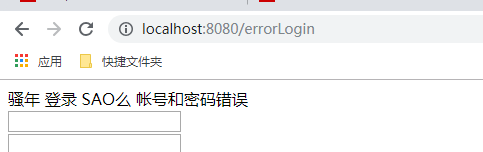
@GetMapping("/errorLogin")
public String errorLogin(Map<String, String> maps) {
maps.put("msg", "帐号和密码错误");
return "login";
}
}登陆成功进入的页面
@Controller
public class IndexController {
@GetMapping("/index")
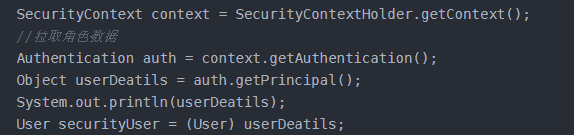
public String toIndex(Map<String, Object> maps) {
//通过上下文获得数据
SecurityContext context = SecurityContextHolder.getContext();
//拉取角色数据
Authentication auth = context.getAuthentication();
Object userDeatils = auth.getPrincipal();
System.out.println(userDeatils);
User securityUser = (User) userDeatils;
maps.put("username", securityUser.getUsername());
return "index";
}
}在写一个展现角色权限的controller
@RestController
@RequestMapping("/role")
public class RoleController {

    @PreAuthorize("hasRole('ROLE_ADMIN')")
    @GetMapping("/admin")
    public String getAdmin() {
        return "admin SUCCESS!!!";
    }

    @PreAuthorize("hasRole('ROLE_USER')")
    @GetMapping("/user")
    public String getUser() {
        return "user SUCCESS!!!";
    }

    @PreAuthorize("hasRole('ROLE_SUPERMAN')")
    @GetMapping("/superman")
    public String getSuperMan() {
        return "superman SUCCESS!!!";
    }
}
5.测试
通过前台登录看是否能登录到index页面
![]()
会跳转到login
因为从

这里看出 他默认是login页面 失败后会跳转到errorLogin请求去,
我们输入一个存在的用户名和密码(这里的密码是加盐了的, 这个加盐方式和md5的不一样)

我们用姬子阿姐的登录试试(密码是123)

说明是成功的。
看后台日志:
得到请求后 开始走 MyUserDetailUservice !!!!
org.springframework.security.core.userdetails.User@2a49a155: Username: 姬子阿姐; Password: [PROTECTED]; Enabled: true; AccountNonExpired: true; credentialsNonExpired: true; AccountNonLocked: true; Granted Authorities: ADMIN,USER
可以看到最后是转成了 security的User类,以及包含了一些常用的参数
是从MyUserdetailUserService中处理的,
得到后 转成了 UserDetail 对象
然后controller通过SecurityContextHolder得到的上下文 拉取到角色对象
这样就展示到前台了。
还有个权限和角色的展示,如下:
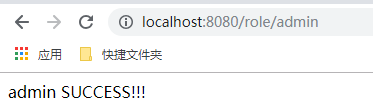
有一个rolecontroller
我们去访问 role/admin 可以看到拥有admin权限,
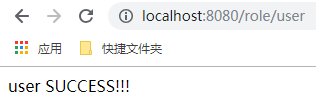
User 权限也有:
但是没有生成superman 的权限
所以前台会报forbidden
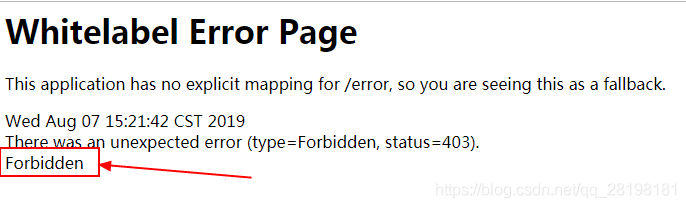
这里 springSecurity的一个机制 就是 显示权限必须加上" ROLE_ "的前缀
可以看到前面在加权限的时候有一个ROLE_+name

是为了在注解 @PreAuthorize("hasRole('ROLE_xxxxx)") 这里使用 这个是 spirng的机制 为了不修改数据库 就在这里加上了一个前缀
记录如上。


 152
152


 被折叠的 条评论
为什么被折叠?
被折叠的 条评论
为什么被折叠?
 到【灌水乐园】发言


