


本文来自简书,原文地址:http://www.jianshu.com/p/c8e638e76e83
iOS 开发中有时候会有夜间模式(换肤设置)的需求, 其实主要是更改相关颜色操作!
思路:每次切换夜间/白天模式时,都会发出通知给所有ViewController,让它们切换到相应的主题。
- 创建一个管理模式主题的单例管理类ThemeManage
- 封装好需要做夜间模式变色处理的控件扩展:UIView (ThemeChange), UINavigationBar (ThemeChange), UITabBar (ThemeChange), UILabel (ThemeChange), UIButton (ThemeChange)
- 在 AppDelegate里先获取夜间模式状态, 根控制器里先设置tabBar 及 子控制器里navigationBar的夜间模式状态
- 添加控制白天/黑夜模式item,发通知切换相对应i模式及image
- 添加相关控件是否黑夜模式下已更换字色和背景色
一. 创建一个管理模式主题的单例管理类ThemeManage
ThemeManage.h 文件:
#import <Foundation/Foundation.h>
#import <UIKit/UIKit.h>

@interface ThemeManage : NSObject

#pragma mark - 颜色属性
@property(nonatomic, retain) UIColor *bgColor;
@property(nonatomic, retain) UIColor *color1;
@property(nonatomic, retain) UIColor *color2;
@property(nonatomic, retain) UIColor *textColor;
@property(nonatomic, retain) UIColor *textColorGray;
@property(nonatomic, retain) UIColor *navBarColor;
@property(nonatomic, retain) UIColor *colorClear;

#pragma mark -

// 是否是夜间 YES表示夜间, NO为正常
@property(nonatomic, assign) BOOL isNight;

/**
 * 模式管理单例
 */
+ (ThemeManage *)shareThemeManage;

@end
ThemeManage. m 文件
#import "ThemeManage.h"

static ThemeManage *themeManage; // 单例


@implementation ThemeManage

#pragma mark - 单例的初始化

+ (ThemeManage *)shareThemeManage {

    static dispatch_once_t onceToken;
    dispatch_once(&onceToken, ^{
        themeManage = [[ThemeManage alloc] init];
    });
    return themeManage;
}

#pragma mark 重写isNight的set方法

- (void)setIsNight:(BOOL)isNight {

    _isNight = isNight;

    if (self.isNight) { // 夜间模式改变相关颜色

        self.bgColor = [UIColor colorWithRed:0.06 green:0.08 blue:0.1 alpha:1];
        self.textColor = [UIColor whiteColor];
        self.color1 = [UIColor colorWithRed:0.08 green:0.11 blue:0.13 alpha:1];
        self.navBarColor = [UIColor whiteColor];
        self.color2 = [UIColor colorWithRed:0.2 green:0.31 blue:0.43 alpha:1];
        self.textColorGray = [UIColor whiteColor];
    } else{

        self.bgColor = [UIColor whiteColor];
        self.textColor = [UIColor blackColor];
        self.color1 = [UIColor colorWithRed:0.06 green:0.25 blue:0.48 alpha:1];
        self.navBarColor = [UIColor colorWithRed:0.31 green:0.73 blue:0.58 alpha:1];
        self.color2 = [UIColor colorWithRed:0.57 green:0.66 blue:0.77 alpha:1];
        self.textColorGray = [UIColor grayColor];
    }

    static dispatch_once_t onceToken;
    dispatch_once(&onceToken, ^{
        self.colorClear = [UIColor clearColor];
    });
}

@end
二. 封装好需要做夜间模式变色处理的控件扩展
一般需要UIView (ThemeChange), UINavigationBar (ThemeChange), UITabBar (ThemeChange), UILabel (ThemeChange), UIButton (ThemeChange);这里拿 UIView 做例子:
#import <UIKit/UIKit.h>

/**
 * 颜色状态枚举值 颜色的定义(一个代表一套)
 */
typedef NS_ENUM(NSInteger, UIViewColorType) {

    UIViewColorTypeNormal, // 白天白色, 夜间黑色
    UIViewColorType1, // 白天蓝色, 夜间深灰
    UIViewColorType2, // 白天浅蓝, 夜间浅蓝
    UIViewColorTypeClear // 透明状态
};

@interface UIView (ThemeChange)

// 定义颜色类型的属性, NSNumber类型
@property(nonatomic, assign) id type;

// 消息中心开始监听
- (void)startMonitor;
// 改变颜色的方法
- (void)changeColor;
// 设置颜色类型和对应颜色
- (void)NightWithType:(UIViewColorType)type;

// 设置字体颜色的方法
- (void)initTextColor;

@end
#import "UIView+ThemeChange.h"
#import "ThemeManage.h"
// 添加runtime头文件
#import <objc/runtime.h>
@implementation UIView (ThemeChange)
#pragma mark - 添加type的set,get方法
- (void)setType:(id)type {
objc_setAssociatedObject(self, @selector(type), type, OBJC_ASSOCIATION_RETAIN_NONATOMIC);
}
- (id)type {
return objc_getAssociatedObject(self, @selector(type));
}
#pragma mark - 开始监听
- (void)startMonitor {
[[NSNotificationCenter defaultCenter] addObserver:self selector:@selector(changeColor) name:@"changeColor" object:nil];
}
#pragma mark - 改变颜色
- (void)changeColor {
// type为NSNumber型, 变为NSInteger
switch ([self.type integerValue]) {
case UIViewColorTypeNormal:
self.backgroundColor = [ThemeManage shareThemeManage].bgColor;
break;
case UIViewColorType1:
self.backgroundColor = [ThemeManage shareThemeManage].color1;
break;
case UIViewColorType2:
self.backgroundColor = [ThemeManage shareThemeManage].color2;
break;
case UIViewColorTypeClear:
self.backgroundColor = [ThemeManage shareThemeManage].colorClear;
break;
default:
break;
}
}
#pragma mark - 设置颜色类型和对应颜色
- (void)NightWithType:(UIViewColorType)type {
self.type = [NSNumber numberWithInteger:type];
[self changeColor];
[self startMonitor];
// 调用设置字体颜色的方法
[self initTextColor];
}
#pragma mark - 改变字体颜色的方法, 空方法, 可以在子类中重写这个方法来改变颜色(例如:Label)
- (void)initTextColor {
}
@end三. 在 AppDelegate里先获取夜间模式状态, 根控制器里先设置tabBar 及 子控制器里navigationBar的夜间模式状态
#import "ThemeManage.h"
#import "UIView+ThemeChange.h"
- (BOOL)application:(UIApplication *)application didFinishLaunchingWithOptions:(NSDictionary *)launchOptions {
// 获取夜间模式状态
[ThemeManage shareThemeManage].isNight = [[NSUserDefaults standardUserDefaults] boolForKey:@"night"];
self.window = [[UIWindow alloc] initWithFrame:[[UIScreen mainScreen] bounds]];
self.window.backgroundColor = [UIColor whiteColor];
[self.window makeKeyAndVisible];
RootViewController *rootVc = [[RootViewController alloc] init];
self.window.rootViewController = rootVc;
return YES;
}RootViewController.m 文件:
- (void)viewDidLoad {
    [super viewDidLoad];

    [self.view NightWithType:UIViewColorTypeNormal];

    HomeViewController *vc = [[HomeViewController alloc] init];
    UINavigationController *nav = [[UINavigationController alloc] initWithRootViewController:vc];
    // 设置navigationBar的夜间模式状态
    [nav.navigationBar NightWithType:UIViewColorTypeNormal];
    vc.tabBarItem = [[UITabBarItem alloc] initWithTitle:@"首页" image:[UIImage imageNamed:@"home"] tag:10];

    SchemaViewController *secondVC = [[SchemaViewController alloc] init];
    UINavigationController *nav1 = [[UINavigationController alloc] initWithRootViewController:secondVC];
    // 设置navigationBar的夜间模式状态
    [nav1.navigationBar NightWithType:UIViewColorTypeNormal];
    secondVC.tabBarItem = [[UITabBarItem alloc] initWithTitle:@"菜单" image:[UIImage imageNamed:@"schema"] tag:11];

    [self.tabBar NightWithType:UIViewColorTypeNormal];
    self.viewControllers = @[nav, nav1];
    self.tabBar.translucent = NO;
    [[UINavigationBar appearance] setTranslucent:NO];
}
四. 添加控制白天/黑夜模式item,发通知切换相对应i模式及image.
#import "ThemeManage.h"
#import "UIView+ThemeChange.h" [self.view NightWithType:UIViewColorTypeNormal];
UIImage *barButtonImage = [ThemeManage shareThemeManage].isNight ? [UIImage imageNamed:@"night"] : [UIImage imageNamed:@"day"];
self.navigationItem.rightBarButtonItem = [[UIBarButtonItem alloc] initWithImage:barButtonImage style:UIBarButtonItemStylePlain target:self action:@selector(rightBarBtnAction:)];#pragma mark - Action点击动作事件
// 切换夜间模式
- (void)rightBarBtnAction:(UIBarButtonItem *)barButton {
[ThemeManage shareThemeManage].isNight = ![ThemeManage shareThemeManage].isNight;
[[NSNotificationCenter defaultCenter] postNotificationName:@"changeColor" object:nil];
[[NSUserDefaults standardUserDefaults] setBool:[ThemeManage shareThemeManage].isNight forKey:@"night"];
UIImage *barBtnImage = [ThemeManage shareThemeManage].isNight ? [UIImage imageNamed:@"night"] : [UIImage imageNamed:@"day"];
[barButton setImage:barBtnImage];
}发了通知不要忘记移除监听
- (void)dealloc {
    // 移除监听
    [[NSNotificationCenter defaultCenter] removeObserver:self];
}
五. 添加相关控件是否黑夜模式下已更换字色和背景色
#import "UILabel+ThemeChange.h" UILabel *label = [[UILabel alloc] initWithFrame:CGRectMake(100, 100, 200, 40)];
label.text = @"测试看看字色及背景色";
[label NightWithType:UIViewColorTypeNormal];
[label NightTextType:LabelColorGray];
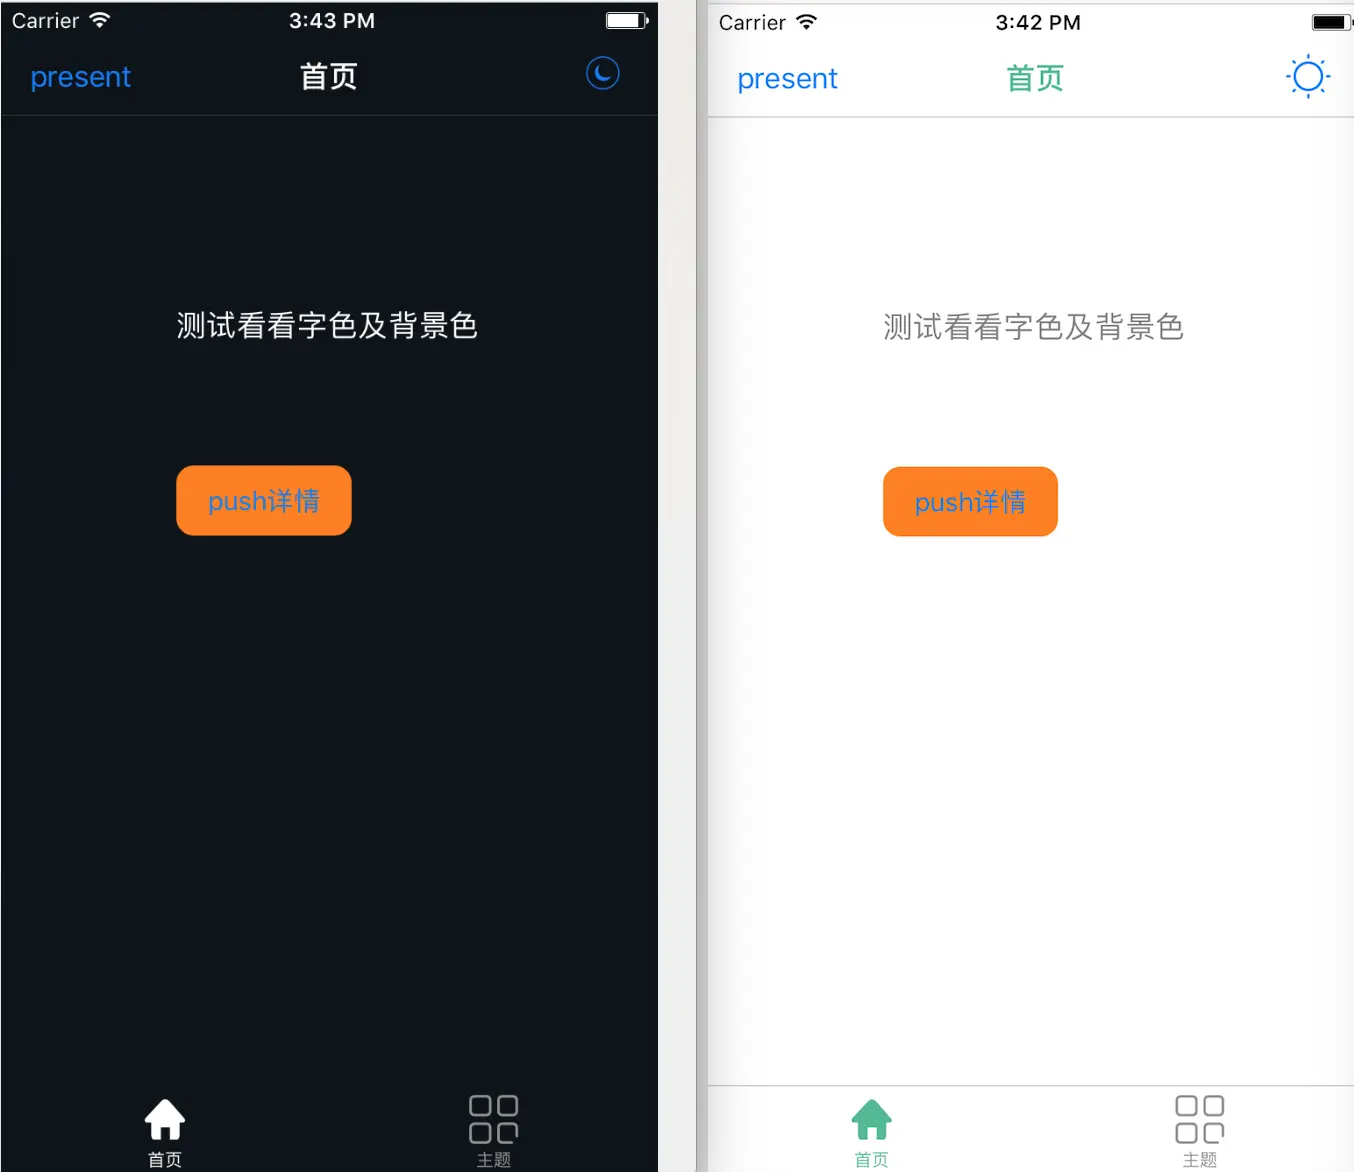
[self.view addSubview:label];这时候测试下, 看下效果:
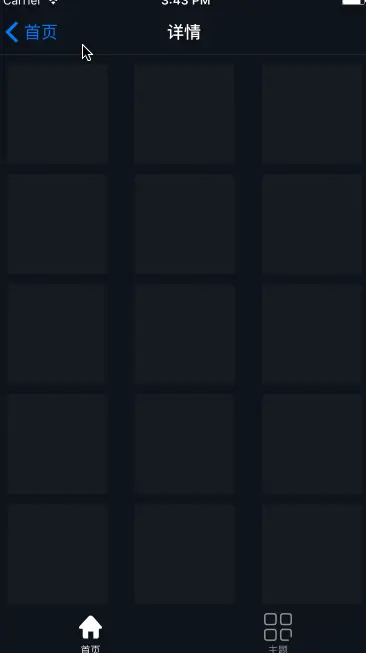
夜间模式.gif


 2856
2856

 被折叠的 条评论
为什么被折叠?
被折叠的 条评论
为什么被折叠?
 到【灌水乐园】发言


