Notification可以让我们在获得消息的时候,在状态栏,锁屏界面来显示相应的信息,很难想象如果没有Notification,那我们的qq和微信以及其他应用没法主动通知我们,我们就需要时时的看手机来检查是否有新的信息和提醒着实让人烦心,也体现出Notification重要性。这里会介绍三种Notification,分别是普通的Notification,折叠式Notification和悬挂式Notification。
1. 普通Notification
首先创建Builder 对象,用PendingIntent 控制跳转,这里跳转到网页
Notification.Builder builder = new Notification.Builder(this)
Intent mIntent = new Intent(Intent.ACTION_VIEW, Uri.parse("http://blog.csdn.net/itachi85/"))
PendingIntent pendingIntent = PendingIntent.getActivity(this, 0, mIntent, 0)
有了builder 我们就可以给Notification添加各种属性:
builder.setContentIntent(pendingIntent)
builder.setSmallIcon(R.drawable.lanucher)
builder.setLargeIcon(BitmapFactory.decodeResource(getResources(), R.drawable.lanucher))
builder.setAutoCancel(true)
builder.setContentTitle("普通通知")
最后是创建NotificationManager调用notify方法:
notificationManager = (NotificationManager) getSystemService(NOTIFICATION_SERVICE)
notificationManager.notify(0, builder.build())
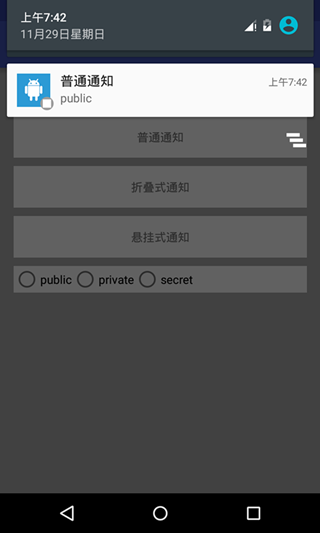
来看看效果:

2. 折叠式Notification
折叠式Notification是一种自定义视图的Notification,用来显示长文本和一些自定义的布局的场景。它有两种状态,一种是普通状态下的视图(如果不是自定义的话和上面普通通知的视图样式一样),一种是展开状态下的视图。和普通Notification不同的是,我们需要自定义的视图,而这个视图显示的进程和我们创建视图的进程不再一个进程,所以我们需要使用RemoteViews,首先要使用RemoteViews来创建我们的自定义视图:
RemoteViews remoteViews = new RemoteViews(getPackageName(), R.layout.view_fold);
视图的布局文件:
<?xml version="1.0" encoding="utf-8"?>
<LinearLayout xmlns:android="http://schemas.android.com/apk/res/android"
    android:layout_width="match_parent"
    android:layout_height="100dp"
    android:background="@drawable/fold"
    android:orientation="horizontal">
<ImageView
    android:id="@+id/iv_image"
    android:layout_width="100dp"
    android:layout_height="100dp"
    android:src="@drawable/fold"
    />

    <TextView
        android:id="@+id/tv_text"
        android:layout_width="wrap_content"
        android:layout_height="wrap_content"
        android:layout_marginTop="30dp"
        android:layout_marginLeft="150dp"
        android:text="展开后的自定义视图"
        android:textColor="@color/colorPrimaryDark"/>
</LinearLayout>
- 1
- 2
- 3
- 4
- 5
- 6
- 7
- 8
- 9
- 10
- 11
- 12
- 13
- 14
- 15
- 16
- 17
- 18
- 19
- 20
- 21
- 22
- 1
- 2
- 3
- 4
- 5
- 6
- 7
- 8
- 9
- 10
- 11
- 12
- 13
- 14
- 15
- 16
- 17
- 18
- 19
- 20
- 21
- 22
我们需要把自定义的视图赋值给Notification的视图,下面代码是把自定义视图赋值给Notification展开时的视图
//指定展开时的视图
notification.bigContentView = remoteViews;
当然我们也可以把自定义视图赋值给Notification普通状态时的视图
//指定普通状态时的视图
notification.contentView = remoteViews;
其他的代码和普通Notification没什么区别,折叠式Notification完整代码:
Notification.Builder builder = new Notification.Builder(this)
Intent mIntent = new Intent(Intent.ACTION_VIEW, Uri.parse("http://blog.csdn.net/itachi85/"))
PendingIntent pendingIntent = PendingIntent.getActivity(this, 0, mIntent, 0)
builder.setContentIntent(pendingIntent)
builder.setSmallIcon(R.drawable.foldleft)
builder.setLargeIcon(BitmapFactory.decodeResource(getResources(), R.drawable.lanucher))
builder.setAutoCancel(true)
builder.setContentTitle("折叠式通知")
//用RemoteViews来创建自定义Notification视图
RemoteViews remoteViews = new RemoteViews(getPackageName(), R.layout.view_fold)
Notification notification = builder.build()
//指定展开时的视图
notification.bigContentView = remoteViews
notificationManager.notify(1, notification)
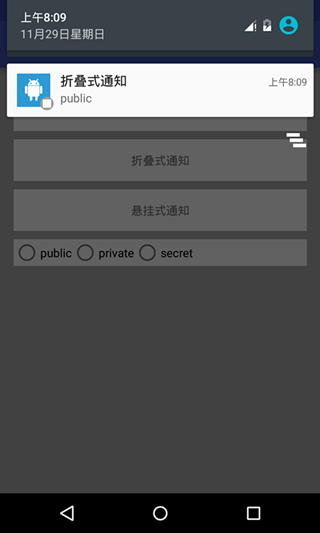
如果不是自定义普通状态视图的话,折叠式Notification普通状态下和普通Notification没什么区别

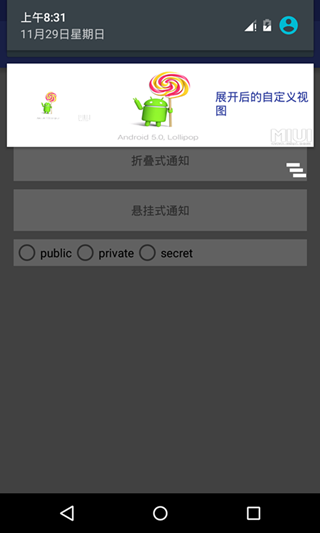
我们接着往下拉,使折叠式Notification完全展开就会出现我们自定义的视图

3. 悬挂式Notification
悬挂式Notification是android5.0新增加的方式,和前两种显示方式不同的是,前两种需要下拉通知栏才能看到通知,而 悬挂式Notification不需要下拉通知栏就直接显示出来悬挂在屏幕上方并且焦点不变仍在用户操作的界面因此不会打断用户的操作,过几秒就会自动消失。
和前两种Notification不同的是,他需要调用setFullScreenIntent来将Notification变为悬挂式Notification
PendingIntent hangPendingIntent = PendingIntent.getActivity(this, 0, hangIntent, PendingIntent.FLAG_CANCEL_CURRENT);
builder.setFullScreenIntent(hangPendingIntent, true);
实现悬挂式Notification完整代码:
Notification.Builder builder = new Notification.Builder(this)
Intent mIntent = new Intent(Intent.ACTION_VIEW, Uri.parse("http://blog.csdn.net/itachi85/"))
PendingIntent pendingIntent = PendingIntent.getActivity(this, 0, mIntent, 0)
builder.setContentIntent(pendingIntent)
builder.setSmallIcon(R.drawable.foldleft)
builder.setLargeIcon(BitmapFactory.decodeResource(getResources(), R.drawable.lanucher))
builder.setAutoCancel(true)
builder.setContentTitle("悬挂式通知")
//设置点击跳转
Intent hangIntent = new Intent()
hangIntent.setFlags(Intent.FLAG_ACTIVITY_NEW_TASK)
hangIntent.setClass(this, MyNotificationActivity.class)
//如果描述的PendingIntent已经存在,则在产生新的Intent之前会先取消掉当前的
PendingIntent hangPendingIntent = PendingIntent.getActivity(this, 0, hangIntent, PendingIntent.FLAG_CANCEL_CURRENT)
builder.setFullScreenIntent(hangPendingIntent, true)
notificationManager.notify(2, builder.build())
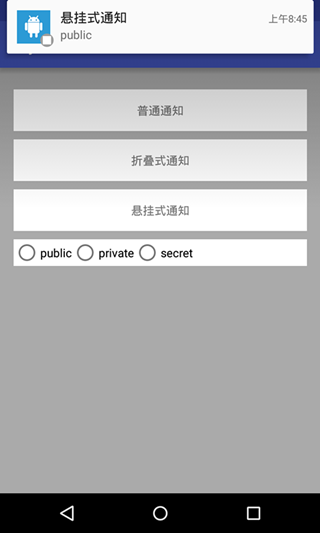
来看看效果

4. Notification的显示等级
android5.0加入了一种新的模式Notification的显示等级,共有三种:
builder.setVisibility(Notification.VISIBILITY_PUBLIC)
我在这里写了个方法来设置Notification等级,用radioGroup来演示Notification的各个显示等级,详情请参照源码。
private void selectNotofovatiomLevel(Notification.Builder builder) {
switch (radioGroup.getCheckedRadioButtonId()) {
case R.id.rb_public:
builder.setVisibility(Notification.VISIBILITY_PUBLIC)
builder.setContentText("public")
break
case R.id.rb_private:
builder.setVisibility(Notification.VISIBILITY_PRIVATE)
builder.setContentText("private")
break
case R.id.rb_secret:
builder.setVisibility(Notification.VISIBILITY_SECRET)
builder.setContentText("secret")
break
default:
builder.setVisibility(Notification.VISIBILITY_PUBLIC)
builder.setContentText("public")
break
}
}


 1824
1824

 被折叠的 条评论
为什么被折叠?


