


转载请标明出处:http://blog.csdn.net/lmj623565791/article/details/27231237
现在app基本都有推送的功能,于是看了下百度云的推送,官方文档和Demo都很到位,记录下使用过程,目标是利用百度云推送最为服务器写个及时通讯的例子~当然了,这是第一篇入门~
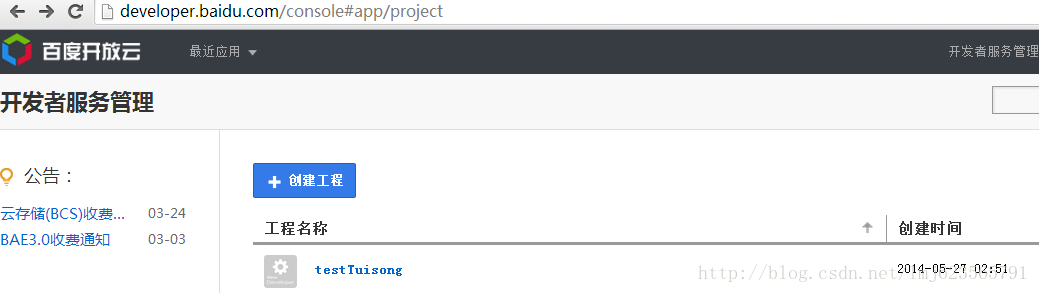
1、第一步就是在百度开发者服务管理中创建项目,然后拿到API key , Secret Key ;这个过程就不多说了,上官网直接申请就行,不复杂。
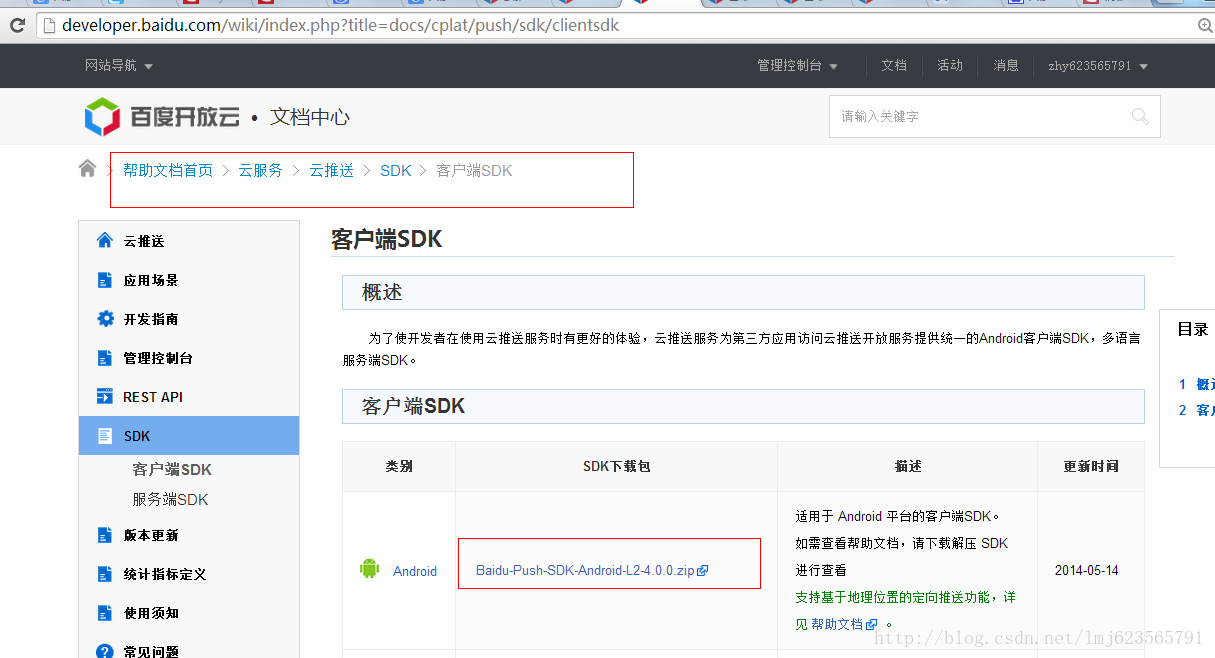
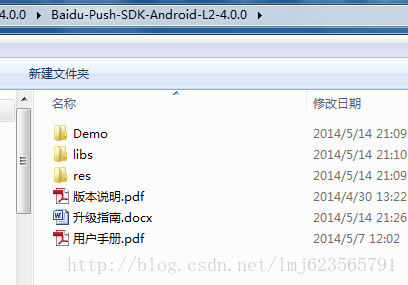
2、下载云推送的客户端SDK,SDK的压缩文件中包含一个例子代码,一个用户手册,和所需的libs和资源等(其实直接看用户手册和Demo基本就没问题了)。
3、准备工作结束,接下来,我们就直接开始新建项目测试
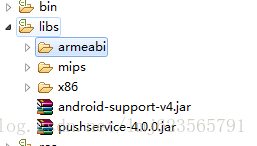
a、新建一个项目,然后把SDK中的libs中的jar和so文件夹拷贝到新建的项目中去
b、将manifest中的application的name设置为:com.baidu.frontia.FrontiaApplication
<application
     android:name="com.baidu.frontia.FrontiaApplication"
     android:allowBackup="true"
     android:icon="@drawable/ic_launcher"
     android:label="@string/app_name"
     android:theme="@style/AppTheme" >
如果你的项目需要自定义Application,请参考用户手册中的相关配置。
c、添加权限
<uses-permission android:name="android.permission.INTERNET" />
   <uses-permission android:name="android.permission.READ_PHONE_STATE" />
   <uses-permission android:name="android.permission.ACCESS_NETWORK_STATE" />
   <uses-permission android:name="android.permission.RECEIVE_BOOT_COMPLETED" />
   <uses-permission android:name="android.permission.WRITE_SETTINGS" />
   <uses-permission android:name="android.permission.VIBRATE" />
   <uses-permission android:name="android.permission.WRITE_EXTERNAL_STORAGE" />
   <uses-permission android:name="android.permission.DISABLE_KEYGUARD" />
   <uses-permission android:name="android.permission.ACCESS_COARSE_LOCATION" />
   <uses-permission android:name="android.permission.ACCESS_WIFI_STATE" />
d、添加两个receiver和一个Service(注释标明了用处)
<!-- push service start -->
       <!-- 用于接收系统消息以保证PushService正常运行 -->
       <receiver
           android:name="com.baidu.android.pushservice.PushServiceReceiver"
           android:process=":bdservice_v1" >
           <intent-filter>
               <action android:name="android.intent.action.BOOT_COMPLETED" />
               <action android:name="android.net.conn.CONNECTIVITY_CHANGE" />
               <action android:name="com.baidu.android.pushservice.action.notification.SHOW" />
               <action android:name="com.baidu.android.pushservice.action.media.CLICK" />
           </intent-filter>
       </receiver>
       <!-- Push服务接收客户端发送的各种请求 -->
       <!-- 注意:RegistrationReceiver 在2.1.1及之前版本有拼写失误,为RegistratonReceiver ,用新版本SDK时请更改为如下代码 -->
       <receiver
           android:name="com.baidu.android.pushservice.RegistrationReceiver"
           android:process=":bdservice_v1" >
           <intent-filter>
               <action android:name="com.baidu.android.pushservice.action.METHOD" />
               <action android:name="com.baidu.android.pushservice.action.BIND_SYNC" />
           </intent-filter>
           <intent-filter>
               <action android:name="android.intent.action.PACKAGE_REMOVED" />

               <data android:scheme="package" />
           </intent-filter>
       </receiver>
       <!-- Push 服务 -->
       <!-- 注意:在4.0 (包含)之后的版本需加上如下所示的intent-filter action -->
       <service
           android:name="com.baidu.android.pushservice.PushService"
           android:exported="true"
           android:process=":bdservice_v1" >
           <intent-filter>
               <action android:name="com.baidu.android.pushservice.action.PUSH_SERVICE" />
           </intent-filter>
       </service>
       <!-- push service end -->
e、我们需要自己实现一个Receiver,来接收Push消息、接口调用回调以及通知点击事件。
<receiver android:name="com.example.zhy_baiduyun_tuisong01.receiver.MyPushMessageReceiver" >
           <intent-filter>
               <!-- 接收push消息 -->
               <action android:name="com.baidu.android.pushservice.action.MESSAGE" />
               <!-- 接收bind、setTags等method的返回结果 -->
               <action android:name="com.baidu.android.pushservice.action.RECEIVE" />
               <!-- 可选。接受通知点击事件,和通知自定义内容 -->
                 <action android:name="com.baidu.android.pushservice.action.notification.CLICK" />
           </intent-filter>
       </receiver>
代码:
package com.example.zhy_baiduyun_tuisong01.receiver;

import java.util.List;

import org.json.JSONException;
import org.json.JSONObject;

import android.content.Context;
import android.content.Intent;
import android.text.TextUtils;
import android.util.Log;

import com.baidu.frontia.api.FrontiaPushMessageReceiver;
import com.example.zhy_baiduyun_tuisong01.MainActivity;
import com.example.zhy_baiduyun_tuisong01.util.PreUtils;

/**
 * Push消息处理receiver。请编写您需要的回调函数, 一般来说: onBind是必须的,用来处理startWork返回值;
 * onMessage用来接收透传消息; onSetTags、onDelTags、onListTags是tag相关操作的回调;
 * onNotificationClicked在通知被点击时回调; onUnbind是stopWork接口的返回值回调
 *
 * 返回值中的errorCode,解释如下:
 *  0 - Success
 *  10001 - Network Problem
 *  30600 - Internal Server Error
 *  30601 - Method Not Allowed
 *  30602 - Request Params Not Valid
 *  30603 - Authentication Failed
 *  30604 - Quota Use Up Payment Required
 *  30605 - Data Required Not Found
 *  30606 - Request Time Expires Timeout
 *  30607 - Channel Token Timeout
 *  30608 - Bind Relation Not Found
 *  30609 - Bind Number Too Many
 *
 * 当您遇到以上返回错误时,如果解释不了您的问题,请用同一请求的返回值requestId和errorCode联系我们追查问题。
 *
 */
public class MyPushMessageReceiver extends FrontiaPushMessageReceiver {
    /** TAG to Log */
    public static final String TAG = MyPushMessageReceiver.class
            .getSimpleName();

    /**
     * 调用PushManager.startWork后,sdk将对push
     * server发起绑定请求,这个过程是异步的。绑定请求的结果通过onBind返回。 如果您需要用单播推送,需要把这里获取的channel
     * id和user id上传到应用server中,再调用server接口用channel id和user id给单个手机或者用户推送。
     *
     * @param context
     *            BroadcastReceiver的执行Context
     * @param errorCode
     *            绑定接口返回值,0 - 成功
     * @param appid
     *            应用id。errorCode非0时为null
     * @param userId
     *            应用user id。errorCode非0时为null
     * @param channelId
     *            应用channel id。errorCode非0时为null
     * @param requestId
     *            向服务端发起的请求id。在追查问题时有用;
     * @return none
     */
    @Override
    public void onBind(Context context, int errorCode, String appid,
            String userId, String channelId, String requestId) {
        String responseString = "onBind errorCode=" + errorCode + " appid="
                + appid + " userId=" + userId + " channelId=" + channelId
                + " requestId=" + requestId;
        Log.e(TAG, responseString);

        // 绑定成功,设置已绑定flag,可以有效的减少不必要的绑定请求
        if (errorCode == 0) {
            PreUtils.bind(context);
        }
        // Demo更新界面展示代码,应用请在这里加入自己的处理逻辑
        updateContent(context, responseString);
    }

    /**
     * 接收透传消息的函数。
     *
     * @param context
     *            上下文
     * @param message
     *            推送的消息
     * @param customContentString
     *            自定义内容,为空或者json字符串
     */
    @Override
    public void onMessage(Context context, String message,
            String customContentString) {
        String messageString = "透传消息 message=\"" + message
                + "\" customContentString=" + customContentString;
        Log.e(TAG, messageString);

        // 自定义内容获取方式,mykey和myvalue对应透传消息推送时自定义内容中设置的键和值
        if (!TextUtils.isEmpty(customContentString)) {
            JSONObject customJson = null;
            try {
                customJson = new JSONObject(customContentString);
                String myvalue = null;
                if (customJson.isNull("mykey")) {
                    myvalue = customJson.getString("mykey");
                }
            } catch (JSONException e) {
                // TODO Auto-generated catch block
                e.printStackTrace();
            }
        }

        // Demo更新界面展示代码,应用请在这里加入自己的处理逻辑
        updateContent(context, messageString);
    }


    /**
     * 接收通知点击的函数。注:推送通知被用户点击前,应用无法通过接口获取通知的内容。
     *
     * @param context
     *            上下文
     * @param title
     *            推送的通知的标题
     * @param description
     *            推送的通知的描述
     * @param customContentString
     *            自定义内容,为空或者json字符串
     */
    @Override
    public void onNotificationClicked(Context context, String title,
            String description, String customContentString) {


        String notifyString = "通知点击 title=\"" + title + "\" description=\""
                + description + "\" customContent=" + customContentString;
        Log.e(TAG, notifyString);

        // 自定义内容获取方式,mykey和myvalue对应通知推送时自定义内容中设置的键和值
        if (!TextUtils.isEmpty(customContentString)) {
            JSONObject customJson = null;
            try {
                customJson = new JSONObject(customContentString);
                String myvalue = null;
                if (customJson.isNull("mykey")) {
                    myvalue = customJson.getString("mykey");
                }
            } catch (JSONException e) {
                // TODO Auto-generated catch block
                e.printStackTrace();
            }
        }

        // Demo更新界面展示代码,应用请在这里加入自己的处理逻辑
        updateContent(context, notifyString);
    }

    /**
     * setTags() 的回调函数。
     *
     * @param context
     *            上下文
     * @param errorCode
     *            错误码。0表示某些tag已经设置成功;非0表示所有tag的设置均失败。
     * @param successTags
     *            设置成功的tag
     * @param failTags
     *            设置失败的tag
     * @param requestId
     *            分配给对云推送的请求的id
     */
    @Override
    public void onSetTags(Context context, int errorCode,
            List<String> sucessTags, List<String> failTags, String requestId) {
        String responseString = "onSetTags errorCode=" + errorCode
                + " sucessTags=" + sucessTags + " failTags=" + failTags
                + " requestId=" + requestId;
        Log.e(TAG, responseString);

        // Demo更新界面展示代码,应用请在这里加入自己的处理逻辑
        updateContent(context, responseString);
    }

    /**
     * delTags() 的回调函数。
     *
     * @param context
     *            上下文
     * @param errorCode
     *            错误码。0表示某些tag已经删除成功;非0表示所有tag均删除失败。
     * @param successTags
     *            成功删除的tag
     * @param failTags
     *            删除失败的tag
     * @param requestId
     *            分配给对云推送的请求的id
     */
    @Override
    public void onDelTags(Context context, int errorCode,
            List<String> sucessTags, List<String> failTags, String requestId) {
        String responseString = "onDelTags errorCode=" + errorCode
                + " sucessTags=" + sucessTags + " failTags=" + failTags
                + " requestId=" + requestId;
        Log.e(TAG, responseString);

        // Demo更新界面展示代码,应用请在这里加入自己的处理逻辑
        updateContent(context, responseString);
    }

    /**
     * listTags() 的回调函数。
     *
     * @param context
     *            上下文
     * @param errorCode
     *            错误码。0表示列举tag成功;非0表示失败。
     * @param tags
     *            当前应用设置的所有tag。
     * @param requestId
     *            分配给对云推送的请求的id
     */
    @Override
    public void onListTags(Context context, int errorCode, List<String> tags,
            String requestId) {
        String responseString = "onListTags errorCode=" + errorCode + " tags="
                + tags;
        Log.e(TAG, responseString);

        // Demo更新界面展示代码,应用请在这里加入自己的处理逻辑
        updateContent(context, responseString);
    }

    /**
     * PushManager.stopWork() 的回调函数。
     *
     * @param context
     *            上下文
     * @param errorCode
     *            错误码。0表示从云推送解绑定成功;非0表示失败。
     * @param requestId
     *            分配给对云推送的请求的id
     */
    @Override
    public void onUnbind(Context context, int errorCode, String requestId) {
        String responseString = "onUnbind errorCode=" + errorCode
                + " requestId = " + requestId;
        Log.e(TAG, responseString);

        // 解绑定成功,设置未绑定flag,
        if (errorCode == 0) {
            PreUtils.unbind(context);
        }
        // Demo更新界面展示代码,应用请在这里加入自己的处理逻辑
        updateContent(context, responseString);
    }

    private void updateContent(Context context, String content) {
        Log.e(TAG, "updateContent");
        //String logText = "" + Utils.logStringCache;

//        if (!logText.equals("")) {
//            logText += "\n";
//        }

//        SimpleDateFormat sDateFormat = new SimpleDateFormat("HH-mm-ss");
//        logText += sDateFormat.format(new Date()) + ": ";
//        logText += content;

        //Utils.logStringCache = logText;

        Intent intent = new Intent();
        intent.putExtra("result", content);
        intent.setClass(context.getApplicationContext(), MainActivity.class);
        intent.addFlags(Intent.FLAG_ACTIVITY_NEW_TASK);
        context.getApplicationContext().startActivity(intent);
    }

}
代码是官方Demo的代码,注释特别详细,做了一点修改,每次回调的结果,我会让显示到主界面上。主Actvity:
package com.example.zhy_baiduyun_tuisong01;

import android.app.Activity;
import android.content.Intent;
import android.os.Bundle;
import android.util.Log;
import android.widget.TextView;

import com.baidu.android.pushservice.PushConstants;
import com.baidu.android.pushservice.PushManager;
import com.example.zhy_baiduyun_tuisong01.util.PreUtils;

public class MainActivity extends Activity
{
    private TextView mTextView;

    @Override
    protected void onCreate(Bundle savedInstanceState)
    {
        super.onCreate(savedInstanceState);
        setContentView(R.layout.activity_main);
        initView();

        autoBindBaiduYunTuiSong();

    }

    private void initView()
    {
        mTextView = (TextView) findViewById(R.id.id_textview);
    }

    @Override
    protected void onNewIntent(Intent intent)
    {
        String result = intent.getStringExtra("result");
        if (result != null)
        {
            mTextView.setText(result);

        }
        // super.onNewIntent(intent);
    }

    /**
     * 如果没有绑定百度云,则绑定,并记录在属性文件中
     */
    private void autoBindBaiduYunTuiSong()
    {
        if (!PreUtils.isBind(getApplicationContext()))
        {
            PushManager.startWork(getApplicationContext(),
                    PushConstants.LOGIN_TYPE_API_KEY,
                    "TVkKGesssSDs5q7AamLGnNCs");
        }
    }

}
最终的测试:
1、应用安装后,如果绑定成功,主界面:
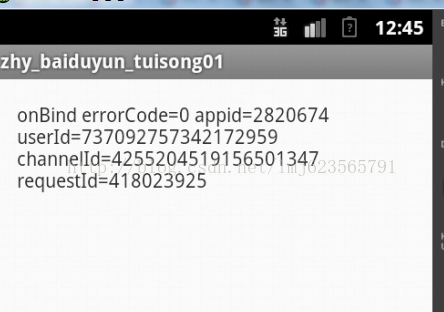
然后在管理控制台开始分别发送通知和消息:
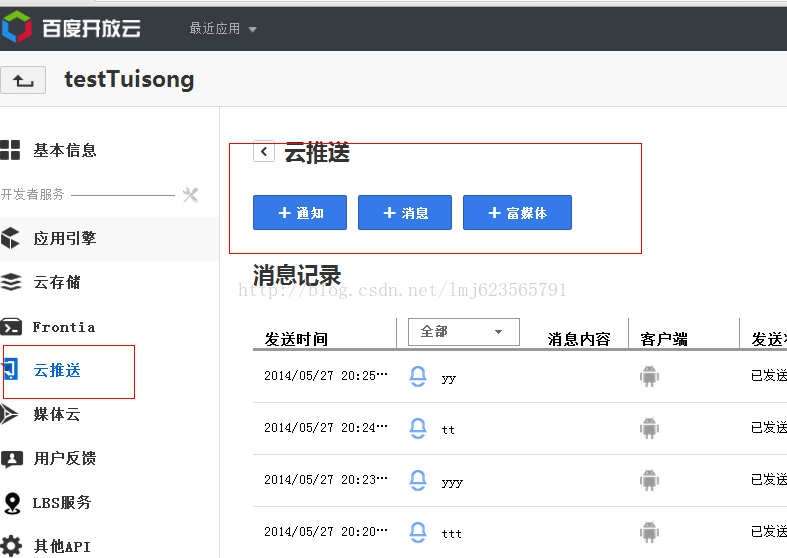

3、当发送消息:
好了,都是最基本的功能,没什么技术含量就是需要点耐心,下面贴上源码,使用源码请把MainActivity里面的KEY设置成自己申请的KEY。
具体的dome 点击 阅读原文


 被折叠的 条评论
为什么被折叠?
被折叠的 条评论
为什么被折叠?
 到【灌水乐园】发言


