


spring boot集成了servlet容器,当我们在pom文件中增加spring-boot-starter-web的maven依赖时,不做任何web相关的配置便能提供web服务,这还得归于spring boot 自动配置的功能(因为加了EnableAutoConfiguration的注解),帮我们创建了一堆默认的配置,以前在web.xml中配置,现在都可以通过spring bean的方式进行配置,由spring来进行生命周期的管理,大多数情况下,我们需要重载这些配置(例如修改服务的启动端口,contextpath,filter,listener,servlet,session超时时间等)
1. servlet配置
当应用只有默认的servlet(即DispatcherServlet)时,映射的url为/,存在其他的servlet时,映射的路径为servlet的注册的beanname(可通过@Component注解修改),创建方式如下:
@Component("myServlet")
public class MyServlet implements Servlet{
    /**
     *
     * @see javax.servlet.Servlet#destroy()
     */
    @Override
    public void destroy() {
        System.out.println("destroy...");
    }
    /**
     * @return
     * @see javax.servlet.Servlet#getServletConfig()
     */
    @Override
    public ServletConfig getServletConfig() {
        return null;
    }
    /**
     * @return
     * @see javax.servlet.Servlet#getServletInfo()
     */
    @Override
    public String getServletInfo() {
        return null;
    }
    /**
     * @param arg0
     * @throws ServletException
     * @see javax.servlet.Servlet#init(javax.servlet.ServletConfig)
     */
    @Override
    public void init(ServletConfig arg0) throws ServletException {
        System.out.println("servlet init...");
    }
    /**
     * @param arg0
     * @param arg1
     * @throws ServletException
     * @throws IOException
     * @see javax.servlet.Servlet#service(javax.servlet.ServletRequest, javax.servlet.ServletResponse)
     */
    @Override
    public void service(ServletRequest arg0, ServletResponse arg1) throws ServletException,
                                                                    IOException {
        System.out.println("service...");
    }
2. filter配置
filter配置的映射是/*,创建方式如下:
@Component("myFilter")
public class MyFilter implements Filter{
    /**
     *
     * @see javax.servlet.Filter#destroy()
     */
    @Override
    public void destroy() {
        System.out.println("destroy...");
    }
    /**
     * @param arg0
     * @param arg1
     * @param arg2
     * @throws IOException
     * @throws ServletException
     * @see javax.servlet.Filter#doFilter(javax.servlet.ServletRequest, javax.servlet.ServletResponse, javax.servlet.FilterChain)
     */
    @Override
    public void doFilter(ServletRequest arg0, ServletResponse arg1, FilterChain arg2)
                                                                                        throws IOException,
                                                                    ServletException {
        System.out.println("doFilter...");
        arg2.doFilter(arg0, arg1);
    }
    /**
     * @param arg0
     * @throws ServletException
     * @see javax.servlet.Filter#init(javax.servlet.FilterConfig)
     */
    @Override
    public void init(FilterConfig arg0) throws ServletException {
        System.out.println("filter init...");
    }

}
3. listener配置
@Component("myListener")

public class MyListener implements ServletContextListener{
    /**
     * @param arg0
     * @see javax.servlet.ServletContextListener#contextDestroyed(javax.servlet.ServletContextEvent)
     */
    @Override
    public void contextDestroyed(ServletContextEvent arg0) {
        System.out.println("contextDestroyed...");
    }
    /**
     * @param arg0
     * @see javax.servlet.ServletContextListener#contextInitialized(javax.servlet.ServletContextEvent)
     */
    @Override
    public void contextInitialized(ServletContextEvent arg0) {
        System.out.println("listener contextInitialized...");
    }

}
如果觉得控制力度不够灵活(例如你想修改filter的映射),spring boot还提供了 ServletRegistrationBean,FilterRegistrationBean,ServletListenerRegistrationBean这3个东西来进行配置
修改filter的映射
@Configuration
public class WebConfig {
    @Bean
    public FilterRegistrationBean filterRegistrationBean(MyFilter myFilter){
        FilterRegistrationBean filterRegistrationBean = new FilterRegistrationBean();
        filterRegistrationBean.setFilter(myFilter);
        filterRegistrationBean.setEnabled(true);
        filterRegistrationBean.addUrlPatterns("/bb");
        return filterRegistrationBean;
    }
}
4. 配置servlet 容器
可以通过两种方式配置servlet容器,一种是通过properties文件,例如:
server.port=8081
server.address=127.0.0.1
server.sessionTimeout=30
server.contextPath=/springboot
另一种方式是java代码的形式:
@Component
public class MyCustomizationBean implements EmbeddedServletContainerCustomizer  {
    /**
     * @param container
     * @see org.springframework.boot.context.embedded.EmbeddedServletContainerCustomizer#customize(org.springframework.boot.context.embedded.ConfigurableEmbeddedServletContainer)
     */
    @Override
    public void customize(ConfigurableEmbeddedServletContainer container) {
         container.setContextPath("/sprintboot");
         container.setPort(8081);
         container.setSessionTimeout(30);
    }

}
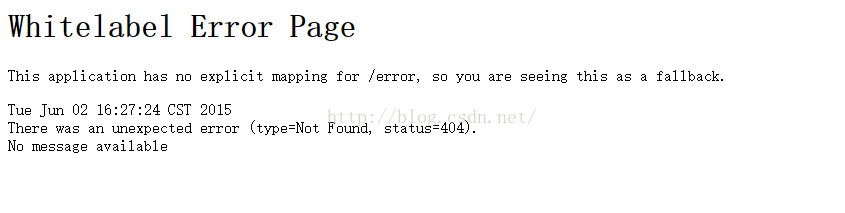
5. error 处理
spring boot 提供了/error映射来进行错误处理,它会返回一个json来对错误信息进行描述(包含了http状态和异常信息),例如404的错误
当然可以定制错误页面,通过实现ErrorController接口,并将它装配起来即可,如下:
[java] view plaincopy

@Controller
public class ErrorHandleController implements ErrorController {
    /**
     * @return
     * @see org.springframework.boot.autoconfigure.web.ErrorController#getErrorPath()
     */
    @Override
    public String getErrorPath() {
        return "/screen/error";
    }

    @RequestMapping
    public String errorHandle(){
        return getErrorPath();
    }
}
还可以这样:
@Component
private class MyCustomizer implements EmbeddedServletContainerCustomizer {

    @Override
    public void customize(ConfigurableEmbeddedServletContainer container) {
        container.addErrorPages(new ErrorPage(HttpStatus.BAD_REQUEST, "/screen/error"));
    }

}
6.模板引擎
spring boot 会自动配置 FreeMarker,Thymeleaf,Velocity,只需要在pom中加入相应的依赖即可,例如应用Velocity
<dependency>
     <groupId>org.springframework.boot</groupId>
     <artifactId>spring-boot-starter-velocity</artifactId>
</dependency>
默认配置下spring boot会从src/main/resources/templates目录中去找模板
7. jsp限制
如果要在spring boot中使用jsp,得将应用打包成war,这里有配置的example https://github.com/spring-projects/spring-boot/tree/master/spring-boot-samples/spring-boot-sample-web-jsp


 603
603

 被折叠的 条评论
为什么被折叠?
被折叠的 条评论
为什么被折叠?
 到【灌水乐园】发言


