


1.单选按钮(RadioButton)的基本概念
- 单选顾名思义,只能在众多的选项中选出一个,但是它还有一个组(Group)的概念,就相当我们做试卷有很多单选题,每道题只能选一个,但是有很多题,不同的题就代表不同的组。

使用单选按钮(RadioButton)的方法步骤:
1.在XML文件中使用<RadioButton/>或者<RadioGroup/>
2.在Avtivity.在代码当中使用RadioGroup与RadioRutton的对象标签表示
3.OnClickListener与OnCheckedChangeListener监听器
例程演示:
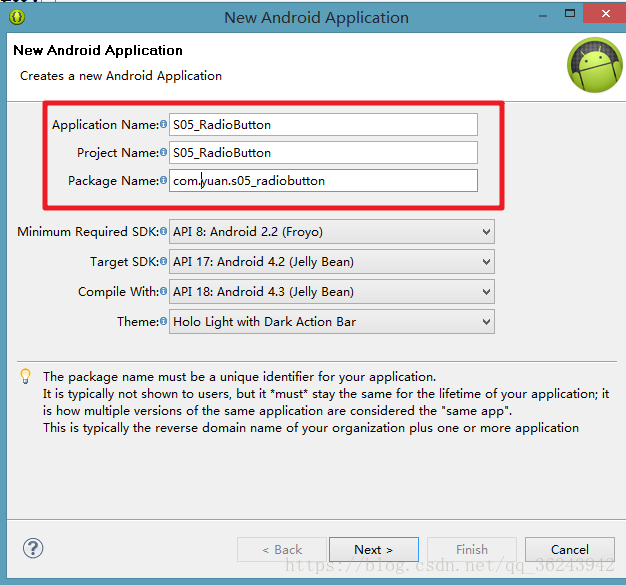
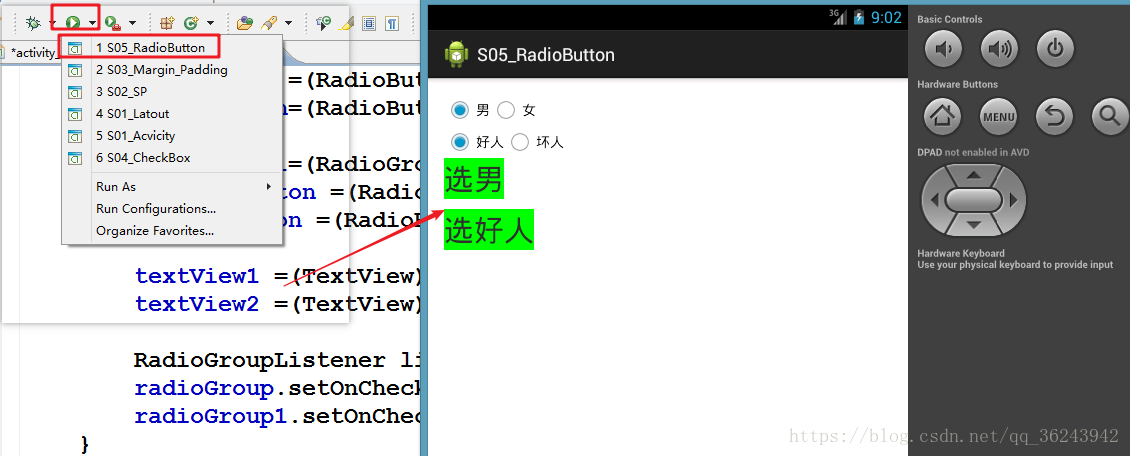
- 创建一个Android 应用程序,命名为:S05_RadioButton
- 修改布局文件,修改为线性水平布局,设置两个组,特别注意xml设置一个组的格式:

在这里顺便把代码贴上,创建两个组,每个组两个选项,为了实验简单明了和练习前面的TextView控件的知识,在选项下面加了两个TextView控件,实时显示单选框的状态:
<LinearLayout xmlns:android="http://schemas.android.com/apk/res/android"
    xmlns:tools="http://schemas.android.com/tools"
    android:layout_width="match_parent"
    android:layout_height="match_parent"
    android:paddingBottom="@dimen/activity_vertical_margin"
    android:paddingLeft="@dimen/activity_horizontal_margin"
    android:paddingRight="@dimen/activity_horizontal_margin"
    android:paddingTop="@dimen/activity_vertical_margin"
    android:orientation="vertical"
    tools:context=".MainActivity" >
    <RadioGroup
        android:id="@+id/radioGroupId"
        android:layout_width="wrap_content"
        android:layout_height="wrap_content"
        android:orientation="horizontal">
        <RadioButton
            android:id="@+id/maleButtonId"
            android:layout_width="wrap_content"
            android:layout_height="wrap_content"
            android:text="男"/>
        <RadioButton
            android:id ="@+id/femalButtonId"
            android:layout_width="wrap_content"
            android:layout_height="wrap_content"
            android:text="女"/>
     </RadioGroup>
     <RadioGroup
        android:id="@+id/radioGroupId2"
        android:layout_width="wrap_content"
        android:layout_height="wrap_content"
        android:orientation="horizontal">
        <RadioButton
            android:id="@+id/goodboyButtonId"
            android:layout_width="wrap_content"
            android:layout_height="wrap_content"
            android:text="好人"/>
        <RadioButton
            android:id ="@+id/badboyButtonId"
            android:layout_width="wrap_content"
            android:layout_height="wrap_content"
            android:text="坏人"/>
     </RadioGroup>
     <TextView
         android:id="@+id/textView1Id"
         android:layout_width="wrap_content"
         android:layout_height="wrap_content"
         android:background="#00FF00"
         android:textSize="30dp"
         android:text="未选"/>
     <TextView
         android:id="@+id/textView2Id"
         android:layout_width="wrap_content"
         android:layout_height="wrap_content"
         android:background="#00FF00"
         android:textSize="30dp"
         android:layout_marginTop="10dp"
         android:text="未选"/>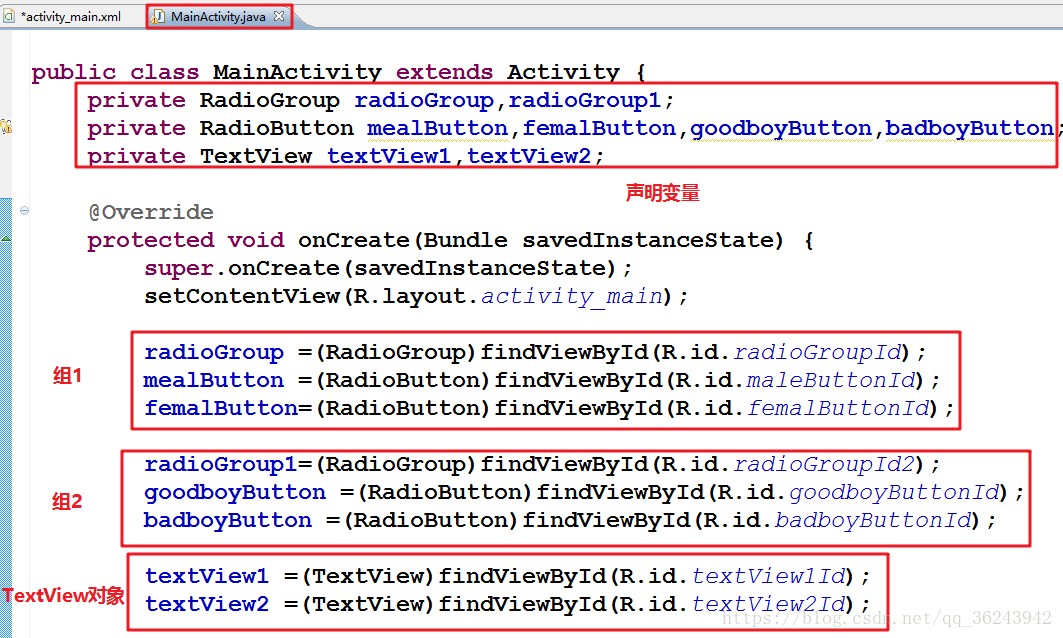
</LinearLayout>- 在Avtivity代码当中使用RadioGroup、RadioButton和TextView的对象标签表示
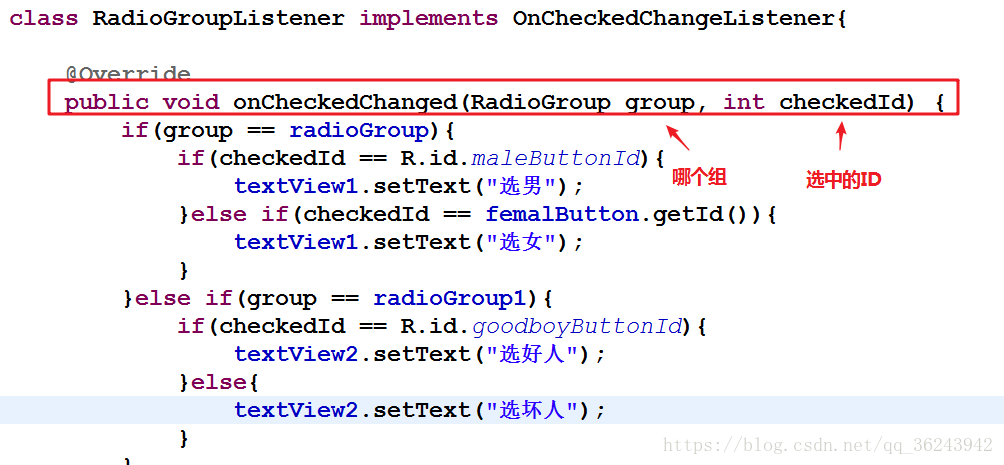
- 绑定OnCheckedChangeListener监听器,首先创建一个内部类去实现OnCheckedChangeListener接口,然后用这个内部类去复写OnCheckedChangeListener的抽象方法onCheckedChanged(RadioGroup group, int checkedId),注意这里需要导入一个OnCheckedChangeListener需要用到的包,不要导错:
- 提示:在打出OnChe后可以按快捷键:Ctrl + Shift + O弹出下面导入包的窗口;

- 内部实现类的代码如下:
- 关于什么是内部类:点我了解
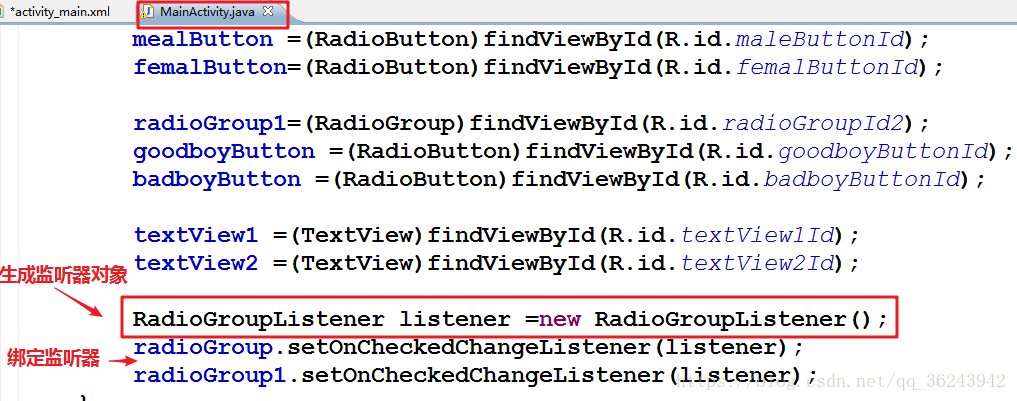
- 接下来用 RadioGroupListener这个类在onCreate函数中生成对象,绑定到readioGroup和readioGroup1.这两个组去监听他们的状态(绑定监听器):
- 运行这个应用程序,和我们前面设置的一样,有两个组,第一组有男女选项,第二组有好人和坏人选项,每一组只能选择一个选项,且显示在TextView控件上:
已上是其中一种判断按钮被选中的方法。
我们使用另外一种方法:我们不去检测一个组,我们检测单个按钮,比如我们有,好人和坏人两个按钮,我们可以去检测它按下与否的状态,和上一节用法类似:点我
- 我们把多余的程序去掉,然后用一个类去实现android.widget.CompoundButton.OnCheckedChangeListener接口,然后绑定监听器,这样我们监听的就是每个选项的状态而不是一个组:
- 但是注意在导入这个接口的时候:

- 实现类代码如下,我们可以发现:
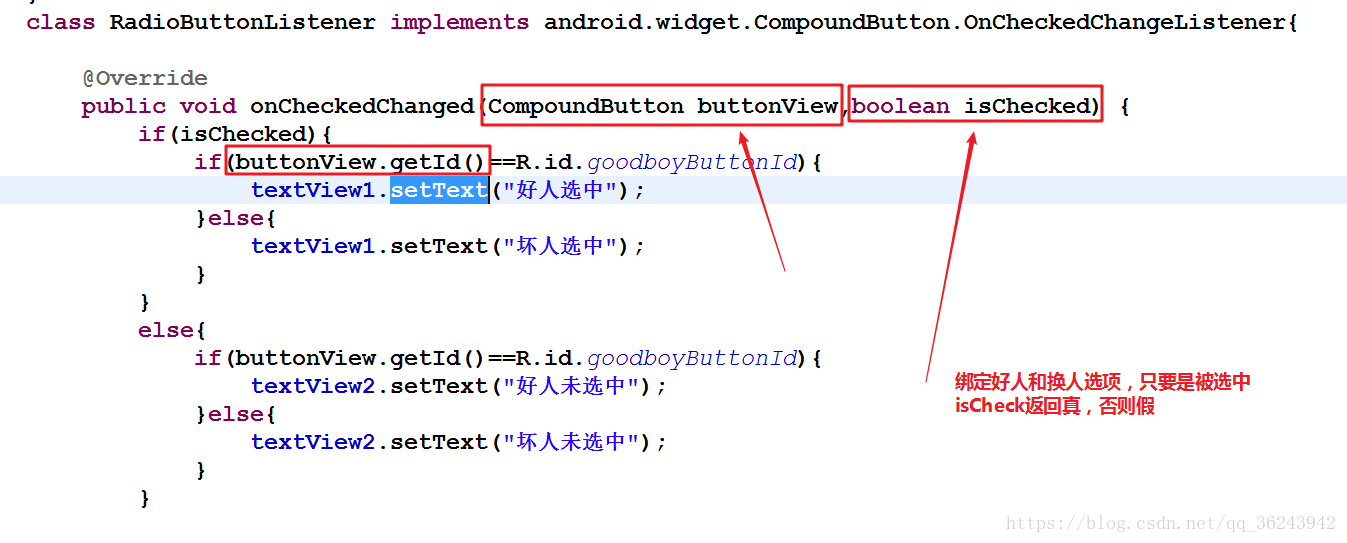
- 代码详解:
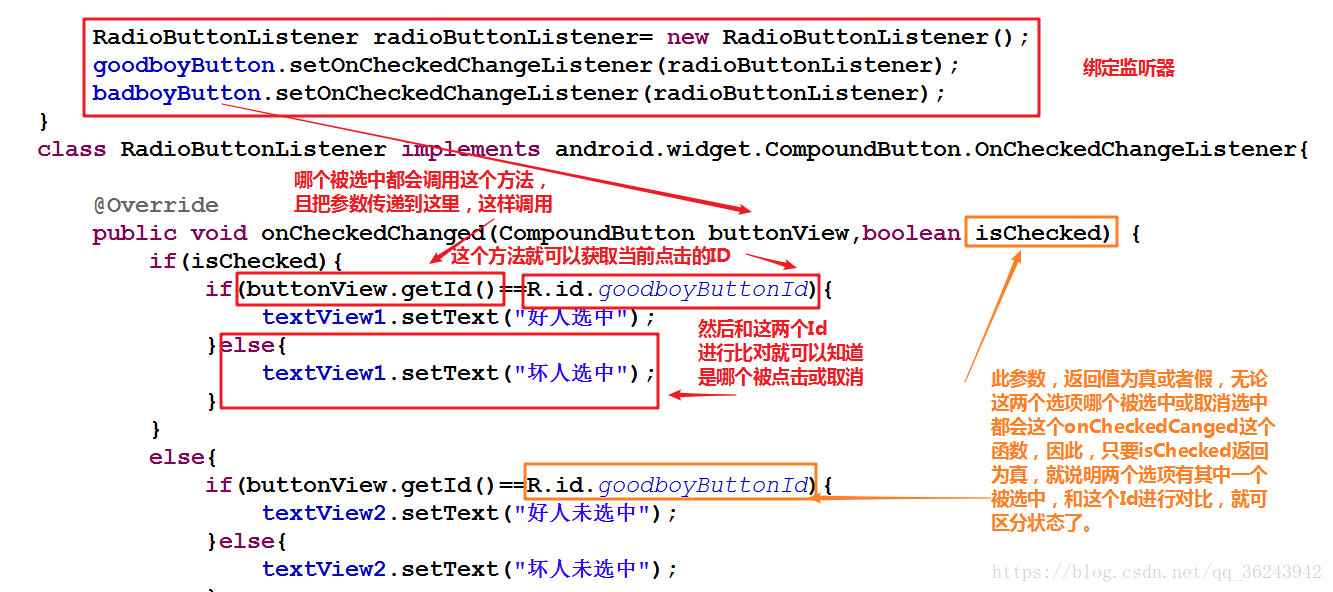
- 生成监听器对象,绑定到单选框上:

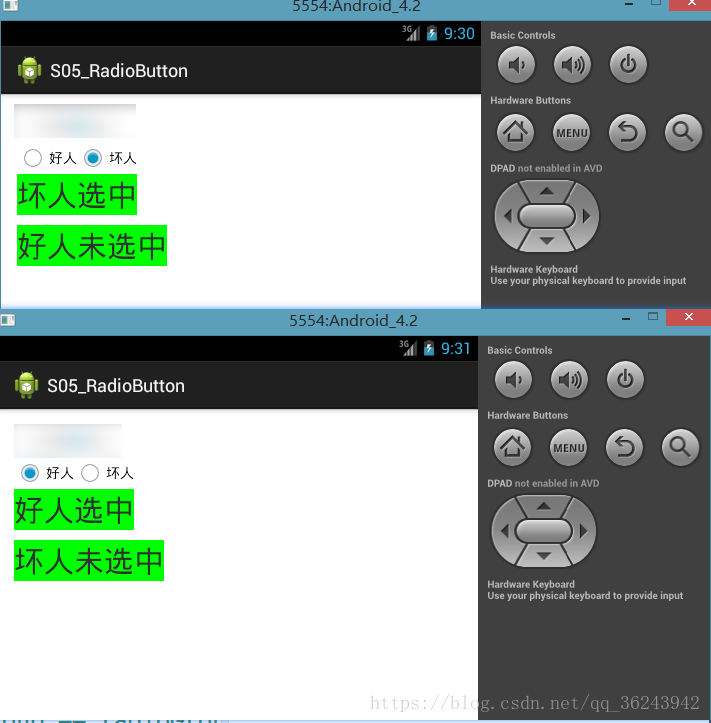
- 效果如下,一个选项不管是选中还是步选中,我们都可以检测到他们的状态:
附录:
本博文Demo下载:https://github.com/zGuangYuan/Android-
github的用法:点我查看


 1203
1203


 被折叠的 条评论
为什么被折叠?
被折叠的 条评论
为什么被折叠?
 到【灌水乐园】发言


