


 本文介绍了Docker Compose的用途,如何通过YAML文件配置应用服务,以及详细步骤进行安装和测试。通过Compose,可以方便地管理和运行多容器应用。在测试部分,展示了创建项目目录、编写相关文件及启动应用的全过程。
一、Docker Compose的介绍
Compose 是一个定义,运行多个容器的工具。使用Compose,用一个YAML文件去配置的应用服务,然后用一条命令从你的配置文件中去启动和创建所有服务。
Compose is a tool for defining and running multi-container Docker applications. With Compose, you use a YAML file to configure your application’s services. Then, with a single command, you create and start all the services from your configuration
使用Compose需要三个步骤:
Define your app’s environment with a
Dockerfileso it can be reproduced anywhere.
定义一个Dockerfile,保证可以再任何地方运行
Define the services that make up your app in
docker-compose.ymlso they can be run together in an isolated environment.
定义一个服务把你的应用放在docker-compose.yml中,保证在任何地方都可以独立环境运行
Run
docker-compose upand Compose starts and runs your entire app.
运行命令docker-compose up,compose启动并启动多有应用
YAML文件的格式:
version: "3.9"  # optional since v1.27.0
services:
  web:
    build: .
    ports:
      - "5000:5000"
    volumes:
      - .:/code
      - logvolume01:/var/log
    links:
      - redis
  redis:
    image: redis
volumes:
  logvolume01: {}
二、安装Docker Compose
下载 Docker Compose
下载命令:sudo curl -L "https://github.com/docker/compose/releases/download/1.27.4/docker-compose-$(uname -s)-$(uname -m)" -o /usr/local/bin/docker-compose
[root@localhost ~]# sudo curl -L "https://github.com/docker/compose/releases/download/1.27.4/docker-compose-$(uname -s)-$(uname -m)" -o /usr/local/bin/docker-compose
  % Total    % Received % Xferd  Average Speed   Time    Time     Time  Current
                                 Dload  Upload   Total   Spent    Left  Speed
100   651  100   651    0     0    206      0  0:00:03  0:00:03 --:--:--   206
100 11.6M  100 11.6M    0     0   688k      0  0:00:17  0:00:17 --:--:-- 1170k
下载完成后修改文件的权限:
sudo chmod +x /usr/local/bin/docker-compose
[root@localhost ~]# sudo chmod +x /usr/local/bin/docker-compose
[root@localhost bin]# ll
total 11936
-rwxr-xr-x. 1 root root 12218968 Dec 22 03:12 docker-compose
[root@localhost bin]#
三、测试
- 先创建一个文件夹:
$ mkdir composetest
$ cd composetest
- 创建一个app.py的文件,把如下内容复制进去:
import time

import redis
from flask import Flask

app = Flask(__name__)
cache = redis.Redis(host='redis', port=6379)

def get_hit_count():
    retries = 5
    while True:
        try:
            return cache.incr('hits')
        except redis.exceptions.ConnectionError as exc:
            if retries == 0:
                raise exc
            retries -= 1
            time.sleep(0.5)

@app.route('/')
def hello():
    count = get_hit_count()
    return 'Hello World! I have been seen {} times.\n'.format(count)
- 创建一个requirements.txt文件,填充如下内容:
flask
redis
- 创建一个dockerfile,复制如下内容:
FROM python:3.7-alpine
WORKDIR /code
ENV FLASK_APP=app.py
ENV FLASK_RUN_HOST=0.0.0.0
RUN apk add --no-cache gcc musl-dev linux-headers
COPY requirements.txt requirements.txt
RUN pip install -r requirements.txt
EXPOSE 5000
COPY . .
CMD ["flask", "run"
上边的内容的意思是:
- Build an image starting with the Python 3.7 image.
- Set the working directory to
/code.- Set environment variables used by the
flaskcommand.- Install gcc and other dependencies
- Copy
requirements.txtand install the Python dependencies.- Add metadata to the image to describe that the container is listening on port 5000
- Copy the current directory
.in the project to the workdir.in the image.- Set the default command for the container to
flask run.
- 创建一个docker-compose.yml文件:
version: "3.9"
services:
  web:
    build: .
    ports:
      - "5000:5000"
  redis:
    image: "redis:alpine"
- 运行命令:
$ docker-compose up
Creating network "composetest_default" with the default driver
Creating composetest_web_1 ...
Creating composetest_redis_1 ...
Creating composetest_web_1
Creating composetest_redis_1 ... done
Attaching to composetest_web_1, composetest_redis_1
web_1    |  * Running on http://0.0.0.0:5000/ (Press CTRL+C to quit)
redis_1  | 1:C 17 Aug 22:11:10.480 # oO0OoO0OoO0Oo Redis is starting oO0OoO0OoO0Oo
redis_1  | 1:C 17 Aug 22:11:10.480 # Redis version=4.0.1, bits=64, commit=00000000, modified=0, pid=1, just started
redis_1  | 1:C 17 Aug 22:11:10.480 # Warning: no config file specified, using the default config. In order to specify a config file use redis-server /path/to/redis.conf
web_1    |  * Restarting with stat
redis_1  | 1:M 17 Aug 22:11:10.483 * Running mode=standalone, port=6379.
redis_1  | 1:M 17 Aug 22:11:10.483 # WARNING: The TCP backlog setting of 511 cannot be enforced because /proc/sys/net/core/somaxconn is set to the lower value of 128.
web_1    |  * Debugger is active!
redis_1  | 1:M 17 Aug 22:11:10.483 # Server initialized
redis_1  | 1:M 17 Aug 22:11:10.483 # WARNING you have Transparent Huge Pages (THP) support enabled in your kernel. This will create latency and memory usage issues with Redis. To fix this issue run the command 'echo never > /sys/kernel/mm/transparent_hugepage/enabled' as root, and add it to your /etc/rc.local in order to retain the setting after a reboot. Redis must be restarted after THP is disabled.
web_1    |  * Debugger PIN: 330-787-903
redis_1  | 1:M 17 Aug 22:11:10.483 * Ready to accept connections
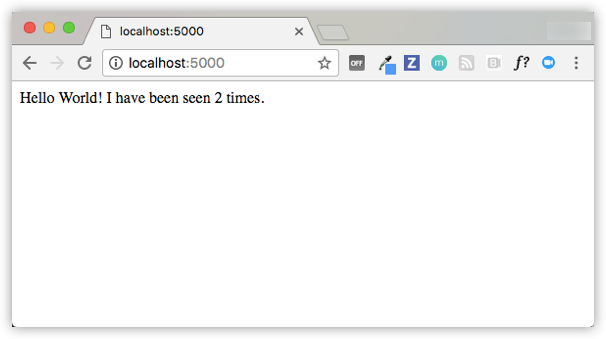
- 可以在浏览器中 访问http://localhost:5000/

- 刷新浏览器:


 1万+
1万+

 被折叠的 条评论
为什么被折叠?
被折叠的 条评论
为什么被折叠?
 到【灌水乐园】发言


