


 本文详细介绍了如何在Spring Boot项目中集成Redis,包括依赖配置、属性设置、服务封装及Swagger API测试,为开发者提供了一个完整的实践指南。
1、redis的安装和简单的命令可以参考的其他文章Redis 采用指令和Redis window上安装和使用。
2、pom的依赖。
    <!--基础-->
    <dependency>
        <groupId>org.springframework.boot</groupId>
        <artifactId>spring-boot-starter</artifactId>
    </dependency>
    <dependency>
        <groupId>org.springframework.boot</groupId>
        <artifactId>spring-boot-starter-web</artifactId>
    </dependency>
    <!--redis-->
    <dependency>
        <groupId>org.springframework.boot</groupId>
        <artifactId>spring-boot-starter-data-redis</artifactId>
    </dependency>
3、application.properties的配置。
server:
  port: 9001

spring:
  profiles:
    active: dev

  redis:
    database: 1
    host: 127.0.0.1        #119.23.206.197  127.0.0.1
    port: 6379             #6379            6379
    password: zhuoxiaojie     #19960815        zhuoxiaojie
    pool:
      max-active: 1000   #最大连接数
      max-wait: 2000      #阻塞时间
      max-idle: 100      #最大空闲
      min-idle: 20       #最小空闲
    timeout: 5000
4、对redis服务的简单封装,具有快速使用增删改查。
package com.zxj.reptile.service.redis;

import org.springframework.beans.factory.annotation.Autowired;
import org.springframework.data.redis.core.StringRedisTemplate;
import org.springframework.data.redis.core.ValueOperations;
import org.springframework.stereotype.Service;

import java.util.concurrent.TimeUnit;

@Service
public class RedisService {
    // Redis为我们提供了两个模板
    // StringRedisTemplate主要提供给我们操作字符串;
    // RedisTemplate提供给我们操作对象;操作对象的时候最好自定义序列化器

    @Autowired
    private StringRedisTemplate template;

    public boolean remove(String key) {
        if (template.hasKey(key)) {
            return template.delete(key);
        }
        return false;
    }

    public String get(String key) {
        if (template.hasKey(key)) {
            ValueOperations<String, String> operations = template.opsForValue();
            return operations.get(key);
        }
        return null;
    }

    public boolean set(String key, String value) {
        try {
            if (template != null) {
                ValueOperations<String, String> operations = template.opsForValue();
                operations.set(key, value);
                return true;
            }
        } catch (Exception e) {
            e.printStackTrace();
        }
        return false;
    }

    public boolean set(String key, String value, Long expireTime, TimeUnit timeUnit) {
        try {
            if (template != null) {
                ValueOperations<String, String> operations = template.opsForValue();
                operations.set(key, value);
                template.expire(key, expireTime, timeUnit);
                return true;
            }
        } catch (Exception e) {
            e.printStackTrace();
        }
        return false;
    }
}
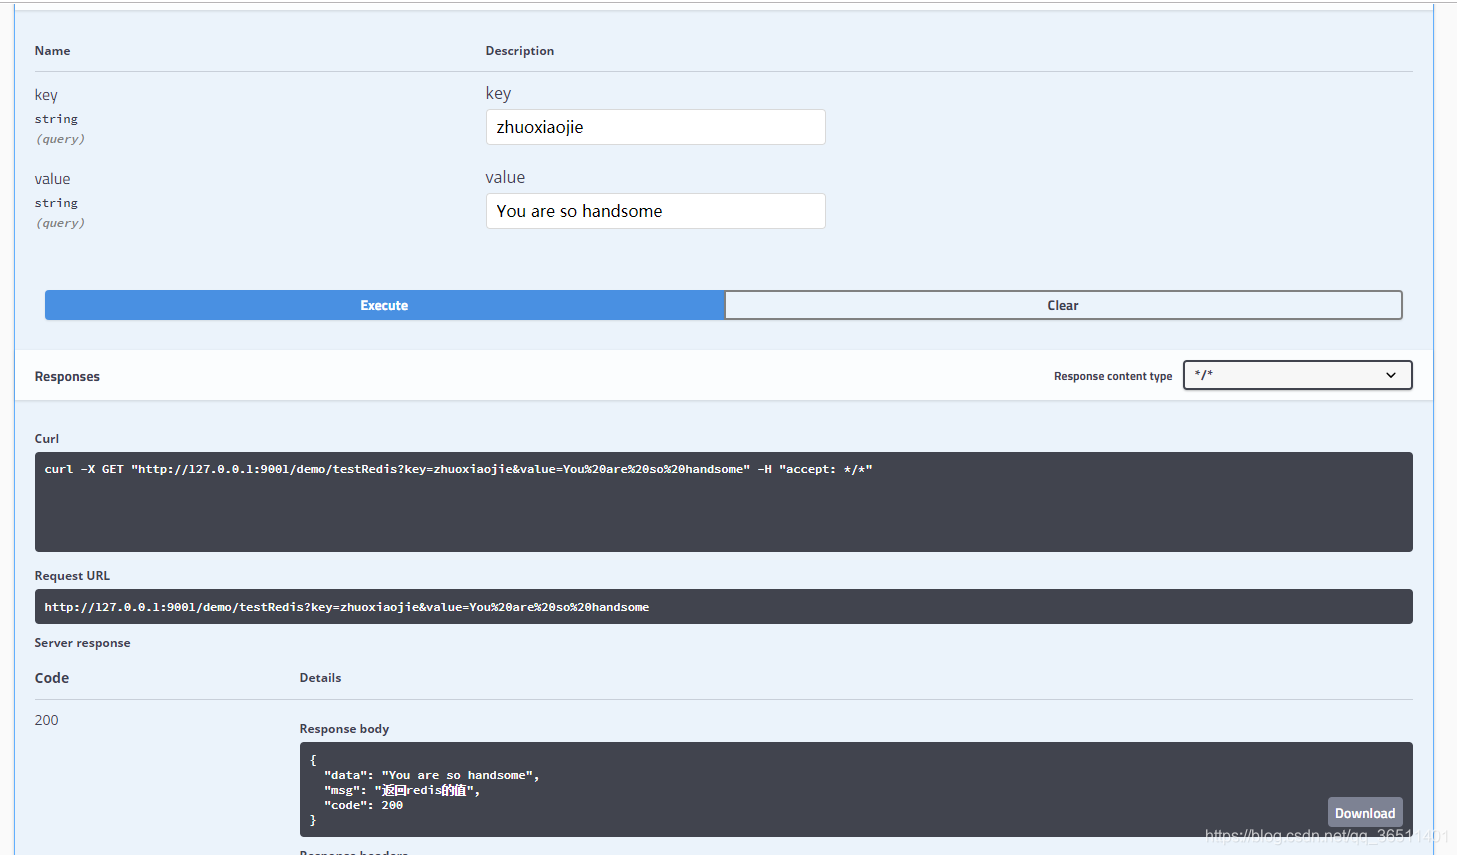
5、swagger的api测试代码。
package com.zxj.reptile.api.demo;

import com.baomidou.mybatisplus.mapper.EntityWrapper;
import com.zxj.reptile.api.AjaxJson;
import com.zxj.reptile.module.demo.entity.Demo;
import com.zxj.reptile.module.demo.service.IDemoService;
import com.zxj.reptile.service.redis.RedisService;
import com.zxj.reptile.utils.PropertyUtils;
import com.zxj.reptile.utils.StringUtils;
import io.swagger.annotations.Api;
import io.swagger.annotations.ApiImplicitParam;
import io.swagger.annotations.ApiImplicitParams;
import io.swagger.annotations.ApiOperation;
import org.springframework.beans.factory.annotation.Autowired;
import org.springframework.web.bind.annotation.RequestMapping;
import org.springframework.web.bind.annotation.RequestMethod;
import org.springframework.web.bind.annotation.RequestParam;
import org.springframework.web.bind.annotation.RestController;

import java.util.List;

@Api(value = "demo", tags = "demo测试Api")
@RestController
@RequestMapping("demo")
public class DemoApi {
    @Autowired
    private RedisService redisService;

    @ApiOperation(value = "测试Redis", notes = "测试Redis")
    @ApiImplicitParams({
            @ApiImplicitParam(name = "key", value = "key", dataType = "String", paramType = "query"),
            @ApiImplicitParam(name = "value", value = "value", dataType = "String", paramType = "query")
    })
    @RequestMapping(value = "testRedis", method = RequestMethod.GET)
    public AjaxJson testRedis(@RequestParam(value = "key") String key, @RequestParam(value = "value") String value) {
        AjaxJson ajaxJson = new AjaxJson<>();
        try {
            if (redisService.set(key, value)) {
                ajaxJson.success("返回redis的值");
                ajaxJson.setData(redisService.get(key));
            } else {
                ajaxJson.error("失败:");
            }
        } catch (Exception e) {
            e.printStackTrace();
            ajaxJson.error("失败: " + e.getMessage());
        }
        return ajaxJson;
    }
}
6、记得测试前,要将本地的redis服务打开,测试结果。


 21万+
21万+

 被折叠的 条评论
为什么被折叠?
被折叠的 条评论
为什么被折叠?
 到【灌水乐园】发言


